1. Güvenlik Bilgileri
Read all instructions carefully before installation and use. Retain this manual for future reference.
- Kurulum veya bakım işlemlerinden önce ana güç kaynağının bağlantısının kesildiğinden emin olun.
- Kurulum, yetkili bir elektrikçi tarafından veya yerel elektrik yönetmeliklerine uygun olarak yapılmalıdır.
- Vantilatörü, tavan kirişine veya vantilatörün ağırlığını taşıyabilecek uygun bir destek yapısına sağlam bir şekilde monte edin.
- Do not install any dimmer switch if you intend to use the remote control for dimming. Use a simple on/off wall switch.
- Çalışma sırasında ellerinizi ve nesneleri fan kanatlarından uzak tutun.
2. Paket İçeriği
Kuruluma başlamadan önce tüm bileşenlerin mevcut ve hasarsız olduğundan emin olun.

Resim 2.1: Üzerindeview of fan components including motor, blades, light kit, remote, and mounting hardware.
- Fan Motoru Montajı
- Fan Blades (3 or 6, reversible brown/black)
- LED Işık Kiti
- Light Shade (Plastic)
- Remote Control with Receiver
- Montaj Braketi
- Downrod (Optional: 5-inch and 10-inch extensions may be included)
- Gölgelik
- Donanım Paketi (vidalar, rondelalar, kablo somunları)
- Kullanıcı Kılavuzu
3. Kurulum ve Yükleme
Detailed instructions and installation videos are provided to assist with the setup process. Ensure power is off before starting.
3.1 Kutudan Çıkarma ve Bileşen Tanımlama
Carefully remove all components from the packaging. Identify each part using the 'Package Contents' section.

Resim 3.1: Reversible fan blades, showing both brown wood grain and black sides.

Resim 3.2: Detail of the fan's quiet DC motor and integrated LED light.
3.2 Braketin Montajı
- Attach the mounting bracket to the ceiling electrical box. Ensure it is securely fastened to a structural support.
- Feed the electrical wires from the ceiling box through the center hole of the mounting bracket.
3.3 Assembling the Fan
- If using a downrod, thread the wires from the fan motor through the downrod. Secure the downrod to the motor.
- Carefully lift the fan motor assembly and hang it onto the mounting bracket.
- Connect the electrical wires (live, neutral, ground) from the ceiling to the fan's receiver unit, following the wiring diagram in the manual.
- Attach the fan blades to the motor housing. Ensure they are firmly screwed in. Choose your preferred blade finish (brown or black).
- Connect the LED light kit wires to the fan motor assembly.
- Attach the light shade by twisting it into place or securing it with screws, depending on the design.
3.4 Kurulum Videosu
Video 3.1: A detailed video demonstrating the unboxing and installation process of the Asyko Ceiling Fan. This video covers attaching the mounting bracket, assembling the fan motor and blades, wiring connections, and installing the light kit and shade.
4. Kullanım Talimatları
The Asyko Ceiling Fan is controlled via the included remote control, offering various settings for comfort and convenience.
4.1 Uzaktan Kumanda İşlevleri

Resim 4.1: The remote control allows adjustment of fan speed, light color temperature, dimming, and timing functions.
- Güç Açma/Kapatma: Vantilatörü ve ışığı açıp kapatın.
- Fan Hızı: Select from 6 adjustable fan speeds (Levels 1-2: Low, Levels 3-4: Medium, Levels 5-6: High).
- Işık Kontrolü:
- Renk Sıcaklığı: Cycle through 3000K (warm white), 4000K (natural white), and 6000K (cold white).
- Karartma: Adjust light brightness from 10% to 100%.
- The fan and light can be operated independently.
- Zamanlayıcı Fonksiyonu: Vantilatörün 1 veya 2 saat sonra otomatik olarak kapanmasını ayarlayın.
- Hafıza Fonksiyonu: The fan remembers the last used brightness, color temperature, and fan speed settings when turned off for at least 10 seconds.
4.2 Tersine Çevrilebilir Motor Fonksiyonu
The reversible DC motor allows for year-round use:
- Yaz Modu (İleri Dönüş): Blades rotate counter-clockwise to push cool air downwards, creating a cooling effect.
- Kış Modu (Ters Dönüş): Blades rotate clockwise to draw cool air up, circulating warm air trapped near the ceiling.

Resim 4.2: Visual representation of the reversible motor function for summer cooling and winter air circulation.
Resim 4.3: Explanation of the 6-speed adjustable fan settings.
4.3 Sessiz Çalışma
The fan features a quiet DC motor, ensuring a peaceful environment suitable for bedrooms, living rooms, and offices.
Video 4.4: This video demonstrates the various operational features of the Asyko Ceiling Fan, including fan speed adjustments, light color temperature changes, dimming, and the reversible motor function for different seasons.
5. Bakım
Düzenli bakım, tavan vantilatörünüzün optimum performans göstermesini ve uzun ömürlü olmasını sağlar.
- Temizlik: Yumuşak bir d kullanınamp Pervane kanatlarını ve motor gövdesini temizlemek için bir bez kullanın. Aşındırıcı temizleyiciler veya çözücüler kullanmayın.
- Bıçak Denetimi: Periodically check that all blade screws are tight. Loose screws can cause wobbling and noise.
- Açık Gölge: Clean the light shade gently with a soft cloth to maintain light output.
- Elektrik Bağlantıları: Ensure all electrical connections remain secure. If you notice any loose wiring, consult a qualified electrician.
6. Sorun Giderme
If you encounter issues with your Asyko Ceiling Fan, refer to the following common problems and solutions:
| Sorun | Olası Neden | Çözüm |
|---|---|---|
| Fan çalışmıyor | No power supply; Loose wiring; Remote control issue | Check circuit breaker; Verify all wire connections; Replace remote batteries or re-pair remote. |
| Işık çalışmıyor | Loose wiring; LED module failure; Remote control issue | Check light kit connections; Contact customer support for LED module replacement; Verify remote functionality. |
| Fan wobbles or is noisy | Loose blade screws; Unbalanced blades; Improper mounting | Tüm bıçak vidalarını sıkın; Bıçakları dengelemek için bir dengeleme kiti (dahil değildir) kullanın; Montaj braketinin sağlam bir şekilde takılı olduğundan emin olun. |
| Uzaktan kumanda yanıt vermiyor | Dead batteries; Not paired correctly; Interference | Replace batteries; Follow pairing instructions in the manual; Reduce interference from other devices. |
| Light color temperature changes unexpectedly | Power cycle within 10 seconds | Allow at least 10 seconds after turning off the light for the memory function to save the setting. |
7. Özellikler
| Özellik | Detay |
|---|---|
| Marka | Asiko |
| Model Adı | Ceiling Fans with Lights (Model 8511) |
| Elektrikli Fan Tasarımı | Tavan Vantilatörü |
| Boyut | 46 inches (3-Blade) |
| Renk | Brown (reversible blades) |
| Güç Kaynağı | DC |
| Motor Tipi | Brushless DC (Quiet Operation) |
| Netage | 40 watt |
| Hafif Tip | Kısılabilir led |
| Renk Sıcaklıkları | 3000K (Sıcak Beyaz), 4000K (Doğal Beyaz), 6000K (Soğuk Beyaz) |
| Parlaklık Ayarı | %10-%100 |
| Fan Hızı Sayısı | 6 |
| Kontrol Yöntemi | Uzaktan kumanda |
| Özel Özellikler | Reversible Motor, Memory Function, Timer (1/2 hour) |
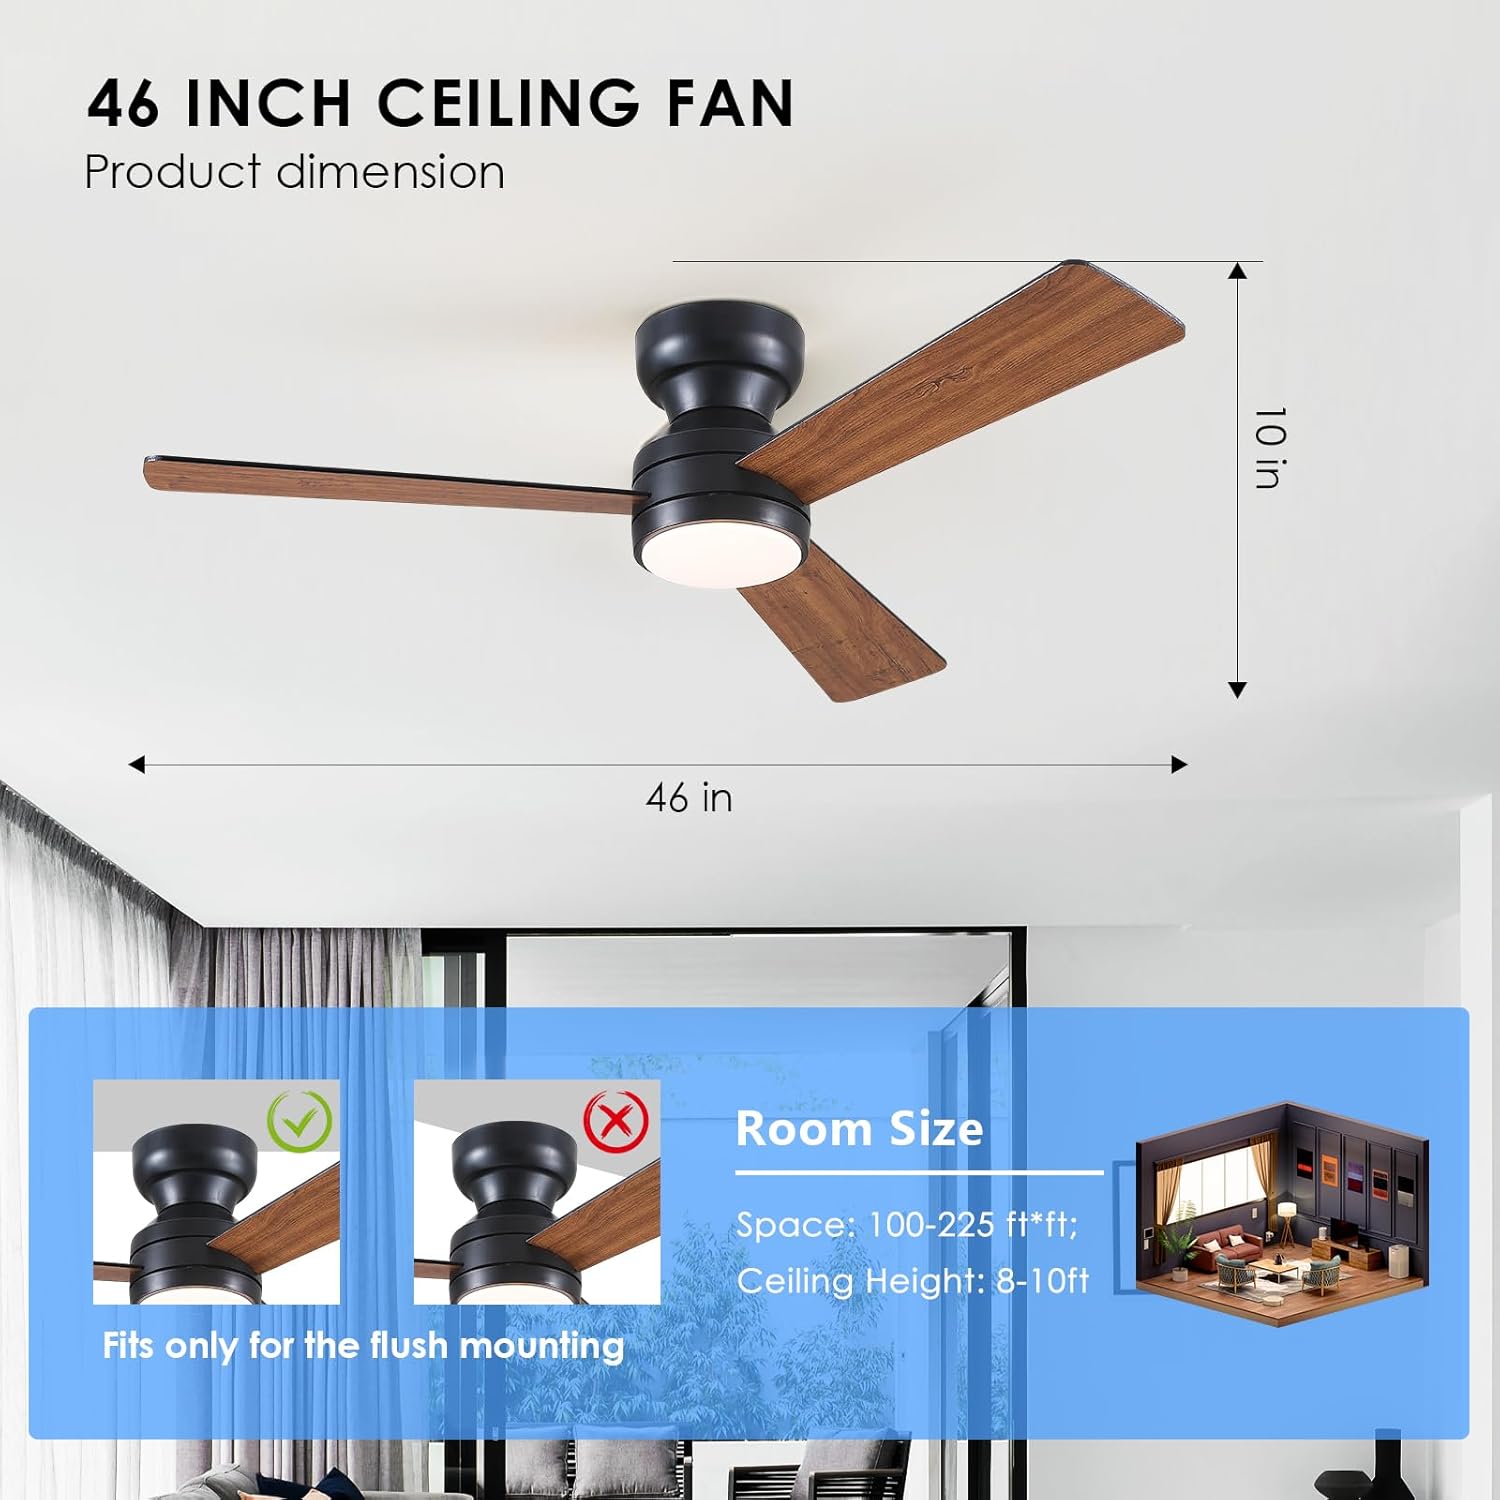
| Kurulum Türü | Flush Mount (Self-install) |
| Ürün Boyutları | 6"D x 6"W x 6"H (Note: This appears to be packaging dimensions, actual fan dimensions are 46" diameter) |
| Ürün Ağırlığı | 7.13 pound |
| İç/Dış Mekan Kullanımı | Kapalı |
8. Garanti ve Destek
Asyko is committed to customer satisfaction. For any questions, concerns, or warranty claims, please contact our customer support team.
- Müşteri Desteği: We offer prompt customer support with a 24-hour response time. Refer to your purchase documentation for specific contact details.
- Garanti: Please refer to the warranty information provided with your purchase for details on coverage and terms.


