1. Güvenlik Bilgileri
Please read all instructions carefully before beginning installation and use. Retain this manual for future reference.
1.1 Elektrik Güvenliği
- Kurulum veya bakım işlemlerinden önce devre kesiciden elektriğin kesildiğinden emin olun.
- Tüm kablolama ulusal ve yerel elektrik yönetmeliklerine uygun olmalıdır.
- Kablolama konusunda emin değilseniz kalifiye bir elektrikçiye danışın.
1.2 Genel Güvenlik
- Do not install any dimmer switch with this fan. Use the provided remote control for dimming.
- Ensure the fan is securely mounted to a ceiling joist or a suitable support structure.
- Çalışma sırasında ellerinizi ve nesneleri fan kanatlarından uzak tutun.
2. Paket İçeriği
Kuruluma başlamadan önce tüm bileşenlerin mevcut ve hasarsız olduğundan emin olun.

Video: Kutudan Çıkarma ve Son İşlemlerview of the Asyko ceiling fan components.
- Fan Motoru Montajı
- Fan Blades (3 or 6, reversible black/wood finish)
- LED Işık Kiti
- Işık Difüzörü
- Remote Control with Receiver
- Montaj Braketi
- Downrods (various lengths, e.g., 5-inch and 10-inch)
- Gölgelik ve Gölgelik Halkası
- Donanım Paketi (vidalar, rondelalar, kablo somunları)
- Kullanıcı Kılavuzu
3. Özellikler
| Özellik | Şartname |
|---|---|
| Marka | Asiko |
| Model Adı | Işıklı Tavan Vantilatörleri |
| Boyut | 46 inç |
| Bıçak Sayısı | 3 |
| Renk | Siyah |
| Motor Tipi | Doğru akım motoru |
| Kontrol Yöntemi | Uzaktan kumanda |
| Hafif Tip | Dimmable LED (3000K, 4000K, 6000K) |
| Fan Hızları | 6 Seviye |
| Ters çevrilebilir Motor | Evet |
| Kurulum Türü | Dağı Flush |
| Ürün Ağırlığı | 7.09 pound |
| Ürün Boyutları | 6"D x 6"W x 6"H (Note: This appears to be packaging dimensions, actual fan dimensions are 46" diameter) |
4. Kurulum
Follow these steps for proper installation. It is recommended to watch the provided installation video for visual guidance.
Video: Detailed installation guide for the Asyko ceiling fan.
- Montaj Yerini Hazırlayın: Ensure the power is off at the circuit breaker. Securely attach the mounting bracket to a ceiling joist or an approved outlet box.
- İndirme çubuğunu monte edin: If using a downrod, feed the electrical wires from the fan motor through the downrod. Secure the downrod to the fan motor assembly.
- Vantilatörü Asın: Fan tertibatını dikkatlice kaldırın ve montaj braketinden asın.
- Elektrik Bağlantılarını Yapın: Connect the fan's electrical wires to the household wiring according to the wiring diagram in the manual. Ensure all connections are secure.
- Fan kanatlarını takın: Attach the fan blades to the motor housing using the provided screws. The blades are reversible, allowing you to choose between a black or wood-grain finish.
- LED Aydınlatma Kitini Takın: Connect the LED light kit wires and secure the light kit to the bottom of the fan motor assembly.
- Attach Light Diffuser: Secure the light diffuser to the light kit.
- Güvenli Gölgelik: Tente kapağını tavana doğru kaydırın ve montaj braketine sabitleyin.

Image: Asyko 46-inch ceiling fan showing product dimensions and suitable room sizes for flush mounting.

Resim: Yakın çekim view of the fan's three blades, 22W LED light, and quiet DC motor.
5. Kullanım Talimatları
Your Asyko ceiling fan is controlled by the included remote. Ensure batteries are installed in the remote control.
5.1 Uzaktan Kumanda İşlevleri
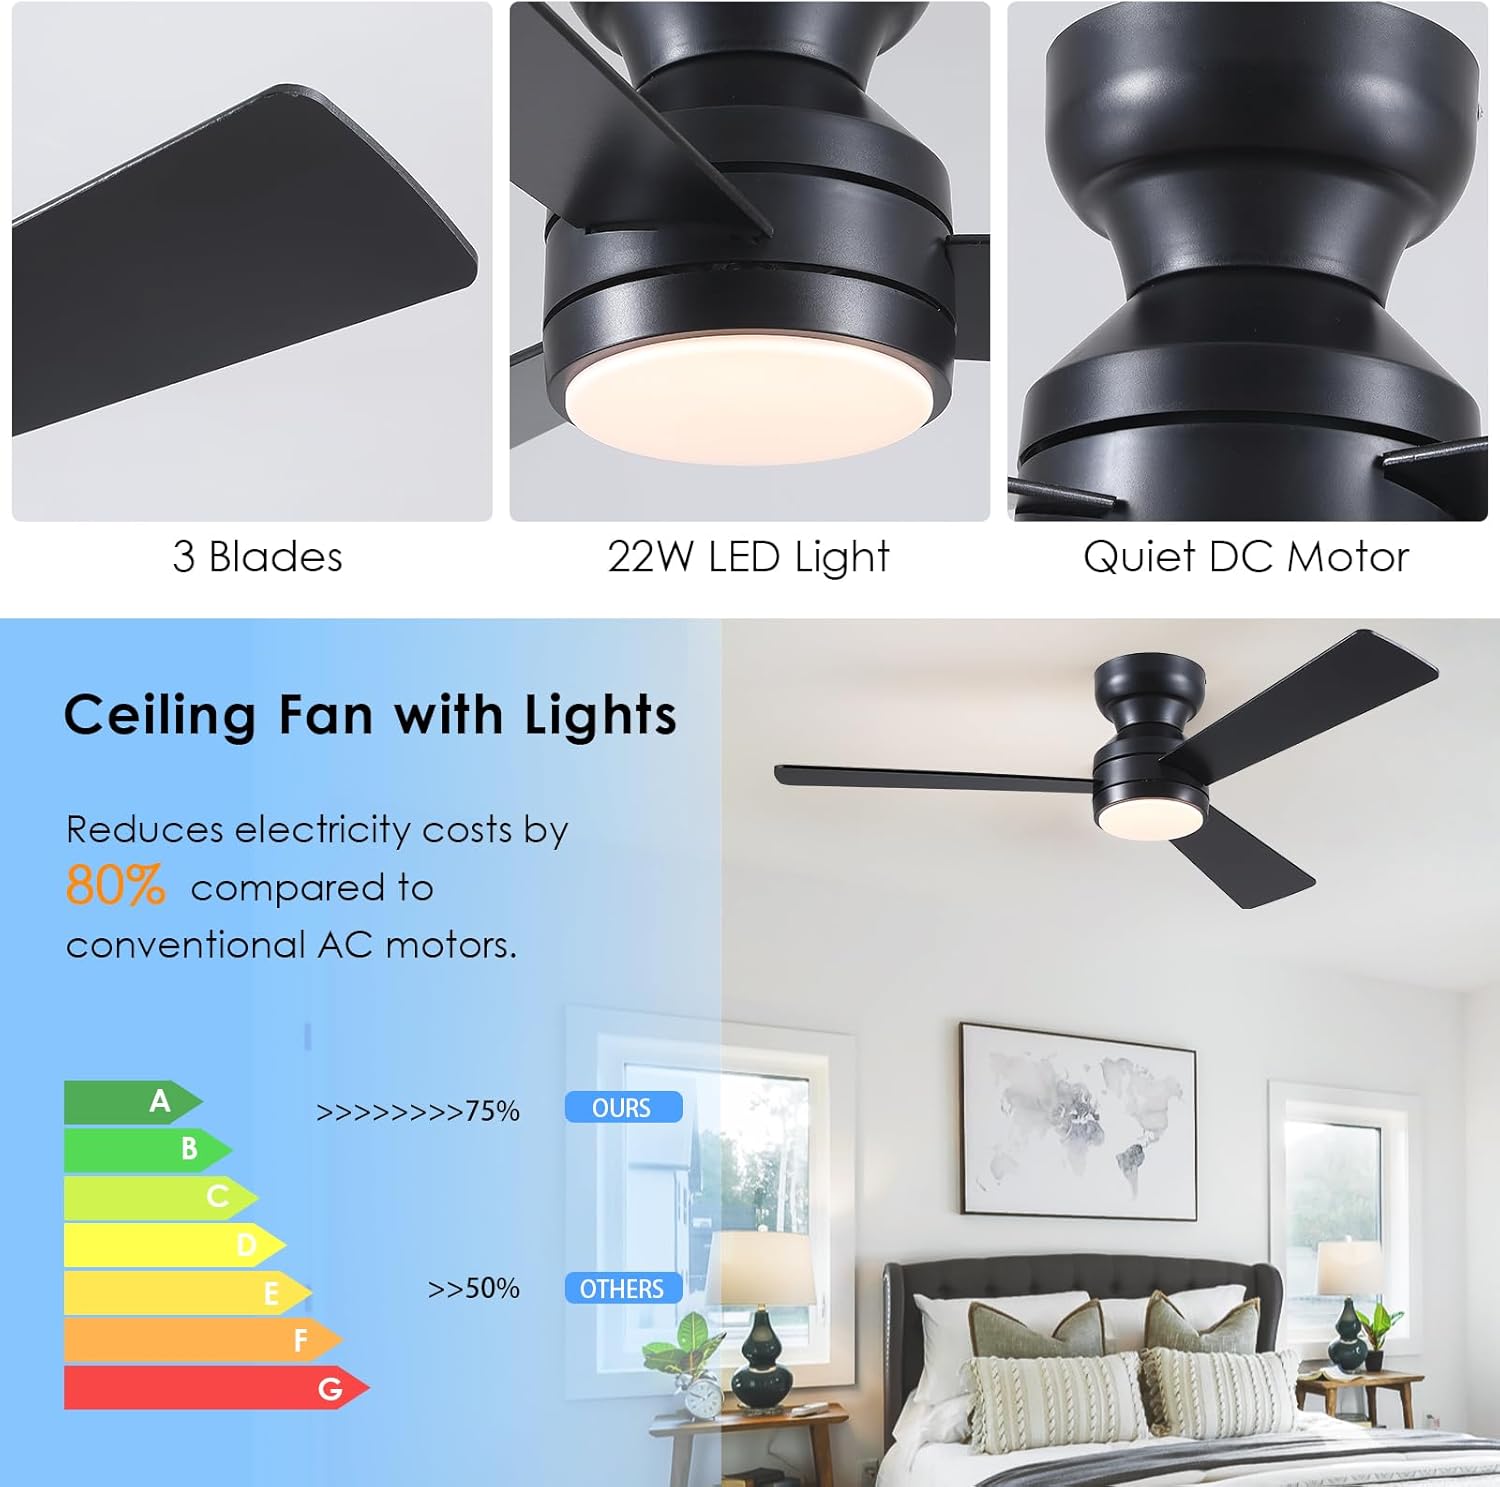
Image: Remote control for the Asyko ceiling fan, showing buttons for fan speed, light color, timing, and power.
- AÇIK/KAPALI: Vantilatörü ve ışığı açar/kapatır.
- Fan Hızı: Adjusts fan speed from 1 (low) to 6 (high).
- Işık Kontrolü: Turns the light on/off independently from the fan.
- Renk Sıcaklığı: Cycles through 3000K (warm white), 4000K (nature white), and 6000K (cold white).
- Karartma: Işık parlaklığını %10 ile %100 arasında ayarlar.
- Zamanlayıcı: Sets the fan to turn off after 1 or 2 hours.
- Reversible Function (F/R): Changes the direction of blade rotation for summer (downward airflow) or winter (upward airflow for air circulation).
5.2 Reversible Motor
The reversible DC motor allows for year-round comfort. In summer, the fan rotates counter-clockwise to create a cooling downdraft. In winter, it rotates clockwise to circulate warm air trapped near the ceiling.

Image: Illustration of the fan's reversible function for summer (forward rotation) and winter (reverse rotation) modes.
5.3 Hafıza Fonksiyonu
The fan features a memory function that retains your preferred brightness, color temperature, and fan speed settings. If the light is turned off for at least 10 seconds, it will resume the last settings when turned back on. The fan will also continue to run in the same gear it was in last time. Note: Turning on the light within 10 seconds will change the color temperature.
6. Bakım
Düzenli bakım, tavan vantilatörünüzün optimum performans göstermesini ve uzun ömürlü olmasını sağlar.
- Temizlik: Yumuşak bir d kullanınamp Pervane kanatlarını ve motor gövdesini temizlemek için bir bez kullanın. Aşındırıcı temizleyiciler veya çözücüler kullanmayın.
- Bıçak Denetimi: Periodically check the fan blades for any signs of damage or warping.
- Vidaları Sıkıştırın: Ensure all screws on the fan blades and mounting bracket are tight. Loose screws can cause wobbling and noise.
7. Sorun Giderme
Fanınızla ilgili sorunlarla karşılaşırsanız, aşağıdaki yaygın sorunlara ve çözümlere bakın:
| Sorun | Olası Çözüm |
|---|---|
| Fan başlamıyor | Check circuit breaker. Ensure all electrical connections are secure. Verify remote control batteries. |
| Işık çalışmıyor | Check light kit wiring. Ensure light is turned on via remote. |
| Fan sallanıyor | Ensure all blade screws are tightened. Check mounting bracket for secure installation. |
| Uzaktan kumanda çalışmıyor | Replace remote control batteries. Ensure remote is paired with the fan (refer to remote pairing instructions in the full manual). |
Daha fazla yardım için lütfen müşteri destek ekibiyle iletişime geçin.
8. Garanti ve Destek
Asyko offers prompt customer support with a 24-hour response time to ensure your satisfaction with every purchase.
For warranty claims or technical assistance, please refer to the contact information provided in your product packaging or visit the official Asyko webalan.


