1. Giriş
Thank you for choosing the Scheppach C-LT300-X 2-in-1 Cordless Trimmer. This versatile tool is designed for efficient trimming of grass and precise edging of lawns, offering cordless convenience with the Scheppach IXES 20V battery system. This manual provides essential information for safe operation, assembly, maintenance, and troubleshooting to ensure optimal performance and longevity of your device.

Şekil 1.1: The Scheppach C-LT300-X 2-in-1 Cordless Trimmer, shown with the included 2Ah battery, charger, and two spools of trimmer line. This image provides an overview Ürün paketinin tamamının.
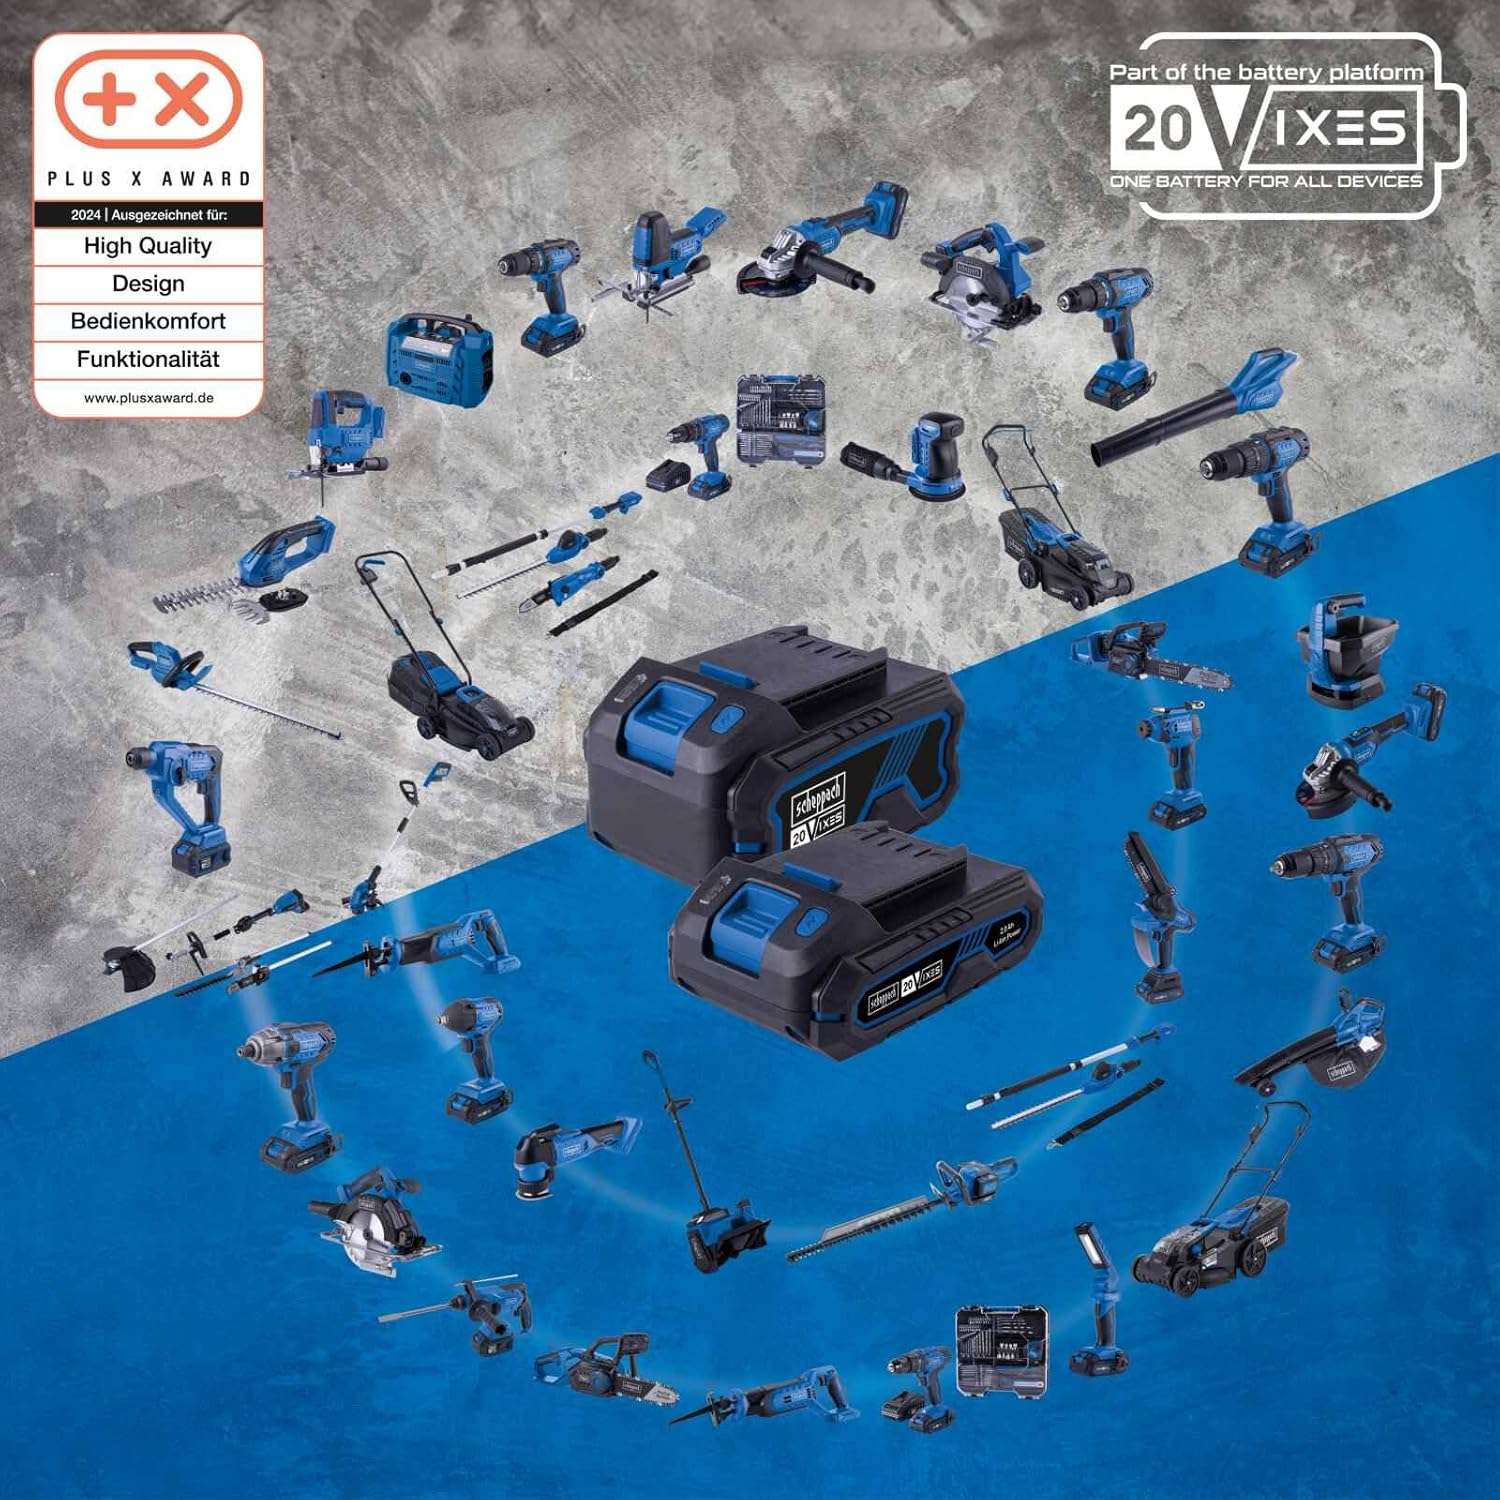
Şekil 1.2: The Scheppach IXES 20V battery platform, illustrating the wide range of compatible tools. This system allows you to use the same battery across multiple Scheppach devices, enhancing versatility and convenience.
2. Güvenlik Talimatları
Yaralanmaları ve aletin hasar görmesini önlemek için lütfen aşağıdaki güvenlik önlemlerine daima uyun.
2.1 Genel Güvenlik
- Aleti çalıştırmadan önce tüm talimatları okuyun ve anlayın.
- Tıraş makinesini çalıştırırken çocukları ve çevredekileri uzak tutun.
- Do not operate the tool in wet conditions or in the rain.
- Always inspect the work area for objects that could be thrown by the trimmer line.
2.2 Elektrik Güvenliği
- Bu alet için yalnızca belirtilen pili ve şarj cihazını kullanın.
- Pilleri d'de şarj etmeyinamp veya ıslak yerler.
- Protect the battery from heat, direct sunlight, and fire.
- Akü terminallerini asla kısa devre yapmayın.
2.3 Kişisel Güvenlik
- Wear appropriate personal protective equipment (PPE), including eye protection, long pants, sturdy footwear, and hearing protection.
- Aşırıya kaçmayın. Her zaman uygun duruş ve dengeyi koruyun.
- Yanlışlıkla çalıştırmayı önleyin. Pil takımını takmadan önce anahtarın kapalı konumda olduğundan emin olun.
- Do not operate the trimmer if you are tired, ill, or under the influence of drugs or alcohol.
3. Ürün Bileşenleri
Familiarize yourself with the main components of your Scheppach C-LT300-X trimmer:
- Düzeltici Kafa: Houses the cutting line and motor.
- Teleskopik Şaft: Allows for length adjustment for ergonomic use.
- Ana Sap: With integrated safety switch.
- Yardımcı Kulp: Adjustable for comfortable grip and control.
- Pil Bölmesi: For inserting the 20V battery.
- Plant Protection Guard: Foldable guard to protect delicate plants.
- Kenar Tekerleği: For precise lawn edging.
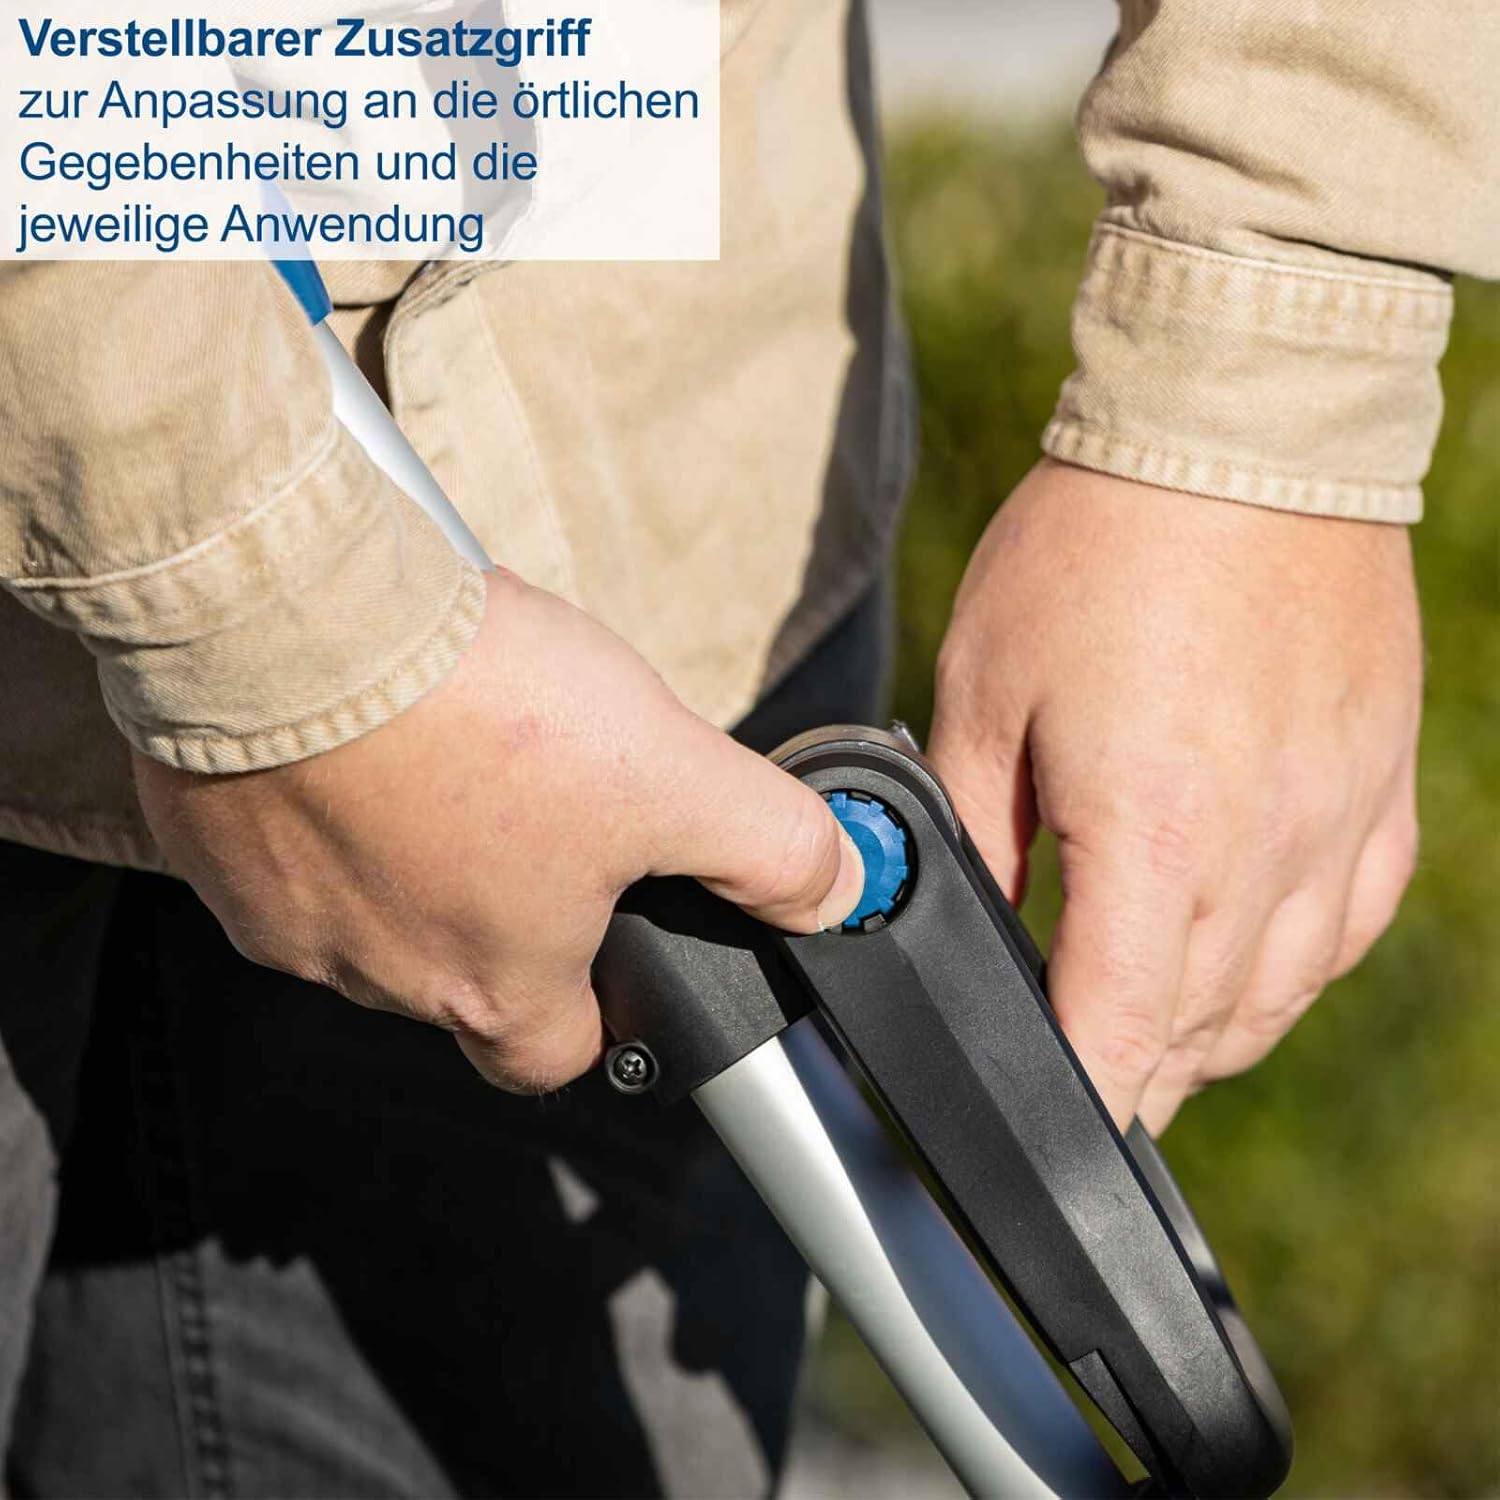
Şekil 3.1: Adjustable auxiliary handle. This handle can be positioned to suit your height and working posture, providing enhanced comfort and control during operation.

Şekil 3.2: Foldable plant protection guard. This guard can be deployed to prevent accidental damage to flowers, shrubs, and other delicate garden features while trimming.
4. Kurulum
4.1 Montaj
Follow these steps to assemble your trimmer:
- Attach the auxiliary handle to the main shaft and secure it firmly.
- Ensure the trimmer head is securely fastened to the lower shaft.
- Adjust the telescopic shaft to your desired working height.
4.2 Pil Şarjı ve Kurulumu
The trimmer operates on a 20V battery. Before first use, fully charge the battery.
- Şarj cihazını elektrik prizine takın.
- Insert the battery pack into the charger. The indicator light will show charging status.
- Tamamen şarj olduktan sonra pili şarj cihazından çıkarın.
- To install, slide the charged battery pack into the battery compartment on the trimmer until it clicks into place.
- Çıkarmak için pil çıkarma düğmesine basın ve pili dışarı doğru kaydırın.
4.3 Adjusting the Trimmer Head
The trimmer head can be adjusted for different cutting angles and for edging.

Şekil 4.1: Tool-free motor head adjustment. The trimmer head can be easily adjusted to various angles without the need for additional tools, allowing for versatile cutting and edging.
5. Operasyon
5.1 Başlatma ve Durdurma
- To start: Press the safety lock-off button and then squeeze the trigger switch.
- Durdurmak için: Tetik düğmesini bırakın.
5.2 Kırpma Fonksiyonu
Hold the trimmer firmly with both hands. Swing the trimmer from side to side, keeping the cutting line parallel to the ground. Maintain a safe distance from obstacles and ensure the plant protection guard is in place if working near delicate plants.

Şekil 5.1: Trimmer use on a slope. The adjustable features of the C-LT300-X make it ideal for maintaining grass on uneven terrain and slopes, ensuring comfortable and effective operation.
5.3 Kenar Fonksiyonu
To switch to edging mode, rotate the trimmer head 90 degrees. Use the edging wheel to guide the trimmer along the edge of your lawn or pathway, creating a clean, precise cut.

Şekil 5.2: Rotatable cutting head. The trimmer head can be rotated 90 degrees, allowing for easy conversion from trimming to precise lawn edging, even in hard-to-reach areas.
5.4 Automatic Line Feed
The trimmer features an automatic line feed system. When the line wears down, it will automatically extend more line as needed during operation. Avoid intentionally bumping the head to feed line, as this can cause premature wear.
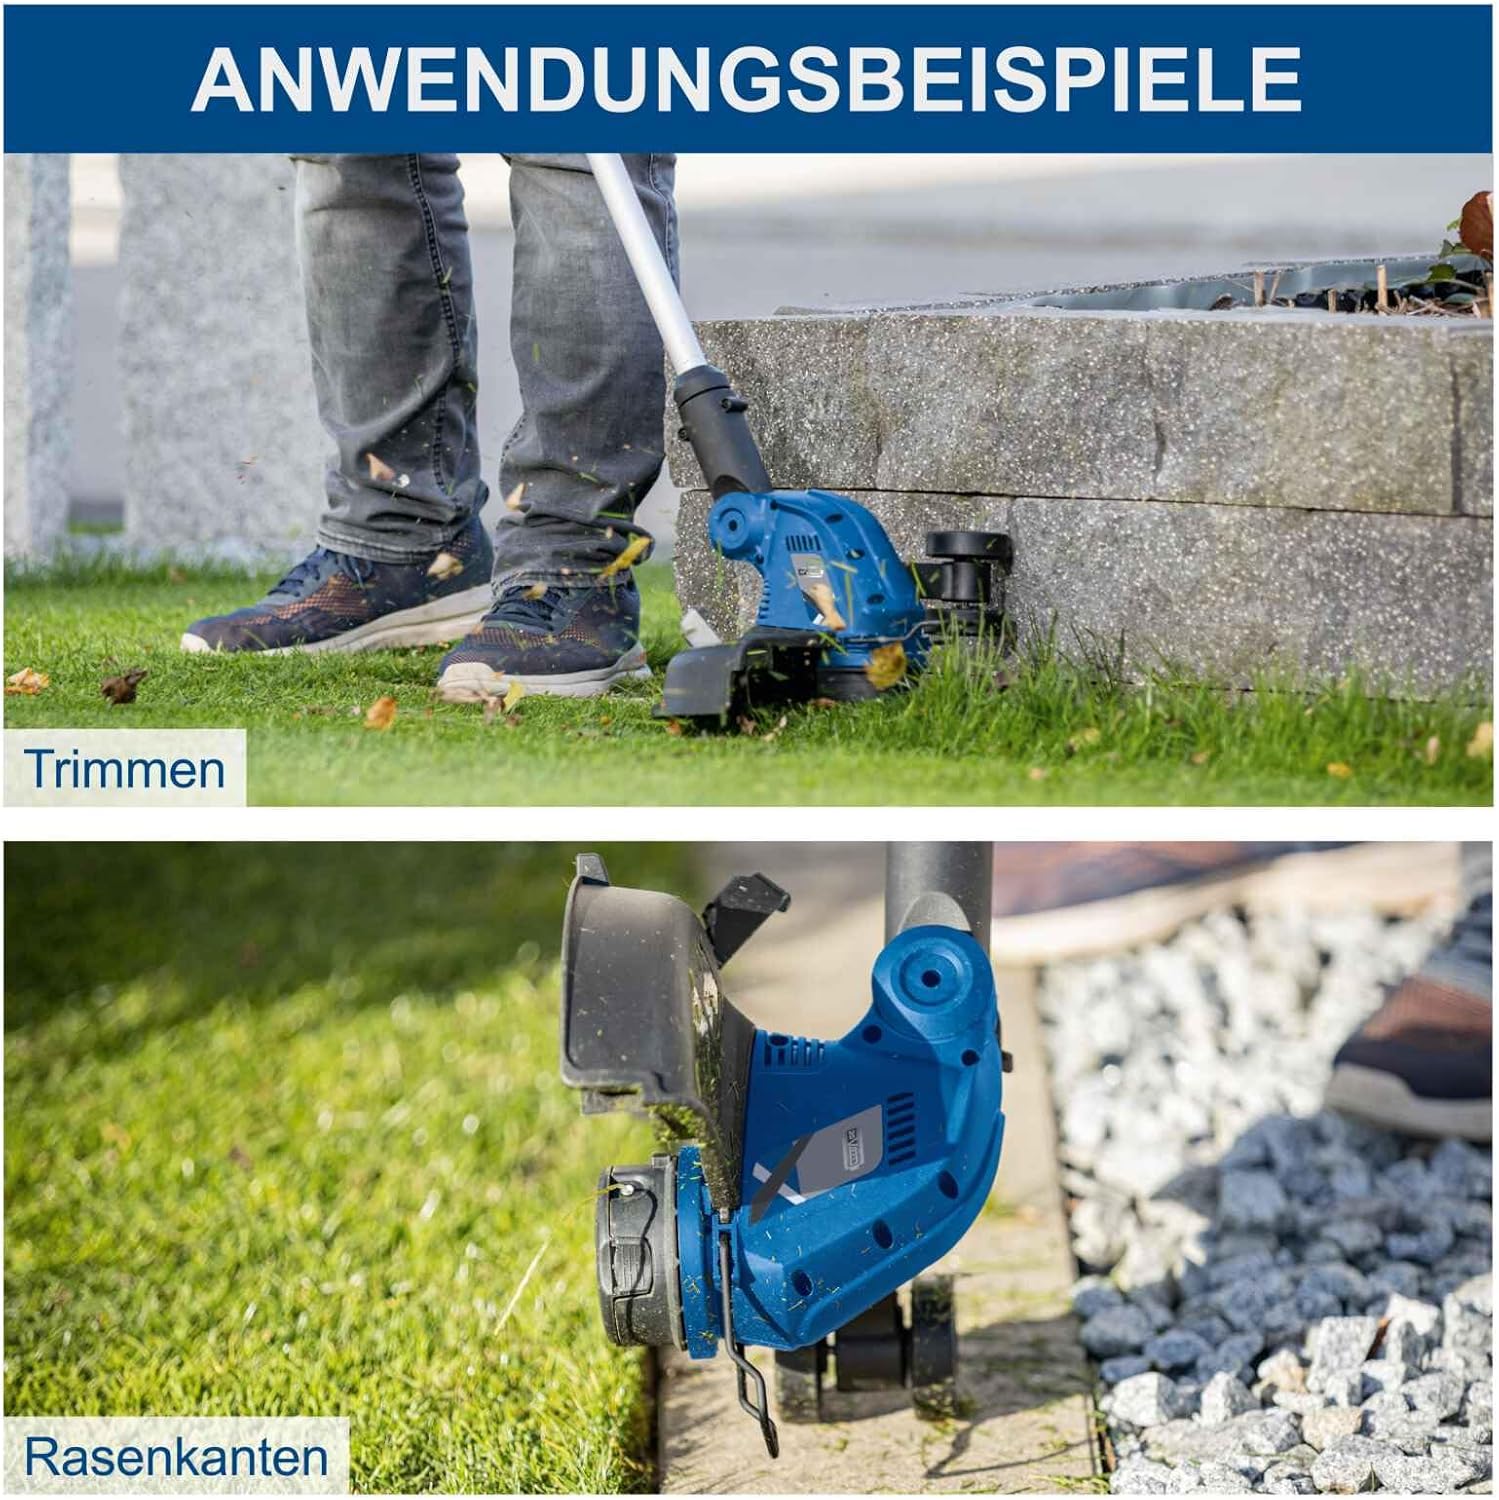
Şekil 5.3: Uygulama örneğiamples. The top image shows the trimmer in use for general grass trimming, while the bottom image demonstrates its capability for precise lawn edging along a paved surface.
6. Bakım
6.1 Temizlik
- Temizlemeden önce her zaman pil takımını çıkarın.
- Clean the trimmer housing with a damp bez. Sert kimyasallar veya aşındırıcı temizleyiciler kullanmayın.
- Remove any grass clippings or debris from the trimmer head and guard.
6.2 Replacing the Trimmer Line Spool
When the trimmer line runs out, replace the spool with a new one. The process is tool-free and straightforward.
- Pilin çıkarıldığından emin olun.
- Makara kapağının yan tarafındaki çıkıntılara basın ve kapağı çıkarın.
- Boş makarayı çıkarın.
- Insert a new pre-wound spool, ensuring the line is threaded through the eyelet.
- Makara kapağını yerine takın ve iyice yerine oturduğundan emin olun.
6.3 Depolama
- Tıraş makinesini kuru, güvenli ve çocukların erişemeyeceği bir yerde saklayın.
- Uzun süreli saklamadan önce pil takımını çıkarın.
- Store batteries in a cool, dry place, away from direct sunlight.
7. Sorun Giderme
Yaygın sorunlar ve çözümleri için aşağıdaki tabloya bakın.
| Sorun | Olası Neden | Çözüm |
|---|---|---|
| Düzeltici başlamıyor | Pil doğru takılmamış Pil boşaldı Güvenlik anahtarı devrede değil | Pili tekrar takın Aküyü şarj edin Ensure safety button is pressed before trigger |
| Trimmer line breaks frequently | Incorrect line type Line worn or old Cutting against hard surfaces | Use recommended line diameter (1.6mm) Replace spool with new line Avoid contact with concrete, rocks, etc. |
| Zayıf kesme performansı | Line too short Motor aşırı yüklendi Kafasında enkaz var | Allow automatic line feed Reduce cutting load Clean trimmer head |
Bu çözümleri denedikten sonra sorun devam ederse lütfen müşteri desteğiyle iletişime geçin.
8. Teknik Özellikler
Key technical data for the Scheppach C-LT300-X trimmer:
- Modeli: C-LT300-X (5910904900)
- Güç Kaynağı: Battery-powered (20V IXES system)
- Kesim Genişliği: Maksimum 300 mm
- Hat Çapı: 1.6 mm (single nylon line)
- Telescopic Shaft Adjustment: Maksimum 270 mm
- Ürün Ölçüleri (U x G x Y): 124x34x12.7 cm
- Ürün Ağırlığı: 4 Kilogram
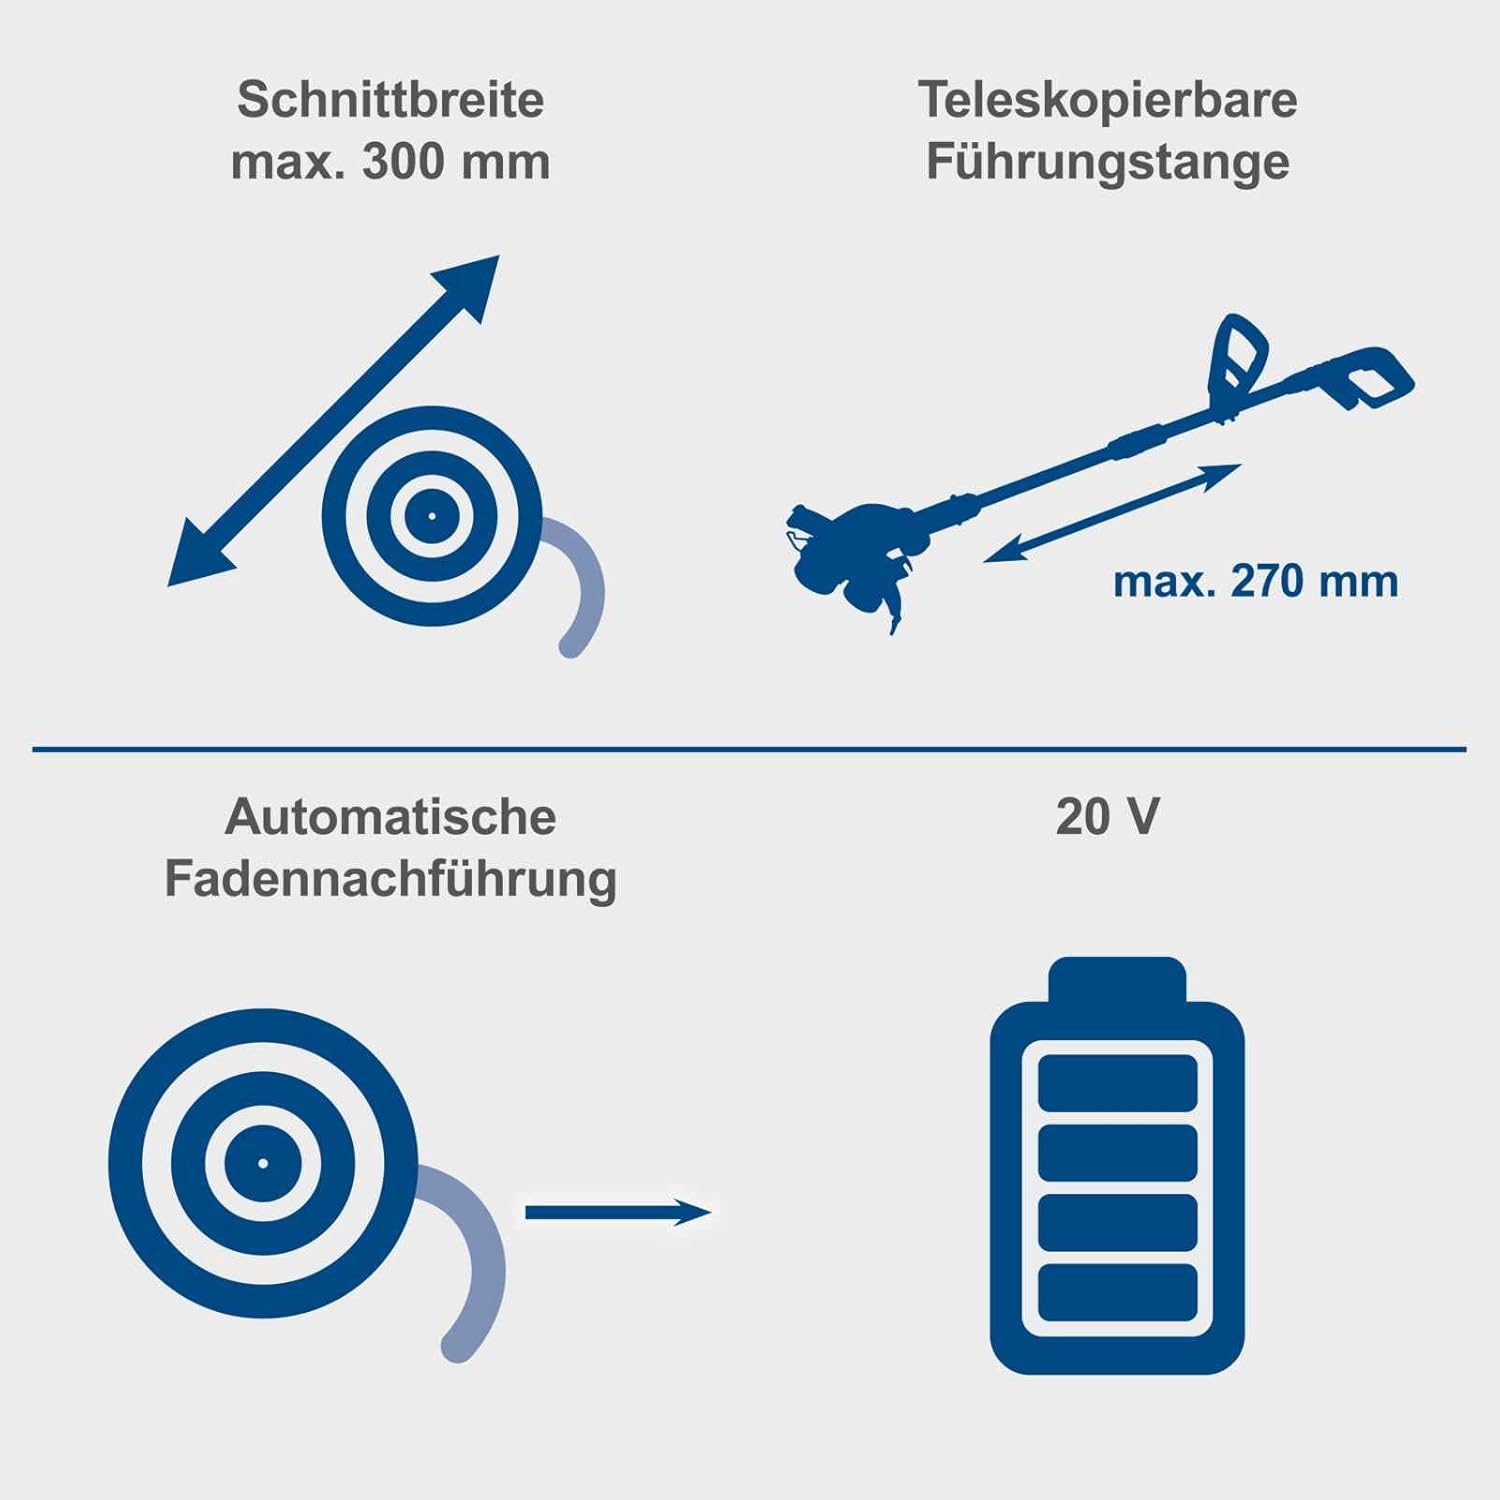
Şekil 8.1: Technical specifications diagram. This visual summary highlights key dimensions and features, including the maximum cutting width of 300mm, telescopic shaft extension up to 270mm, automatic line feed, and 20V battery compatibility.
9. Garanti ve Destek
Garanti bilgileri için lütfen ürününüzle birlikte verilen garanti kartına bakın veya resmi Scheppach web sitesini ziyaret edin. website. If you require technical assistance, spare parts, or have any questions not covered in this manual, please contact Scheppach customer support through their official channels.


