1. Ürün Bittiview
The Apera PX-250BT is a versatile music system designed for various audio playback options. It combines a traditional cassette player with modern features such as an FM radio, USB/SD MP3 player, and Bluetooth connectivity, all within a portable unit.
Temel Özellikler
- FM radio with real cassette player functionality, including roll back and forth.
- Recording function with a built-in microphone, allowing direct recording to cassette.
- Adjustable sound speed for cassette playback (requires a Phillips screwdriver for access).
- Integrated USB and SD card slots for MP3 audio playback.
- Uyumlu cihazlardan kablosuz ses akışı için Bluetooth bağlantısı.
- Powered by a standard corded electric wall socket.

Image: The Apera PX-250BT Music Set, showing its overall design and approximate dimensions (255mm width, 120mm height, 100mm depth).
2. Paket İçeriği
Lütfen paketin içindeki tüm ürünlerin eksiksiz olduğundan emin olun:
- Apera PX-250BT Music Set
- Kullanıcı Kılavuzu
- Power Cable (for corded electric operation)
3. Kontroller ve Bağlantılar
Familiarize yourself with the various controls and connection ports on your PX-250BT unit for proper operation.
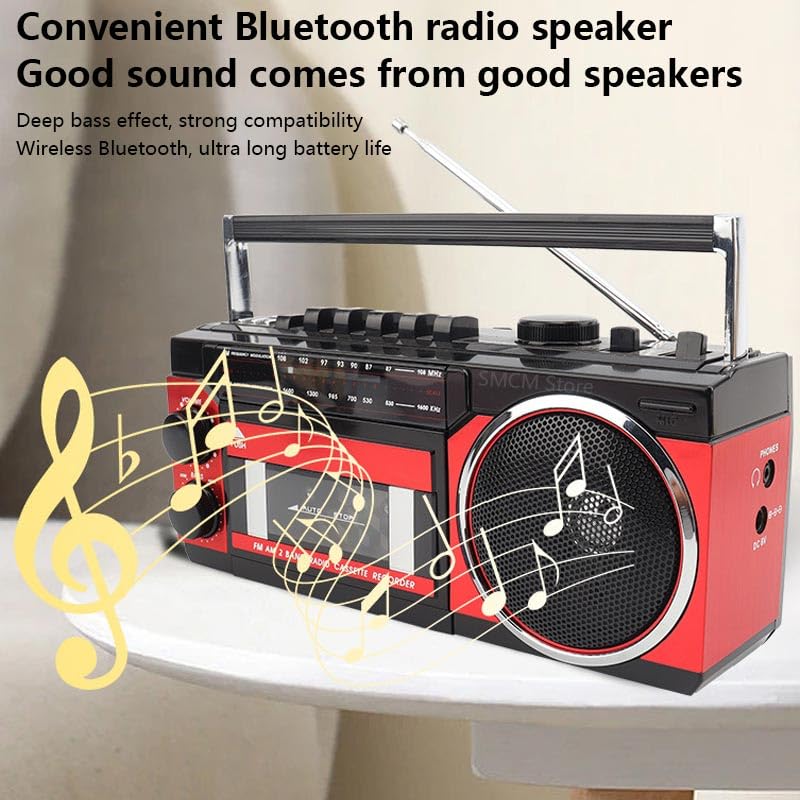
Image: The front panel of the Apera PX-250BT, displaying the cassette deck, radio tuner dial, volume and bass controls, and function buttons.
Ön Panel Kontrolleri
- SES Düğmesi: Genel ses çıkış seviyesini ayarlar.
- LOW BASS Knob: Adjusts the bass level for richer sound.
- TUNING Dial: Used to select desired radio frequencies (FM/AM).
- FONKSİYON Seçici: Switches between operating modes: FM/AM Radio, Cassette, USB/SD, and Bluetooth.
- Cassette Player Controls: Includes buttons for Play, Stop, Fast Forward, Rewind, Record, and Pause.
- USB/SD Controls: Buttons for Play/Pause, Skip Forward, and Skip Back when playing media from USB or SD.
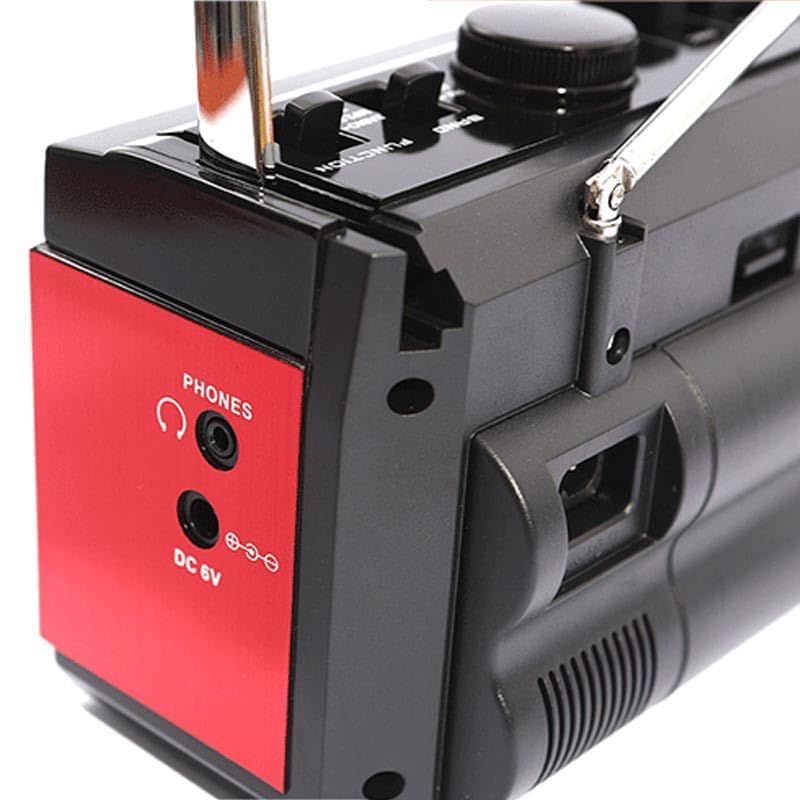
Image: The side panel of the Apera PX-250BT, showing the headphone jack and the DC 6V power input port.
Rear/Side Panel Connections
- DC 6V Güç Girişi: Sağlanan güç kablosunu buraya bağlayın.
- TELEFONLAR Jack: 3.5mm stereo jack for connecting headphones for private listening.
- USB Bağlantı Noktası: For inserting USB flash drives containing MP3 files.
- SD Kart Yuvası: For inserting SD memory cards containing MP3 files.
- Teleskopik Anten: Daha iyi radyo alımı için uzatın.
4. Kurulum
Güç Bağlantısı
- Connect the power cable to the DC 6V input port on the unit.
- Plug the other end of the power cable into a standard wall socket.
Anten Ayarı
For optimal FM radio reception, fully extend the telescopic antenna. Adjust its position and orientation for the clearest signal.
5. Kullanım Talimatları
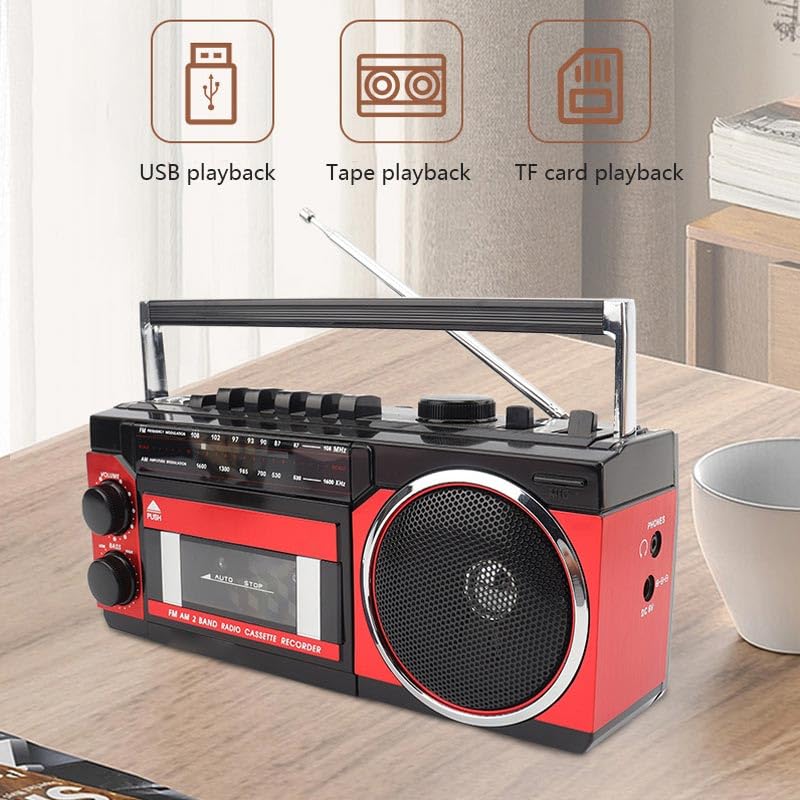
Image: This image illustrates the various playback options of the Apera PX-250BT, including USB playback, tape playback, and TF card playback, indicating its versatility.
FM Radyo İşlemi
- Set the FUNCTION Selector to "FM" or "Radio".
- Teleskopik anteni tamamen uzatın.
- Rotate the TUNING Dial to select your desired radio station.
- Adjust the VOLUME and LOW BASS knobs as needed for optimal sound.
Kasetçaların Çalıştırılması
- Press the "PUSH" button on the cassette door to open it.
- Insert a cassette tape with the open side facing up.
- Kaset kapağını tık sesi duyana kadar yavaşça kapatın.
- Set the FUNCTION Selector to "Cassette".
- Basın OYNAMAK button to start tape playback.
- Kullanın HIZLI İLERLEME or GERİ SARMA Bant üzerinde gezinmek için düğmeler.
- Basın DURMAK Oynatmayı sonlandırmak için düğme.
Recording to Cassette
The PX-250BT allows recording audio directly to a cassette tape using its built-in microphone.
- Kaset çalara boş bir kaset bandı yerleştirin.
- Set the FUNCTION Selector to "Cassette".
- Basın KAYIT button (this may require simultaneously pressing PLAY on some units).
- Cihaz üzerinde bulunan dahili mikrofona net bir şekilde konuşun.
- Basın DURMAK Kaydı sonlandırmak için düğmeye basın.
USB / SD MP3 Playback
- USB flash sürücüyü USB bağlantı noktasına veya SD kartı SD kart yuvasına takın.
- Set the FUNCTION Selector to "USB" or "SD".
- Cihaz, MP3 dosyalarını otomatik olarak algılayacak ve çalmaya başlayacaktır. fileeklenen medyadan s.
- Parçalar arasında geçiş yapmak için İleri/Geri Atla düğmelerini kullanın.
- Oynat/Duraklat düğmesini kullanarak oynatmayı kontrol edin.
Bluetooth Hoparlör Fonksiyonu
- Set the FUNCTION Selector to "Bluetooth". The unit will enter pairing mode, typically indicated by a flashing light or an audible prompt.
- On your smartphone or other Bluetooth-enabled device, search for available Bluetooth devices.
- Select "PX-250BT" (or a similar name) from the list to pair. A confirmation sound will indicate successful pairing.
- Bağlı cihazınızdan ses oynatın.
- Adjust the volume using the unit's VOLUME knob or your connected device's volume controls.
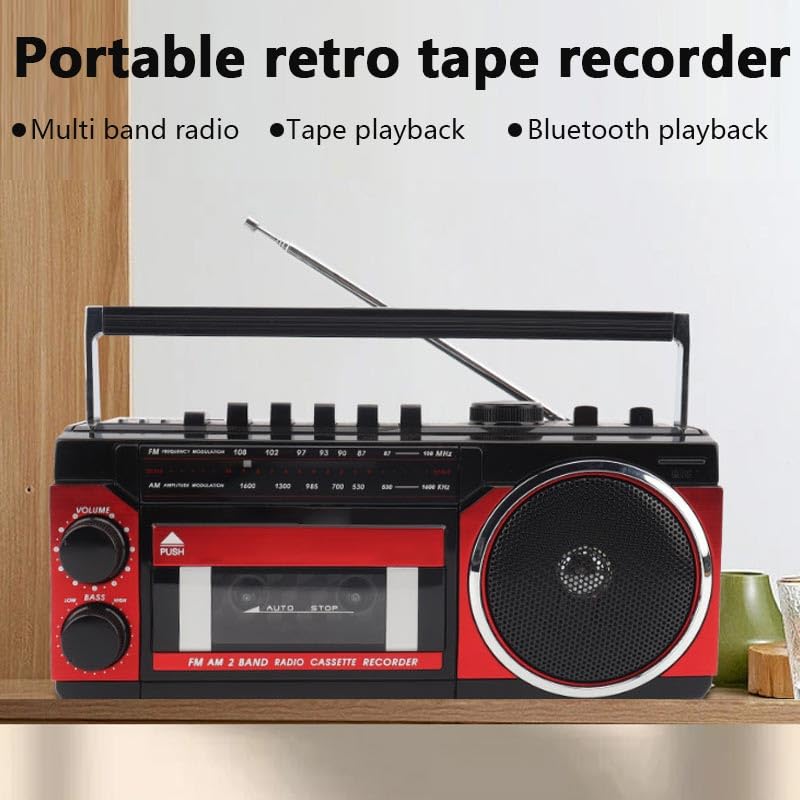
Image: This image highlights the portable and retro design of the Apera PX-250BT, emphasizing its multi-band radio, tape playback, and Bluetooth playback capabilities.
6. Bakım
Temizlik
Wipe the exterior of the unit with a soft, dry cloth. Do not use abrasive cleaners, solvents, or strong detergents, as these can damage the finish.
Kaset Kafası Temizliği
To ensure optimal sound quality and prevent damage to your cassette tapes, periodically clean the cassette player's heads and pinch rollers. Use a specialized cassette head cleaning kit, following its instructions carefully.
7. Sorun Giderme
Güç Yok
- Ensure the power cable is securely connected to both the unit and a functional wall socket.
- Check if the wall socket is receiving power by testing it with another appliance.
Ses Yok
- Ses seviyesi düğmesini artırın.
- Ensure the correct FUNCTION (FM, Cassette, USB, Bluetooth) is selected.
- Kulaklık kullanıyorsanız, kulaklıkların PHONES girişine tam olarak takılı olduğundan emin olun.
Zayıf Radyo Alımı
- Fully extend and adjust the telescopic antenna for better signal reception.
- Try moving the unit to a different location, away from potential interference sources.
Kaset Çalma Sorunları
- Ensure the cassette tape is inserted correctly and the door is fully closed.
- Clean the cassette player heads and pinch rollers.
- Check if the tape itself is damaged or tangled.
Bluetooth Eşleştirme Sorunları
- Ensure the unit is in Bluetooth mode and discoverable (indicated by a flashing light or audio prompt).
- Make sure your Bluetooth device's Bluetooth function is enabled and within range (typically 10 meters).
- If previously paired, try forgetting the "PX-250BT" device on your smartphone and attempting to pair again.
8. Özellikler
| Marka | Apera |
| Üretici | Güneysu Sanal Mağ. Tic. Ltd. Şti. |
| Paket Boyutları | 28x14x11.5 cm |
| Ürün Ağırlığı | 1 kilo |
| Donanım Arayüzü | Bluetooth, MicroSD, Radio Frequency, USB |
| Tuner Teknolojisi | FM |
| Uyumlu Cihazlar | Akıllı telefon |
| Özel Özellikler | Radio, Cassette Player, USB/SD MP3 Player, Bluetooth Speaker, Recording |
| Güç Kaynağı | Kablolu Elektrik |
| Piller Gerekli | HAYIR |
| Bağlayıcı Türü | Bluetooth, USB |
| Desteklenen Radyo Bantları | 1 Band (FM) |
| Medya Türü | MP3 |
| Bluetooth Teknolojisini Destekler | Evet |
| Renk | Siyah / Kırmızı |
9. Garanti ve Destek
For detailed warranty information, please refer to the warranty card or documentation included with your purchase. In case of technical issues or for customer support, please contact your retailer or the manufacturer directly. Keep your purchase receipt as proof of purchase for any warranty claims.


