1. Güvenlik Talimatları
Please read these safety instructions carefully before using the appliance. Keep this manual for future reference.
- Montaj, demontaj veya temizlik işlemlerinden önce cihazın fişinin mutlaka çekili olduğundan emin olun.
- Yaralanmaları önlemek için çalışma sırasında ellerinizi ve aletlerinizi hareketli parçalardan uzak tutun.
- Do not use the appliance for grinding bones, nuts, or other hard foods that could damage the motor or blades.
- Ensure the appliance is placed on a stable, flat surface during use.
- Motor ünitesini suya veya diğer sıvılara batırmayın.amp Kumaş.
- Bu cihaz yalnızca ev kullanımı içindir. Açık havada kullanmayın.
- Cihazla oynamadıklarından emin olmak için çocukları denetleyin.
- Güç kablosu hasar görmüşse, tehlikeyi önlemek için üretici, servis acentesi veya benzer vasıflı kişiler tarafından değiştirilmelidir.
2. Ürün Bittiview
The Clatronic FW 3803 Meat Grinder is designed for versatile food preparation, including grinding meat, making sausages, and preparing pastries.
Bileşenler:
- Motor Ünitesi
- Metal Neck
- Metal Screw (Auger)
- 4-Blade Stainless Steel Knife
- 3 Perforated Metal Discs (3mm, 5mm, 7mm)
- Sabitleme Halkası
- Rotating Filling Tray
- İtici
- Sosis Doldurma Aparatı
- Kebbe Eki
- Cookie/Pastry Attachment

Şekil 2.1: Patlatılmış view of the Clatronic FW 3803 Meat Grinder showing its various attachments for different food preparations.

Şekil 2.2: Ayrıntılı view of key features such as the carrying handle for easy transport, the robust metal neck and screw, the convenient rotating filling tray, and the quick-change mechanism for attachments.
3. Kurulum
- Paketin açılması: Tüm parçaları ambalajından dikkatlice çıkarın. Saklama veya imha için ambalajı muhafaza edin.
- Temizlik: Before first use, wash all detachable parts (metal neck, screw, knife, discs, attachments, tray) in warm soapy water. Rinse thoroughly and dry completely. Wipe the motor unit with a damp Kumaş.
- Toplantı:
- Insert the metal screw (auger) into the metal neck.
- Place the 4-blade stainless steel knife onto the end of the screw, ensuring the sharp edges face outwards.
- Select the desired perforated metal disc (3mm, 5mm, or 7mm) and place it over the knife.
- Secure these parts with the fixing ring, tightening it firmly but not excessively.
- Attach the assembled grinding head to the motor unit by aligning the grooves and turning until it locks into place.
- Place the rotating filling tray on top of the metal neck.
- Atama: Position the meat grinder on a stable, dry, and level surface. Ensure there is adequate ventilation around the motor unit.
4. Kullanım Talimatları
4.1. Et Kıyma
- Eti, beslenme tüpüne kolayca sığacak şekilde küçük parçalara (yaklaşık 2-3 cm) keserek hazırlayın. Kemikleri, kıkırdakları veya sert tendonları çıkarın.
- Kıymayı toplamak için öğütme başlığının altına bir kase veya kap yerleştirin.
- Cihazı uygun bir elektrik prizine takın.
- Cihazı AÇIK konuma getirin.
- Feed the meat into the filling tray and gently push it down the feeding tube using the pusher. Et kıyma makinesine et itmek için asla parmaklarınızı veya başka aletler kullanmayın.
- After grinding, turn the appliance OFF and unplug it.

Figure 4.1: The meat grinder efficiently processing meat, demonstrating its capability to produce finely ground meat suitable for various dishes.
4.2. Ters Fonksiyon
The appliance features a reverse function to clear any blockages. If the grinder becomes jammed:
- Turn the appliance OFF immediately.
- Press and hold the reverse (R) button. This will rotate the screw in the opposite direction, pushing the blockage back up.
- Release the R button once the blockage is cleared.
- You can then resume normal operation.

Figure 4.2: Demonstrating the reverse function, which is crucial for easily resolving any food blockages during the grinding process.
4.3. Sausage Making
- Disassemble the grinding head and remove the knife and perforated disc.
- Attach the sausage stuffer attachment to the metal neck and secure it with the fixing ring.
- Sosis c'yi kaydırınasing doldurma memesine takın.
- Prepare your seasoned meat mixture.
- Turn the appliance ON and feed the mixture into the tray, guiding the casing doldukça.
4.4. Pastry/Cookie Making
- Disassemble the grinding head and remove the knife and perforated disc.
- Attach the cookie/pastry attachment to the metal neck and secure it with the fixing ring.
- Kurabiye hamurunuzu hazırlayın.
- Turn the appliance ON and feed the dough into the tray. The dough will be extruded in various shapes.
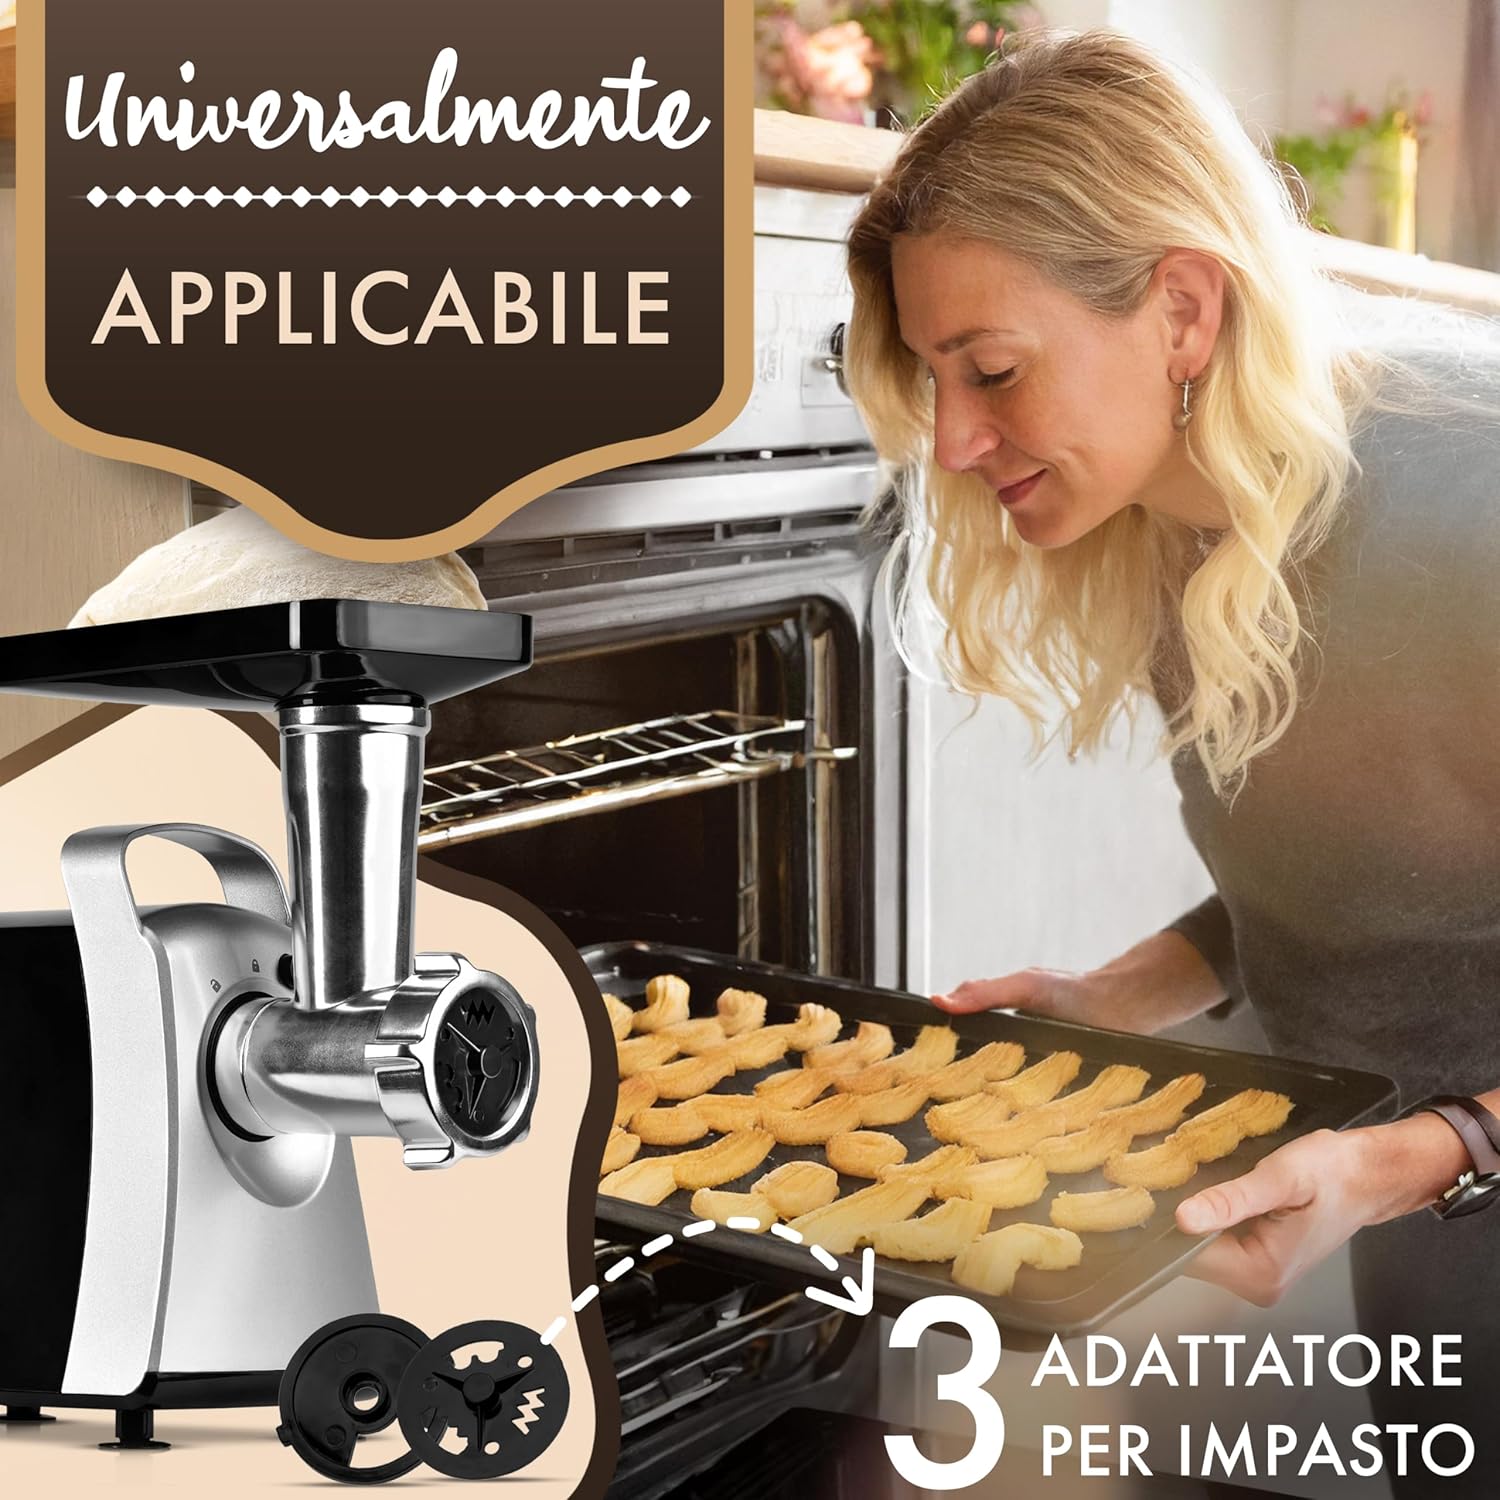
Figure 4.3: The meat grinder equipped with the pastry adapter, demonstrating its capability to create various cookie shapes directly onto a baking sheet.
5. Bakım ve Temizlik
Düzenli temizlik, cihazınızın optimum performansını sağlar ve ömrünü uzatır.
- Her zaman cihazın fişini çekin Temizlemeden önce elektrik prizinden çıkarın.
- Disassemble all removable parts: fixing ring, perforated disc, knife, screw, metal neck, and filling tray.
- Wash all metal and plastic attachments in warm, soapy water. Use a brush to remove any food residue from the perforated discs and knife.
- Tüm parçaları akan su altında iyice durulayın.
- Yeniden monte etmeden veya saklamadan önce tüm parçaları tamamen kurulayın. Yapamaz put metal parts in a dishwasher as this may cause discoloration.
- Motor ünitesini yumuşak, damp Kumaş. Motor ünitesini asla suya batırmayın.
- Cihazı ve aksesuarlarını kuru ve güvenli bir yerde saklayın.
6. Sorun Giderme
| Sorun | Olası Neden | Çözüm |
|---|---|---|
| Cihaz başlamıyor | Not plugged in correctly; Power outage; ON/OFF switch not engaged. | Check power connection; Verify power supply; Ensure switch is in ON position. |
| Meat is not grinding or is grinding slowly | Meat pieces are too large; Grinding head is blocked; Knife or disc incorrectly assembled. | Cut meat into smaller pieces; Use reverse function to clear blockage; Disassemble and reassemble parts correctly. |
| Olağandışı gürültü veya titreşim | Loose parts; Foreign object inside; Overload. | Check all parts are securely fastened; Unplug and inspect for foreign objects; Reduce load and restart. |
| Çalışma sırasında motor durur | Uzun süreli kullanım veya aşırı yüklenme nedeniyle aşırı ısınma. | Turn OFF and unplug. Allow to cool down for at least 30 minutes before restarting. Reduce load. |
7. Özellikler
| Özellik | Detay |
|---|---|
| Marka | Klatronik |
| Örnek | Yazılım Sürümü 3803 |
| Güç | 1000W |
| Cilttage | 230 Volt |
| Boyutlar | 29.9x13.9x29.6 cm |
| Ağırlık | 1.92 Kilogram |
| Malzeme | Plastic (body), Metal (neck, screw, discs) |
| Özellikler | Forward/Reverse function, 3 metal perforated discs (3mm, 5mm, 7mm), Sausage stuffer, Kebbe attachment, Cookie/Pastry attachment, Rotating filling tray, Metal neck and screw, 4-blade stainless steel knife. |
8. Garanti ve Destek
Bu ürün standart üretici garantisiyle birlikte gelir. Lütfen ürün ambalajında bulunan garanti kartındaki ayrıntılı şartlar ve koşullara bakın.
For technical support, spare parts, or service inquiries, please contact Clatronic customer service through their official website veya ürün dokümantasyonunuzda sağlanan iletişim bilgileri.
Garanti kapsamındaki talepleriniz için satın alma belgenizi saklayın.


