1. Giriş ve Üzeriview
This manual provides essential instructions for the safe and efficient use of your Maxcom MM135L Basic Mobile Phone. The MM135L is designed for straightforward communication, featuring a user-friendly interface, large keys, and a 1.77-inch screen. It supports 2G networks and includes dual SIM capability, an SOS button for emergencies, and convenient USB-C charging. Please read this manual thoroughly before operating the device.
2. Paket İçeriği
Paketin içinde tüm öğelerin mevcut olduğundan emin olun:
- Maxcom MM135L Mobile Phone
- Battery (Lithium-Ion, 600 mAh)
- USB kablosu
- SIM Tepsisi Çıkarıcı
- Kullanım Kılavuzu (bu belge)
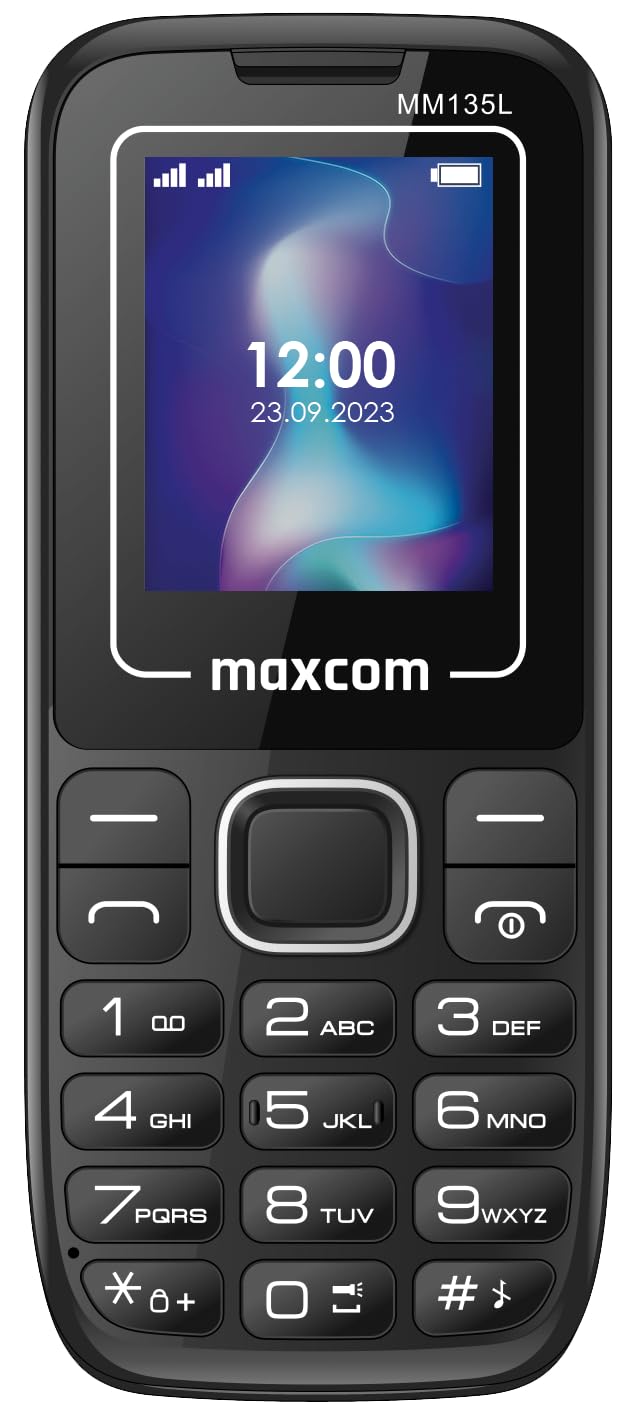
3. Cihaz Düzeni
Familiarize yourself with the physical components of your Maxcom MM135L phone.
Şekil 3.1: Arka view of the Maxcom MM135L phone, showing the blue textured back cover, Maxcom logo, and speaker grille at the top.

Şekil 3.2: Ön view of the Maxcom MM135L phone, displaying the screen, large numeric keypad, and call/end buttons.

Figure 3.3: Bottom edge of the phone, featuring the USB-C charging port and a 3.5mm headphone jack.

Figure 3.4: Top edge of the phone, highlighting the integrated flashlight.
Temel Bileşenler:
- Ekran Görüntüsü: 1.77-inch LCD for clear text and call information.
- Sayısal tuş takımı: Large, tactile buttons for easy dialing and texting.
- Arama/Sonlandırma Butonları: Dedicated buttons for managing calls.
- Gezinme Tuşları: Menü gezintisi için.
- SOS Butonu: Located on the rear for emergency calls (refer to Figure 3.1).
- El feneri: Integrated at the top of the device (refer to Figure 3.4).
- USB-C Bağlantı Noktası: For charging the device (refer to Figure 3.3).
- Kulaklık girişi: 3.5mm port for audio accessories (refer to Figure 3.3).
4. Kurulum
4.1 Pil Kurulumu
- Telefonun arka kapağını dikkatlice çıkarın.
- Pil kontaklarını pil bölmesinin içindeki terminallerle hizalayın.
- Pili yavaşça yerine bastırın.
- Arka kapağı yerine takın ve iyice yerine oturduğundan emin olun.
4.2 SIM Kart Kurulumu
The Maxcom MM135L supports dual SIM cards.
- With the phone powered off and the back cover removed, locate the SIM card slots.
- Insert your SIM card(s) into the designated slot(s) with the gold contacts facing down, following the orientation indicated on the phone.
- Ensure the SIM card(s) are fully seated.
- Replace the back cover and battery.
4.3 Telefonun Şarj Edilmesi
The phone uses a USB-C port for charging.
- Connect the USB-C cable to the charging port at the bottom of the phone (refer to Figure 3.3).
- USB kablosunun diğer ucunu uyumlu bir USB güç adaptörüne veya bilgisayarın USB portuna bağlayın.
- Ekranda bulunan pil göstergesi şarj durumunu gösterecektir.
- Akü tamamen şarj olduğunda şarj cihazını çıkarın.
Not: For optimal battery life, fully charge the phone before first use.
5. Kullanım Talimatları
5.1 Güç Açma/Kapatma
- Açmak İçin: Basılı tutun Call/Power ekran aydınlanıncaya kadar düğmesine basın.
- Kapatmak İçin: Basılı tutun Bitiş/Güç button until the power off options appear, then confirm.
5.2 Arama Yapma ve Alma
- Telefon çağrısı yapmak: Telefon numarasını tuş takımını kullanarak girin ve ardından tuşuna basın. Arama düğme.
- Bir Aramayı Cevaplamak için: Basın Arama Telefon çaldığında düğmeye basın.
- Aramayı Bitirmek İçin: Basın Son düğme.
5.3 Mesaj Gönderme ve Alma
- Navigate to the "Messages" menu using the navigation keys.
- Select "Create New Message" to compose an SMS.
- Alıcının numarasını ve mesajınızı girin, ardından gönderin.
- Received messages will appear in the "Inbox".
5.4 Using the SOS Button
The SOS button is located on the rear of the phone. It is designed for emergency situations.
- Etkinleştirmek: Press and hold the SOS button for several seconds.
- The phone will automatically sound an alarm and send emergency SMS messages to pre-set contacts.
- It will then automatically call the saved emergency contacts in a loop until a call is answered.
- Ensure emergency contacts are properly configured in the phone settings.
5.5 El Feneri Fonksiyonu
The built-in flashlight can be activated for convenience.
- Refer to the phone's specific settings or a dedicated side button for flashlight activation. Typically, a long press on a designated key or a side switch controls it.
6. Bakım
- Temizlik: Telefonun yüzeyini temizlemek için yumuşak, kuru bir bez kullanın. Sıvı temizleyicilerden kaçının.
- Pil Bakım: Pili aşırı sıcaklıklara maruz bırakmayın. Pili sık sık tamamen boşaltmaktan kaçının.
- Depolamak: Uzun süre kullanmayacağınız zaman telefonunuzu serin ve kuru bir yerde saklayın.
- Suya Dayanıklılık: Bu telefon su geçirmez değildir. Sıvılarla temasından kaçının.
7. Sorun Giderme
| Sorun | Olası Çözüm |
|---|---|
| Telefon açılmıyor. | Pilinin doğru takıldığından ve şarj edildiğinden emin olun. Şarj cihazını bağlayın ve tekrar deneyin. |
| Arama yapılamaz veya alınamaz. | Check if the SIM card is properly inserted and activated. Verify network signal strength. Contact your service provider if issues persist. |
| Pil şarj olmuyor. | Ensure the USB-C cable and charger are securely connected and functional. Try a different charging cable or adapter. |
| SOS butonu çalışmıyor. | Verify that emergency contacts are saved in the phone's settings. Ensure the phone has network coverage. |
| Çağrı kalitesi düşük. | Move to an area with better network reception. Check the speaker and microphone for obstructions. |
8. Özellikler
| Özellik | Detay |
|---|---|
| Model Adı | MM135L |
| Ekran Boyutu | 1.77 inç |
| Görüntü Türü | LCD |
| Çözünürlük | 128x160 |
| Hücresel Teknoloji | 2G |
| SIM Desteği | Çift SIM |
| Pil Türü | Lityum-İyon |
| Pil Kapasitesi | 600 mAh |
| Şarj Portu | USB-C |
| Boyutlar (U x G x Y) | 7x14x3.5 cm |
| Ağırlık | 60 gr |
| Özel Özellikler | SOS Button, Flashlight, Expandable Memory, Fast Charging Support |
9. Garanti ve Destek
For warranty information, technical support, or service inquiries, please refer to the warranty card included with your product or contact Maxcom customer service directly. Keep your proof of purchase for warranty claims.


