giriiş
This manual provides detailed instructions for the setup, operation, and maintenance of your ClocTeck Transparent Digital Alarm Clock. Please read this manual thoroughly before using the product to ensure proper function and longevity.
Güvenlik Bilgileri
- Cihazı aşırı sıcaklıklara, doğrudan güneş ışığına veya yüksek neme maruz bırakmayın.
- Cihazı düşürmekten veya güçlü darbelere maruz bırakmaktan kaçının.
- Cihazınızı su ve diğer sıvılardan uzak tutunuz.
- Cihazı kendiniz sökmeye veya onarmaya çalışmayın. Servis için yetkili personele başvurun.
- Use only the specified Type-C charging cable for power.
Paket İçeriği
Lütfen kutuyu açtığınızda paket içeriğini kontrol edin:
- ClocTeck Transparent Digital Alarm Clock (Gold)
- Type-C USB Şarj Kablosu
- Kullanım Kılavuzu (bu belge)
Ürün Bittiview
The ClocTeck Transparent Digital Alarm Clock features a clear LCD display that shows time, date, day of the week, temperature, humidity, and a weather icon. It is designed with a sleek aluminum alloy case.
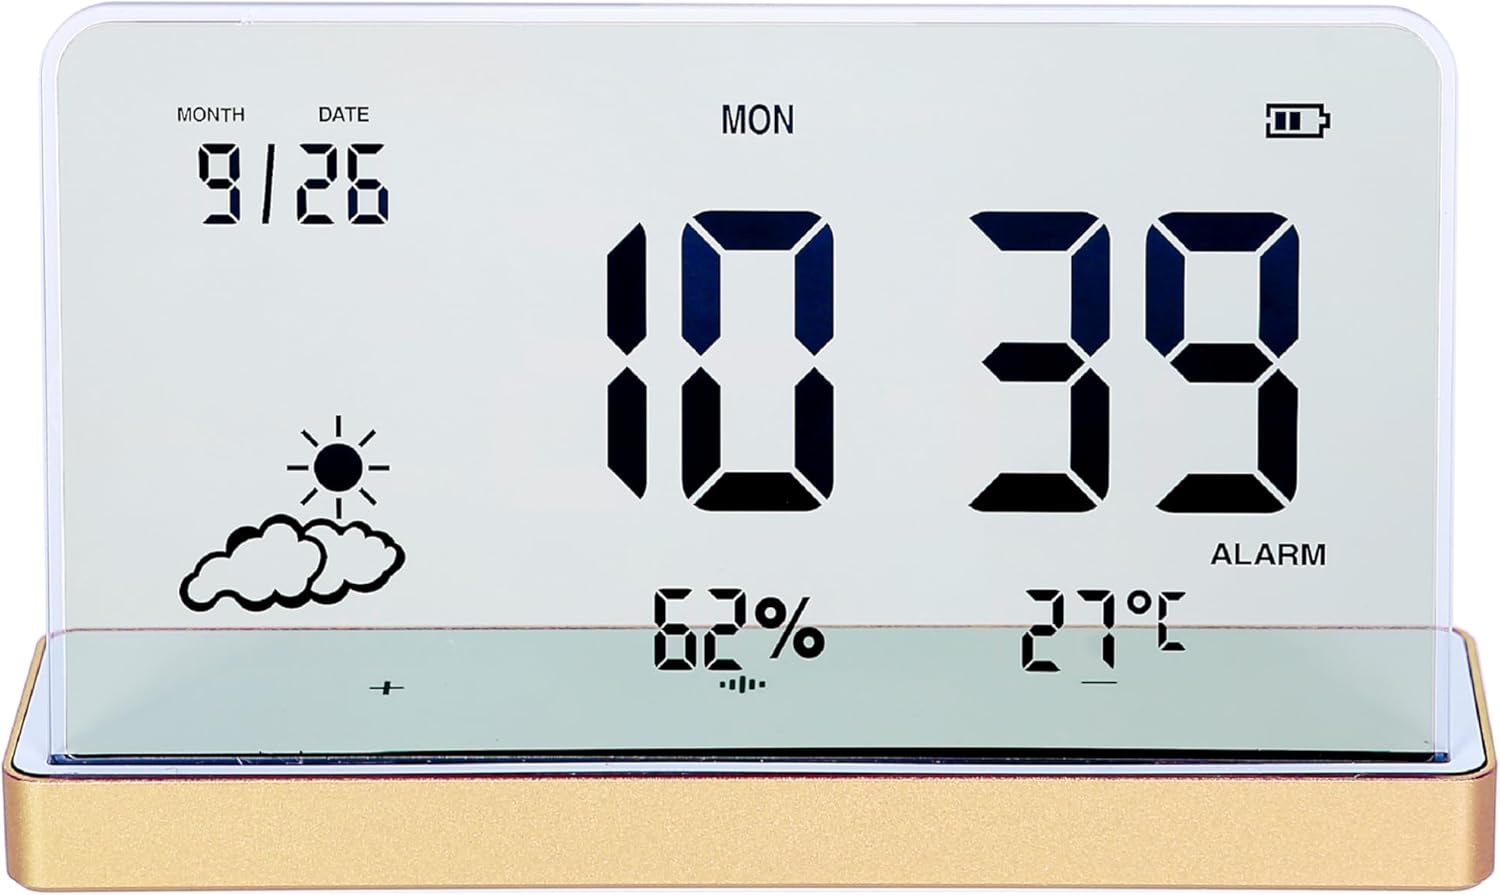
Şekil 1: Ön view of the ClocTeck Transparent Digital Alarm Clock. The display shows the current time (10:39), date (9/26), day (MON), humidity (62%), temperature (27°C), and a partly cloudy weather icon. A battery indicator is visible in the top right corner.
Temel Özellikler:
- Transparent LCD Display
- Time, Date, and Day Display
- Indoor Temperature and Humidity Monitoring
- Up to 3 Programmable Alarms
- Rechargeable Battery with long standby time
- Durable Aluminum Alloy Case
Kurmak
1. Açma ve Şarj Etme
The clock is powered by a built-in rechargeable battery. Before first use, or if the battery indicator is low, connect the provided Type-C USB charging cable to the charging port on the back or side of the clock and plug the other end into a standard USB power adapter (not included).
- A full charge provides approximately 75 days of operation.
- Ekrandaki pil göstergesi şarj durumunu gösterecektir.
2. İlk Yerleştirme
Place the clock on a stable, flat surface. For accurate temperature and humidity readings, avoid placing it near heat sources, direct sunlight, or in areas with extreme drafts.
Kullanım Talimatları
The clock features several buttons, typically located on the back or bottom, for setting time, alarms, and other functions. Refer to the specific button labels on your device.
1. Saat ve Tarihin Ayarlanması
- Basın AYARLAMAK Zaman ayar moduna girmek için düğmeye basın.
- Kullanın UP Ve AŞAĞI Saati ayarlamak için düğmelere basın. AYARLAMAK Onaylamak ve tutanaklara geçirmek için.
- Aynı işlemi dakika, yıl, ay ve tarih için de tekrarlayın.
- Basmak AYARLAMAK Ayar modundan çıkmak için tekrar basın.
2. Alarmları Ayarlama
The clock supports up to 3 independent alarms.
- Basın ALARM button to cycle through Alarm 1, Alarm 2, Alarm 3, and alarm off modes.
- When an alarm is selected, press and hold the ALARM button to enter alarm setting mode for that specific alarm.
- Kullanın UP Ve AŞAĞI buttons to set the alarm hour and minutes. Press ALARM to confirm each step.
- After setting the time, you may be prompted to set the alarm's activation days (e.g., weekdays, weekends, daily). Use UP/AŞAĞI Ve ALARM seçmek için.
- To activate or deactivate an alarm, short press the ALARM button until the alarm icon appears or disappears next to the corresponding alarm number on the display.
3. Sıcaklık ve Nem Göstergesi
The clock continuously displays indoor temperature and humidity. The temperature range is -20°C to 65°C, and the humidity range is 10% to 99%.
- Temperature is displayed in Celsius (°C).
- Humidity is displayed as a percentage (%)
4. Erteleme Fonksiyonu
When an alarm sounds, press any button (other than the alarm off button, if present) to activate the snooze function. The alarm will sound again after a short interval (typically 5-10 minutes).
5. Ekran Parlaklığı Ayarı
The clock may feature automatic brightness adjustment or manual control. Consult the device's physical buttons for a dedicated brightness control button or a combination of buttons to adjust display intensity.
Bakım
- To clean the display and casing, use a soft, dry cloth. Do not use abrasive cleaners or solvents.
- Şarj portunun toz ve kalıntılardan arındırılmış olduğundan emin olun.
- Saati uzun süre kullanmadığınız zamanlarda serin ve kuru bir yerde saklayın.
Sorun giderme
| Sorun | Olası Neden | Çözüm |
|---|---|---|
| Ekran boş veya karanlık. | Low battery or power saving mode. | Charge the device using the Type-C cable. Check brightness settings. |
| Alarm çalmıyor. | Alarm etkinleştirilmedi veya ses seviyesi çok düşük. | Ensure the alarm is set and activated (alarm icon visible). Check if there's a volume setting. |
| Yanlış sıcaklık/nem ölçümleri. | Device placed in an unsuitable environment. | Relocate the clock away from direct heat, cold, or high drafts. Allow time for readings to stabilize. |
| Düğmeler yanıt vermiyor. | Geçici yazılım hatası veya düşük pil. | Recharge the device. If issue persists, try a soft reset (refer to manual for reset procedure, if available, or let battery drain and recharge). |
Özellikler
- Modeli: ClocTeck-CL01
- Boyutlar: Approximately 12.5 cm (Width) × 3.2 cm (Depth) × 8 cm (Height)
- Vücut Ağırlığı: Yaklaşık 0.13 kg
- Kasa Malzemesi: Alüminyum Alaşımı
- Görüntüleme Türü: Transparent LCD Digital Display
- Sıcaklık Aralığı: -20°C ila 65°C
- Nem aralığı: %10 ila %99
- Güç Kaynağı: Şarj Edilebilir Pil (Type-C USB şarj)
- Pil Ömrü: Approximately 75 days on a full charge
- Alarmlar: 3 programlanabilir alarm

Figure 2: Dimensions of the ClocTeck Transparent Digital Alarm Clock. The image shows the clock with labels indicating a height of 8cm and a width of 12.5cm.
Garanti ve Destek
ClocTeck provides a 12-month refund and exchange guarantee Satın alma tarihinden itibaren geçerlidir. Bu garanti, üretim hatalarını ve normal kullanımdan kaynaklanan sorunları kapsar.
If you encounter any problems or have questions regarding your ClocTeck Transparent Digital Alarm Clock, please do not hesitate to contact our customer support team. We are committed to providing assistance and ensuring your satisfaction.
For support, please refer to the contact information provided on the product packaging or the seller's page where you purchased the item.


