1. Giriş
This user manual provides comprehensive instructions for the installation, operation, and maintenance of your HDWR videoCAR-L300 Dash Cam. Please read this manual thoroughly before using the device to ensure proper functionality and to maximize its lifespan. Keep this manual for future reference.
2. Ürün Bittiview
The HDWR videoCAR-L300 is a versatile dash camera designed to enhance your driving safety and record your journeys. It functions as both a front and rear recording device, integrated into a rearview mirror with a touchscreen display.
Temel Özellikler:
- Full HD Video Kaydı: The front camera records in Full HD (1920x1080) resolution, providing clear and detailed video footage.
- Arka Kamera İşlevselliği: The rear camera offers VGA (640x480) recording resolution and can also serve as a reverse camera for parking assistance.
- Integrated 4.7-inch Touchscreen Display: The wide mirror, approximately 30 cm, features a built-in 4.7-inch touchscreen for easy operation and increased rear visibility.
- 120-Degree Wide-Angle Lens: The front camera's lens offers a 120-degree viewing angle, capturing a broad area in front of your vehicle.
- Otomatik çalışma: Features include automatic camera start and stop, motion detection, and adjustable sensitivity.
- G-Sensor for Impact Detection: Automatically protects recordings from being overwritten in the event of sudden braking or a collision.
- MicroSD Kart Desteği: Supports microSD memory cards up to 32GB for storing recorded video and audio files.

Şekil 2.1: Ön view of the HDWR videoCAR-L300 Dash Cam, showing the mirror display with a car image.
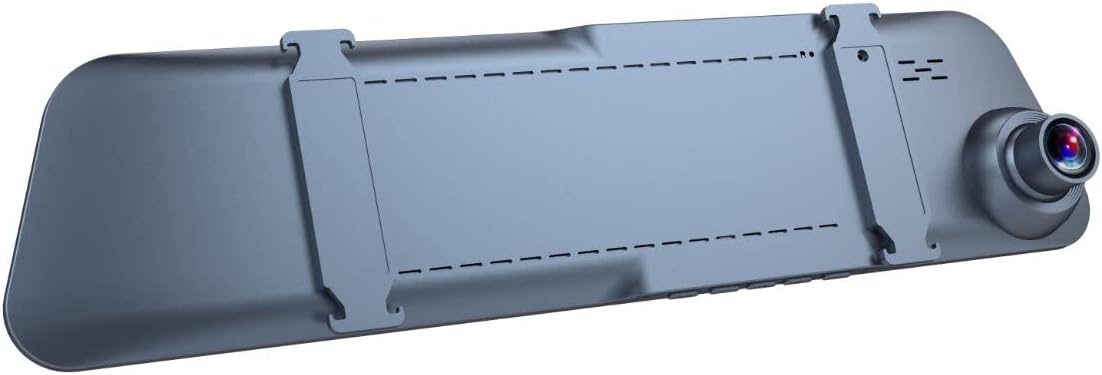
Şekil 2.2: Arka view of the HDWR videoCAR-L300 Dash Cam, highlighting the mounting clips for installation.
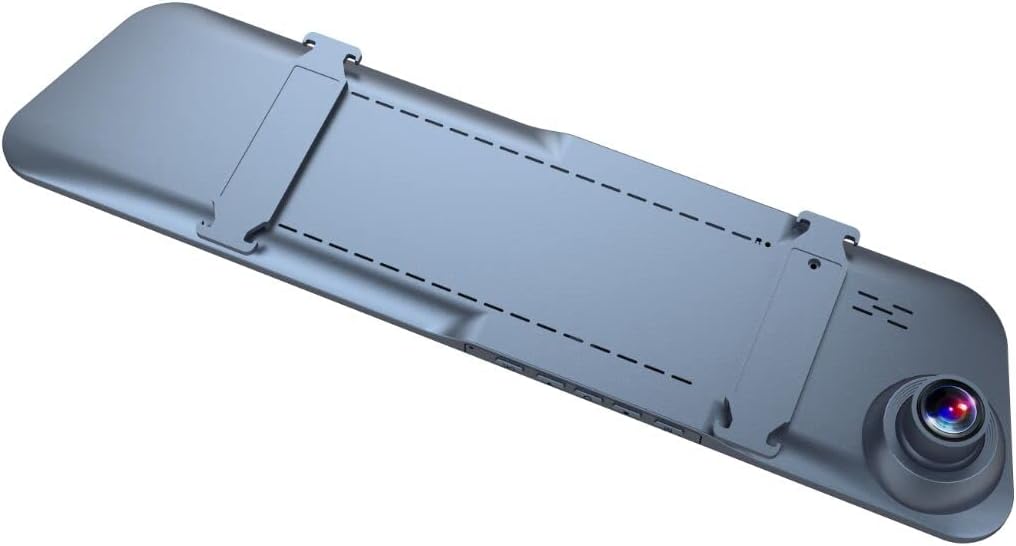
Şekil 2.3: Açısal arka view of the HDWR videoCAR-L300 Dash Cam, showing the camera lens and mounting clips.

Şekil 2.4: Patlatılmış view illustrating the various perspectives of the HDWR videoCAR-L300 Dash Cam.
3. Kurulum ve Kurulum
3.1 Kutuda Neler Var?
Kuruluma başlamadan önce lütfen tüm bileşenlerin mevcut olduğundan emin olun:
- HDWR videoCAR-L300 Dash Cam Unit
- Şarj kablosu
- Kurulum Aracı
- Kullanım Kılavuzu (bu belge)
3.2 Installation Steps (Windshield Mount)
The videoCAR-L300 is designed for windshield mounting, typically over your existing rearview ayna.
- Cihazı Hazırlayın: Gently unbox the dash cam and ensure the protective film is removed from the screen and lens.
- Montaj: Securely attach the dash cam to your vehicle's rearview mirror using the integrated clips. Ensure it is firmly in place and does not obstruct your view.
- Gücü bağlayın: Use the provided charging cable to connect the dash cam to your vehicle's 12V power outlet (cigarette lighter socket). Route the cable neatly to avoid interference with driving.
- Arka Kamera Takılması (İsteğe Bağlı): If using the rear camera, connect it to the main unit and route its cable to the rear of the vehicle. Mount the rear camera in a suitable location, typically near the license plate or inside the rear window, ensuring a clear view.
- MicroSD Kartı Takın: Insert a compatible microSD card (up to 32GB, not included) into the designated slot on the dash cam. Ensure it is inserted correctly until it clicks into place.
- İlk Güç Açma: Start your vehicle. The dash cam should automatically power on. If not, press the power button.
- Açıyı Ayarla: Adjust the angle of the front camera lens to ensure it captures the road ahead clearly. Use the live view on the touchscreen display for precise alignment.

Figure 3.1: The dash cam installed on the vehicle's rearview Ayna, aracın iç mekanına entegrasyonunu gösteriyor.
4. Kullanım Talimatları
4.1 Güç Açma/Kapatma
- Otomatik çalışma: The device is designed to automatically power on and begin recording when your vehicle's ignition is turned on, and power is supplied. It will automatically power off when the ignition is turned off.
- Manuel İşlem: To manually power on or off, press and hold the power button located on the device.
4.2 Dokunmatik Ekran Navigasyonu
The 4.7-inch touchscreen display allows for intuitive navigation through menus and settings.
- Ana arayüz: Canlı görüntüler view from the front and/or rear cameras.
- Menülere Erişim: Tap the screen to reveal menu icons. Swipe left/right or up/down to navigate through options.
- Seçeneklerin Seçilmesi: Seçmek için bir simgeye veya seçeneğe dokunun.

Figure 4.1: The dash cam's screen showing a live road view, indicating active recording.
4.3 Kayıt Modları
- Döngü Kaydı: The dash cam continuously records video in segments (e.g., 1, 3, or 5 minutes). When the memory card is full, the oldest unlocked files otomatik olarak üzerine yazılır.
- G-Sensörü (Acil Durum Kaydı): In the event of sudden braking or a collision, the built-in G-Sensor detects the impact and automatically locks the current video segment, preventing it from being overwritten by loop recording.
- Hareket Algılama: When enabled, the camera will automatically start recording if it detects movement in front of the vehicle while parked. This feature requires continuous power supply.
4.4 Oynatma
Yırttıview kaydedilmiş footage:
- From the main screen, tap to access the menu.
- Select the "Playback" or "Gallery" option.
- Browse through the recorded video and audio files. Kilitli files (from G-Sensor events) will typically be in a separate folder.
- Birine dokunun file to play it back on the screen.
4.5 Ayarların Düzenlenmesi
Çeşitli parametreleri özelleştirmek için ayarlar menüsüne erişin:
- Video Çözünürlüğü: Adjust recording quality (e.g., Full HD, VGA).
- Döngü Kayıt Süresi: Set the length of video segments.
- G-Sensör Hassasiyeti: Adjust the sensitivity of the impact detection.
- Hareket Algılama: Bu özelliği etkinleştirin veya devre dışı bırakın.
- Tarih/Saat Stamp: Zaman kayıtlarının doğru yapılabilmesi için tarih ve saatin doğru ayarlandığından emin olun.amps.
- Ses Kaydı: Enable or disable microphone recording.
- Ekran koruyucusu: Set the display to turn off after a period of inactivity to avoid distraction while driving.
5. Bakım
Regular maintenance ensures optimal performance and longevity of your dash cam.
- Lensin Temizlenmesi: Use a soft, lint-free cloth to gently wipe the camera lenses. Avoid abrasive materials or harsh chemicals that could scratch the lens.
- Ekranın Temizlenmesi: Wipe the touchscreen display with a soft, dry cloth. For stubborn smudges, slightly dampBezi suyla yıkayın.
- MicroSD Kart Bakımı: Format the microSD card regularly (e.g., once a month) within the camera's settings to prevent data corruption and ensure smooth recording. Back up any important footagBiçimlendirmeden önce e.
- Sıcaklık: Avoid exposing the device to extreme temperatures (very hot or very cold) for extended periods, as this can affect battery life and component performance.
- Güvenli Montaj: Titreşimlerin video kalitesini etkilemesini veya cihazın düşmesine neden olmasını önlemek için araç kamerasının güvenli bir şekilde monte edildiğinden periyodik olarak emin olun.
6. Sorun Giderme
If you encounter issues with your HDWR videoCAR-L300, refer to the following common problems and solutions:
| Sorun | Olası Neden | Çözüm |
|---|---|---|
| Cihaz açılmıyor. | No power supply; loose cable connection; faulty power adapter. | Check the charging cable connection to the device and the vehicle's power outlet. Ensure the vehicle's ignition is on. Try a different power outlet or cable if available. |
| Kayıt duruyor veya donuyor. | Full or corrupted microSD card; slow microSD card; G-Sensor triggered too often. | Format the microSD card (back up data first). Use a high-speed (Class 10 or U1/U3) microSD card. Adjust G-Sensor sensitivity in settings. |
| video footage bulanık veya belirsiz. | Dirty lens; protective film still on lens; improper camera angle. | Clean the camera lens with a soft cloth. Remove any protective film. Adjust the camera angle to ensure a clear view Yolun. |
| Ekran tepkisiz. | Geçici yazılım hatası. | Perform a soft reset by pressing and holding the power button until the device restarts. If unresponsive, disconnect power and reconnect. |
| Arka kamera çalışmıyor. | Loose connection; faulty cable or camera. | Arka kamera kablosunun ana üniteye olan bağlantısını kontrol edin. Kablonun hasarlı olmadığından emin olun. |
If the problem persists after trying these solutions, please contact HDWR customer support for further assistance.
7. Özellikler
| Özellik | Detay |
|---|---|
| Marka | HDWR |
| Model Adı | videoCAR |
| Ürün Model Numarası | L300 |
| Ürün Boyutları | 3.5D x 29.7W x 7H cm; 180 grams |
| Ekran Boyutu | 4.7 inç |
| Video Çözünürlüğü (Ön) | Tam HD (1920x1080p) |
| Video Çözünürlüğü (Arka) | VGA (640x480) |
| ViewAçı | 120 Derece |
| Flash Bellek Türü | microSD (32 GB'a kadar) |
| Bağlantı Teknolojisi | Yardımcı |
| Özel Özellikler | Motion Sensor, G-Sensor |
| Kontrol Yöntemi | Dokunmak |
| Montaj Tipi | Ön Cam Bağlantısı |
| Piller Dahil | HAYIR |
| Uyumlu Cihazlar | Akıllı telefon |
8. Garanti ve Destek
For warranty information and technical support, please refer to the official HDWR website or contact their customer service directly. Details regarding warranty periods and service procedures are typically provided with your purchase documentation or on the manufacturer's webalan.
Daha fazla yardım için lütfen şu adresi ziyaret edin: www.hdwr.eu


