1. Önemli Güvenlik Bilgileri
Please read all instructions carefully before using this monitor. Keep this manual for future reference.
- Güç: Yalnızca monitörle birlikte verilen güç adaptörünü kullanın. Elektrik prizinin doğru şekilde topraklanmış olduğundan emin olun.
- Havalandırma: Havalandırma açıklıklarını kapatmayın. Monitörün etrafında yeterli hava akışı için yeterli boşluk bırakın.
- Nem: Do not expose the monitor to rain, moisture, or excessive humidity. Do not place objects filled with liquids on the monitor.
- Sıcaklık: Keep the monitor away from heat sources such as radiators, heat registers, stoves, or other heat-producing appliances.
- Temizlik: Unplug the monitor from the power outlet before cleaning. Use a soft, dry cloth. Do not use liquid or aerosol cleaners.
- Servis: Bu ürüne kendiniz servis vermeye çalışmayın. Tüm servis işlemleri için kalifiye servis personeline başvurun.
2. Paket İçeriği
Paketinizdeki tüm ürünlerin eksiksiz olduğundan emin olun. Herhangi bir ürün eksik veya hasarlıysa, lütfen müşteri desteğiyle iletişime geçin.
- KOORUI 24-inch PC Monitor (Model P01)
- Monitör Standı (Taban ve Boyun)
- Güç Adaptörü
- HDMI Kablosu
- Kullanıcı Kılavuzu

Image: KOORUI 24-inch PC Monitor P01 and its included accessories, including the monitor, stand, power adapter, HDMI cable, and user manual.
3. Kurulum Talimatları
3.1 Monitör Standının Montajı
- Monitör ve stand bileşenlerini ambalajından dikkatlice çıkarın.
- Standın boyun kısmını monitör paneline takın. Yerine sağlam bir şekilde oturduğundan veya varsa vidalarla sabitlendiğinden emin olun.
- Attach the stand base to the stand neck. Tighten the thumb screw at the bottom of the base to secure it.

Image: The KOORUI 24-inch PC Monitor P01 fully assembled with its stand, ready for connection.
3.2 Monitörü Bağlama
Monitör HDMI ve VGA bağlantılarını desteklemektedir.
- Güç Bağlantısı: Connect the power adapter to the monitor's DC input port, then plug the other end into a power outlet.
- Video Bağlantısı:
- For HDMI: Connect one end of the HDMI cable to the HDMI port on your computer and the other end to the HDMI port on the monitor.
- For VGA: Connect one end of the VGA cable to the VGA port on your computer and the other end to the VGA port on the monitor.
- Ses (İsteğe bağlı): If your computer supports audio output via HDMI, the monitor's built-in speakers will play audio.

Resim: Yakın çekim view of the monitor's rear panel, highlighting the HDMI, VGA, and DC power input ports for easy identification during connection.

Image: The KOORUI 24-inch PC Monitor P01 connected to a laptop, demonstrating a typical setup for extended display use.
4. Kullanım Talimatları
4.1 Açma/Kapatma
Monitörü açmak veya kapatmak için monitörün sağ alt tarafında bulunan güç düğmesine basın. Monitör açık olduğunda güç gösterge ışığı yanacaktır.
4.2 Ekran Üstü Görüntüleme (OSD) Menüsü
Use the control buttons on the bottom right of the monitor to navigate the OSD menu. These buttons typically include Menu, Up, Down, Select, and Exit.
- Menü: OSD menüsünü açar.
- Yukarı aşağı: Menü seçenekleri arasında gezinmeyi sağlar.
- Seçme: Bir seçimi onaylar veya bir alt menüye girer.
- Çıkış: Mevcut menüden veya OSD'den çıkar.
4.3 Ekran Ayarlarını Düzenleme
Within the OSD menu, you can adjust various settings:
- Parlaklık/Kontrast: Ekranın genel parlaklığını ve kontrast oranını ayarlayın.
- Renk ayarları: Renk sıcaklığını, tonunu ve doygunluğunu değiştirin.
- Giriş kaynağı: Manually select between HDMI and VGA input.
- Düşük Mavi Işık Modu: Activates a filter to reduce blue light emissions, minimizing eye strain during prolonged use.
- Adaptive FreeSync: Enables dynamic refresh rate adjustment for smoother visuals, especially in gaming.
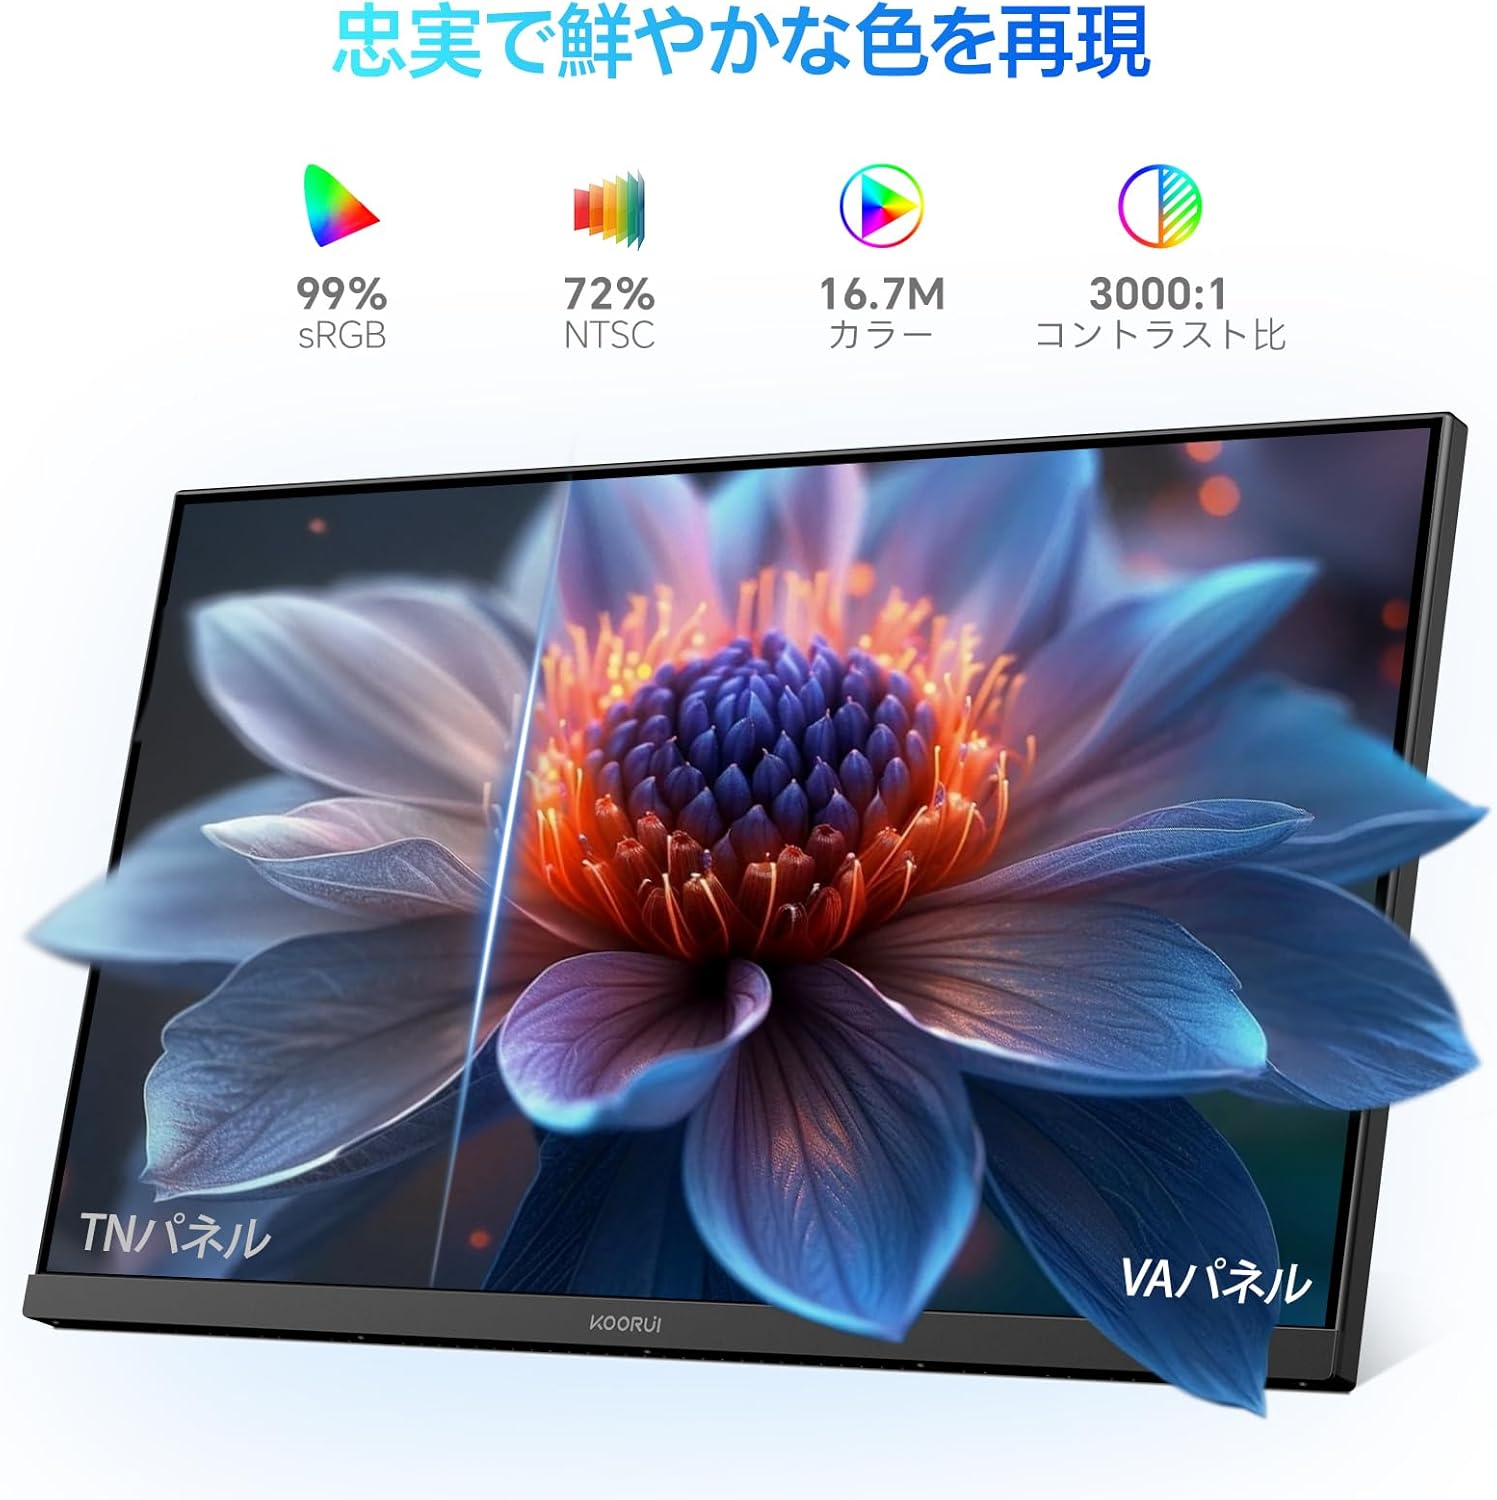
Image: A user working at a desk with the KOORUI 24-inch PC Monitor P01, illustrating the visual comfort provided by the Low Blue Light mode.

Image: A visual comparison demonstrating the benefits of Flicker-free and Low Blue Light technologies in reducing eye strain compared to a conventional display.
4.4 Fiziksel Ayarlamalar
Monitör, görüş açınızı optimize etmek için eğim ayarı yapmanıza olanak tanır. viewaçı.
- Tilt: Gently tilt the monitor panel forward (up to 5 degrees) or backward (up to 15 degrees) to find your preferred viewpozisyon.

Resim: Bir yan profesyonelfile of the monitor illustrating its adjustable tilt feature, allowing users to angle the screen for optimal comfort.
5. Bakım
5.1 Monitörün Temizlenmesi
Monitörünüzün uzun ömürlü ve en iyi performansı göstermesi için aşağıdaki temizleme yönergelerini izleyin:
- Temizlemeden önce monitörün fişini mutlaka prizden çekin.
- Yumuşak, tiftiksiz bir bez kullanın ve hafifçe kurulayın.ampened with water to clean the screen. Avoid applying excessive pressure.
- Monitör c içinasing, yumuşak ve kuru bir bez kullanın.
- Do not use alcohol, ammonia-based cleaners, or abrasive cleaning agents, as these can damage the screen or casing.
5.2 Genel Bakım
- Monitörün veya kablolarının üzerine ağır cisimler koymaktan kaçının.
- Monitörü doğrudan güneş ışığına veya aşırı sıcaklıklara maruz bırakmayın.
- Monitör uzun süre kullanılmayacaksa, fişini prizden çekin.
6. Sorun Giderme
Monitörünüzde sorunlarla karşılaşırsanız, aşağıdaki yaygın sorunlara ve çözümlere bakın:
| Sorun | Olası Neden | Çözüm |
|---|---|---|
| Ekranda görüntü yok | Monitor not powered on; Video cable loose or disconnected; Incorrect input source selected. | Ensure power cable is connected and monitor is on; Check video cable connections; Select correct input source via OSD menu. |
| Görüntü bulanık veya bozuk | Yanlış çözünürlük; Video kablosu sorunu. | Ekran çözünürlüğünü 1920x1080 olarak ayarlayın; Farklı bir video kablosu deneyin. |
| Renkler yanlış | Color settings in OSD; Video cable issue. | Adjust color settings in OSD menu; Check video cable for damage. |
| Monitör titriyor | Yenileme hızı uyumsuzluğu; Kablo sorunu. | Ensure refresh rate is set to 100Hz (or compatible); Try a different video cable. |
| Ses yok | Volume too low; Incorrect audio output selected on computer; HDMI cable not transmitting audio. | Increase monitor volume; Check computer's audio output settings; Ensure HDMI cable supports audio. |
Bu çözümleri denedikten sonra sorun devam ederse, lütfen KOORUI müşteri desteğiyle iletişime geçin.
7. Özellikler
Technical specifications for the KOORUI 24-inch PC Monitor P01:
| Özellik | Şartname |
|---|---|
| Marka | KOORUI |
| Model Numarası | P01 |
| Ekran Boyutu | 24 inç |
| Çözünürlük | FHD 1920 x 1080 Pixels |
| En Boy Oranı | 16:9 |
| Panel Tipi | VA Paneli |
| Yenileme Hızı | 100 Hz |
| Tepki Süresi | 5 Milisaniye |
| Kontrast Oranı | 3000:1 |
| ViewAçı | 178° (Yatay/Dikey) |
| Surface Description | Mat |
| Özel Özellikler | Low Blue Light Filter, Tilt Adjustment, Frameless Design, Flicker-Free, Adaptive FreeSync |
| Bağlantı | HDMI, VGA |
| Renk | Siyah |

Image: Detailed diagram showing the dimensions and weight of the KOORUI 24-inch PC Monitor P01.
8. Garanti ve Destek
8.1 Garanti Bilgileri
This KOORUI monitor comes with a 3 yıllık üretici garantisiBu garanti, normal kullanım koşullarındaki malzeme ve işçilik kusurlarını kapsar. Garanti talepleriniz için lütfen satın alma belgenizi saklayın.
8.2 Müşteri Desteği
KOORUI is committed to providing premium service. If you encounter any damage, malfunctions, or missing accessories, please do not hesitate to contact us. We offer 24-hour assistance and a 12-month replacement service for eligible issues.
Destek için lütfen resmi KOORUI sitesini ziyaret edin. websitesine bakın veya satıcınızla iletişime geçin.


