1. Giriş
Thank you for choosing the Ingco ID11008 1100W 13mm Impact Drill. This manual provides important information regarding the safe operation, maintenance, and care of your tool. Please read these instructions carefully before using the drill and keep them for future reference. Proper use and maintenance will ensure long-lasting performance and safety.
2. Güvenlik Talimatları
Yangın, elektrik çarpması ve kişisel yaralanma riskini azaltmak için her zaman temel güvenlik önlemlerine uyun. Hızlı başvuru için bu kılavuzu elinizin altında bulundurun.
Genel Elektrikli Alet Güvenlik Uyarıları:
- Çalışma Alanı Güvenliği: Çalışma alanınızı temiz ve iyi aydınlatılmış tutun. Dağınık veya karanlık alanlar kazalara davetiye çıkarır. Elektrikli aletleri yanıcı sıvılar, gazlar veya toz gibi patlayıcı ortamlarda çalıştırmayın.
- Elektriksel Güvenlik: Elektrikli aletlerin fişleri prize uygun olmalıdır. Fişte hiçbir şekilde değişiklik yapmayın. Topraklı elektrikli aletlerde adaptör fiş kullanmayın. Borular, radyatörler, ocaklar ve buzdolapları gibi topraklı veya topraklanmış yüzeylerle vücut temasından kaçının.
- Kişisel Güvenlik: Always wear eye protection. Use safety glasses, goggles, or a face shield. Wear hearing protection when operating noisy tools. Dress properly; do not wear loose clothing or jewelry. Keep hair, clothing, and gloves away from moving parts.
- Alet Kullanımı ve Bakımı: Elektrikli aleti zorlamayın. Uygulamanız için doğru elektrikli aleti kullanın. Herhangi bir ayarlama yapmadan, aksesuar değiştirmeden veya elektrikli aletleri saklamadan önce fişi prizden çekin. Kullanılmayan elektrikli aletleri çocukların erişemeyeceği yerde saklayın ve elektrikli aleti veya bu talimatları bilmeyen kişilerin elektrikli aleti kullanmasına izin vermeyin.
- Hizmet: Elektrikli aletinizin bakımını yalnızca aynı yedek parçaları kullanan kalifiye bir tamirciye yaptırın. Bu, elektrikli aletin güvenliğinin sağlanmasını garanti altına alacaktır.
3. Ürün Bileşenleri
Familiarize yourself with the parts of your Ingco ID11008 Impact Drill:

- Chuck: Matkap ucunu güvenli bir şekilde tutar.
- Mod Seçici Anahtarı: Allows selection between drilling and hammer drilling modes.
- Değişken Hız Tetikleyicisi: Controls the rotation speed of the drill.
- Kilitleme Düğmesi: Tetiğe basılı tutmadan sürekli çalışma için.
- İleri/Geri Anahtarı: Dönüş yönünü değiştirir.
- Yardımcı Kulp: Ekstra kavrama ve kontrol sağlar.
- Derinlik Ölçer: İstenilen delme derinliğini ayarlamak için kullanılır.

4. Kurulum
4.1 Yardımcı Sapın Takılması
- Yardımcı kolu saat yönünün tersine çevirerek gevşetin.
- Sapı matkap gövdesinin ön tarafına takın.
- Sapı rahat ve güvenli bir konuma ayarlayın.
- Sapı sıkıca sabitlenene kadar saat yönünde çevirerek sıkın.
4.2 Matkap Uçlarının Takılması ve Çıkarılması
- Matkabın güç kaynağından çekildiğinden emin olun.
- Çeneleri açmak için mandreni saat yönünün tersine çevirin.
- Matkap ucunu mandrene tam olarak yerleştirin.
- Rotate the chuck clockwise to tighten the jaws firmly around the drill bit. For keyless chucks, hand-tighten securely. For keyed chucks, use the chuck key to ensure maximum grip.
- Kaldırmak için işlemi tersine çevirin.
4.3 Derinlik Ölçeri Ayarlama
- Derinlik ölçerini yardımcı tutamaktaki deliğe yerleştirin.
- Adjust the depth gauge to the desired drilling depth. The tip of the drill bit should extend beyond the end of the depth gauge by the desired depth.
- Tighten the auxiliary handle to secure the depth gauge in place.
5. Kullanım Talimatları
5.1 Güç Bağlantısı
Connect the drill's power cord to a suitable power outlet (220-240V, 50/60Hz). Ensure the power source matches the tool's requirements.
5.2 Çalışma Modunun Seçilmesi
The Ingco ID11008 features two operating modes:
- Drilling Mode (Rotary): For drilling in wood, metal, plastics, and ceramics. Set the mode selector switch to the drill icon.
- Hammer Drilling Mode (Impact): For drilling in masonry, concrete, and stone. Set the mode selector switch to the hammer icon.
5.3 Değişken Hız Kontrolü
The drill features a variable speed trigger. Press the trigger lightly for low speed and press harder for increased speed. This allows for precise control depending on the material and application.
5.4 İleri/Geri Dönüş
Use the forward/reverse switch located above the trigger to select the rotation direction. Set to forward (clockwise) for drilling and reverse (counter-clockwise) for removing screws or freeing a jammed drill bit.
5.5 Operating the Drill
- Hareketi önlemek için iş parçasını sabitleyin.
- Select the appropriate drill bit and operating mode.
- Hold the drill firmly with both hands, using the auxiliary handle for stability.
- Matkap ucunu istenilen delme noktasına yerleştirin.
- Start the drill at a low speed and gradually increase as the bit penetrates the material.
- Sabit ve eşit bir basınç uygulayın. Matkabı zorlamayın.
- When finished, release the trigger and wait for the chuck to stop rotating before setting the tool down.
6. Bakım
Düzenli bakım, aletinizin optimum performansını sağlar ve ömrünü uzatır.
6.1 Temizlik
- Always unplug the drill before cleaning.
- Clean the ventilation openings and the motor housing regularly with a soft brush or compressed air.
- Dış yüzeyini yumuşak bir bezle silin.amp bez. Sert kimyasallar veya aşındırıcı temizleyiciler kullanmayın.
6.2 Karbon Fırça Değişimi
The carbon brushes may need replacement after extended use. This should ideally be performed by a qualified service technician to ensure proper installation and tool function.
6.3 Depolama
When not in use, store the drill in a dry, secure place out of reach of children. Protect it from dust and moisture.
7. Sorun Giderme
Matkabınızla ilgili sorunlarla karşılaşırsanız, aşağıdaki yaygın sorunlara ve çözümlere bakın:
| Sorun | Olası Neden | Çözüm |
|---|---|---|
| Matkap başlamıyor | Güç kaynağı yok; Arızalı güç kablosu/fişi; Aşınmış karbon fırçalar | Check power connection; Inspect cord/plug for damage; Have brushes checked/replaced by technician |
| Azaltılmış güç/hız | Worn carbon brushes; Overload; Incorrect speed setting | Have brushes checked/replaced; Reduce load; Adjust variable speed trigger |
| Aşırı titreşim/gürültü | Gevşek matkap ucu; Hasarlı mandren; İç bileşen sorunu | Ensure bit is securely tightened; Inspect chuck for damage; Contact service center |
| Aşırı ısınma | Blocked ventilation; Prolonged heavy use; Dull drill bit | Clean ventilation slots; Allow tool to cool; Use sharp drill bits |
If the problem persists after attempting these solutions, please contact an authorized service center.
8. Özellikler
The following table details the technical specifications for the Ingco ID11008 Impact Drill:
| Özellik | Şartname |
|---|---|
| Model Numarası | Kimlik11008 |
| Üretici | Ingco |
| Maksimum Güç | 1100 Watt |
| Cilttage | 8 Volts (Note: Product description mentions 220-240V, 50/60Hz for operation, 8V might refer to an internal component or be an error in source data. Always refer to product label for operational voltage.) |
| Akım | 6 Amps |
| Yüksüz Hız | 2800 RPM |
| Chuck Boyutu | 13 mm |
| Güç Kaynağı | Kablolu Elektrik |
| Malzeme | Metal |
| Özel Özellikler | Değişken Hız |
| Dahil Bileşenler | Drill attachment (likely auxiliary handle and depth gauge) |
| Ürün Ağırlığı | 3 Kilogram |
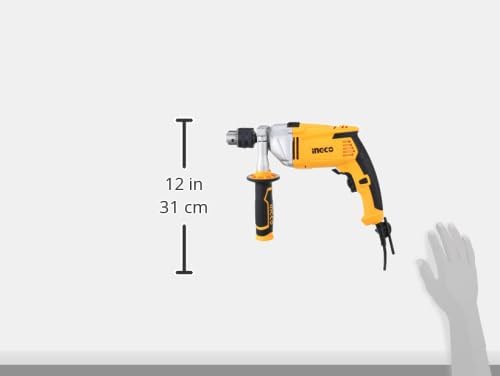
| Ürün Boyutları (U x G x Y) | 26.4x8.4x34 cm |
9. Garanti ve Destek
For warranty information, please refer to the documentation provided at the time of purchase or contact your retailer. Ingco products typically come with a manufacturer's warranty covering defects in materials and workmanship. Keep your proof of purchase for any warranty claims.
For technical support or service inquiries, please contact your local Ingco service center or the retailer from whom you purchased the product.


