1. Güvenlik Bilgileri
Read all instructions carefully before beginning installation. Failure to follow these instructions may result in electrical shock, fire, or personal injury.
- Kurulum veya bakım işlemlerinden önce daima devre kesiciden veya sigorta kutusundan elektriği kesin.
- Tüm kablolama ulusal ve yerel elektrik kodlarına uygun olmalıdır. Kablolama konusunda bilginiz yoksa, kalifiye bir elektrikçiye danışın.
- Ensure the installation site can support the weight of the fan (approximately 3.53 kg).
- Hasarlı kanatlara veya gövdeye sahip fanı çalıştırmayın.
- Zeminden fan kanatlarının alt kenarına kadar en az 2.1 metre (7 fit) mesafe bırakın.
- Vantilatör kanatlarının dönüş yoluna herhangi bir cisim sokmayın.
2. Paket İçeriği
Verify that all components listed below are present before beginning installation. If any parts are missing or damaged, do not proceed with installation and contact customer support.
- Motor Muhafazası Komplesi
- Fan Blades (4) - Reversible white/bleached oak
- Bıçak Braketleri (4)
- aşağı çubuk
- Gölgelik
- Montaj Braketi
- Işık Kiti Montajı
- Mushroom Globe Glass
- Pull Chains (2)
- Donanım Paketi (vidalar, rondelalar, kablo somunları)
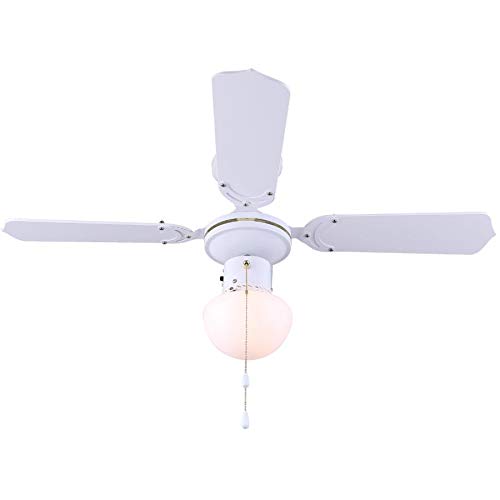
Şekil 2.1: Üzeriview of the Canarm Unity Ceiling Fan with Light, displaying the motor housing, four blades, and the central mushroom globe light.
3. Kurulum ve Kurulum
Profesyonel kurulum önerilir. İşleme başlamadan önce elektrik şalterinden elektriğin kesildiğinden emin olun.
3.1 Fanın Montajı
- Montaj braketini tavan bağlantı kutusuna sabitleyin. Bağlantı kutusunun bina yapısına sağlam bir şekilde sabitlendiğinden ve fanın ağırlığını taşıyabileceğinden emin olun.
- Feed the electrical wires from the junction box through the center hole of the mounting bracket.
- Attach the downrod to the motor housing, ensuring all screws are tightened.
- Carefully lift the fan assembly and hang it from the mounting bracket using the hook provided on the downrod.
3.2 Elektrik Bağlantıları
Connect the fan's electrical wires to the household wiring according to the following:
- Connect the green/bare copper wire (ground) from the fan to the ground wire from the junction box.
- Connect the white wire (neutral) from the fan to the white wire from the junction box.
- Connect the black wire (hot for fan) from the fan to the black wire from the junction box.
- Connect the blue wire (hot for light) from the fan to the black or blue wire from the junction box (if separate light switch).
- Secure all connections with wire nuts and ensure no loose strands of wire are exposed.
3.3 Fan Kanatlarının Takılması
- Attach each blade to a blade bracket using the provided screws. Ensure the desired blade finish (white or bleached oak) is facing downwards.
- Secure each blade assembly to the motor housing using the screws provided. Ensure all screws are tight.
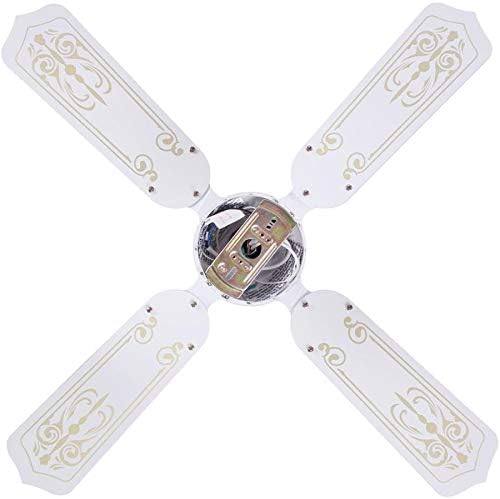

Figure 3.3: Images showing the blade attachment points on the motor housing (left) and the assembled blades from a top-down perspective (right).
3.4 Aydınlatma Kitinin Kurulumu
- Connect the light kit wires to the corresponding wires from the fan motor housing (usually white to white, blue to black).
- Secure the light kit assembly to the bottom of the motor housing with the provided screws.
- Install the appropriate light bulb(s) (not included) into the sockets.
- Carefully attach the mushroom globe glass to the light kit by twisting or securing with screws, depending on the design.

Şekil 3.4: Yakın çekim view of the fan's light kit with the mushroom globe glass.
3.5 Son Adım
- Carefully slide the canopy up against the ceiling and secure it with the provided screws.
- Sigortadan elektriği geri verin.
4. Kullanım Talimatları
The Canarm Unity ceiling fan is operated by two pull chains.
- Fan Hız Kontrolü: One pull chain controls the fan speed. Pull the chain repeatedly to cycle through the three available speeds (High, Medium, Low) and Off.
- Işık Kontrolü: The second pull chain controls the light. Pull the chain to turn the light On or Off.
- Blade Reversal: To change the direction of the fan blades (e.g., for summer cooling or winter heat circulation), locate the slide switch on the motor housing. With the fan off, slide the switch to the opposite position. This fan features reversible white/bleached oak blades.

Figure 4.1: The Canarm Unity fan installed, demonstrating its function within a living space.
5. Bakım
Düzenli bakım, tavan vantilatörünüzün en iyi performansı göstermesini sağlar ve ömrünü uzatır.
- Temizlik: Fan kanatlarını ve motor gövdesini yumuşak bir bezle düzenli olarak temizleyin.amp bezle silin. Aşındırıcı temizleyiciler veya çözücüler kullanmayın.
- Sıkma Vidaları: Check all screws on the blade attachments and mounting hardware annually. Tighten any loose screws to prevent wobbling or noise.
- Ampul Değişimi: Disconnect power before replacing light bulbs. Allow bulbs to cool before handling. Use bulbs of the correct wattage and type as specified in the fan's electrical ratings.
6. Sorun Giderme
Herhangi bir onarım işlemine başlamadan önce, devre kesiciden elektriğin kesildiğinden emin olun.
| Sorun | Olası Neden | Çözüm |
|---|---|---|
| Fan başlamıyor | No power to the fan; Loose wire connections; Motor malfunction | Check circuit breaker/fuse; Verify all wire connections are secure; Contact a qualified electrician or customer support. |
| Işık çalışmıyor | Bulb faulty or loose; Loose wire connections; Light kit malfunction | Replace bulb; Tighten bulb; Check light kit wiring; Contact customer support. |
| Fan sallanıyor | Gevşek bıçak vidaları; Dengesiz bıçaklar; Gevşek montaj braketi | Tighten all blade screws; Ensure blades are balanced (balancing kit may be needed); Verify mounting bracket is secure. |
| Gürültülü çalışma | Loose screws; Motor bearings; Canopy rubbing ceiling | Check and tighten all screws; Ensure canopy is not touching the ceiling; If motor noise persists, contact customer support. |
7. Özellikler
| Marka | canarm |
| Model Numarası | CF2336411L |
| Ürün Boyutları | 91.44 x 91.44 x 20.32 cm (36 x 36 x 8 inç) |
| Ürün Ağırlığı | 3.53 kilo |
| Renk | Beyaz |
| Bıçak Sayısı | 4 |
| Bıçak Cilası | Reversible White/Bleached Oak |
| Hız Sayısı | 3 |
| Güç/Wattage | 60 watt |
| Montaj Tipi | Downrod Dağı |
| Denetleyici Türü | Çekme Zinciri Kontrolü |
8. Garanti ve Destek
This product is covered by the manufacturer's standard warranty. Please refer to the warranty card included in your original packaging for specific terms and conditions.
For technical assistance, missing parts, or warranty claims, please contact Canarm customer support. Contact information can typically be found on the manufacturer's websitede veya ürün ambalajında yer almamaktadır.
Lütfen bu kılavuzu ileride başvurmak üzere saklayın.


