1. Giriş
Thank you for choosing the Vacmaster 10 Gallon 4 Peak HP Wet/Dry Vacuum with Detachable Blower, model VBVA1010PF. This manual provides essential information for the safe assembly, operation, maintenance, and troubleshooting of your new appliance. Please read all instructions carefully before use and retain this manual for future reference.
2. Önemli Güvenlik Talimatları
UYARI: Yangın, elektrik çarpması veya yaralanma riskini azaltmak için, bu cihazı kullanmadan önce tüm talimatları okuyun ve anlayın.
- Fişi prize takılıyken cihazın başından ayrılmayınız. Kullanılmadığında ve bakım yapmadan önce fişini prizden çekiniz.
- Açık havada veya ıslak zeminlerde kullanmayınız.
- Oyuncak olarak kullanılmasına izin vermeyin. Çocuklar tarafından veya yakınında kullanıldığında yakın ilgi gereklidir.
- Yalnızca bu kılavuzda açıklandığı şekilde kullanın. Yalnızca üreticinin önerdiği ekleri kullanın.
- Hasarlı kablo veya fişle kullanmayın. Cihaz gerektiği gibi çalışmıyorsa, düşürülmüşse, hasar görmüşse, dışarıda bırakılmışsa veya suya düşürülmüşse, bir servis merkezine geri götürün.
- Kordonu çekmeyin veya taşımayın, kordonu sap olarak kullanmayın, kordonun üzerine kapı kapatmayın veya kordonu keskin kenarlar veya köşelerin etrafından çekmeyin. Cihazı kordonun üzerinden geçirmeyin. Kordonu ısıtılmış yüzeylerden uzak tutun.
- Fişi kablodan çekerek çıkarmayın. Fişi çıkarmak için kabloyu değil fişi tutun.
- Islak elle fişe veya cihaza dokunmayın.
- Açıklıklara herhangi bir nesne koymayın. Herhangi bir açıklığı tıkalı haldeyken kullanmayın; toz, tiftik, saç ve hava akışını azaltabilecek her şeyden uzak tutun.
- Saçınızı, bol giysilerinizi, parmaklarınızı ve vücudunuzun tüm kısımlarını açıklıklardan ve hareketli parçalardan uzak tutun.
- Sigara, kibrit, sıcak kül gibi yanan veya dumanı tüten hiçbir şeyi toplamayın.
- Benzin gibi yanıcı veya parlayıcı sıvıları almak için veya bunların bulunabileceği alanlarda kullanmayın.
- Filtreler takılı olmadan kullanmayınız.
- Fişi çekmeden önce tüm kontrolleri kapatın.
- Merdiven temizliğinde ekstra özen gösterin.
- Do not use to pick up toxic, carcinogenic, combustible or other hazardous materials like asbestos, arsenic, barium, beryllium, lead, pesticides or other health endangering materials.
- Do not use to pick up soot, cement, plaster or drywall dust without a cartridge filter and filter bag in place. These are very fine particles that may affect the performance of the motor or be exhausted back into the air.
- Elektrik çarpması riskini azaltmak için bu cihaz polarize bir fişe sahiptir (bir bıçak diğerinden daha geniştir). Bu fiş polarize bir prize yalnızca bir şekilde takılabilir. Fiş prize tam olarak uymuyorsa, fişi ters çevirin. Yine uymuyorsa, uygun prizi takması için kalifiye bir elektrikçiye başvurun. Fişi hiçbir şekilde değiştirmeyin.
3. Paket İçeriği
Aşağıda listelenen tüm bileşenlerin paketinizde mevcut olduğundan emin olun. Herhangi bir parça eksik veya hasarlıysa, lütfen müşteri hizmetleriyle iletişime geçin.
- Vacmaster Wet/Dry Vacuum Unit (10 Gallon Tank, Motor Head)
- Detachable Blower Unit
- Flexible Hose (7 ft)
- Extension Wands (2 pieces)
- Zemin Başlığı
- Yarık Açma Aleti
- Yardımcı Nozul
- Kartuş Filtresi (kuru alım için)
- Foam Filter (for wet pickup)
- Kullanım Kılavuzu (bu belge)
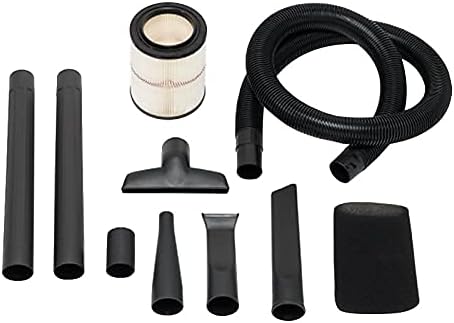
Image: Various accessories for the Vacmaster Wet/Dry Vacuum, including the flexible hose, two extension wands, a floor nozzle, a crevice tool, a utility nozzle, and both cartridge and foam filters.
4. Kurulum Talimatları
4.1 Paketin açılması
- Ambalajın içindeki tüm içeriği çıkarın.
- Tüm parçaların mevcut ve hasarsız olduğundan emin olun.
4.2 Tekerleklerin Takılması
- Invert the tank.
- Dört adet tekerleği tankın altındaki yuvalara yerleştirin.
- Press firmly until each caster foot clicks securely into place.
4.3 Filtre Kurulumu
The correct filter must be installed for the type of cleaning you are performing.
For Dry Vacuuming: Cartridge Filter
- Ensure the foam filter is removed.
- Slide the cartridge filter over the filter cage on the motor head.
- Secure the filter with the filter cap by twisting it clockwise until tight.
For Wet Vacuuming: Foam Filter
- Remove the cartridge filter and filter cap.
- Slide the foam filter over the filter cage on the motor head.
- Köpük filtrenin filtre kafesini tamamen kapladığından emin olun.
4.4 Hortum ve Aksesuarların Takılması
- Insert the large end of the flexible hose into the vacuum port on the tank and twist to lock.
- Attach desired accessories (extension wands, floor nozzle, crevice tool, utility nozzle) to the other end of the hose.

Image: The Vacmaster Wet/Dry Vacuum fully assembled, showing the main unit, flexible hose, and floor nozzle ready for use.
5. Kullanım Talimatları
5.1 Genel İşlem
- Ensure the vacuum is properly assembled with the correct filter for your task.
- Plug the power cord into a suitable 120V grounded outlet.
- Turn the power switch located on the motor head to the 'ON' position to start the vacuum.
- To stop operation, turn the power switch to the 'OFF' position.
5.2 Kuru Süpürme
Use the cartridge filter for dry debris pickup.
- Ensure the cartridge filter is securely installed.
- Use appropriate accessories for the type of dry debris (e.g., floor nozzle for large areas, crevice tool for tight spaces).
- Regularly check and clean the cartridge filter to maintain optimal suction.
5.3 Islak Vakumlama
Use the foam filter for liquid pickup.
- Ensure the foam filter is securely installed and the cartridge filter is removed.
- Do not overfill the tank. The vacuum is equipped with an automatic shut-off float mechanism that will stop suction when the tank is full. If suction stops, turn off the vacuum, unplug it, and empty the tank.
- After wet pickup, always empty and clean the tank thoroughly to prevent mold and odors.
5.4 Detachable Blower Function
Your Vacmaster unit features a detachable blower for versatile use.
- Detaching the Blower: Locate the release latches on the motor head. Unlatch them and lift the motor head from the tank. The motor head itself functions as the blower unit.
- Attaching Blower Nozzle: Attach the desired blower nozzle to the air outlet port on the motor head.
- İşlem: Plug the blower unit into a 120V grounded outlet. Turn the power switch to 'ON' to operate the blower.
- Reattaching to Vacuum: To convert back to a vacuum, place the blower unit (motor head) back onto the tank, aligning the latches, and secure them.

Image: A person demonstrating the detachment of the blue blower unit from the main vacuum tank, highlighting the versatility of the product.
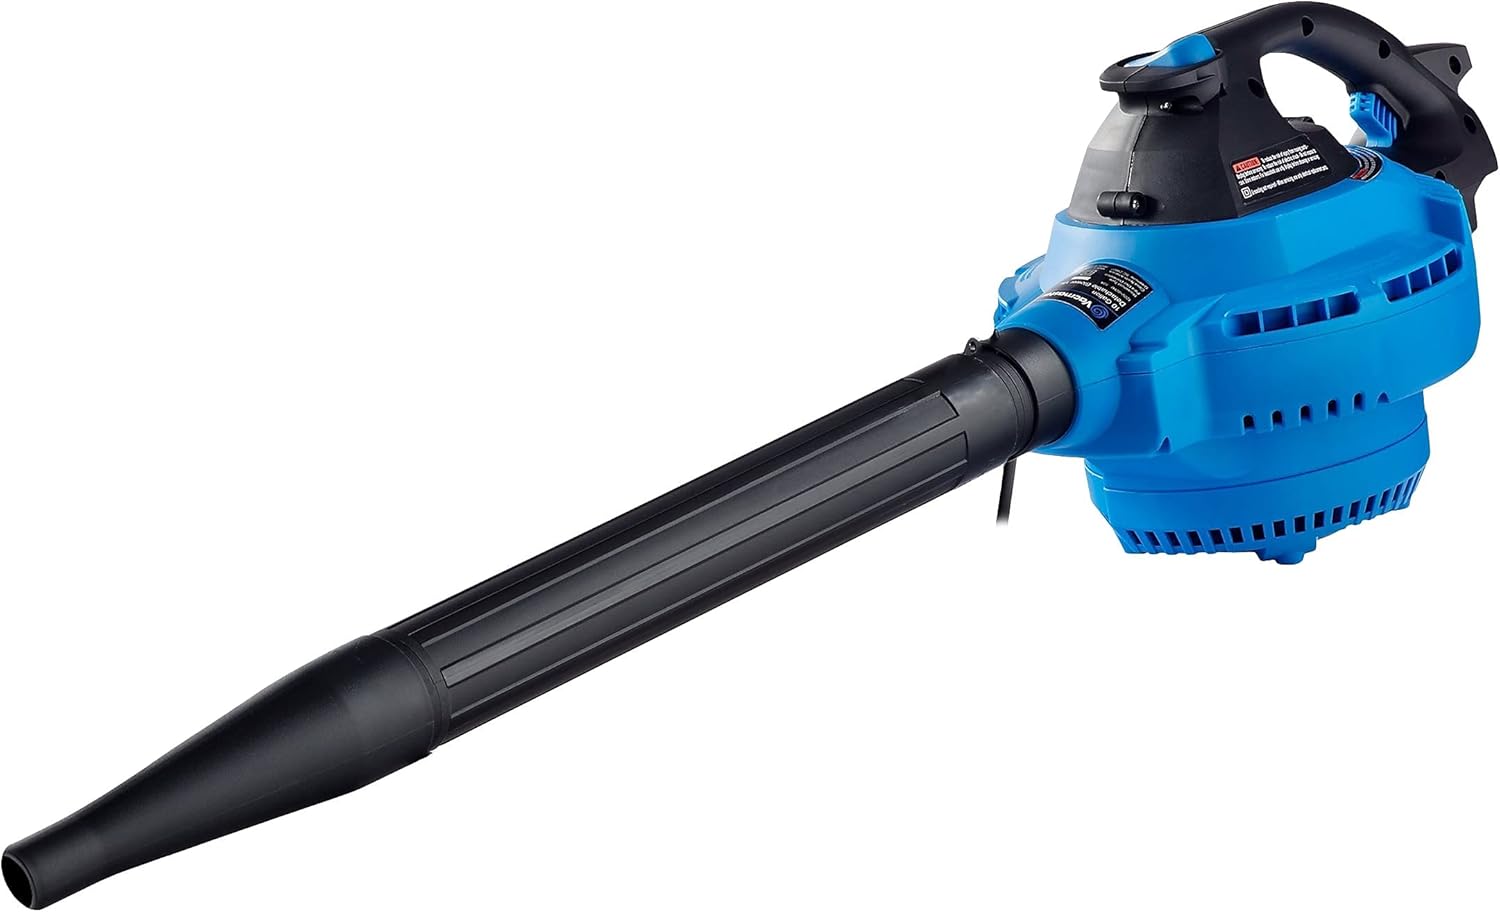
Image: The detached blower unit, a compact blue device with a black handle and a long black nozzle, ready for use as a standalone blower.
6. Bakım
Regular maintenance ensures optimal performance and extends the life of your Vacmaster wet/dry vacuum.
6.1 Filtre Temizliği ve Değişimi
Herhangi bir bakım işlemi yapmadan önce daima elektrikli süpürgenin fişini çekin.
Cartridge Filter (Dry Pickup)
- Remove the filter cap and cartridge filter from the filter cage.
- Gently tap the filter against the inside of a trash can to remove loose dirt.
- For thorough cleaning, rinse the filter under running water. Allow it to air dry completely before reinstallation. Do not use the filter if it is still wet.
- Replace the cartridge filter if it is damaged or if suction performance significantly decreases after cleaning.
Foam Filter (Wet Pickup)
- Köpük filtreyi filtre kafesinden çıkarın.
- Köpük filtreyi akan su altında yıkayarak kalıntıları temizleyin.
- Squeeze out excess water and allow it to air dry completely before storage or reinstallation.
6.2 Tank Temizliği
- After each use, especially wet pickup, empty the tank of all debris and liquids.
- Rinse the inside of the tank with water and mild detergent if necessary.
- Wipe the tank dry or allow it to air dry completely before storing to prevent odors and mildew.
6.3 Hortum ve Aksesuar Bakımı
- Inspect the hose and accessories for blockages or damage before and after each use.
- Clean accessories with water and mild detergent as needed.
- Store the hose and accessories neatly to prevent kinking or damage. The vacuum unit has integrated storage for the hose and some accessories.

Image: The Vacmaster Wet/Dry Vacuum with its hose wrapped around the top and accessories stored in designated slots, demonstrating compact storage.
7. Sorun Giderme
If you encounter issues with your Vacmaster wet/dry vacuum, refer to the following common problems and solutions:
| Sorun | Olası Neden | Çözüm |
|---|---|---|
| Vakum başlamıyor. | Prizde elektrik yok. Güç kablosu takılı değil. Arızalı güç anahtarı. | Devre kesiciyi/sigortayı kontrol edin. Ensure cord is firmly plugged into a working outlet. Müşteri desteğiyle iletişime geçin. |
| Emiş kaybı. | Hose or accessory clogged. Filtre kirli veya tıkalı. Tank is full (wet pickup). Kapak düzgün kapatılmamış. | Clear any blockages from hose or accessories. Filtreyi temizleyin veya değiştirin. Depoyu boşaltın. Ensure motor head latches are securely fastened. |
| Motor çalışıyor ancak emme yok. | Hose not connected to inlet. Hose or accessory clogged. Tank is full (wet pickup). | Ensure hose is securely attached to the vacuum port. Tüm tıkanıklıkları giderin. Depoyu boşaltın. |
| Dust escapes from exhaust. | Filter is missing or damaged. Filtre doğru şekilde takılmamış. | Install or replace the correct filter. Ensure filter is properly seated and secured. |
8. Özellikler
| Özellik | Detay |
|---|---|
| Marka | Vakum ustası |
| Örnek | VBVA1010PF |
| Kapasite | 10 Galon |
| Motor | 4 Peak HP, 120V |
| Netage | 270 watt |
| Ampöfke | 10 Amps |
| Hortum Uzunluğu | 7 Ayak |
| Kablo Uzunluğu | 10 Ayak |
| Ürün Boyutları (U x G x Y) | 18 x 18 x 24 inç |
| Ürün Ağırlığı | 26.2 pound |
| Filtre Türü | Kartuş (Kuru), Köpük (Islak) |
| Özel Özellikler | Wet/Dry Functionality, Detachable Blower |
| Küresel Ticari Kimlik Numarası (GTIN) | 00814953015406 |
| Evrensel Ürün Kodu (UPC) | 814953015406 |
9. Garanti Bilgileri
This Vacmaster product is covered by a 1 yıllık üretici garantisi from the date of purchase. This warranty covers defects in materials and workmanship under normal use. It does not cover damage resulting from misuse, abuse, accident, commercial use, or unauthorized repairs. Please retain your proof of purchase for warranty claims.
10. Müşteri Desteği
For technical assistance, replacement parts, or warranty inquiries, please contact Vacmaster customer support. Refer to the official Vacmaster webEn güncel iletişim bilgileri için lütfen sitenizi veya ürün ambalajınızı ziyaret edin.
When contacting support, please have your model number (VBVA1010PF) and proof of purchase readily available.


