1. Giriş
This manual provides detailed instructions for the installation, operation, and maintenance of your LEDVANCE Sylvania 74246 1x4 ft. Integrated LED Edge-Lit Panel Light with Emergency Battery Backup. Please read this manual thoroughly before installation and retain it for future reference. This product is designed for indoor use and provides efficient, cool white illumination with an integrated emergency power source.
2. Güvenlik Bilgileri
Yaralanmaları veya ürüne zarar gelmesini önlemek için aşağıdaki güvenlik önlemlerine uyun:
- Elektriksel Güvenlik: Always disconnect power at the circuit breaker before installation, maintenance, or servicing. Ensure all wiring complies with national and local electrical codes.
- Kalifiye Personel: Kurulum ve bakım işlemleri yalnızca yetkili bir elektrikçi tarafından yapılmalıdır.
- İşleme: Handle the LED panel with care to avoid damage to the light source or frame.
- Çevre: Bu ürün yalnızca iç mekanda kullanım için tasarlanmıştır. Neme veya aşırı sıcaklıklara maruz bırakmayın.
- Acil Durum Bataryası: The emergency battery backup system requires periodic testing to ensure proper function. Refer to the operation section for testing procedures.
- Cilttage: Tedarik hacmini sağlayıntage, ürünün belirtilen hacmiyle eşleşir.tage (277 Volt).
3. Paket İçeriği
Kuruluma başlamadan önce tüm bileşenlerin mevcut olduğundan emin olun:
- 1x LEDVANCE Sylvania 1x4 ft. Integrated LED Edge-Lit Panel Light with Emergency Battery Backup
- Kurulum Kılavuzu (bu kılavuz)
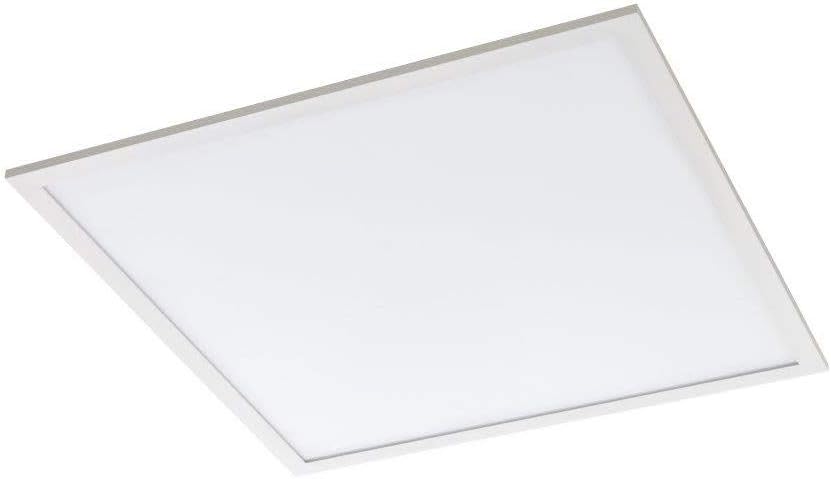
Figure 1: LEDVANCE Sylvania 1x4 ft. Integrated LED Edge-Lit Panel Light. A top-down view of the LEDVANCE Sylvania 1x4 ft. Integrated LED Edge-Lit Panel Light. The panel is white with a thin silver-colored frame, designed for ceiling installation.
4. Özellikler
| Özellik | Detay |
|---|---|
| Marka | LEDVANCE Sylvania |
| Model Numarası | 74246 |
| Boyutlar | 1 m x 4 m. |
| Netage | 32 Watt |
| Parlaklık | 3300 Lümen |
| Renk Sıcaklığı (CCT) | 4000 Kelvin (Soğuk Beyaz) |
| Cilttage | 277 Volt |
| Işık Kaynağı Türü | Entegre LED |
| Malzeme | Alüminyum |
| Kurulum Türü | Surface Mount (also suitable for recessed T-grid ceilings) |
| Acil Durum Yedeklemesi | Integrated Battery Backup |
| İç/Dış Mekan Kullanımı | Sadece İç Mekan |
| Yeterlik | Watt başına 103.125 lümen |
| Ürün Ağırlığı | 5.99 pound |
5. Kurulum Talimatları
Önemli: Installation must be performed by a qualified electrician and in accordance with all applicable electrical codes.
5.1 Kurulum Öncesi Kontrol Listesi
- Devre kesiciden elektriğin KAPALI olduğundan emin olun.
- Tedarik hacmini doğrulayıntage 277V'tur.
- Paket içeriğinin tamamının eksiksiz ve hasarsız olduğunu doğrulayın.
- Gather necessary tools (e.g., screwdriver, wire strippers, drill, mounting hardware if not included for specific mounting type).
5.2 Montaj Seçenekleri
This panel light supports surface mount installation. For recessed T-grid ceiling installations, additional clips (not included) may be required.
5.3 Kablolama Talimatları
- Gücü Kesin: Ana sigortadan elektriği kapatın.
- Kablolama Bölmesine Erişim: Locate and open the wiring compartment on the back of the LED panel.
- Kabloları Bağlayın:
- Bağlan siyah Armatürden gelen kablo canlı (hot) wire from the power supply.
- Bağlan beyaz Armatürden gelen kablo doğal Güç kaynağından gelen kablo.
- Bağlan yeşil or Saf bakır Armatürden gelen kablo zemin Güç kaynağından gelen kablo.
- For the emergency battery backup, ensure the dedicated unswitched AC power line is connected as per local codes to allow continuous charging.
- Güvenli Bağlantılar: Use appropriate wire connectors (e.g., wire nuts) to secure all connections.
- Kapalı Bölme: Carefully tuck all wires into the wiring compartment and close the cover securely.
5.4 Panelin Montajı
- Konumlandırma: Carefully position the LED panel in the desired location.
- Güvenli Montaj: For surface mount, use appropriate screws and anchors (not included) to secure the panel directly to the ceiling or wall structure. Ensure the mounting is robust enough to support the panel's weight (approx. 5.99 lbs).
- Son Kontrol: Double-check all connections and mounting security.
6. Operasyon
6.1 Normal Çalışma
- Güç Açık: Kurulum tamamlandıktan ve doğrulandıktan sonra devre kesicideki gücü geri yükleyin.
- Açma: Operate the light using the wall switch connected to the fixture. The panel will illuminate with 4000K cool white light.
6.2 Emergency Battery Backup Function
The integrated emergency battery backup provides illumination during power outagee.
- Upon loss of normal AC power, the panel will automatically switch to battery power, providing reduced lumen output for a specified duration (typically 90 minutes).
- The battery charges automatically when AC power is present.
6.3 Testing the Emergency Function
Regular testing is crucial to ensure the emergency battery backup is functioning correctly.
- Monthly Test (30 seconds): Press and hold the test button (if present, typically a small button on the side of the fixture or driver housing) for 30 seconds. The light should switch to emergency mode. Release the button; the light should return to normal operation.
- Annual Test (90 minutes): Once a year, perform a full discharge test. Turn off the AC power to the fixture for 90 minutes. The light should remain illuminated in emergency mode for the entire duration. Restore AC power after the test.
- Gösterge Işığı: A small LED indicator light (if present) typically shows the battery status: green for charged, red for charging or fault. Consult the specific driver instructions for detailed indicator meanings.
7. Bakım
The LEDVANCE Sylvania LED panel light requires minimal maintenance.
- Temizlik: Ensure power is off before cleaning. Wipe the surface of the panel with a soft, damp Bez kullanın. Aşındırıcı temizleyiciler veya çözücüler kullanmayın, çünkü bunlar yüzeye veya optik bileşenlere zarar verebilir.
- Denetleme: Periodically inspect the fixture for any signs of damage, loose wiring, or wear.
- LED'ler: Entegre LED'ler uzun ömürlü olacak şekilde tasarlanmıştır ve kullanıcı tarafından değiştirilemez.
- Pil Değişimi: The emergency battery has a finite lifespan. If the unit fails the annual 90-minute test, the battery may need replacement. Contact qualified service personnel for battery replacement.
8. Sorun Giderme
Before attempting any troubleshooting, ensure power is disconnected at the circuit breaker.
| Sorun | Olası Neden | Çözüm |
|---|---|---|
| Light does not turn on (normal operation) |
|
|
| Elektrik kesintisi sırasında ışık yanmıyor.tage (acil durum modu) |
|
|
| Işık düzensiz bir şekilde titriyor veya sönüyor. |
|
|
9. Garanti ve Destek
Garanti Bilgileri: For warranty details, please refer to the documentation included with your product or visit the official LEDVANCE Sylvania website. The product is typically covered by a manufacturer's warranty against defects in materials and workmanship.
Müşteri Desteği: For technical assistance, troubleshooting, or warranty claims, please contact LEDVANCE Sylvania customer service:
- Phone (US & Canadian Customers): 1-800-LIGHTBULB (1-800-544-4828)
- Webalan: www.ledvanceus.com (veya ilgili bölgesel) webSite)
Destek ekibiyle iletişime geçerken lütfen model numaranızı (74246) ve satın alma tarihini hazır bulundurun.


