giriiş
Thank you for choosing the Atlanta Digital LCD Radio Alarm Clock, Model 1882-0. This compact and easy-to-use alarm clock features a clear LCD display, temperature indication, and a radio-controlled time function for automatic synchronization. This manual provides detailed instructions for setup, operation, and maintenance to ensure optimal performance.
Güvenlik Bilgileri
- Pil Güvenliği: Use only the specified battery type. Ensure correct polarity (+/-) when inserting batteries. Do not mix old and new batteries, or different types of batteries. Remove batteries if the device will not be used for an extended period. Dispose of used batteries responsibly according to local regulations.
- Atama: Place the clock on a stable, flat surface. Avoid direct sunlight, extreme temperatures, high humidity, or dusty environments.
- Temizlik: Do not use abrasive cleaners or solvents. Wipe with a soft, dry cloth.
- Suya Maruz Kalma: This device is not waterproof. Avoid exposure to water or other liquids.
Paket İçeriği
- Atlanta Digital LCD Radio Alarm Clock (Model 1882-0)
- Kullanım Kılavuzu (bu belge)
- (Piller genellikle dahil değildir ve ayrıca satın alınmalıdır.)
Ürün Bittiview
Çalar saatinizin temel bileşenlerini ve kontrollerini öğrenin.

Şekil 1: Ön View. This image displays the front of the Atlanta Digital LCD Radio Alarm Clock. The large LCD screen shows the current time (10:40), radio control signal indicator, DST indicator, alarm time (6:00), and temperature (24.6°C). Below the screen are three buttons: "TIME", "ALARM", and "+ / -". A red snooze/light button is visible on the top edge.
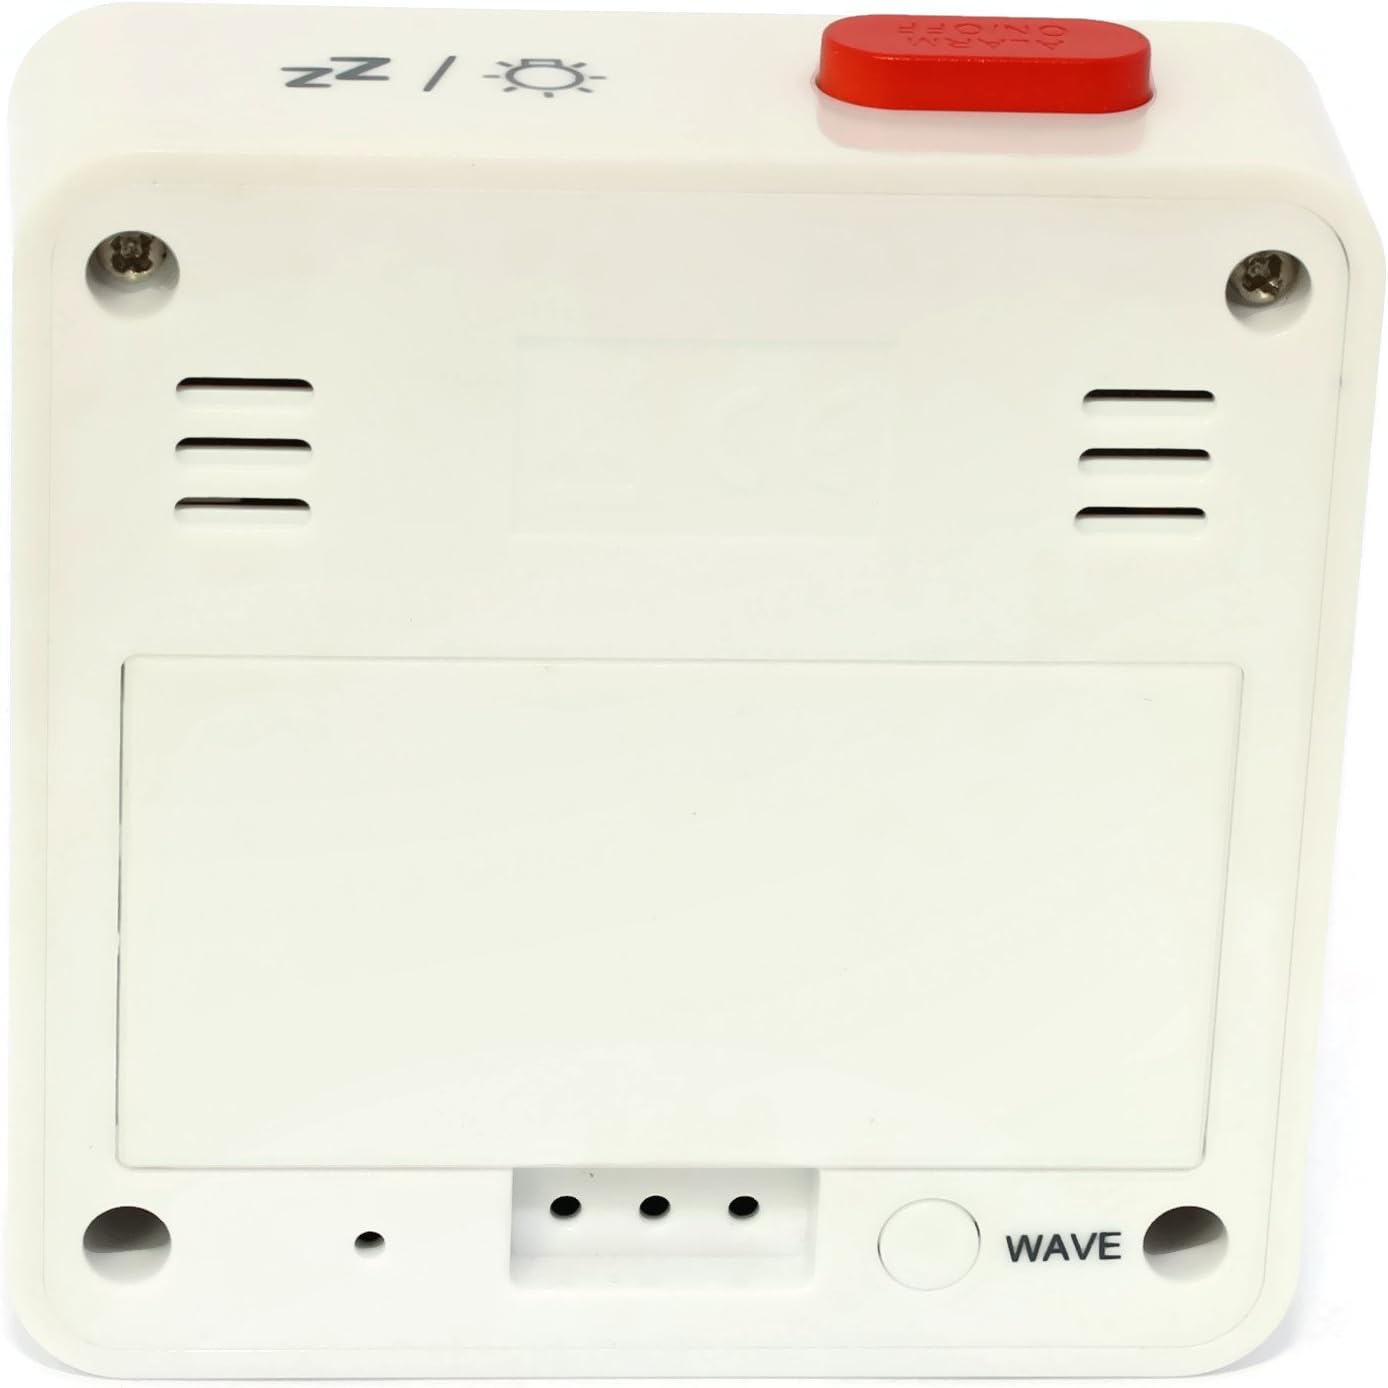
Şekil 2: Geri View. This image shows the back of the Atlanta Digital LCD Radio Alarm Clock. The large rectangular cover for the battery compartment is prominent. Below it, a circular "WAVE" button is visible, used for manual radio signal reception. Ventilation slots are present on both sides of the upper back panel.
Controls and Display Elements:
- LCD Ekran: Shows time, alarm time, temperature, and radio control status.
- ZAMAN Düğmesi: Used to set the current time manually.
- Alarm butonu: Used to set and activate/deactivate the alarm.
- + / - Düğmeleri: Used to adjust values (time, alarm) and potentially toggle settings.
- SNOOZE / LIGHT Button (Top): Activates snooze function during an alarm; illuminates the display backlight.
- WAVE Button (Back): Initiates manual radio signal reception for time synchronization.
- Battery Compartment (Back): Holds the required batteries.
Kurmak
1. Pil Kurulumu
- Saatin arkasında bulunan pil bölmesi kapağını açın (Şekil 2'e bakınız).
- Insert the required batteries (e.g., 2x AAA, not included) according to the polarity markings (+ and -) inside the compartment.
- Pil bölmesi kapağını sıkıca kapatın.
- The clock will power on and attempt to receive the radio-controlled time signal.
2. İlk Zaman Senkronizasyonu (Radyo Kontrolü)
Upon battery insertion, the clock will automatically search for the radio time signal. This process may take several minutes. During this time, a signal icon (e.g., ((()))) ekranda yanıp sönecektir.
- For best reception, place the clock near a window and away from electronic devices that may cause interference.
- Once the signal is successfully received, the time will be set automatically, and the signal icon will appear solid.
- If the signal is not received after a few minutes, press the DALGA button on the back of the clock to initiate a manual search.
3. Manual Time Setting (If Radio Control is Unavailable)
- Basılı tutun ZAMAN Saat rakamları yanıp sönmeye başlayana kadar düğmeye yaklaşık 3 saniye basılı tutun.
- Kullanın + or - Saati ayarlamak için düğmeler.
- Basın ZAMAN button again to confirm the hour and move to the minute setting.
- Kullanın + or - Dakikaları ayarlamak için düğmeler.
- Basın ZAMAN Zaman ayarı modundan çıkmak ve onaylamak için düğmeye bir kez daha basın.
Kullanım Talimatları
1. Alarmı Ayarlama
- Basılı tutun ALARM Alarm saati rakamları yanıp sönmeye başlayana kadar düğmeye yaklaşık 3 saniye basılı tutun.
- Kullanın + or - İstenilen alarm saatini ayarlamak için düğmeler.
- Basın ALARM button again to confirm the hour and move to the alarm minute setting.
- Kullanın + or - buttons to adjust the desired alarm minutes.
- Basın ALARM Alarm ayar modundan çıkmak ve onaylamak için düğmeye bir kez daha basın.
2. Alarmı Etkinleştirme/Devre Dışı Bırakma
- Kısaca basın ALARM Alarmı açıp kapatmak için kullanılan düğme.
- When the alarm is active, an alarm icon (e.g., a bell symbol) will appear on the display.
- Alarm çaldığında, düğmesine basın. ERTELEME / IŞIK button on top to activate the snooze function. The alarm will sound again after a few minutes.
- Alarmı tamamen kapatmak için başka bir düğmeye basın (örn. ZAMAN, ALARM, +, -) or let it sound for its full duration.
3. Arka Aydınlatma Fonksiyonu
Basın ERTELEME / IŞIK button on the top of the clock to illuminate the display for a few seconds, allowing for easy viewdüşük ışık koşullarında.
4. Sıcaklık Göstergesi
The clock continuously displays the ambient temperature. The unit of temperature (Celsius or Fahrenheit) may be switchable by a dedicated button or a combination of existing buttons (refer to specific model variations if applicable, otherwise it defaults to Celsius as shown in the image).
Bakım
Temizlik
- Wipe the clock's exterior with a soft, dry, lint-free cloth.
- Do not use liquid cleaners, aerosol sprays, or abrasive materials, as these can damage the finish or internal components.
Pil Değişimi
- When the display becomes dim or the clock functions erratically, it is time to replace the batteries.
- "Kurulum" bölümünde belirtilen pil kurulum adımlarını izleyin.
- Eski pillerin uygun şekilde imha edildiğinden emin olun.
Sorun giderme
| Sorun | Olası Neden | Çözüm |
|---|---|---|
| Ekran boş veya karanlık. | Piller bitmiş veya yanlış takılmış. | Pilleri doğru kutuplara yerleştirerek değiştirin. |
| Zaman yanlış. | Poor radio signal reception or manual time not set. | Move the clock to a location with better reception (near a window). Press the DALGA button for manual synchronization. If still incorrect, set the time manually. |
| Alarm çalmıyor. | Alarm aktif değil veya yanlış ayarlanmış. | Ensure the alarm icon is visible on the display. Recheck alarm time settings. |
| Erteleme fonksiyonu çalışmıyor. | Alarm was turned off instead of snoozed. | Ensure you press the ERTELEME / IŞIK button when the alarm sounds, not other buttons. |
Özellikler
- Modeli: 1882-0
- Marka: atlanta
- Renk: Beyaz
- Malzeme: Plastik
- Görüntüleme Türü: Dijital lcd
- Boyutlar (U x G x Y): 6.5 x 2.1 x 6.5 cm (yaklaşık 2.56 x 0.83 x 2.56 inç)
- Ağırlık: 65 gram (yaklaşık 2.29 ons)
- Güç Kaynağı: Battery powered (e.g., 2x AAA, not included)
- Özel Özellikler: Temperature Display, Alarm, Radio-Controlled Time, Backlight, Snooze
- Kullanım Amacı: Kapalı
Garanti ve Destek
Specific warranty information for your Atlanta product may vary by region and retailer. Please refer to the documentation provided at the time of purchase or visit the official Atlanta webAyrıntılı garanti şartları ve koşulları için siteyi ziyaret edin.
For technical support or inquiries, please contact your retailer or the manufacturer's customer service department. Contact information can typically be found on the product packaging or the official brand webalan.
Not: Yedek parça bulunabilirliğine ilişkin bilgiler üretici tarafından sağlanmamaktadır.


