Ürün Bittiview
The Orbit H2O-Six® Gear-Drive Sprinkler is a highly versatile watering solution designed for various lawn and garden sizes. Its innovative gear-drive mechanism ensures quiet operation and consistent performance. Mounted on a sturdy, adjustable tripod, this sprinkler offers flexible placement and precise water distribution.
Temel Özellikler:
- NO TOOLS REQUIRED: Ready to use out of the box, simple to operate, and offers versatility in spray settings.
- LARGE-AREA COVERAGE: Sprays up to 80 feet in diameter, covering 5,026 square feet when set to a full circle.
- ADJUSTABLE SPRAY COVERAGE: Use the collar tabs to adjust your spray from partial to full circle (360°) coverage.
- 6 SPRAY PATTERNS: Choose from small, medium, large, shower, vertical, and flat.
- 4-POSITION DIFFUSER: Customize your spray to distribute water in drops or small jets.
- KULLANIMI KOLAY: Simply twist and click into place for pattern selection.
- YENİLİKÇİ TASARIM: Gear drive, designed by Orbit, offers whisper-quiet operation.
- LONG-LASTING CONSTRUCTION: Made from strong, durable plastic to ensure this product will last from season to season without rust or corrosion.
- TELESCOPING TRIPOD: Metal tripod, with three-leg adjustment, to water at the perfect height as your garden grows. Tripod adjusts from 25 to 48 inches.
- OPERATING WATER PRESSURE: Works from 15 to 65 psi.
Paket İçeriği
- 1 x H2O-Six® Gear-Drive Sprinkler Head
- 1 x Adjustable Tripod Base
- Kullanım Kılavuzu (bu belge)
Kurulum Talimatları
1. Ambalajdan Çıkarma ve İlk Montaj
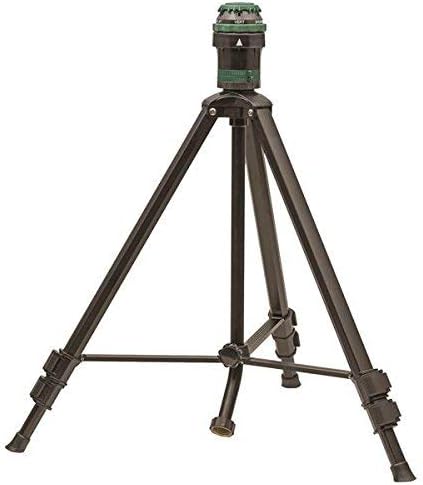
Carefully remove all components from the packaging. The Orbit H2O-Six® Gear-Drive Sprinkler comes pre-assembled on its tripod base, requiring no tools for initial setup.

Image: The Orbit H2O-Six® Gear-Drive Sprinkler head mounted on its adjustable tripod base, ready for use.
2. Tripod Yüksekliğinin Ayarlanması
The sturdy metal tripod legs are telescoping and can be adjusted from 25 to 48 inches. To adjust the height, locate the quick-release locking mechanisms on each leg. Open the locks, extend or retract the legs to your desired height, and then firmly close the locks to secure them. Ensure the tripod is stable on a level surface before operation.
Resim: Yakın çekim view of a hand operating the locking mechanism on a tripod leg to adjust its length.
3. Connecting to Water Source
Connect a standard garden hose to the inlet located at the base of the tripod. Hand-tighten the connection to ensure it is secure and leak-free. The sprinkler is designed to operate efficiently with water pressure between 15 and 65 PSI.
Kullanım Talimatları
1. Selecting Spray Pattern
The H2O-Six® sprinkler offers six distinct spray patterns to suit various watering needs: small, medium, large, shower, vertical, and flat. To select a pattern, simply rotate the green ring on the top of the sprinkler head. You will feel and hear a click as each pattern locks into place. No tools are required for this adjustment.

Resim: Ayrıntılı view of the sprinkler head, highlighting the adjustable ring and the labels for the six different spray patterns.
2. Adjusting Spray Coverage (Arc)
To define the watering arc (from 25 to 360 degrees), locate the two adjustment collar tabs at the base of the sprinkler head, just above the tripod connection. Slide these tabs to set the desired start and end points for the sprinkler's rotation. The sprinkler will automatically reverse direction when it reaches either tab.

Image: A hand demonstrating how to adjust the black tabs on the sprinkler's collar to control the spray arc.
3. Utilizing the 4-Position Diffuser
The sprinkler is equipped with a four-position diffuser, providing complete control over the water spray. This feature allows you to customize the water distribution from a fine mist to larger, more concentrated jets, optimizing watering for different plant types or soil conditions.

Image: The Orbit H2O-Six® Sprinkler actively watering a lawn, showcasing its effective spray pattern.
Bakım
The Orbit H2O-Six® Gear-Drive Sprinkler is built for durability. Regular maintenance will ensure its optimal performance and extend its lifespan:
- Düzenli Olarak Temizleyin: Periodically inspect the sprinkler head and nozzles for any debris, dirt, or mineral buildup. Use a soft brush or cloth to gently clean any obstructions.
- Kışlama: Before the first frost, disconnect the sprinkler from the water source. Drain all water from the unit to prevent freezing and potential damage to internal components. Store the sprinkler in a dry, protected area during winter months.
- Bağlantıları Kontrol Edin: Routinely check all hose connections to ensure they remain tight. Loose connections can lead to water leaks and reduced water pressure, affecting sprinkler performance.
Sorun giderme
| Sorun | Olası Neden | Çözüm |
|---|---|---|
| Sulama başlığı dönmüyor. | Low water pressure; Obstruction in gear mechanism; Adjustment tabs set too close. | Ensure adequate water pressure (15-65 PSI); Clean sprinkler head for debris; Adjust arc tabs to allow for full rotation. |
| Düzensiz püskürtme deseni | Clogged nozzle; Incorrect diffuser setting. | Clean any clogged nozzles; Adjust the 4-position diffuser to the desired setting. |
| Bağlantılardan su sızıyor | Loose hose connection; Worn or missing washer. | Tighten the hose connection; Check and replace the rubber washer if it is worn or missing. |
| Sprinkler head leaks (from the unit itself) | Internal seal issue or damage. | Ensure all parts are correctly assembled; If the issue persists, contact Orbit customer support for assistance. |
Özellikler
- Marka: Yörünge
- Model Numarası: 56481
- Stil: Sprinkler on Tripod
- Malzeme: Plastic, Zinc
- Renk: Yeşil
- Öğe Boyutları (U x G x Y): 33 x 4 x 3 inç
- Ürün Ağırlığı: 4.69 pound
- Maksimum Basınç: 65 PSI
- Maksimum Akış Hızı: Dakikada 29.41 Litre
- Kapsama Alanı: Up to 5,026 square feet (80 feet diameter at full circle)
- Tripod Ayarı: 25 ila 48 inç
- Sprey Modelleri: 6 (Small, Medium, Large, Shower, Vertical, Flat)
- UPC: 046878564817
Garanti ve Destek
For detailed warranty information or technical support regarding your Orbit H2O-Six® Gear-Drive Sprinkler, please visit the official Orbit webSite üzerinden iletişime geçebilir veya doğrudan müşteri hizmetleri departmanıyla görüşebilirsiniz. Garanti talepleri için satın alma fişinizi saklamanız önerilir.
Official Orbit Store: Amazon'daki Orbit Mağazasını ziyaret edin.


