1. Giriş
This manual provides essential information for the safe installation, operation, and maintenance of your Ducasa Ducaverre White 1200W Glass Radiant Panel Heater. Please read these instructions carefully before use and retain them for future reference.
1.1 Güvenlik Bilgileri
- Elektriksel Güvenlik: Always ensure the heater is connected to a properly grounded electrical outlet. Do not operate with a damaged cord or plug.
- Atama: Maintain a safe distance from flammable materials (curtains, furniture) as indicated in the installation section. Do not cover the heater.
- Suya Maruz Kalma: Do not install the heater near water sources (bathrooms, laundry rooms) unless specifically rated for such environments. Avoid direct water spray.
- Çocuklar ve Hassas Gruplar: Bu cihaz, 8 yaş ve üzeri çocuklar ve fiziksel, duyusal veya zihinsel yetenekleri azalmış veya deneyim ve bilgi eksikliği olan kişiler tarafından, cihazın güvenli bir şekilde kullanımıyla ilgili gözetim veya talimat verilmişse ve içerdiği tehlikeleri anlamışlarsa kullanılabilir. Çocuklar cihazla oynamamalıdır. Temizlik ve kullanıcı bakımı gözetim olmaksızın çocuklar tarafından yapılmamalıdır.
- Bakım: Disconnect from power before cleaning or performing any maintenance.
1.2 Paket İçeriği
Ambalajda tüm bileşenlerin mevcut olduğunu doğrulayın:
- Ducasa Ducaverre 1200W Glass Radiant Panel Heater
- Duvara Montaj Braketi(leri)
- Montaj Vidaları ve Duvar Dübelleri
- Kullanım Kılavuzu (bu belge)
2. Kurulum ve Kurulum
Proper installation is crucial for the safe and efficient operation of your heater. If you are unsure about any step, consult a qualified electrician.
2.1 Duvara Montaj
The Ducasa Ducaverre heater is designed for wall mounting. Choose a suitable location away from direct drafts, windows, and areas where it might be accidentally covered. Ensure there is sufficient clearance around the heater as specified in the diagram below.
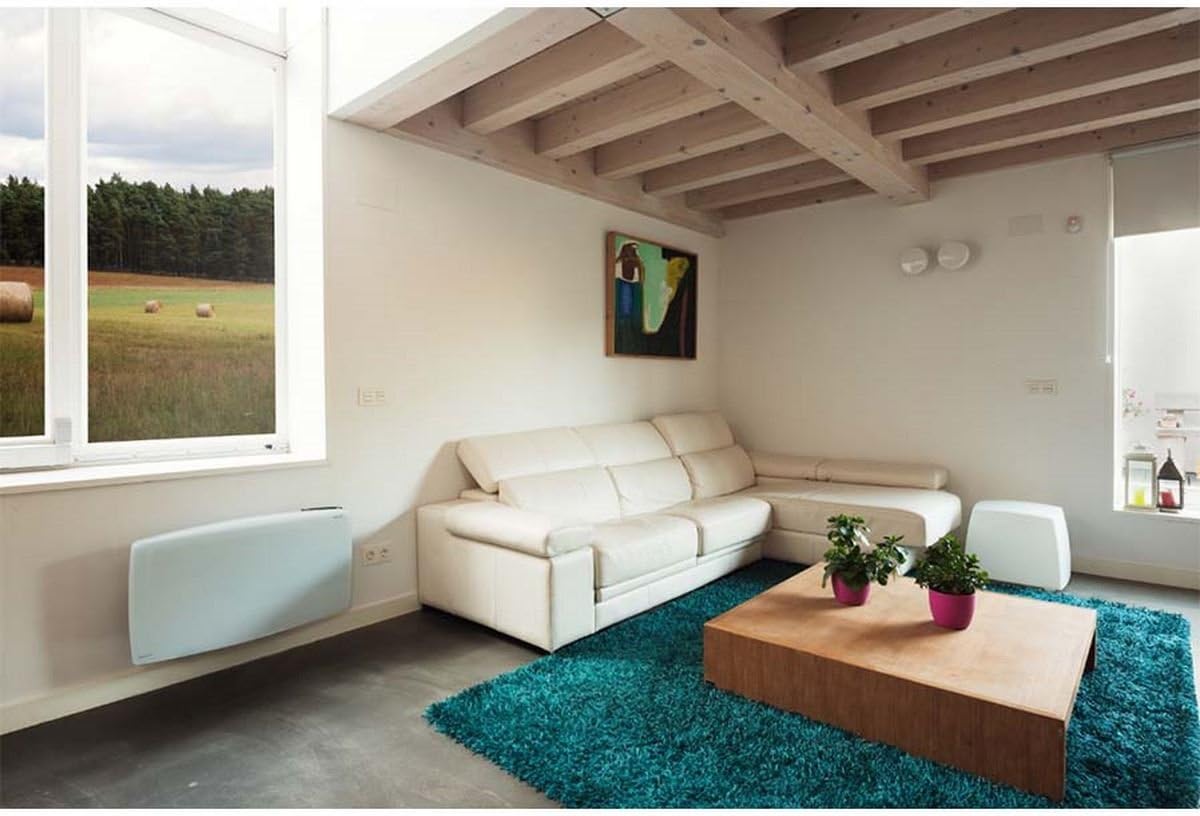
Resim 1: Ducasa Ducaverre 1200W Glass Radiant Panel Heater mounted on a wall in a modern living room setting. The heater is white and rectangular, positioned low on the wall, illustrating a typical installation scenario.
- İşaretleme: Hold the mounting bracket against the wall at the desired height. Use a pencil to mark the drilling points.
- Delme: Duvar tipinize uygun matkap ucu kullanarak işaretli noktalara delikler açın. Dübelleri takın.
- Braketi Takın: Secure the mounting bracket to the wall using the provided screws. Ensure it is level and firmly attached.
- Isıtıcı Dağı: Carefully lift the heater and hook it onto the mounting bracket. Ensure it clicks securely into place. Some models may require additional screws to fix the heater to the bracket from below.
2.2 Elektrik Bağlantısı
Once mounted, connect the heater to a standard electrical outlet. Ensure the outlet is easily accessible and rated for the heater's power consumption (1200W). Do not use extension cords or multi-plugs unless absolutely necessary and only if they are rated for the heater's power.
3. Kullanım Talimatları
Your Ducasa Ducaverre heater features an intuitive control panel for setting temperature and operating modes.

Resim 2: Yakın çekim view of the black control panel located on the top right side of the white Ducasa Ducaverre heater. The panel features a digital display and several buttons labeled 'OK', '+', '-', 'MODE', and 'PROG', indicating user interface for settings and programming.
3.1 Kontrol Paneli Üstüview
- Dijital gösterge: Shows current temperature, set temperature, and operating mode.
- MOD Düğmesi: Cycles through operating modes (Comfort, Eco, Frost Protection, Program).
- '+' / '-' Butonları: Sıcaklık ayarlarını yapın veya menü seçeneklerinde gezinin.
- Tamam Düğmesi: Seçimleri onaylar.
- PROG Düğmesi: Accesses programming functions.
3.2 Saati ve Günü Ayarlama
Before using programmed modes, set the current time and day:
- Basılı tutun MOD button until the time setting appears.
- Kullanmak '+' or '-' Saati ayarlamak için ardından basın. OK.
- Aynı işlemi dakika ve haftanın günü için tekrarlayın.
3.3 Çalışma Modları
- Konfor Modu (C): Maintains your desired set temperature. Use '+' or '-' sıcaklığı ayarlamak için.
- Eco Mode (E): Maintains a temperature typically 3-4°C lower than the Comfort setting, saving energy.
- Frost Protection Mode (F): Donmayı önlemek için minimum bir sıcaklığı (örneğin, 7°C) korur.
- Program Mode (P): Follows a pre-set weekly heating schedule.
3.4 Programming a Weekly Schedule
To set a custom heating schedule:
- Basın PROG button. The display will show the current day and a time segment.
- Kullanmak MOD to select the desired operating mode (Comfort, Eco, Frost Protection) for that specific hour.
- Kullanmak '+' to advance to the next hour or '-' geri dönmek.
- Repeat for all 24 hours of the day.
- Basmak PROG again to move to the next day.
- Once all days are programmed, press OK kaydedip çıkmak için.
4. Bakım
Düzenli temizlik, ısıtıcınızın en iyi performansı göstermesini sağlar ve kullanım ömrünü uzatır.
4.1 Temizlik
- Gücü Kesin: Always unplug the heater from the electrical outlet before cleaning.
- Dış: Wipe the glass panel and exterior surfaces with a soft, damp Aşındırıcı temizleyiciler, çözücüler veya sert kimyasallar kullanmayın, çünkü bunlar cilaya zarar verebilir.
- Toz: Use a soft brush or vacuum cleaner with a brush attachment to remove dust from air inlets and outlets.
- Kurutma: Isıtıcıyı tekrar prize takmadan önce tamamen kuruduğundan emin olun.
4.2 Depolama
If storing the heater for an extended period, ensure it is clean and dry. Store it in its original packaging or a protective cover in a cool, dry place, away from direct sunlight and extreme temperatures.
5. Sorun Giderme
Isıtıcınızla ilgili sorunlarla karşılaşırsanız, aşağıdaki yaygın sorunlara ve çözümlere bakın:
- Isıtıcı açılmıyor:
- Güç kablosunun çalışan bir prize güvenli bir şekilde takılı olup olmadığını kontrol edin.
- Sigortanın atmadığını doğrulayın.
- Ensure the heater is not in standby mode.
- Heater is on but not heating:
- Check the set temperature; it might be lower than the ambient room temperature.
- Ensure the heater is not in Frost Protection mode if you expect higher heat output.
- Verify that no objects are obstructing the air vents.
- Olağandışı sesler:
- Minor expansion/contraction noises are normal during heating and cooling cycles.
- If noises are loud or persistent, disconnect power and contact support.
- Hata Kodları: If an error code appears on the display, note the code and consult the manufacturer's support or a qualified technician.
If the problem persists after attempting these solutions, disconnect the heater from the power supply and contact customer support.
6. Özellikler
- Modeli: Ducasa Ducaverre 1200W
- Tip: Glass Radiant Panel Heater
- Güç Çıkışı: 1200W
- Cilttage: 230V ~ 50Hz (Standard European)
- Malzeme: Cam ön panel
- Kurulum: Duvara monte
- Boyutlar: Ürün ambalajına veya üreticinin talimatlarına bakın. website for exact measurements.
- ASIN: B01HZMXDAY

Resim 3: A full, slightly angled view of the Ducasa Ducaverre 1200W Glass Radiant Panel Heater. The heater is white with a sleek glass surface, and the 'ducasa' brand name is visible on the top right, along with the small digital control panel.
7. Garanti ve Destek
Your Ducasa Ducaverre heater is covered by a manufacturer's warranty. Please refer to the warranty card included with your purchase or visit the official Ducasa webAyrıntılı şartlar ve koşullar için site.
For technical assistance, spare parts, or warranty claims, please contact Ducasa customer support through their official channels. Have your product model and ASIN (B01HZMXDAY) ready when contacting support.


