1. Giriş
This manual provides essential information for the safe and effective operation, maintenance, and troubleshooting of your Einhell TE-CD 18/2 Li Cordless Drill Power X-Change Kit. Please read this manual thoroughly before using the product and keep it for future reference.
The Einhell TE-CD 18/2 Li is a powerful, robust, and versatile cordless drill designed for demanding screwing and drilling tasks in various materials. It is part of the Einhell Power X-Change family, ensuring compatibility with other Power X-Change batteries and chargers.

Image 1.1: Einhell TE-CD 18/2 Li Cordless Drill Kit components.
2. Güvenlik Bilgileri
Always observe the following safety precautions to prevent electric shock, injury, and fire:
- Güvenlik gözlüğü, işitme koruması ve eldiven gibi uygun kişisel koruyucu ekipman (KKE) kullanın.
- Çalışma alanının iyi aydınlatıldığından ve engellerden arındırıldığından emin olun.
- Aleti çalıştırırken çocukları ve etraftaki kişileri uzak tutun.
- Elektrikli aletleri yanıcı sıvılar, gazlar veya tozların bulunduğu patlayıcı ortamlarda çalıştırmayın.
- Herhangi bir ayarlama yapmadan, aksesuarları değiştirmeden veya aleti saklamadan önce daima pil takımını çıkarın.
- Use only Einhell Power X-Change batteries and chargers with this tool.
- Do not expose the tool or battery to rain or wet conditions.
- Yanlışlıkla çalıştırmayı önleyin. Pil takımını takmadan önce anahtarın kapalı konumda olduğundan emin olun.
3. Paket İçeriği
The Einhell TE-CD 18/2 Li Cordless Drill Power X-Change Kit typically includes the following items:
- 1 x Einhell TE-CD 18/2 Li Cordless Drill-Driver
- 2 x 1.5 Ah Power X-Change Lithium-Ion Batteries
- 1 x Power X-Change Hızlı Şarj Cihazı
- 1 x Kemer Kancası
- 1 x Plastik Taşıma Çantası
Please check that all items are present and undamaged upon unpacking. If any items are missing or damaged, contact your retailer.
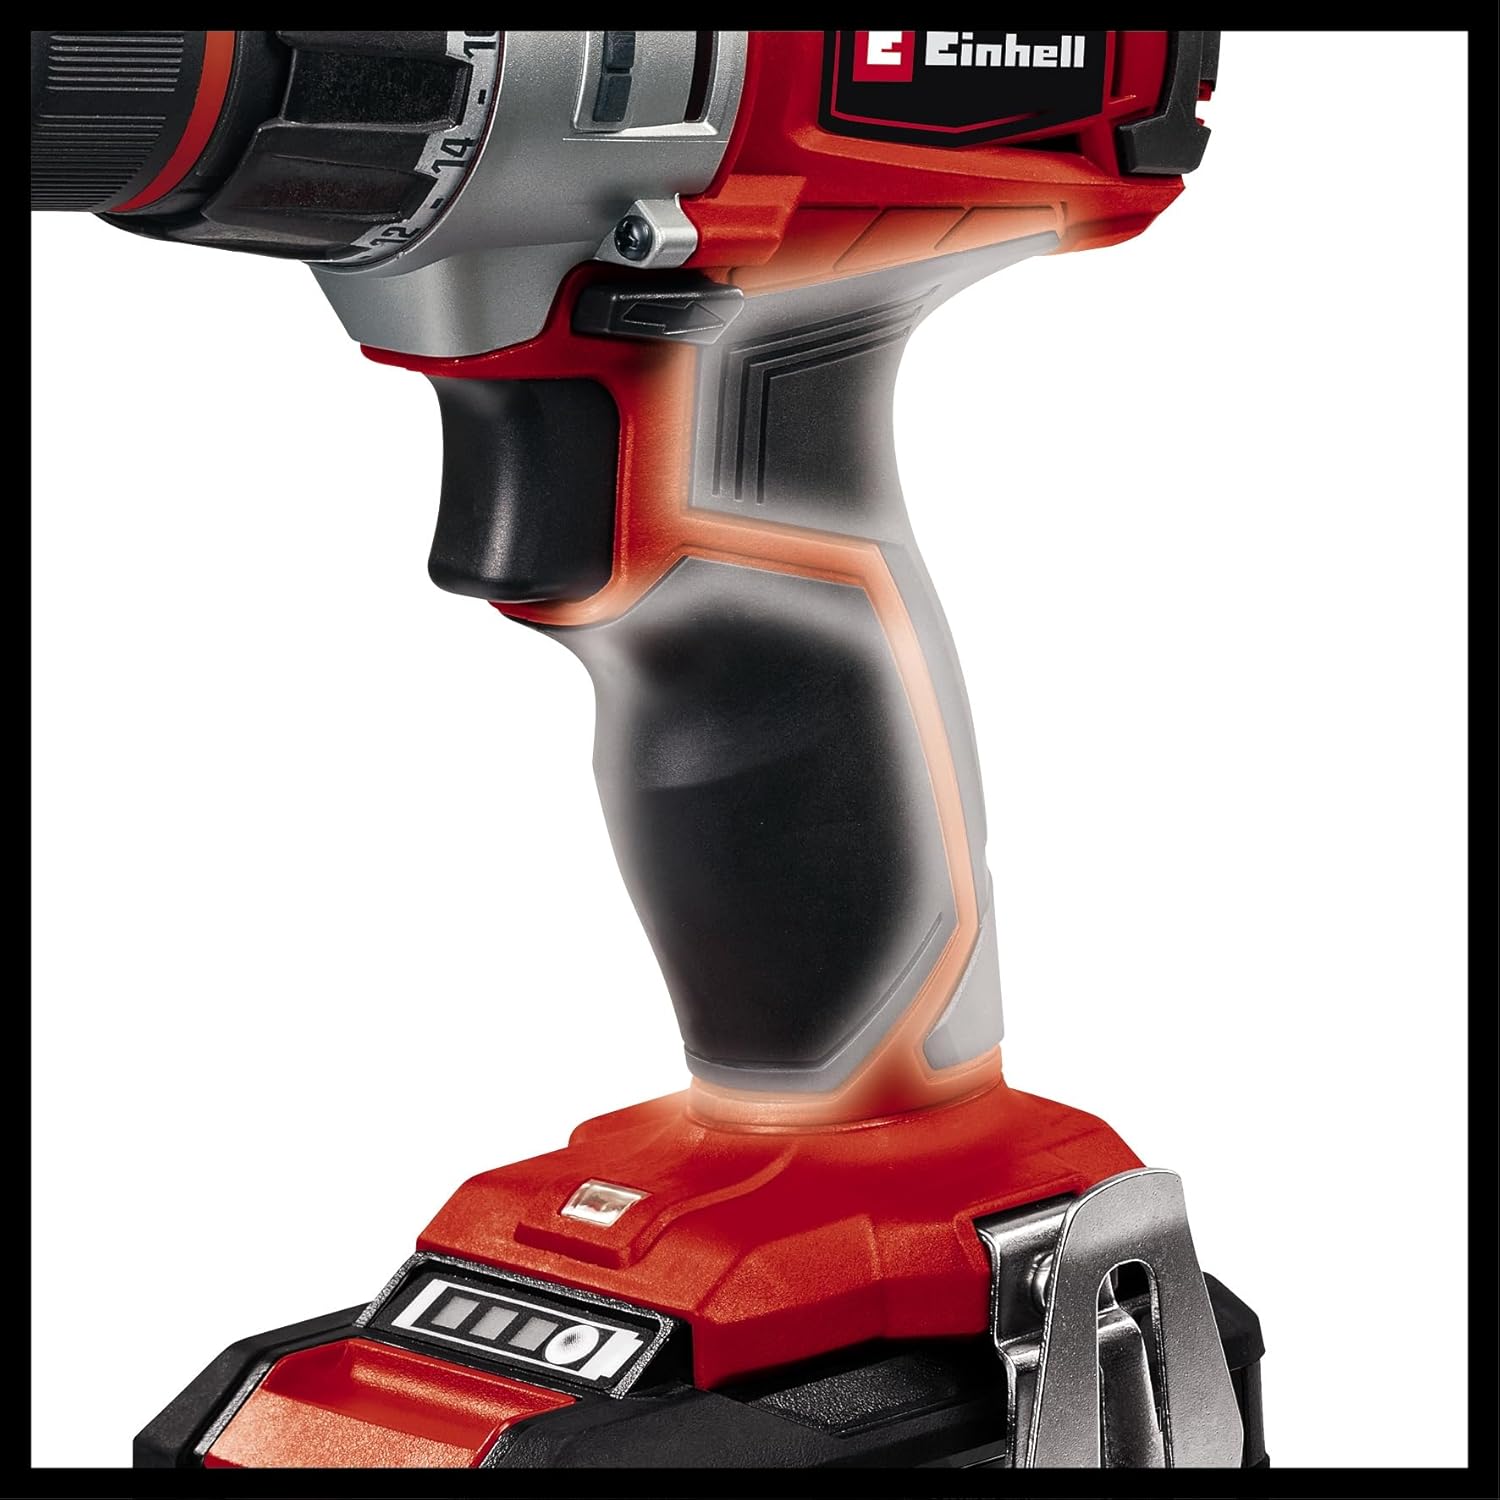
Image 3.1: All components included in the kit.
4. Kurulum
4.1 Pilin Şarj Edilmesi
Before first use, fully charge the battery pack. The charger is designed for Einhell Power X-Change batteries only.
- Pil takımını şarj cihazına takın. Yerine oturduğundan emin olun.
- Plug the charger into a suitable power outlet (120V AC, 60Hz).
- The charging indicator light on the charger will show the charging status. Refer to the charger's specific manual for detailed light indications.
- Tamamen şarj olduktan sonra, şarj cihazını elektrik prizinden çıkarın ve pil takımını çıkarın.
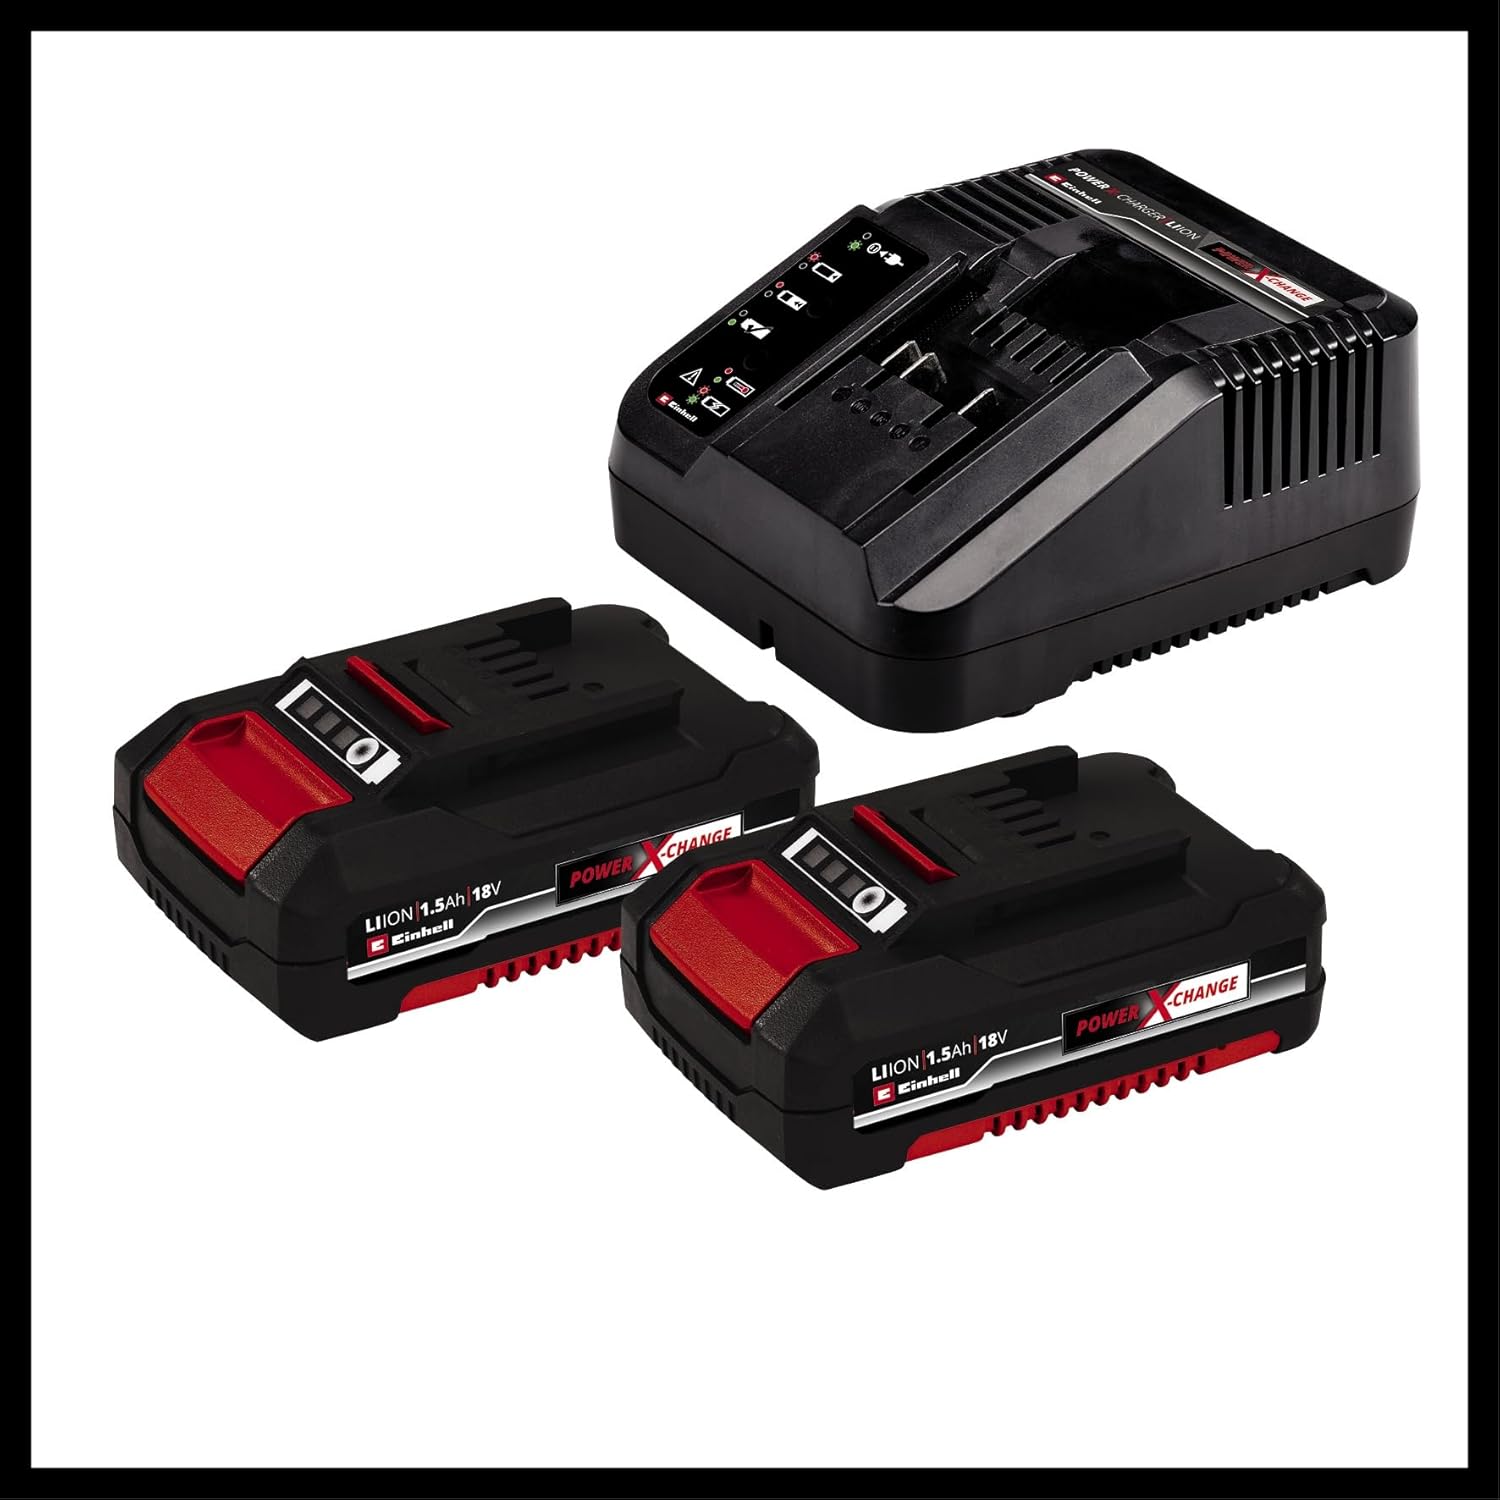
Image 4.1: Einhell Power X-Change batteries and charger.
4.2 Pil Paketinin Takılması
Pil paketini takmak için:
- Pil takımını matkap sapının altındaki pil yuvasıyla hizalayın.
- Pil takımını yerine güvenli bir şekilde oturana kadar yuvaya kaydırın.
To remove the battery pack, press the release button(s) on the sides of the battery and slide it out.
4.3 Attaching/Changing Drill Bits
The drill features a quick-change chuck for easy bit changes.
- Güvenlik açısından matkabın kapalı olduğundan ve pilinin çıkarıldığından emin olun.
- Çeneleri açmak için mandreni saat yönünün tersine çevirin.
- Matkap ucunu veya tornavida ucunu tamamen mandrene yerleştirin.
- Mandreni saat yönünde çevirerek çeneleri uç etrafına sıkıca oturtun. Elle iyice sıkın.
5. Matkabın Çalıştırılması
5.1 Açma/Kapatma
The drill is activated by pressing the trigger switch. The speed is variable depending on how far the trigger is pressed.
- To start: Press the trigger switch.
- To stop: Release the trigger switch. The quick-stop function will rapidly halt the chuck rotation.

Image 5.1: Proper use of the cordless drill.
5.2 İleri/Geri Dönüş
Tetik düğmesinin üzerinde bulunan sürgülü anahtar, dönüş yönünü kontrol eder:
- Slide left for forward rotation (for drilling and tightening screws).
- Slide right for reverse rotation (for loosening screws).
- Merkez konum, taşıma sırasında veya uç değiştirme işlemlerinde güvenlik için tetiği kilitler.
5.3 Speed Settings (2-Speed Gearbox)
The drill features a 2-speed gearbox for optimal performance in different applications:
- Vites 1 (Düşük Hız, Yüksek Tork): Ideal for heavy-duty screwing and drilling large holes in tough materials.
- Vites 2 (Yüksek Hız, Düşük Tork): Suitable for fast drilling in wood, plastic, and light metals, and for smaller screws.
To change gears, slide the gear selector switch on top of the drill. Ensure the drill is stopped before changing gears to prevent damage.

Image 5.2: Key features: High Power, Drill/Screw, 2 Gears.
5.4 Torque Adjustment (Clutch Setting)
The torque adjustment ring allows you to set the desired torque for screwing applications. This prevents over-tightening screws and damaging the workpiece or screw head.
- Rotate the torque adjustment ring to select a setting from 1 to 21. Lower numbers provide less torque, higher numbers provide more.
- The matkap sembolü setting bypasses the clutch for maximum torque, suitable for drilling.
- Start with a lower torque setting and increase it as needed until the screw is driven flush without stripping.
5.5 LED Çalışma Işığı
The integrated LED work light illuminates the work area when the trigger is pressed, improving visibility in dimly lit spaces.

Resim 5.3: LED çalışma lambası ve pil şarj göstergesi.
5.6 Ergonomic Design and Belt Clip
The drill features an ergonomic soft grip handle for comfortable and secure handling during extended use. A convenient belt clip allows for easy carrying and quick access while working.
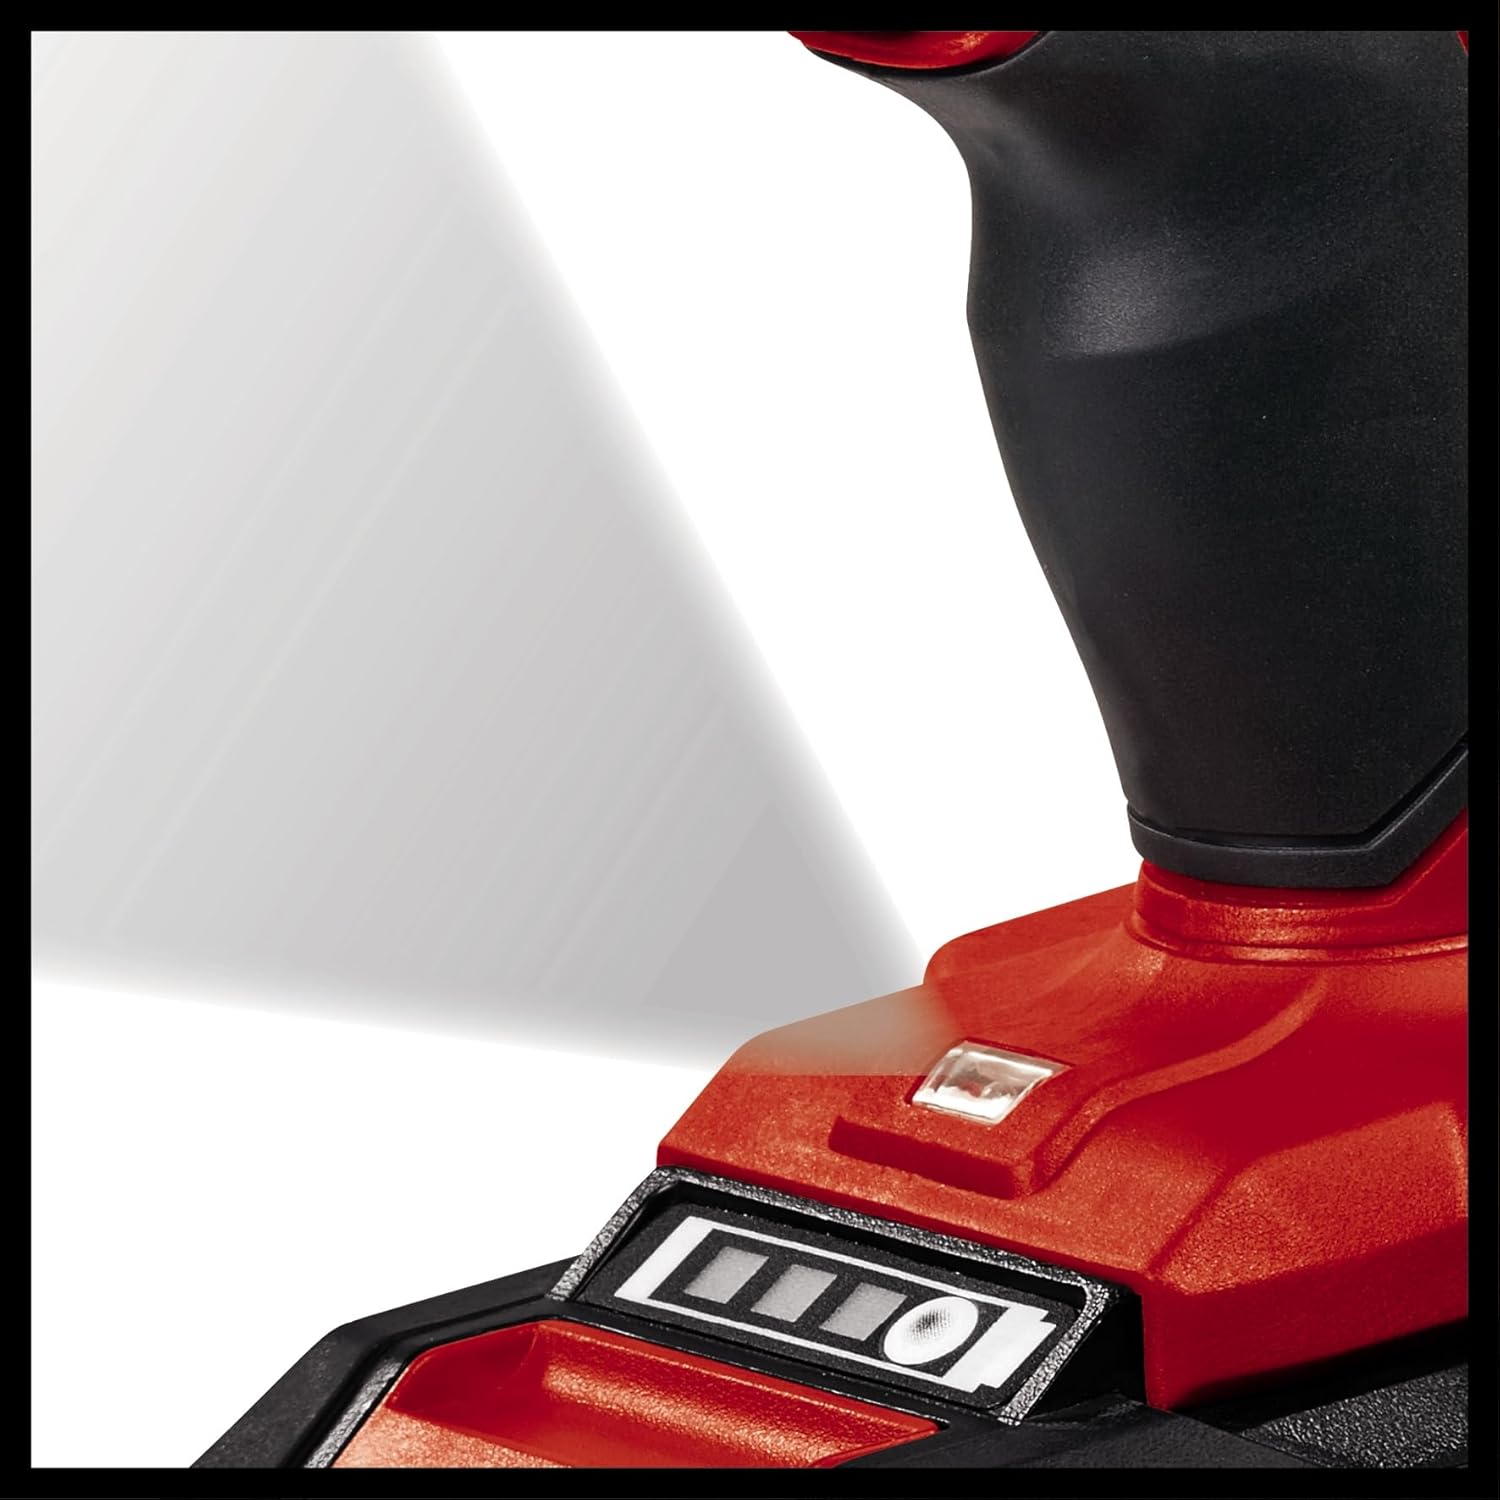
Image 5.4: Ergonomic soft grip handle for comfortable use.
6. Bakım
Düzenli bakım, matkabınızın uzun ömürlü olmasını ve optimum performans göstermesini sağlar.
- Temizlik: Havalandırma açıklıklarını temiz ve tozdan arındırılmış halde tutun. Yumuşak bir bez kullanın.amp Aleti silmek için bez kullanın. Sert kimyasallar veya aşındırıcı temizleyiciler kullanmayın.
- Depolamak: Store the drill, batteries, and charger in a dry, cool place, away from direct sunlight and moisture. Use the provided carrying case for protection.
- Pil Bakım: Store batteries at room temperature and partially charged (around 50%) if storing for extended periods. Do not store fully discharged batteries.
- Denetleme: Periodically inspect the chuck, power cord (of the charger), and housing for any signs of damage. Do not use the tool if any part is damaged.
7. Sorun Giderme
| Sorun | Olası Neden | Çözüm |
|---|---|---|
| Matkap başlamıyor. | Pil doğru takılmamış veya boşalmış. Tetik kilidi devrede. | Ensure battery is fully inserted and charged. Disengage the forward/reverse switch from the center (locked) position. |
| Azaltılmış güç veya hız. | Battery low. Overload. | Recharge battery. Reduce pressure on the tool or use a lower gear setting. |
| Chuck ağzını sağlam tutmuyor. | Mandren yeterince sıkılmamış. Matkap sapı kirli veya hasarlı. | Mandreni tekrar sıkıca takın. Ucu temizleyin veya değiştirin. |
| Aşırı ısınma. | Sürekli yoğun kullanım. Havalandırma engellenmiş. | Aletin soğumasını bekleyin. Havalandırma açıklıklarındaki tıkanıklıkları giderin. |
8. Özellikler
| Özellik | Şartname |
|---|---|
| Örnek | TE-CD 18/2 Li (4513830) |
| Cilttage | 18V |
| Pil Türü | Lithium-Ion (Power X-Change) |
| Pil Kapasitesi | 1.5 Ah (2 adet dahil) |
| Yüksüz Hız (Vites 1) | 0-350 RPM |
| Yüksüz Hız (Vites 2) | 0-1250 RPM |
| Maksimum Tork | 44 Nm |
| Tork Ayarları | 21 + Drill |
| Chuck Tipi | Anahtarsız Chuck |
| Ürün Boyutları (U x G x Y) | 12.99" x 3.94" x 13.11" (yaklaşık) |
| Ürün Ağırlığı | 8.38 lbs (yaklaşık) |

Image 8.1: Internal gear mechanism for powerful performance.
9. Garanti ve Destek
Einhell products are manufactured to high quality standards and are subject to strict quality controls. This product is covered by a manufacturer's warranty. Please refer to the warranty card included with your product for specific terms and conditions, including warranty period and coverage details.
Teknik destek, yedek parça veya garanti talepleri için lütfen Einhell müşteri hizmetleriyle iletişime geçin. İletişim bilgileri genellikle Einhell'in resmi web sitesinde bulunabilir. websitede veya garanti belgesinde yer almaktadır.
You can also visit the official Einhell website for more information and product registration: www.einhell.com


