1. Giriş
This manual provides essential instructions for the safe and efficient operation of your SINGER Start 1306 Sewing Machine. Please read it thoroughly before using the machine to ensure proper setup, usage, and maintenance. The SINGER Start 1306 is designed for home sewing projects, featuring 6 built-in stitches, easy threading, and a 4-step buttonhole function.

Resim 1.1: Ön view of the SINGER Start 1306 Sewing Machine.
2. Güvenlik Bilgileri
Yangın, elektrik çarpması veya yaralanma riskini azaltmak için elektrikli aletleri kullanırken her zaman temel güvenlik önlemlerine uyun.
- Makineyi kullanmadan önce tüm talimatları okuyun.
- Keep the machine away from water or wet surfaces.
- Makineyi kullanılmadığı zamanlarda, bakım yapılırken veya aksesuarlar değiştirilirken elektrik prizinden çıkarın.
- Kablo veya fişi hasarlıysa, düzgün çalışmıyorsa, düşürülmüş veya hasar görmüşse makineyi asla çalıştırmayın.
- Parmaklarınızı tüm hareketli parçalardan uzak tutun. Dikiş makinesi iğnesinin çevresinde özel dikkat gereklidir.
- Yalnızca üretici tarafından önerilen aksesuarları kullanın.
- Hiçbir zaman herhangi bir nesneyi herhangi bir açıklığa düşürmeyin veya sokmayın.
3. Kurulum
3.1 Paketin Açılması ve İçerik
Carefully remove the machine from its packaging. Retain all packaging materials for future transport or storage. Verify that all included components are present:
- All-Purpose Foot
- Fermuar Ayağı
- İlik Ayağı
- Yama Plakası
- Pack of Needles
- Bobinler
- Spool Pin Felts
- Needle Plate Screwdriver
- Seam Ripper / Lint Brush
- Vinyl Dust Cover
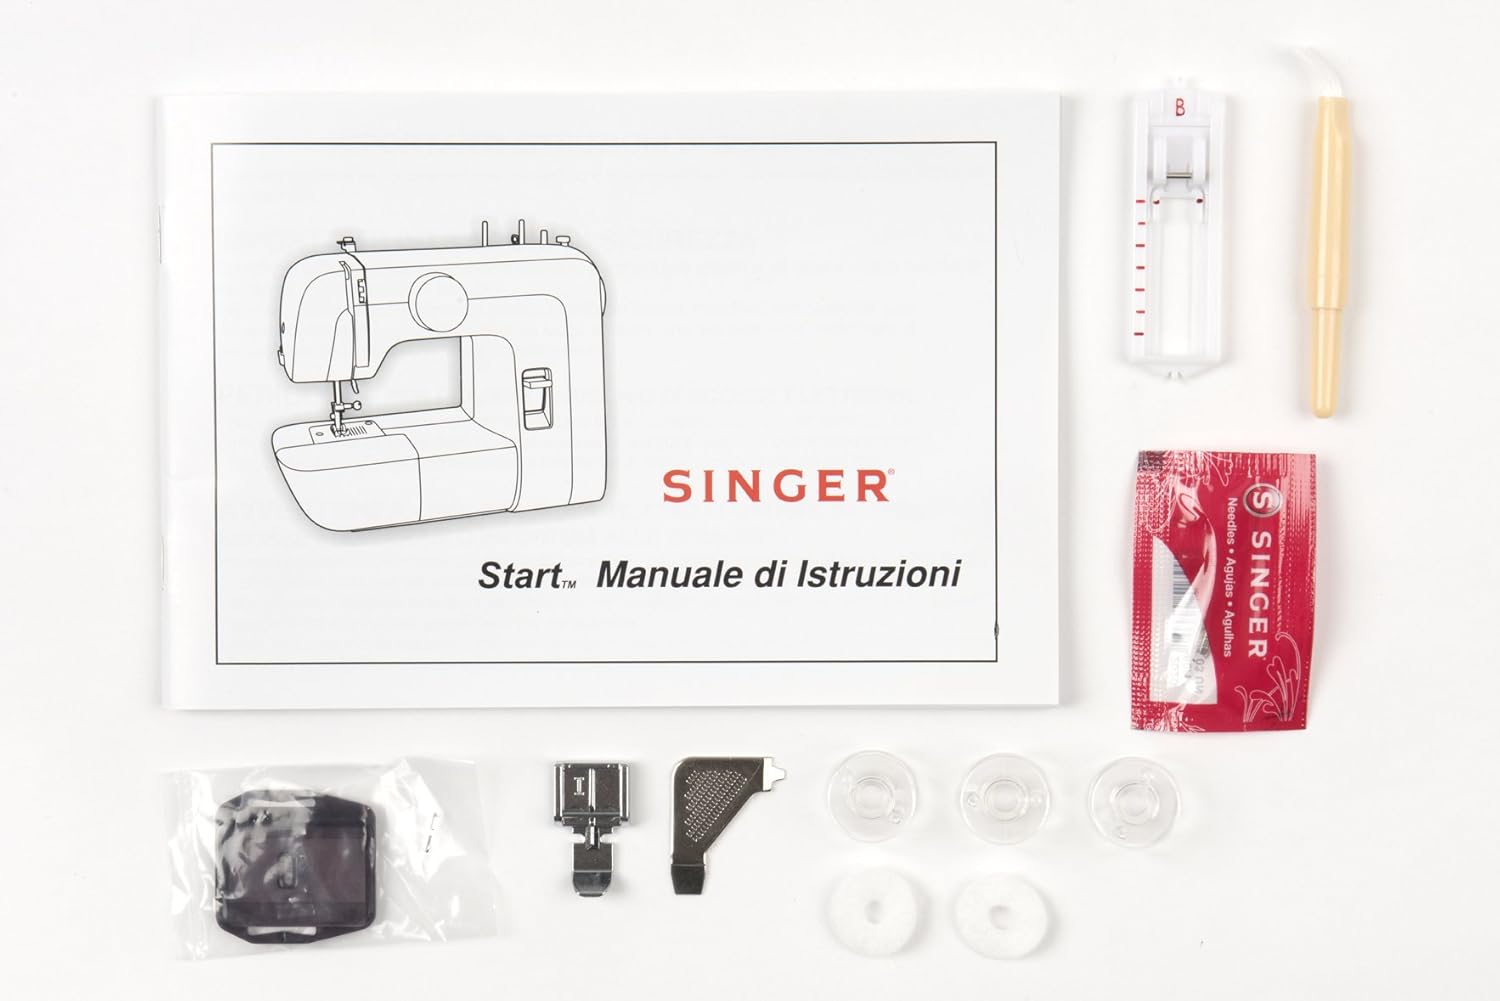
Image 3.1: Included accessories and instruction manual.
3.2 Güç Bağlantısı
Connect the power cord to the machine's power input socket and then plug it into a suitable electrical outlet (220V). Ensure the machine is switched off before connecting to power.

Resim 3.2: Arka view showing power input and foot pedal connection.
3.3 Makineye İplik Takılması
Correct threading is crucial for proper stitch formation.
3.3.1 Bobin Sarma
- Makara pimine bir makara iplik yerleştirin.
- İpliği üst iplik kılavuzundan geçirin.
- Wrap the thread clockwise around the bobbin winding tension disc.
- Insert the thread through the small hole in the bobbin from the inside out.
- Bobini bobin sarma miline yerleştirin ve mili sağa doğru itin.
- Hold the thread end and press the foot pedal. Wind a few turns, then trim the excess thread.
- Continue winding until the bobbin is full. The winder will stop automatically.
- Push the bobbin winder spindle to the left and remove the bobbin.
3.3.2 Bobinin Takılması
- Bobin kapağını açın.
- Sarılmış makarayı, ipliği saat yönünün tersine açacak şekilde makara kutusuna yerleştirin.
- Guide the thread into the tension spring slot and pull it firmly until it snaps into place.
- Bobin kapak plakasını kapatın.
3.3.3 Üst Dişli
- El çarkını kullanarak ibreyi en yüksek konumuna getirin.
- Baskı ayağı kaldırıcısını kaldırın.
- Makara pimine bir makara iplik yerleştirin.
- İpliği üst iplik kılavuzundan geçirin.
- Bring the thread down through the right channel, then up through the left channel, ensuring it passes through the take-up lever.
- İpliği iğnenin ön tarafından arka tarafına doğru geçirin.

Image 3.3: Illustration of the upper threading path.
3.4 İğne Takılması
To install or replace a needle:
- İğneyi en yüksek konumuna kaldırmak için volanı çevirin.
- İğneyi gevşetin clamp vidası.
- Eski iğneyi çıkarın.
- Yeni iğneyi düz tarafı makinenin arkasına bakacak şekilde yerleştirin. İğneyi gidebildiği kadar yukarı doğru itin.
- İğneyi sıkınamp güvenli bir şekilde vidalayın.

Image 3.4: Close-up of the needle and presser foot area.
4. Kullanım Talimatları
4.1 Dikiş Seçimi
The SINGER Start 1306 offers 6 built-in stitch patterns. Turn the stitch selector dial to choose your desired stitch. The available stitches include 4 basic, 1 decorative, and 1 buttonhole stitch.

Image 4.1: Stitch selector dial with various stitch patterns.
4.2 Dikiş Temelleri
4.2.1 Starting a Seam
- Kumaşı baskı ayağının altına yerleştirin ve kenarını iğne plakasındaki dikiş kılavuzuyla hizalayın.
- Baskı ayağını indirin.
- İğneyi başlangıç noktasında kumaşa indirmek için el çarkını çevirin.
- Press the foot pedal gently to begin sewing.
4.2.2 Dikişin Bitirilmesi
- Sew to the end of your seam.
- Press the reverse stitch lever to sew a few stitches backward to secure the seam.
- İğneyi en yüksek konumuna kaldırın.
- Baskı ayağını kaldırın.
- Pull the fabric away from the machine, then cut the threads using the thread cutter on the machine.
4.3 4-Step Buttonhole Function
The machine features a 4-step buttonhole function for creating buttonholes. Refer to the markings on the stitch selector dial for each step (1, 2, 3, 4). Use the buttonhole foot for best results.
4.4 Zipper Insertion
Attach the zipper foot to the machine. This foot allows you to sew close to the zipper teeth, ensuring a neat finish. Follow standard zipper insertion techniques, adjusting the needle position as needed.
4.5 Free Arm Usage
The removable free arm provides access to difficult-to-reach areas such as collars, sleeves, cuffs, and pant hems. To use, slide off the accessory storage compartment to expose the free arm.
5. Bakım
5.1 Temizlik
Regular cleaning helps maintain machine performance. Always unplug the machine before cleaning.
- Lint Temizleme: Use the provided lint brush to remove lint and dust from the bobbin area and feed dogs.
- Dış Temizlik: Dış yüzeyleri yumuşak, kuru bir bezle silin. Sert kimyasallar veya aşındırıcı temizleyiciler kullanmayın.
5.2 İğne Değişimi
Replace needles regularly, especially when sewing different fabric types or if the needle becomes bent or dull. A damaged needle can cause skipped stitches or fabric damage. Refer to section 3.4 for needle installation instructions.
6. Sorun Giderme
Bu bölüm, karşılaşabileceğiniz yaygın sorunları ele almaktadır. Burada listelenmeyen sorunlar için müşteri desteğiyle iletişime geçin.
| Sorun | Olası Neden | Çözüm |
|---|---|---|
| Atlanan Dikişler | Yanlış iğne, bükülmüş iğne, yanlış iplik geçirme. | İğneyi değiştirin, makineye yeniden iplik takın, kumaş için doğru iğne tipini kullandığınızdan emin olun. |
| Konu Kırma | Incorrect threading, tension too tight, damaged needle, poor quality thread. | Re-thread, adjust tension, replace needle, use good quality thread. |
| Bobbin Thread Jamming | Improperly wound bobbin, incorrect bobbin insertion, lint in bobbin case. | Re-wind bobbin, re-insert bobbin correctly, clean bobbin area. |
| Makine Başlamıyor | Power cord not connected, machine switched off, foot pedal not connected. | Check power connections, ensure switch is ON, connect foot pedal. |
7. Özellikler
| Özellik | Detay |
|---|---|
| Marka | ŞARKICI |
| Model Numarası | Başlat 1306 |
| Ürün Ağırlığı | 4.3 kilo |
| Ürün Boyutları (UxGxY) | 35x18x29 cm |
| Cilttage | 220V |
| Netage | 70 Watt |
| Dahili Dikişler | 6 (4 basic, 1 decorative, 1 buttonhole) |
| İlik Tipi | 4-step automatic |
| Çerçeve Malzemesi | Heavy Duty Metal |
| Dahil Bileşenler | All Purpose Foot, Zipper Foot, Buttonhole Foot, Darning Plate, Pack of Needles, Bobbins, Spool Pin Felts, Needle Plate Screwdriver, Seam Ripper / Lint Brush, Vinyl Dust Cover |

Image 7.1: Product dimensions of the SINGER Start 1306 Sewing Machine.
8. Garanti ve Destek
Your SINGER Start 1306 Sewing Machine comes with a manufacturer's warranty. Please refer to the warranty card included with your product for specific terms, conditions, and duration. For technical assistance, service, or to inquire about replacement parts, please contact SINGER customer support through their official webSiteyi veya garanti belgelerinizde yer alan iletişim bilgilerini kullanın.


