1. Ürün Bittiview
This product is a replacement LCD display specifically designed for the Apple iPad Mini 3. It is compatible with iPad Mini 3 models A1599 and A1600. This component provides the visual display for your device. Please note that this product includes the LCD display only and does Olumsuz include the front glass touch panel or digitizer.

Resim 1.1: Ön view of the LCD display for iPad Mini 3. This image shows the full display panel with its integrated flex cable connector at the top.
2. Önemli Güvenlik Bilgileri
- Electronic repair requires careful handling. Always disconnect the device's power source (battery) before beginning any repair work to prevent electrical shock or damage to components.
- Handle the LCD display by its edges. Avoid touching the screen surface or the flex cables directly to prevent damage from oils or static electricity.
- Use appropriate tools for disassembly and reassembly. Incorrect tools can cause damage to the device or the new display.
- Static electricity can damage electronic components. Consider using an anti-static wrist strap during the repair process.
- Keep small parts, screws, and tools organized to avoid loss and ensure correct reassembly.
3. Kurulum Kılavuzu
This LCD display is a replacement part for the iPad Mini 3. Repairing instructions and specialized tools are not included with this product. Professional installation is highly recommended. If you choose to perform the installation yourself, ensure you have access to detailed repair guides specific to the iPad Mini 3 (models A1599, A1600) and the necessary tools.
Kurulum Öncesi Test
It is crucial to test the new LCD display before fully installing it into your device. This helps identify any potential issues with the new part before completing the repair.
- After carefully opening your iPad Mini 3 and disconnecting the old display, connect the new LCD display's flex cable to the logic board connector.
- Do Olumsuz fully install or adhere the display at this stage.
- Pil konektörünü yeniden bağlayın.
- Power on the iPad and check the display for proper functionality, including brightness, color, and absence of dead pixels or lines.
- If the display functions correctly, power off the device, disconnect the battery, and proceed with the full installation.
Bağlantı Ayrıntıları
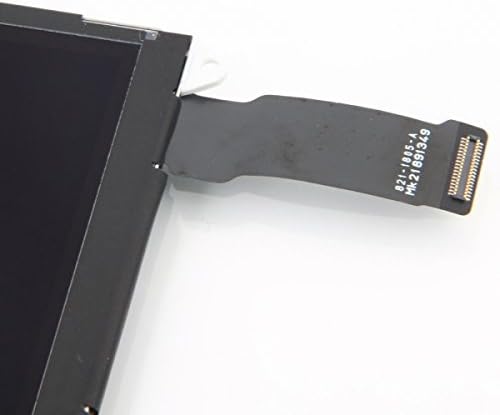
Resim 3.1: Yakın çekim view of the flex cable and connector. This component must be securely and correctly seated into the corresponding port on the iPad's logic board.

Resim 3.2: Arka view of the LCD display, illustrating the routing of the flex cable. Ensure the cable is not creased or damaged during installation.
4. Ekranın Çalıştırılması
Once correctly installed, the LCD display will function as the primary visual output for your iPad Mini 3. Its operation is integrated with the iPad's operating system. The display will activate upon powering on the device and respond to inputs from the digitizer (touch screen, sold separately).
5. Bakım
To ensure the longevity and optimal performance of your new LCD display:
- Keep the screen clean using a soft, lint-free cloth. Avoid abrasive materials or harsh chemical cleaners.
- Protect your iPad from drops and impacts, which can damage the display.
- Cihazı aşırı sıcaklıklara veya uzun süre doğrudan güneş ışığına maruz bırakmaktan kaçının.
6. Sorun Giderme
If you encounter issues after installing the new LCD display, consider the following troubleshooting steps:
- Display Not Turning On / No Image:
Ensure the battery connector was disconnected and reconnected after the display installation. This action can reset the iPad and help it recognize the new LCD display. - Display Issues (e.g., flickering, lines, incorrect colors):
Power off the iPad, disconnect the battery, then carefully release the LCD flex cable from the logic board connector. Inspect the cable and connector for any damage or debris. Reconnect the cable firmly and ensure it is properly seated. Reconnect the battery and test again. - Touch Screen Not Working:
This product is the LCD display only and does not include the touch panel (digitizer). If your touch screen is not responding, the issue is likely with the digitizer component or its connection, not the LCD display itself. Ensure the digitizer's flex cable is properly connected.
If problems persist after attempting these steps, professional assistance may be required.
7. Özellikler
| Özellik | Detay |
|---|---|
| Ürün Türü | LCD Display (Screen only) |
| Uyumluluk | Apple iPad Mini 3 (Models A1599, A1600) |
| Ürün Ağırlığı | 5 ons |
| Paket Boyutları | 10 x 6.8 x 1.2 inç |
| Üretici | eInc |
| İlk Mevcut Tarih | 16 Ocak 2015 |
8. Garanti ve Destek
For information regarding product warranty, returns, or technical support, please contact the original seller or retailer from whom this LCD display was purchased. Specific warranty terms and support procedures are provided by the seller.


