1. Giriş
This manual provides detailed instructions for the safe and efficient operation, setup, and maintenance of your Janome 8002D Serger. Please read this manual thoroughly before using the machine to ensure proper function and to prevent damage or injury. The Janome 8002D is designed for 3 or 4 thread overlock stitching, featuring a built-in rolled hem and color-coded threading for ease of use.
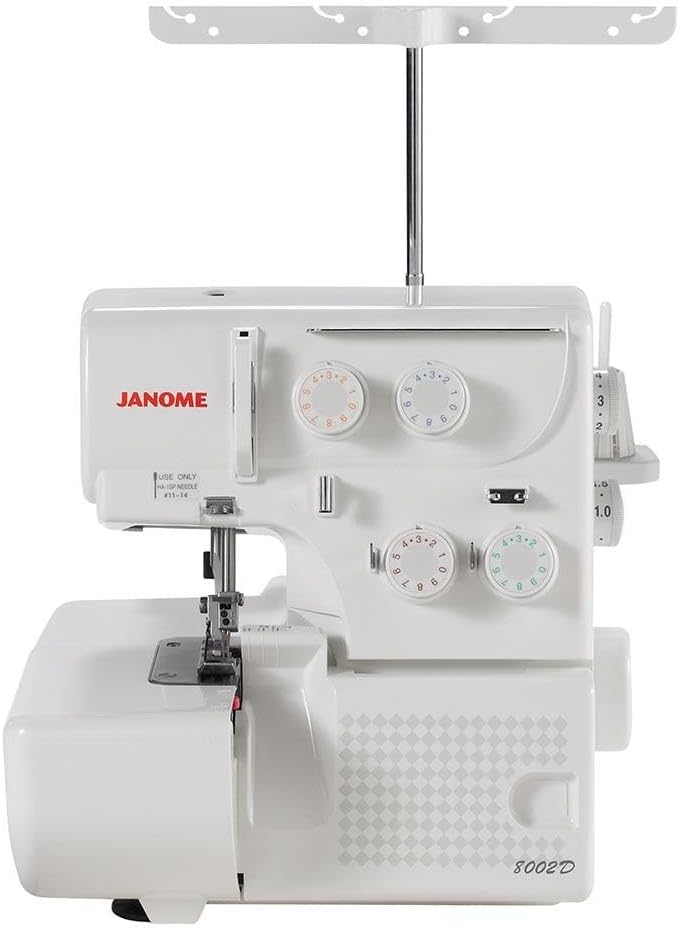
Şekil 1.1: Ön view of the Janome 8002D Serger, showcasinkompakt tasarımı ve kolay erişilebilir kontrolleri sayesinde.
2. Güvenlik Talimatları
- Kapakları çıkarırken, yağlarken veya kullanım kılavuzunda belirtilen diğer kullanıcı bakım ayarlarını yaparken daima makinenin fişini elektrik prizinden çekin.
- Keep fingers away from all moving parts. Special care is required around the serger needles and cutting blades.
- Doğru iğne plakasını kullanın. Yanlış plaka iğnenin kırılmasına neden olabilir.
- Eğik iğneler kullanmayınız.
- Dikiş yaparken kumaşı çekmeyin veya itmeyin. Bu, iğnenin yönünü değiştirerek kırılmasına neden olabilir.
- Always operate the serger on a flat, stable surface.
- Ensure the machine is connected to a 110-volt power supply for use in the US only.
3. Kurulum
3.1 Paketten Çıkarma ve Yerleştirme
Carefully remove the serger from its packaging. Place the machine on a stable, level surface with adequate lighting. Ensure there is enough space around the machine for comfortable operation and fabric handling.
3.2 Güç Bağlantısı
Connect the power cord to the machine and then to a standard 110-volt electrical outlet. The machine is designed for use in the US only. Locate the power switch, typically on the side or back of the machine.

Şekil 3.1: Arka view of the Janome 8002D Serger, showing the power switch and power input.
3.3 Makineye İplik Takılması
The Janome 8002D features a color-coded threading chart to simplify the process. Follow the numbered and colored guides for each of the four threads. It is recommended to refer to the included instructional DVD for a visual guide.

Figure 3.2: The Janome 8002D Serger with four spools of thread correctly installed and guided through the machine's threading paths.

Şekil 3.3: Yakın çekim view of the color-coded tension dials on the Janome 8002D Serger, indicating thread paths and tension settings.
4. Operasyon
4.1 Temel Dikiş Teknikleri
Once threaded, place your fabric under the presser foot. Lower the presser foot and gently press the foot pedal to begin stitching. The machine will trim the fabric edge and create a secure overlock stitch.
4.2 Dikiş Ayarlarını Düzenleme
The Janome 8002D allows for adjustments to stitch tightness and length. These controls are typically located on the side of the machine. Experiment with scrap fabric to find the optimal settings for your material.
- Gerilim Ayar Düğmeleri: Adjust the tension for each thread using the corresponding color-coded dials.
- Dikiş Uzunluğu Ayar Düğmesi: Controls the length of the stitches.
- Kesme Genişliği Ayarı: Adjust the cutting width from 3.1mm to 7.3mm to suit different fabric types and desired finishes.

Şekil 4.1: Yan view of the Janome 8002D Serger, highlighting the stitch length and cutting width adjustment dials.
4.3 Built-in Rolled Hem Feature
To activate the built-in rolled hem feature, slide the needle plate setting to the "R" position. This eliminates the need for changing the needle plate, providing a professional finish for delicate fabrics.
5. Bakım
5.1 Temizlik
Regularly clean lint and dust from the machine, especially around the loopers, feed dogs, and knife area. Use a small brush and vacuum cleaner if necessary. Always unplug the machine before cleaning.

Figure 5.1: The Janome 8002D Serger with its front cover open, revealing the internal mechanisms for cleaning and maintenance.
5.2 Yağlama
Refer to the instruction manual for specific lubrication points and frequency. Use only recommended sewing machine oil.
5.3 İğne Değişimi
Replace needles regularly, especially if they become bent or dull. Use only HA-1SP needles, size #11-14, as indicated on the machine. Ensure needles are inserted correctly and securely.
6. Sorun Giderme
| Sorun | Olası Neden | Çözüm |
|---|---|---|
| Atlanan Dikişler | İğnenin yanlış yerleştirilmesi, iğnenin bükülmesi, ipliğin yanlış takılması, gerginliğin yanlış ayarlanması. | İğneyi doğru şekilde yeniden takın, bükülmüş iğneyi değiştirin, makineye yeniden iplik geçirin, gerginliği ayarlayın. |
| İplik Kopması | High tension, poor quality thread, incorrect threading, burrs on thread path. | Reduce tension, use quality thread, re-thread, check for burrs and smooth them. |
| Kumaş Büzülmesi | Aşırı gerilim, yanlış diferansiyel besleme ayarı. | Gerilimi azaltın, diferansiyel beslemeyi ayarlayın. |
| Makine Başlamıyor | Power cord not connected, power switch off, foot pedal not connected. | Check power connections, ensure switch is on, connect foot pedal. |
For more detailed troubleshooting, refer to the comprehensive instruction manual or the included instructional DVD.
7. Özellikler
- Modeli: Janome 8002D
- Dikiş Türü: 3 or 4 thread overlock
- Dahili Özellikler: Rolled hem (no plate change required)
- İş parçacığı: Color-coded threading chart
- Kesim Genişliği: 3.1 mm'den 7.3 mm'ye kadar ayarlanabilir
- Güç: 110-volt (US only)
- Boyutlar: 15 x 13.5 x 14.5 inç
- Ağırlık: 19 pound
- İğne Tipi: HA-1SP, sizes #11-14
- Malzeme: Alüminyum
8. Garanti ve Destek
Ürününüzün garantisiyle ilgili bilgi için lütfen satın alma işleminizle birlikte verilen garanti kartına bakın veya resmi Janome web sitesini ziyaret edin. website. For technical support, service, or to purchase accessories, please contact Janome customer service directly. Keep your purchase receipt as proof of purchase for warranty claims.
The product includes an instructional DVD which provides detailed guidance on setup and usage.