giriiş
Welcome to the Greenlee DM-810A True RMS Digital Multimeter user manual. This document provides essential information for the safe and effective operation, maintenance, and troubleshooting of your device. The DM-810A is designed for accurate measurement of AC/DC voltage, AC/DC current, resistance, capacitance, frequency, and continuity, making it a versatile tool for electrical professionals.
Güvenlik Bilgileri
Sayacın güvenli çalışmasını ve servisini sağlamak için bu talimatları izleyin. Bu uyarılara uyulmaması ciddi yaralanmalara veya ölüme neden olabilir.
- Always read and understand the entire instruction manual before using the meter.
- Herhangi bir fonksiyon için maksimum giriş limitlerini aşmayın.
- Vol ile çalışırken dikkatli oluntag30V AC RMS, 42V tepe veya 60V DC'nin üzerinde. Bu hacimtagşok tehlikesi yaratabilir.
- Always use the proper terminals, function, and range for your measurements. The DM-810A features a Beep-Jack audible and visible warning to guard against improper A and mA terminal plug-in.
- Her kullanımdan önce test uçlarında hasarlı yalıtım veya açıkta metal olup olmadığını kontrol edin. Hasarlıysa değiştirin.
- Hasarlı görünüyorsa veya kutusu açıksa ölçüm cihazını kullanmayın.
- Çalıştırmadan önce pil kapağının güvenli bir şekilde kapatıldığından emin olun.
- Adhere to local and national safety codes. Use personal protective equipment (PPE) such as approved safety glasses and electrically insulated gloves when necessary.
Ürün Bittiview
This section identifies the key parts and controls of your Greenlee DM-810A multimeter.

Şekil 1: Ön view of the Greenlee DM-810A Digital Multimeter, showing the display, function selector dial, and input jacks.
- Görüntülemek: Large LCD for clear readings, often with dual display capability.
- Fonksiyon Seçici Kadranı: Used to select the desired measurement function (e.g., V~, V-, A~, A-, Ω, CAP, Hz, Continuity).
- Giriş Jakları:
- İletişim: Tüm ölçümler için ortak (negatif) giriş.
- VΩHz: Hacim için pozitif giriştage, direnç, frekans ve kapasitans ölçümleri.
- mAμA: Milli için pozitif girişampve mikroampMevcut ölçümler.
- A: Olumlu girdi için ampMevcut ölçümler.
- Düğmeler:
- SEÇME: Toggles between functions on a single dial position (e.g., AC/DC voltage, diyot/süreklilik).
- ARALIK: Manually selects measurement range or returns to auto-ranging.
- △: Delta function for relative measurements.
- TUTMAK: Mevcut ekran okumasını dondurur.
Kurmak
Pil Kurulumu
The Greenlee DM-810A requires batteries for operation. Refer to the back of the meter for the battery compartment. Use a screwdriver to open the compartment, insert the specified batteries (typically AA or 9V, check the compartment label), observing correct polarity, and then securely close the cover.
Test Uçlarını Bağlama
Always ensure test leads are properly connected before taking measurements.
- Siyah test kablosunu Bİlgİ (ortak) giriş jakı.
- Insert the red test lead into the appropriate positive input jack based on the measurement you intend to make:
- cilt içintage, resistance, capacitance, or frequency, use the VΩHz kriko.
- Milyonlarca kişi içinampburada veya mikroampere current, use the maμA kriko.
- İçin ampere current, use the A kriko.
- The meter's Beep-Jack feature will provide an audible and visible alert if the function selector is set to a current measurement (A or mA) but the test lead is incorrectly plugged into a voltage/resistance jack, or vice-versa. This helps prevent damage to the meter and ensures correct setup.
Kullanım Talimatları
This section details how to perform various measurements with your DM-810A multimeter.
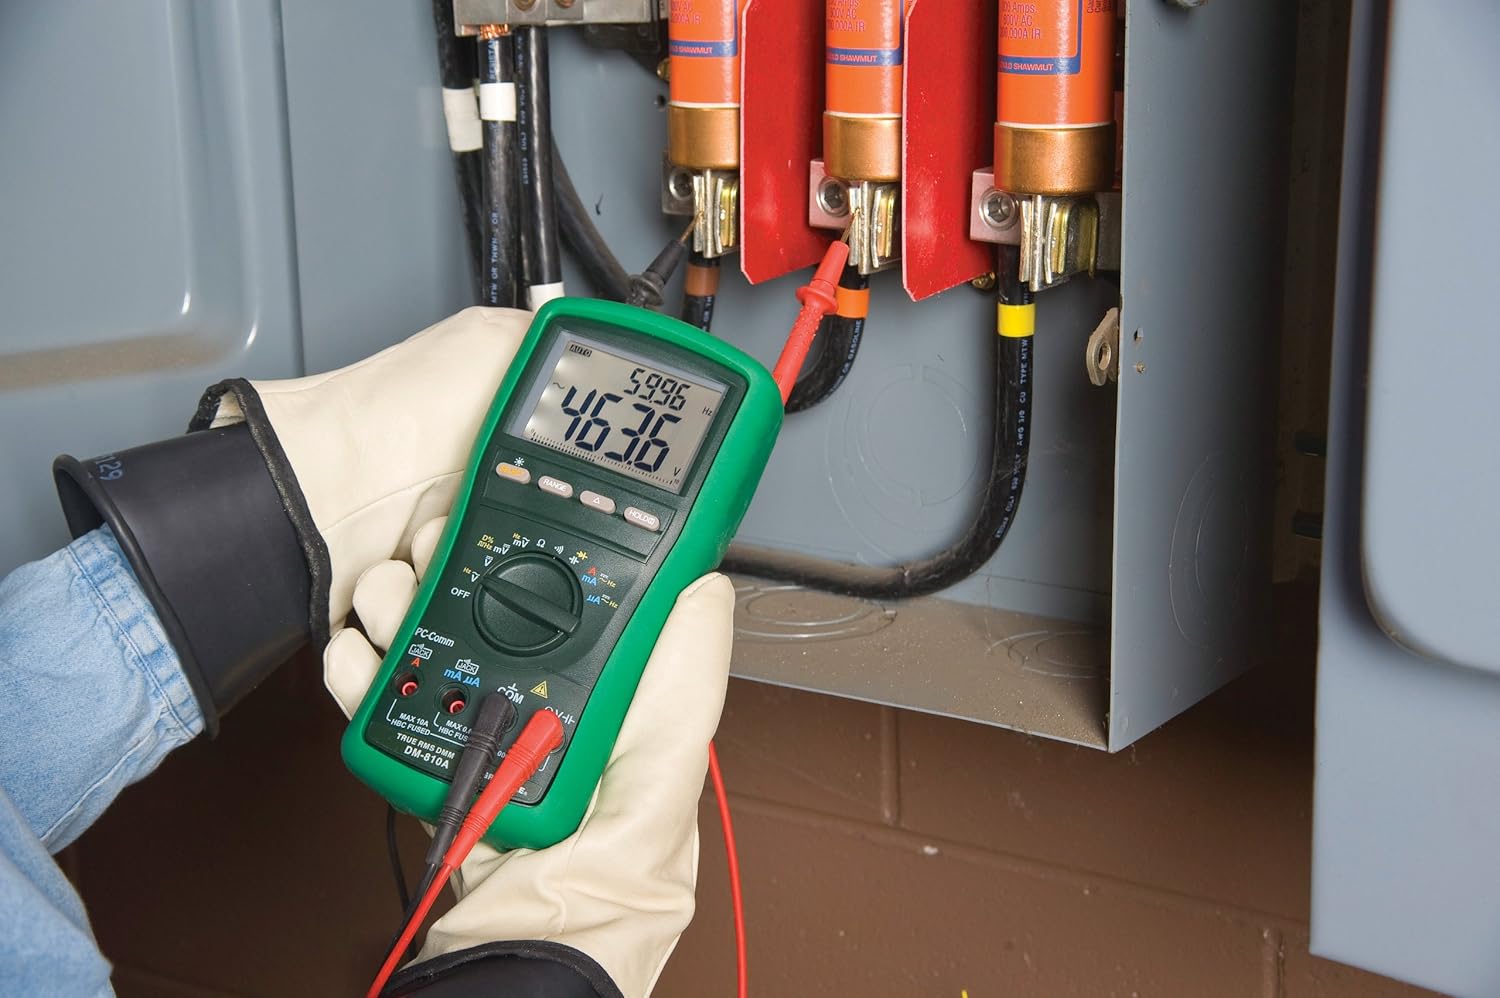
Şekil 2: The Greenlee DM-810A Digital Multimeter being used to take measurements within an electrical panel, demonstrating practical application.
AC/DC Hacim Ölçümütage
- Set the function selector to V~ (AC Voltage) veya V- (DC Voltage). Use the SELECT button to toggle if both are on one position.
- Siyah test ucunu şuraya bağlayın: Bİlgİ ve kırmızı test ucu şuna işaret ediyor VΩHz.
- Ölçülecek devre veya bileşen boyunca test problarını paralel olarak bağlayın.
- Cildi okutagEkrandaki e değeri.
AC/DC Akımının Ölçülmesi
Önemli: Akım ölçümleri için ölçüm cihazının devreye seri olarak bağlanması gerekir. Ölçüm cihazını bağlamadan önce devrenin enerjisinin kesildiğinden emin olun.
- Devrenin enerjisini kesin.
- Set the function selector to A~ (AC Current) or A- (DC Current), or mA~ / mA-.
- Siyah test ucunu şuraya bağlayın: Bİlgİ. Connect the red test lead to maμA for small currents or A for larger currents (up to 10A). The Beep-Jack warning will activate if leads are in the wrong jacks for the selected function.
- Open the circuit where the current is to be measured and connect the meter in series.
- Devreye tekrar enerji verin ve akım değerini okuyun.
- Sayaç bağlantısını kesmeden önce devrenin enerjisini kesin.
Direnç Ölçümü (Ω)
- De-energize the circuit or component.
- Set the function selector to Ω.
- Siyah test ucunu şuraya bağlayın: Bİlgİ ve kırmızı test ucu şuna işaret ediyor VΩHz.
- Test problarını bileşen boyunca bağlayın.
- Direnç değerini okuyun.
Measuring Capacitance (CAP)
- Ölçüm yapmadan önce kondansatörün tamamen boşaldığından emin olun.
- Set the function selector to CAP.
- Siyah test ucunu şuraya bağlayın: Bİlgİ ve kırmızı test ucu şuna işaret ediyor VΩHz.
- Test problarını kondansatör terminallerine bağlayın.
- Kapasitans değerini okuyun.
Measuring Frequency (Hz)
- Set the function selector to Hz.
- Siyah test ucunu şuraya bağlayın: Bİlgİ ve kırmızı test ucu şuna işaret ediyor VΩHz.
- Test problarını sinyal kaynağına bağlayın.
- Frekans değerini okuyun.
Süreklilik Testi
- De-energize the circuit or component.
- Set the function selector to the continuity symbol (often shared with diode test, use SELECT to toggle).
- Siyah test ucunu şuraya bağlayın: Bİlgİ ve kırmızı test ucu şuna işaret ediyor VΩHz.
- Connect the test probes across the circuit path or component.
- Duyulabilir bir bip sesi, sürekliliğin (düşük direncin) olduğunu gösterir. Ekranda direnç değeri görüntülenecektir.
Bakım
Temizlik
Sayaçları reklamla silinamp Bez ve hafif deterjan kullanın. Aşındırıcı veya çözücü maddeler kullanmayın. Kullanmadan önce ölçüm cihazının tamamen kuru olduğundan emin olun.
Pil Değişimi
When the battery indicator appears on the display, replace the batteries immediately to ensure accurate readings. Follow the battery installation steps outlined in the Setup section.
Sigorta Değişimi
If the current measurement functions cease to work, the internal fuses may need replacement. Refer to the meter's internal diagram (usually accessible by opening the battery compartment or back casing) for fuse specifications and replacement instructions. Always replace fuses with those of the specified type and rating to maintain safety and performance.
Sorun giderme
This section provides solutions for common issues encountered during the operation of your DM-810A multimeter.
| Sorun | Olası Neden | Çözüm |
|---|---|---|
| Ekran yok veya soluk ekran | Bitmiş veya zayıf piller | Pilleri değiştirin. |
| Yanlış okumalar | Incorrect function/range selected; Damaged test leads; External interference | Verify function and range; Inspect and replace test leads; Move away from strong electromagnetic fields. |
| Mevcut ölçüm çalışmıyor | Blown fuse; Incorrect lead connection | Check and replace fuses; Ensure leads are in the correct A or mA jacks. |
| Beep-Jack warning active | Test leads connected to incorrect input jacks for the selected function | Adjust test lead connections to match the selected function on the dial. |
| Süreklilik testi bip sesi çıkarmıyor | Open circuit; High resistance | Ensure the circuit is closed; Check for breaks in the circuit or component. |
Teknik Özellikler
The following table outlines the key technical specifications for the Greenlee DM-810A Digital Multimeter.
| Özellik | Değer |
|---|---|
| Marka | Yeşil Lee |
| Örnek | DM-810A |
| Ölçüm Türü | True RMS Dijital Multimetre |
| Güç Kaynağı | Pil ile çalışır |
| Stil | Dijital |
| Ürün Ağırlığı | 16 ons (1 pound) |
| Ürün Boyutları (U x G x Y) | 10 x 10 x 12 inç |
| Sertifikalar | CE, CSA, UL |
| UPC | 783310087434 |
Garanti ve Destek
Garanti Bilgileri
The Greenlee DM-810A Digital Multimeter comes with a 1 yıllık üretici garantisiBu garanti, normal kullanım koşullarındaki malzeme ve işçilik kusurlarını kapsar. Garanti talepleriniz için lütfen satın alma belgenizi saklayın.
Müşteri Desteği
For technical assistance, warranty service, or to inquire about replacement parts, please contact Greenlee customer support. Refer to the official Greenlee webEn güncel iletişim bilgileri için site veya ürün ambalajına bakın.


