1. Önemli Güvenlik Bilgileri
Please read and understand all instructions before beginning installation. Failure to do so may result in electric shock, fire, or other injuries that could be hazardous or fatal. This product must be installed in accordance with the applicable installation code by a person familiar with the construction and operation of the product and the hazards involved.
- UYARI: Elektrik çarpması riski vardır. Kurulum veya bakım işlemlerinden önce devre kesiciden veya sigorta kutusundan elektriği kesin.
- Tüm elektrik bağlantıları yerel yönetmeliklere, kanunlara veya Ulusal Elektrik Koduna (NEC) uygun olmalıdır.
- Kablolama prosedürleri konusunda emin değilseniz kalifiye bir elektrikçiye danışın.
- Maksimum su miktarını aşmayıntage, ampuller için belirtilmiştir.
- Bu ürün yalnızca iç mekan kullanımı için tasarlanmıştır.
2. Paket İçeriği
Carefully unpack your new fixture and lay out all parts on a clear area. Ensure all components listed below are present before discarding any packaging materials.
- A. Fixture Body (Chandelier)
- B. Mounting Hardware Kit (Crossbar, mounting screws, wire nuts, ground screw)
- C. Canopy and Collar Ring
- D. Chain and Quick Links
- E. Instruction Manual
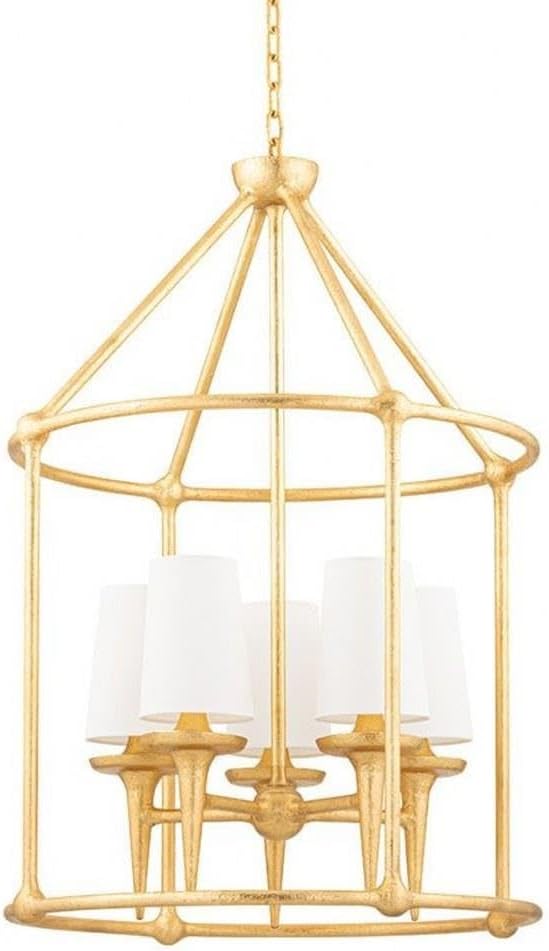
Image 1: The Hudson Valley Lighting 6625-GL Torch 5 Light Lantern, showcasing its gold leaf finish and five light sources within a decorative cage structure.
3. Kurulum ve Kurulum
3.1 Gerekli Araçlar (Dahil Değildir)
- Yıldız uçlu tornavidalar
- Düz tornavida
- Tel Soyucular
- Pense
- Elektrik Bandı
- Merdiven
3.2 Kurulum Adımları
- Gücü Kapatın: Before starting, ensure the power to the junction box is turned off at the circuit breaker or fuse box.
- Montajı Hazırlayın: Attach the mounting crossbar to the junction box using the provided mounting screws. Ensure the crossbar is securely fastened.
- Zincir Uzunluğunu Ayarlayın: Determine the desired hanging height for your fixture. Use pliers to open and remove excess chain links. Attach one quick link to the top loop of the fixture and the other to the mounting loop on the canopy.
- Kablo Bağlantıları: Carefully connect the fixture's electrical wires to the corresponding wires from the junction box.
- Connect the bare copper (ground) wire from the fixture to the ground wire from the junction box (or to the green ground screw on the crossbar).
- Connect the ribbed or white fixture wire to the white (neutral) wire from the junction box.
- Connect the smooth or black fixture wire to the black (hot) wire from the junction box.
- Güvenli Gölgelik: Carefully push the canopy up against the ceiling, covering the junction box. Secure it in place using the collar ring, twisting it onto the threaded nipple on the crossbar until snug.
- Ampulleri yükleyin: Insert five (5) E12 candelabra base bulbs (not included) into the sockets. Do not exceed the maximum wattagampul başına 40 watt e.
- Gücü Geri Yükle: Kurulum tamamlandıktan ve tüm bağlantılar güvenli hale getirildikten sonra devre kesicideki gücü geri yükleyin.
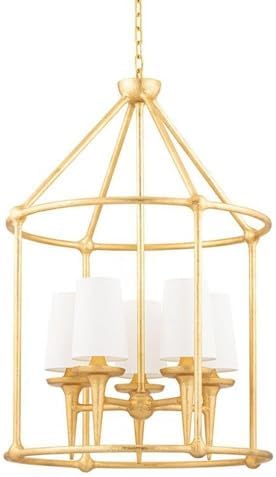
Image 2: Illustrative view of typical mounting hardware and wiring connections for a ceiling fixture. Always refer to specific diagrams if provided with your product.
4. Kullanım Talimatları
The Hudson Valley Lighting 6625-GL Torch Lantern operates via a standard wall switch connected to the circuit. Ensure the wall switch is in the 'ON' position for the fixture to illuminate.
- Ampul Tipi: Uses E12 Candelabra base bulbs.
- Maksimum Watttage: Do not exceed 40 watts per bulb. Using higher wattage bulbs can cause overheating and damage the fixture or create a fire hazard.
- Ampul Değişimi: To replace bulbs, first turn off power at the wall switch and, if necessary, at the circuit breaker. Allow bulbs to cool before unscrewing and replacing them.
5. Bakım
Proper care and maintenance will ensure the longevity and appearance of your lighting fixture.
- Temizlik: Always disconnect power before cleaning. To clean the fixture, wipe it with a soft, dry cloth. Do not use abrasive cleaners, solvents, or polishes as they may damage the finish.
- Denetleme: Periodically inspect the fixture for any signs of wear, loose connections, or damage. If any issues are found, disconnect power and consult a qualified electrician or the manufacturer.
6. Sorun Giderme
Aydınlatma armatürünüzle ilgili sorun yaşıyorsanız, aşağıdaki yaygın sorunlar ve çözümlere göz atın:
| Sorun | Olası Neden | Çözüm |
|---|---|---|
| Armatür yanmıyor | Fikstürde güç yok Gevşek tel bağlantıları Arızalı ampul | Check circuit breaker/fuse. Ensure wall switch is ON. Tüm kablo bağlantılarının sağlam olduğundan emin olun (güç kapalıyken). Ampulü yenisiyle değiştirin. |
| Işıklar titriyor | Gevşek ampul Gevşek tel bağlantısı Incorrect dimmer switch (if applicable) | Tighten bulb securely. (Güç kapalıyken) Kablo bağlantılarını kontrol edin. Ensure dimmer switch is compatible with incandescent bulbs. |
| Vızıltı sesi | Uyumsuz dimmer anahtarı Gevşek bileşenler | Replace dimmer with a high-quality, compatible model. Check for any loose parts within the fixture. |
7. Özellikler
| Özellik | Detay |
|---|---|
| Model Numarası | 6625-GL |
| Marka | Hudson Vadisi Aydınlatması |
| Boyutlar (U x G x Y) | 25"U x 25"G x 36.75"Y |
| Ürün Ağırlığı | 23.1 Pound |
| Sona ermek | Altın Yaprak |
| Malzeme | Alloy Steel, Linen (Shade) |
| Işık Sayısı | 5 |
| Ampul Tabanı | E12 Şamdan |
| Maksimum VattagAmpul başına e | 40 Watt |
| Güç Kaynağı | Kablolu Elektrik |
| Montaj Gerekli | Evet |
| Oda Tipi | Oturma Odası (Önerilen) |
8. Garanti ve Destek
Hudson Valley Lighting products are manufactured to high standards and are backed by a manufacturer's warranty. For specific warranty details, please refer to the documentation included with your purchase or visit the official Hudson Valley Lighting webalan.
For technical assistance, replacement parts, or any questions regarding your 6625-GL Torch Lantern, please contact Hudson Valley Lighting customer support directly. Contact information can typically be found on their official websitede veya ürün ambalajında yer almamaktadır.
Çevrimiçi destek: www.hudsonvalleylighting.com


