1. Ürün Bittiview
The MOOG K9820 Suspension Ball Joint is engineered for reliable performance and ease of installation, designed to meet or exceed original equipment specifications. This component is crucial for maintaining proper steering and suspension function in your vehicle.
Temel Özellikler:
- Üstün Malzemeler: Constructed with hardened ball studs made of OE equivalent or better materials to withstand higher loads.
- Sıkı Testler: Backed by extensive testing to ensure reliable performance.
- Kolay Kurulum: Designed with problem-solving innovations for a fast, hassle-free installation process.
- Sağlam Yapı: Features a premium forged housing with an increased cross-section, providing up to 52% more material in key areas for enhanced durability.
- Validated Design: Construction and design are validated by MOOG engineers.
- Geniş Uygulama: Suitable for a wide range of foreign and domestic vehicle applications.
- Performans Standartları: Engineered to meet or exceed original equipment performance.
2. Ürün Bileşenleri
The MOOG K9820 Suspension Ball Joint includes the main ball joint assembly, a castle nut, a cotter pin, and a snap ring for secure installation.
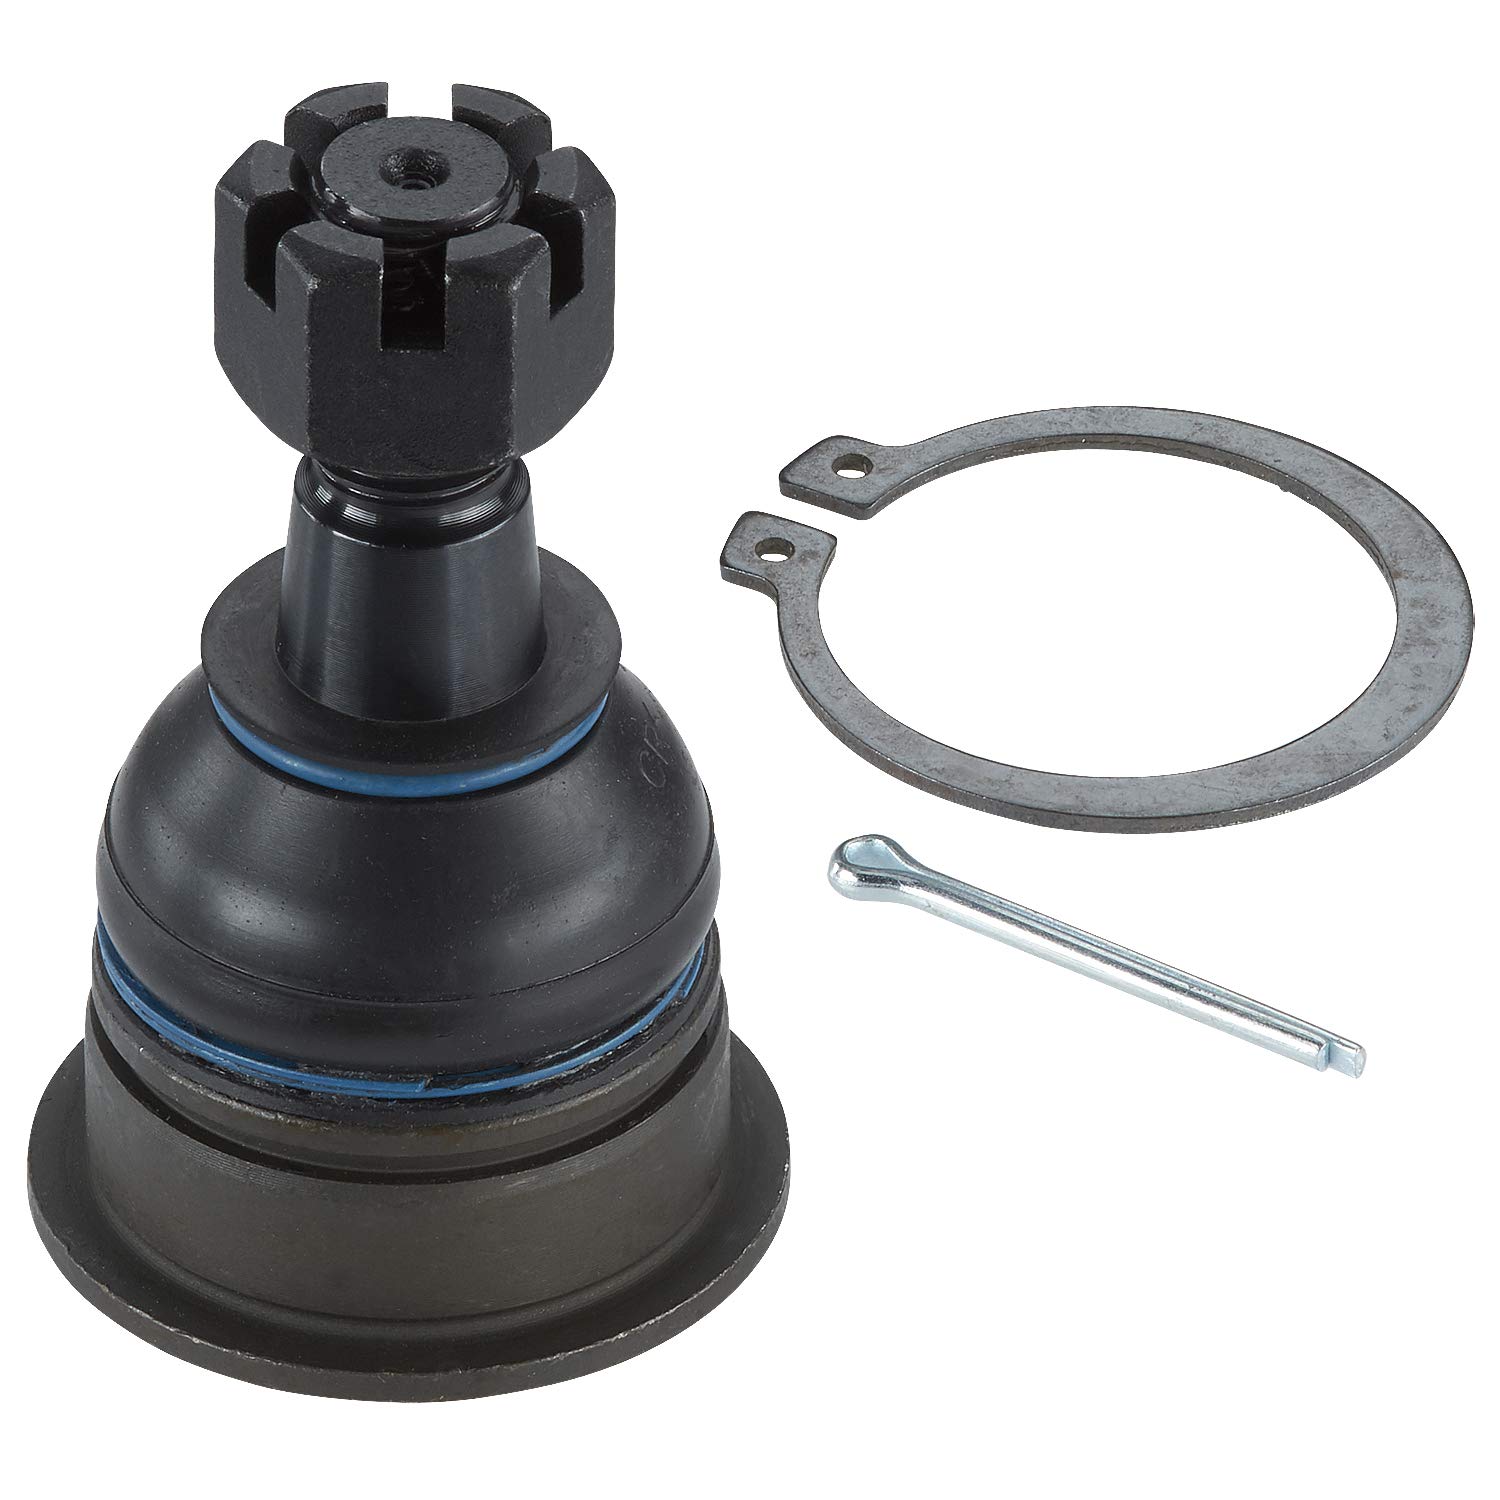
Image: MOOG K9820 Suspension Ball Joint Front Lower, showing the main assembly, castle nut, cotter pin, and snap ring.
3. Kurulum ve Kurulum
Proper preparation is crucial for the correct installation and longevity of the ball joint. Ensure the receiving pocket is clean and free of debris.
Hazırlanış Adımları:
- Clean the Pocket: Before pressing the new ball joint into place, thoroughly clean the pocket or area where it will be installed. Remove any rust, scale, or other debris. Failure to do so can lead to excessive pressure on the ball joint case and stud, potentially causing "memory steer" and premature wear.
- Consult Vehicle-Specific Manual: Always refer to your vehicle's service manual for specific torque specifications and detailed installation procedures.
Video: Ball Joint Installation Tips. This video provides general guidance on preparing the installation area for a ball joint.
4. İşletme Hususları
Once installed, the MOOG K9820 ball joint contributes to the proper functioning of your vehicle's suspension and steering system. It allows for smooth articulation of the suspension components while maintaining wheel alignment.
- Smooth Steering: A properly installed ball joint ensures the steering wheel returns to center after turning, preventing "memory steer."
- Stable Handling: Contributes to stable and predictable vehicle handling.
- Reduced Tire Wear: Helps maintain correct wheel alignment, which is essential for even tire wear.
5. Teftiş ve bakım
Regular inspection of ball joints is vital for vehicle safety and performance. Loose ball joints can lead to alignment issues, affecting handling and tire wear. It is recommended to check ball joints at regular service intervals and during any wheel alignment procedures.
İnceleme prosedürü:
- Kaldırma Aracı: Use a floor jack to raise one tire at a time, ensuring the suspension is unloaded and the upper control arm is not touching the frame (for load-carrying ball joints). For MacPherson strut suspensions, lift the vehicle off the ground.
- Check for Vertical Looseness (Load-Carrying): Use a pry bar to check for vertical play between the stud and ball joint housing.
- Check for Horizontal Looseness (Load-Carrying): Grab the tire at the 3 and 9 o'clock positions and move it in and out.
- Check for Axial Looseness (MacPherson Strut): Use a pry bar to lift the weight off the unloaded tire and wheel assembly. If using a dial indicator, attach it to measure axial looseness.
- Check for Radial Looseness (MacPherson Strut): Push in and pull out on the bottom of the tire (6 and 12 o'clock positions).
- Evaluate Play: While some manufacturers allow for a small amount of play within specifications, even minimal looseness can cause alignment and handling issues, especially when combined with other worn components. Use your best judgment to determine if replacement is necessary.
Video: How to Inspect Ball Joints for Looseness. This video demonstrates the proper techniques for inspecting ball joints for wear and looseness.
6. Yaygın Sorunların Giderilmesi
If you experience any of the following symptoms, your ball joint may require inspection or replacement:
- Çatırtı veya Patlama Sesleri: Often heard when going over bumps or turning.
- Excessive Play in Steering: Loose or sloppy steering feel.
- Düzensiz Lastik Aşınması: Can indicate alignment issues caused by worn ball joints.
- Araç Çekme: The vehicle drifts to one side while driving straight.
- Titreşimler: Steering wheel or vehicle vibrations, especially at certain speeds.
Always consult a qualified mechanic for diagnosis and repair if you suspect a faulty ball joint.
7. Ürün Özellikleri
| Şartname | Detay |
|---|---|
| Marka | MOOG |
| Üretici | MOOG Şasi Ürünleri |
| Model Numarası | K9820 |
| Ürün Ağırlığı | 11.2 ons |
| Ürün Boyutları | 5.25 x 3.31 x 2.75 inç |
| Konum | Ön |
| Üretici Parça Numarası | K9820 |
| OEM Parça Numarası | K9820 |
| İlk Mevcut Tarih | 1 Haziran 2006 |
8. Garanti ve Destek
For warranty information or technical support regarding your MOOG K9820 Suspension Ball Joint, please refer to the official MOOG webSite üzerinden satın alabilir veya müşteri hizmetleri departmanıyla iletişime geçebilirsiniz. Garanti talepleriniz için satın alma fişinizi saklayın.
Çevrimiçi Kaynaklar: Ziyaret etmek moogparts.com for additional technical tips and product information.


