1. Giriş
Thank you for choosing the THOMSON TDF-1001P Digital Photo Frame. This device allows you to display your favorite photos and videos, play music, and utilize features like a calendar, clock, and alarm. With Wi-Fi connectivity, you can easily share media and receive weather updates. Please read this manual thoroughly before operating the device to ensure proper use and maintenance.
2. Güvenlik Bilgileri
- Cihazı neme, yağmura veya aşırı sıcaklıklara maruz bırakmayın.
- Cihazı ısı kaynaklarının yakınına veya doğrudan güneş ışığına maruz bırakmaktan kaçının.
- Yalnızca ürünle birlikte verilen güç adaptörünü kullanın. Yetkisiz adaptörlerin kullanılması cihaza zarar verebilir ve garantiyi geçersiz kılabilir.
- Cihazı kendiniz sökmeye veya onarmaya çalışmayın. Tüm bakım işlemlerini yetkili personele yaptırın.
- Cihazı güçlü manyetik alanlardan uzak tutun.
- Clean the screen with a soft, dry cloth. Do not use liquid cleaners or sprays directly on the screen.
3. Paket İçeriği
Lütfen paketi aşağıdaki öğeler açısından kontrol edin:
- THOMSON TDF-1001P Digital Photo Frame
- Güç Adaptörü
- Kullanım Kılavuzu (bu belge)
- Ayakta durmak (varsa)
4. Ürün Bittiview
Dijital fotoğraf çerçevesinin bileşenlerini tanıyın.
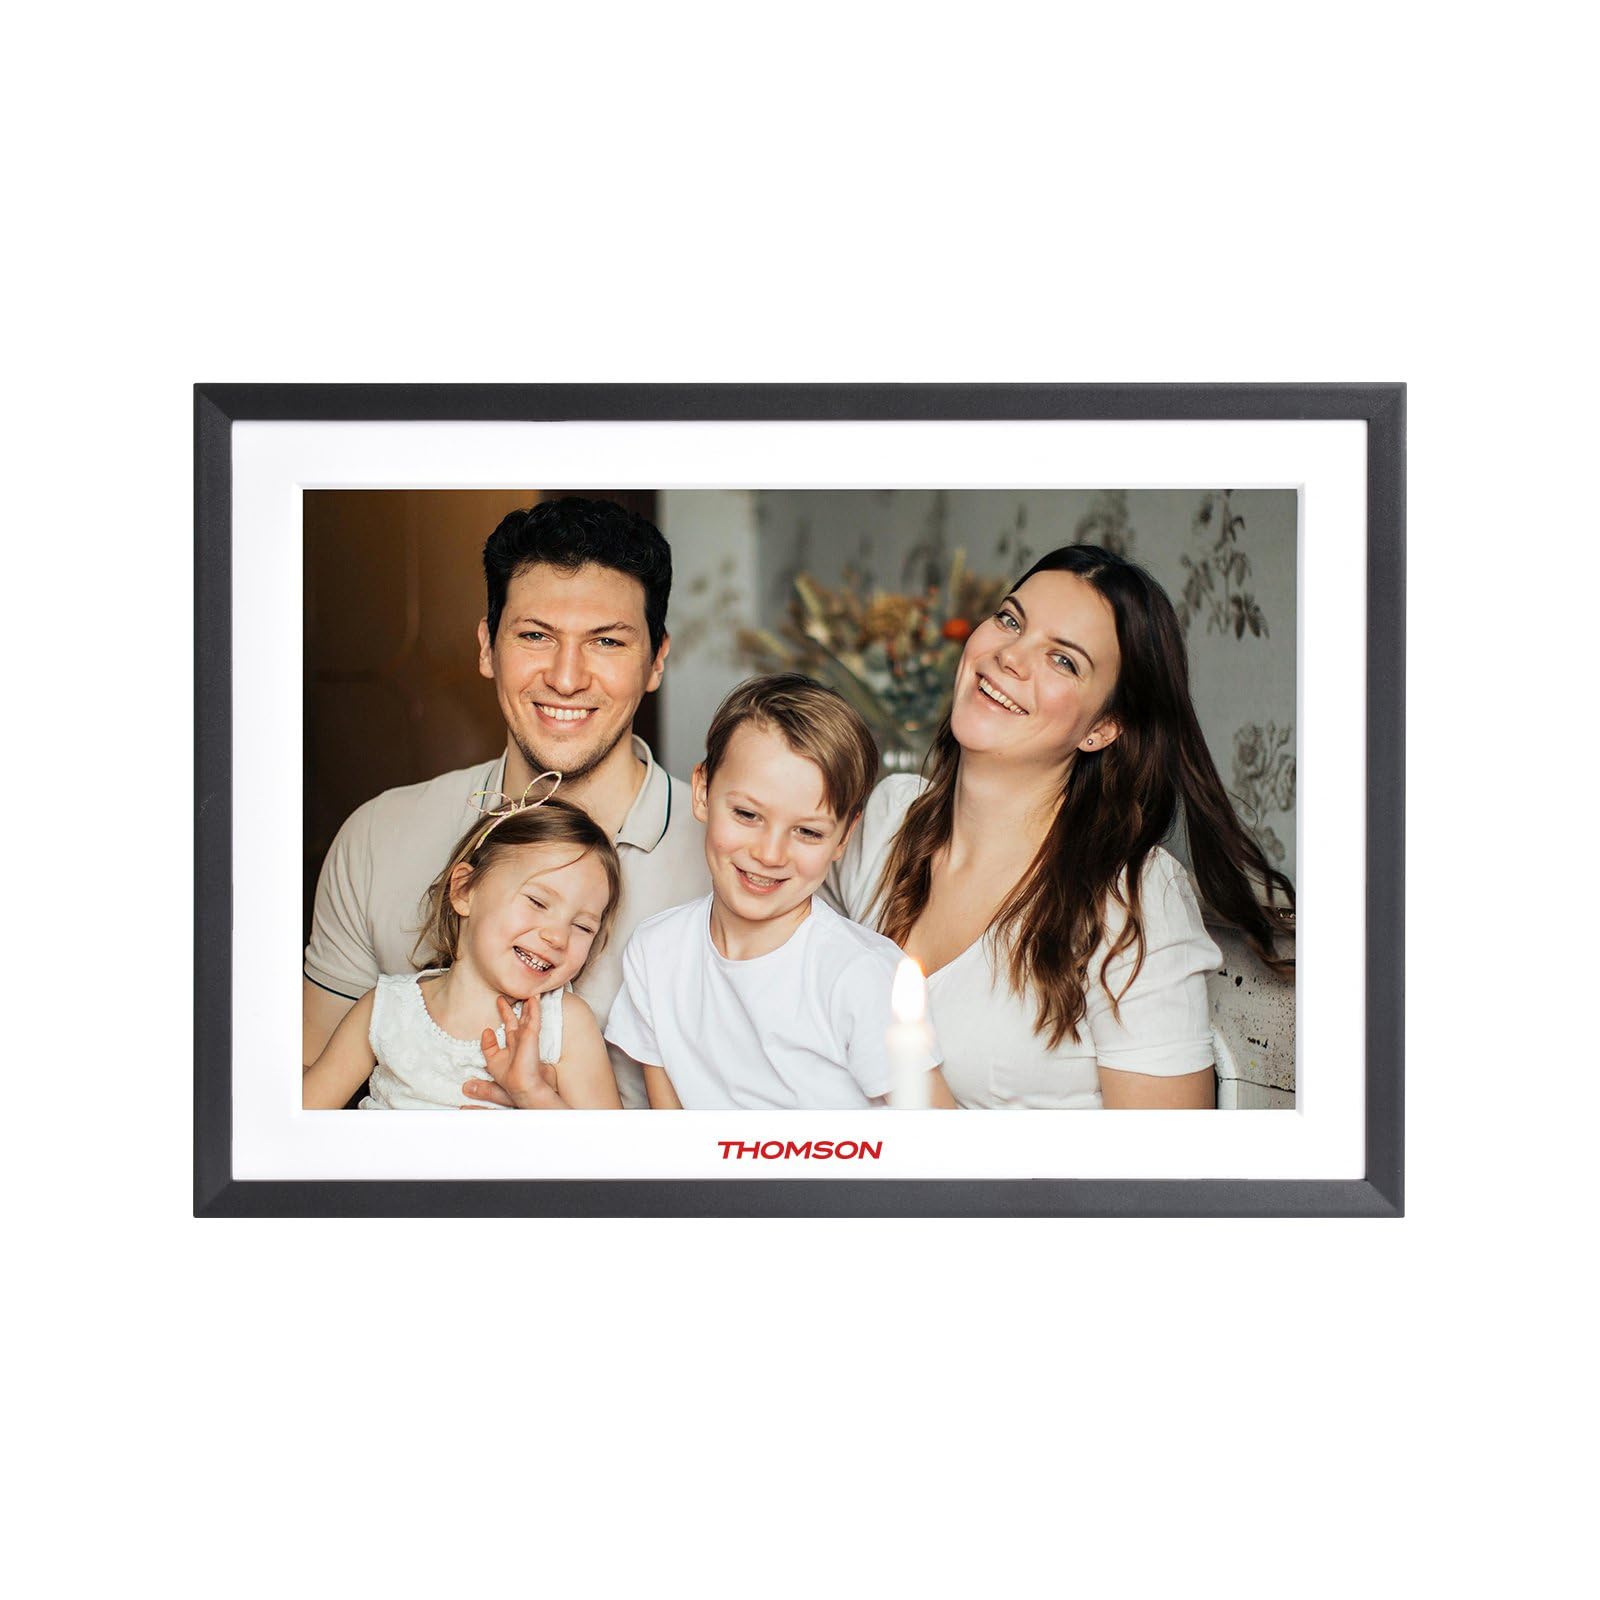
Şekil 4.1: Ön view of the THOMSON TDF-1001P Digital Photo Frame. This image shows the 10.1-inch IPS display with a black frame, designed for clear photo and video playback.
4.1. Ön panel
- 10.1 inç IPS Dokunmatik Ekran: The main display for viewing content and interacting with the device.
4.2. Arka Panel ve Bağlantı Noktaları
The rear panel typically includes various ports for connectivity and power.
- Güç Girişi: Ürünle birlikte verilen güç adaptörüne bağlanır.
- USB Bağlantı Noktası: For connecting USB drives to transfer media.
- SD Kart Yuvası: For inserting SD cards to expand storage or transfer media.
- Sıfırlama Düğmesi: A small pinhole button to reset the device if necessary.
5. Kurulum
5.1. İlk Açılış
- Unpack the digital photo frame and its accessories.
- Attach the stand to the back of the frame, ensuring it is securely fastened.
- Güç adaptörünü çerçevenin üzerindeki güç giriş portuna bağlayın.
- Güç adaptörünü duvardaki prize takın. Çerçeve otomatik olarak açılacaktır.
- Dilinizi ve bölgenizi seçmek için ekrandaki talimatları izleyin.
5.2. Wi-Fi Bağlantısı
Connecting to Wi-Fi enables online features like photo sharing and weather updates.
- Ana menüden 'Ayarlar'a dokunun.
- Select 'Wi-Fi' or 'Network Settings'.
- Toggle Wi-Fi to 'On'. The frame will scan for available networks.
- İstediğiniz Wi-Fi ağını listeden seçin.
- Ekran klavyesini kullanarak Wi-Fi şifresini girin ve 'Bağlan'a dokunun.
- Bağlandığınızda durum çubuğunda Wi-Fi simgesi görünecektir.
5.3. App Setup for Sharing
To share photos and videos via Wi-Fi, you will need to install the dedicated app on your smartphone.
- Locate the app name or QR code in the frame's settings under 'Cloud Services' or 'App Connection'.
- Download and install the app on your smartphone from your device's app store.
- Uygulamayı açın ve bir hesap oluşturun veya giriş yapın.
- Follow the app's instructions to pair your smartphone with the digital photo frame, typically by scanning a QR code displayed on the frame or entering a unique device ID.
- Once paired, you can send photos and videos directly from your smartphone to the frame.
6. Dijital Fotoğraf Çerçevesinin Kullanımı
6.1. Arayüzde Gezinme
The frame features a touch screen for easy navigation. Tap icons to open applications and swipe to browse content or menus.
6.2. Photo and Video Playback
- From the main menu, tap the 'Photos' or 'Gallery' icon.
- Select the source of your media (Internal Storage, SD Card, USB Drive, or Cloud/App).
- Browse through your albums or individual files. Tap on a photo or video to view BT.
- During playback, you can typically swipe left/right to navigate between files, or tap the screen to reveal playback controls (play/pause, next, previous, rotate, delete).
6.3. Müzik Çalma
- Tap the 'Music' icon from the main menu.
- Select the source of your music files.
- Browse and tap on a song to begin playback.
- Use the on-screen controls for play/pause, skip, volume adjustment, and repeat modes.
6.4. Calendar, Clock, and Alarm
- Takvim: Tap the 'Calendar' icon to view the current date and month. Some models may allow adding events.
- Saat: The current time is usually displayed on the home screen. Time settings can be adjusted in the 'Settings' menu.
- Alarm: Access the 'Alarm' function via the main menu or 'Settings'. You can set multiple alarms with custom times and sounds.
6.5. Weather Updates
If connected to Wi-Fi, the frame can display local weather information.
- Çerçevenin Wi-Fi'ye bağlı olduğundan emin olun.
- Go to 'Settings' and find 'Weather' or 'Location Services'.
- Enable weather updates and set your location (either automatically or manually).
- The weather forecast will then be displayed on the home screen or a dedicated weather widget.
7. Bakım
7.1. Cihazın Temizlenmesi
- Temizlemeden önce mutlaka cihazınızı kapatın ve fişini çekin.
- Ekranı ve çerçeveyi yumuşak, tüy bırakmayan bir bezle nazikçe silin.
- Ekrandaki inatçı lekeler için, hafifçe silin.ampen the cloth with water or a screen-safe cleaning solution, then wipe gently. Do not spray liquids directly onto the screen.
- Aşındırıcı temizleyicilerden veya çözücülerden kaçının.
7.2. Depolama
When not in use for extended periods, store the digital photo frame in a cool, dry place, away from direct sunlight and extreme temperatures. It is recommended to keep the original packaging for storage.
8. Sorun Giderme
Bu bölümde karşılaşabileceğiniz yaygın sorunlar ele alınmaktadır.
| Sorun | Olası Neden | Çözüm |
|---|---|---|
| Çerçeve açılmıyor. | Güç adaptörü bağlı değil veya arızalı. | Güç adaptörünün çerçeveye ve çalışan bir elektrik prizine güvenli bir şekilde bağlı olduğundan emin olun. Farklı bir priz deneyin. |
| Wi-Fi'ye bağlanılamıyor. | Yanlış parola, kapsama alanı dışında olma veya yönlendirici sorunu. | Verify the Wi-Fi password. Move the frame closer to the router. Restart your Wi-Fi router. |
| Fotoğraflar/videolar görüntülenmiyor. | Desteklenmiyor file biçim, bozuk files, or incorrect source selected. | Emin olmak files are in supported formats (e.g., JPEG for photos, MP4 for videos). Check if the files are corrupted. Select the correct storage source (SD card, USB, internal). |
| Dokunmatik ekran çalışmıyor. | Geçici yazılım hatası. | Restart the frame by unplugging and replugging the power adapter. If the issue persists, use a pin to press the reset button on the back. |
9. Özellikler
| Özellik | Şartname |
|---|---|
| Örnek | TDF-1001P |
| Ekran Boyutu | 10.1 inç |
| Çözünürlük | 800 * 1280 IPS |
| En Boy Oranı | 16:10 |
| Internal Flash Storage | 32 GB |
| Dokunmatik Ekran | G+P Type |
| Bağlantı | Wifi |
| Fonksiyonlar | Photo, Music, Video, Calendar, Clock, Alarm, Weather, Wi-Fi Sharing |
| Malzeme | Plastic black frame and white middle frame |
| Ürün Boyutları (U x G) | 7.25"U x 10.44"G |
| Güç Kaynağı | Kablolu Elektrik |
10. Garanti Bilgileri
The THOMSON TDF-1001P Digital Photo Frame comes with a 1 yıllık sınırlı garanti from the date of purchase. This warranty covers manufacturing defects in materials and workmanship under normal use. It does not cover damage caused by misuse, accidents, unauthorized modifications, or external causes such as power surges.
Please retain your proof of purchase for warranty claims. For detailed warranty terms and conditions, refer to the warranty card included in your package or contact customer support.
11. Müşteri Desteği
If you have any questions, require technical assistance, or need to make a warranty claim, please contact THOMSON customer support. Refer to the contact information provided on the product packaging or the official THOMSON webalan.
When contacting support, please have your product model number (TDF-1001P) and proof of purchase readily available.