giriiş
This manual provides detailed instructions for the proper setup, operation, and maintenance of your Dumborc 2.4Ghz 10-Channel P10F Receiver. Designed for use with RC cars, boats, and tanks, this receiver offers reliable 2.4Ghz communication and a range of features to enhance your remote control experience. Please read this manual thoroughly before using the product to ensure safe and optimal performance.
The P10F receiver operates within a voltage range of 4.8-10V and has an operating current of 30mA. It supports high-voltage servos and includes essential functions such as fail-safe protection.
Ürün Bittiview
Familiarize yourself with the receiver's components and connection points.

Resim 1: Tepe view of the Dumborc P10F receiver, highlighting the left and right key definitions and various ports. This image shows the layout of the receiver with labels for channels, power input, and control buttons.

Resim 2: Diagram illustrating the receiver's function, showing channel assignments and button locations. Channels 1-5 are on the right, and channels 6-10 are on the left. The 'Mode' and 'Bind' buttons are clearly marked.
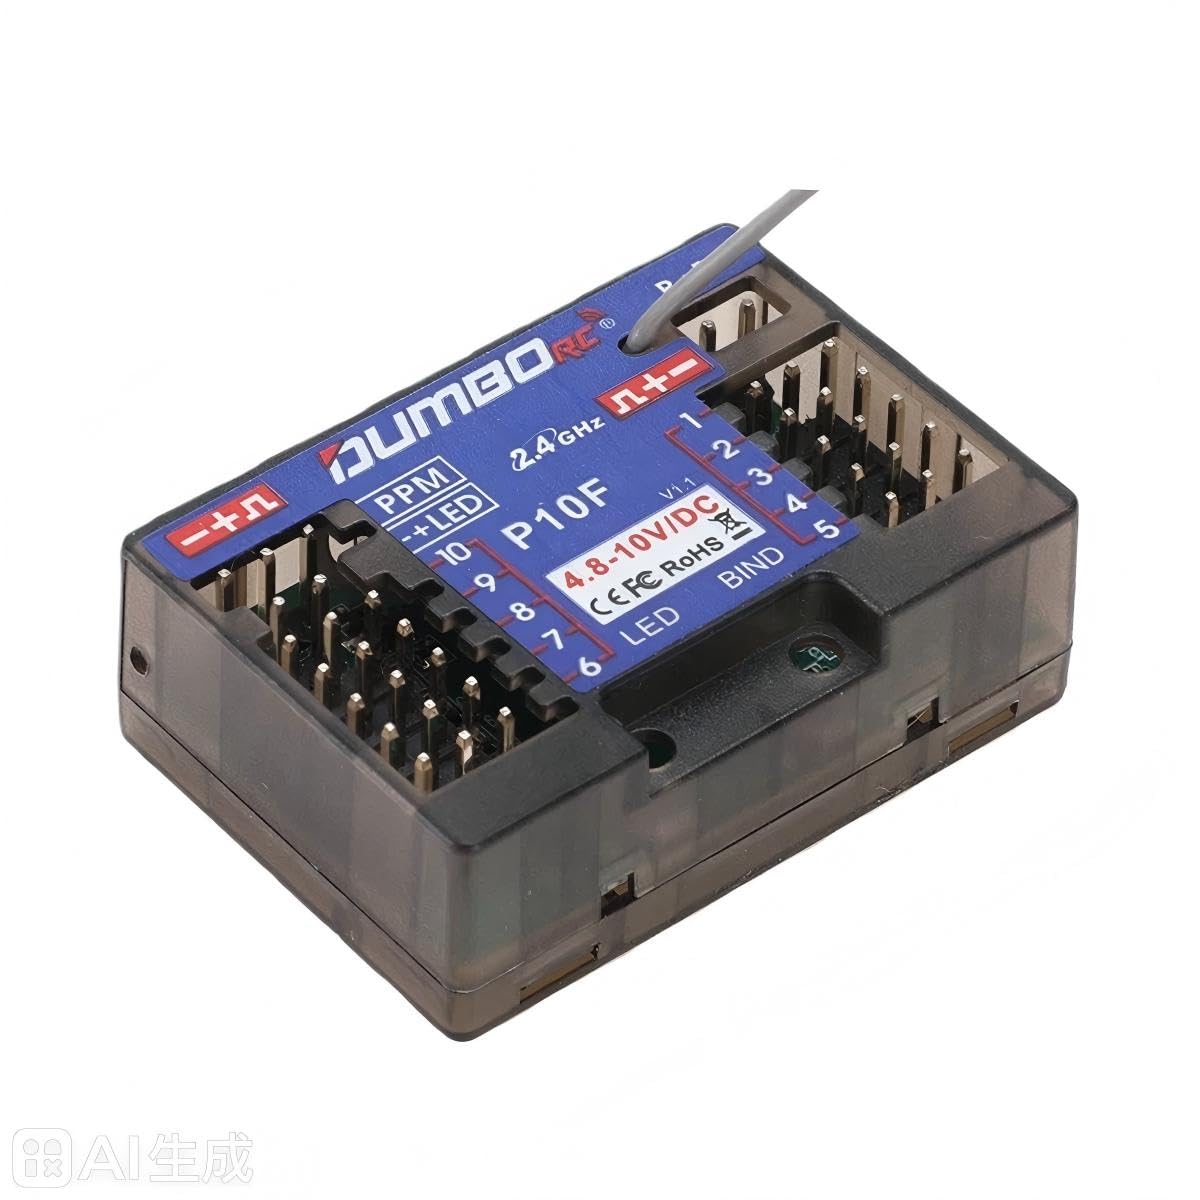
Resim 3: Açılı view of the Dumborc P10F receiver, showing its compact size and antenna. This provides a clear perspective of the physical product.
Kurulum ve Bağlama
Follow these steps to properly set up and bind your P10F receiver with your transmitter.
Alıcı Bağlantıları:
- Connect your servos, ESC (Electronic Speed Controller), and other accessories to the corresponding channels (CH1-CH10) on the receiver. Refer to Resim 2 for channel layout.
- Ensure the power supply (4.8-10V DC) is connected to the designated power input pins (B+ B- or 4.8-10V/DC).
Bağlama Prosedürü:
- Turn on your transmitter and ensure it is in binding mode (refer to your transmitter's manual for specific instructions).
- Connect power to the receiver. The LED indicator on the receiver should start flashing.
- Basılı tutun BAĞLAMAK button on the receiver (located near channel 5, as shown in Resim 2).
- Release the BIND button once the LED on the receiver turns solid, indicating a successful bind.
- Test all channels to ensure proper communication between the transmitter and receiver.
Key Definitions (Refer to Image 1):
Left Key Definitions:
- Press 1 to switch the gyro direction (Note: This function applies to P10FG models with gyro. The P10F model does not include gyro functionality.)
- Short press 3 to turn the gyroscope on/off (Note: This function applies to P10FG models with gyro. The P10F model does not include gyro functionality.)
- Hold down to set EPA (End Point Adjustment).
Right Key Definitions:
- Press and hold for 3 seconds to set runaway protection (Fail-Safe).
- Press 1 to set runaway protection (Fail-Safe).
- Press 2 to control any channel indicator.
- Press 3 to enable PPM mode.
Kullanım Talimatları
Once the receiver is bound to your transmitter, you can begin operating your RC model.
- Normal Çalışma: After successful binding, the receiver's LED will be solid, indicating a stable connection. Control your model using your transmitter.
- Fail-Safe Protection: The receiver features a fail-safe function. To set it, press and hold the right key for 3 seconds, or press the right key 1 (as per Image 1). This function ensures that if signal is lost, the model will return to a pre-set safe state (e.g., throttle to neutral, steering straight).
- PPM Modu: To enable PPM mode, press the right key 3 (as per Image 1). This mode is used for specific applications requiring a PPM signal output.
- EPA (Son Nokta Ayarlaması): To set EPA, hold down the left key (as per Image 1). This allows you to adjust the maximum travel of your servos.
Bakım
Proper maintenance will extend the life and ensure the reliability of your receiver.
- Alıcıyı temiz tutun ve toz, kir ve nemden uzak tutun.
- Alıcıyı aşırı sıcaklıklara veya uzun süre doğrudan güneş ışığına maruz bırakmaktan kaçının.
- Her kullanımdan önce tüm bağlantıların güvenli olduğundan emin olun.
- Do not attempt to open the receiver casing, çünkü bu durum olası garantiyi geçersiz kılabilir ve iç bileşenlere zarar verebilir.
- Regularly inspect the antenna for any damage.
Sorun giderme
If you encounter issues with your P10F receiver, refer to the following common problems and solutions:
| Sorun | Olası Neden | Çözüm |
|---|---|---|
| Receiver LED not lighting up or flashing. | Güç yok veya yanlış ses seviyesitage. | Check power connections and ensure voltage, 4.8-10V aralığındadır. |
| Receiver not binding with transmitter. | Incorrect binding procedure, transmitter too far/close, or incompatible transmitter. | Repeat binding steps carefully. Ensure transmitter is compatible and in binding mode. Try binding at a closer distance. |
| No control after binding. | Servos/ESC not connected correctly, or transmitter not sending signals. | Verify all connections to the receiver. Check transmitter battery and settings. |
| Aralıklı sinyal kaybı. | Interference, damaged antenna, or range issues. | Ensure antenna is properly positioned and undamaged. Avoid operating near strong interference sources. Check range. |
Özellikler
- Modeli: P10F
- Kanallar: 10CH
- Alıcı Hacmitage Aralık: 4.8-10V
- Receiver Operating Current: 30mA
- Modülasyon Modu: GFSK
- Spreading Mode: FHSS 67 channel pseudo-random frequency hopping
- Ürün Ölçüleri: 40 mm x 35 mm x 13 mm (1.53 x 1.1 x 0.51 inç)
- Ürün Ağırlığı: Yaklaşık 32 gram (1.13 ons)
- Uyumluluk: RC Car, Boat, Tank Models

Resim 4: Ayrıntılı view of the Dumborc P10F receiver, showing its physical dimensions (39mm, 28mm, 13mm). This image helps in understanding the compact size of the receiver.
Garanti ve Destek
This product is manufactured by Dumborc. For any warranty claims or technical support, please refer to the retailer where you purchased the product or contact Dumborc customer service directly. Keep your proof of purchase for warranty validation.
Always ensure you are using genuine parts and accessories to maintain product performance and warranty validity.