
1. Giriş
This manual provides detailed instructions for the installation, operation, and maintenance of your JOOAN 4G Solar Security Camera. This outdoor wireless surveillance camera is designed for areas without traditional power or network infrastructure, utilizing 4G cellular connectivity and solar power for continuous operation. Please read this manual thoroughly before use to ensure proper setup and functionality.

Image 1.1: JOOAN 4G Solar Security Camera with its solar panel and a smartphone displaying the camera's live feed, highlighting its 4MP/5MP HD resolution capability.
2. Ürün Özellikleri
- 4G Bağlantısı: Operates independently using a SIM card, ideal for remote locations.
- Güneş Enerjili: Equipped with a solar panel for continuous charging, reducing the need for external power sources.
- High Definition Resolution: Net video görüntüleri yakalar.tage for effective surveillance.
- Renkli Gece Görüşü: Offers multiple night vision modes including infrared, full-color, and smart color night vision for enhanced visibility in low-light conditions up to 10 meters.
- Yerel ve Bulut Depolama: Supports up to 256GB SD card storage and optional cloud storage for recorded footage.
- Kolay Kurulum: Designed for straightforward setup and mounting.
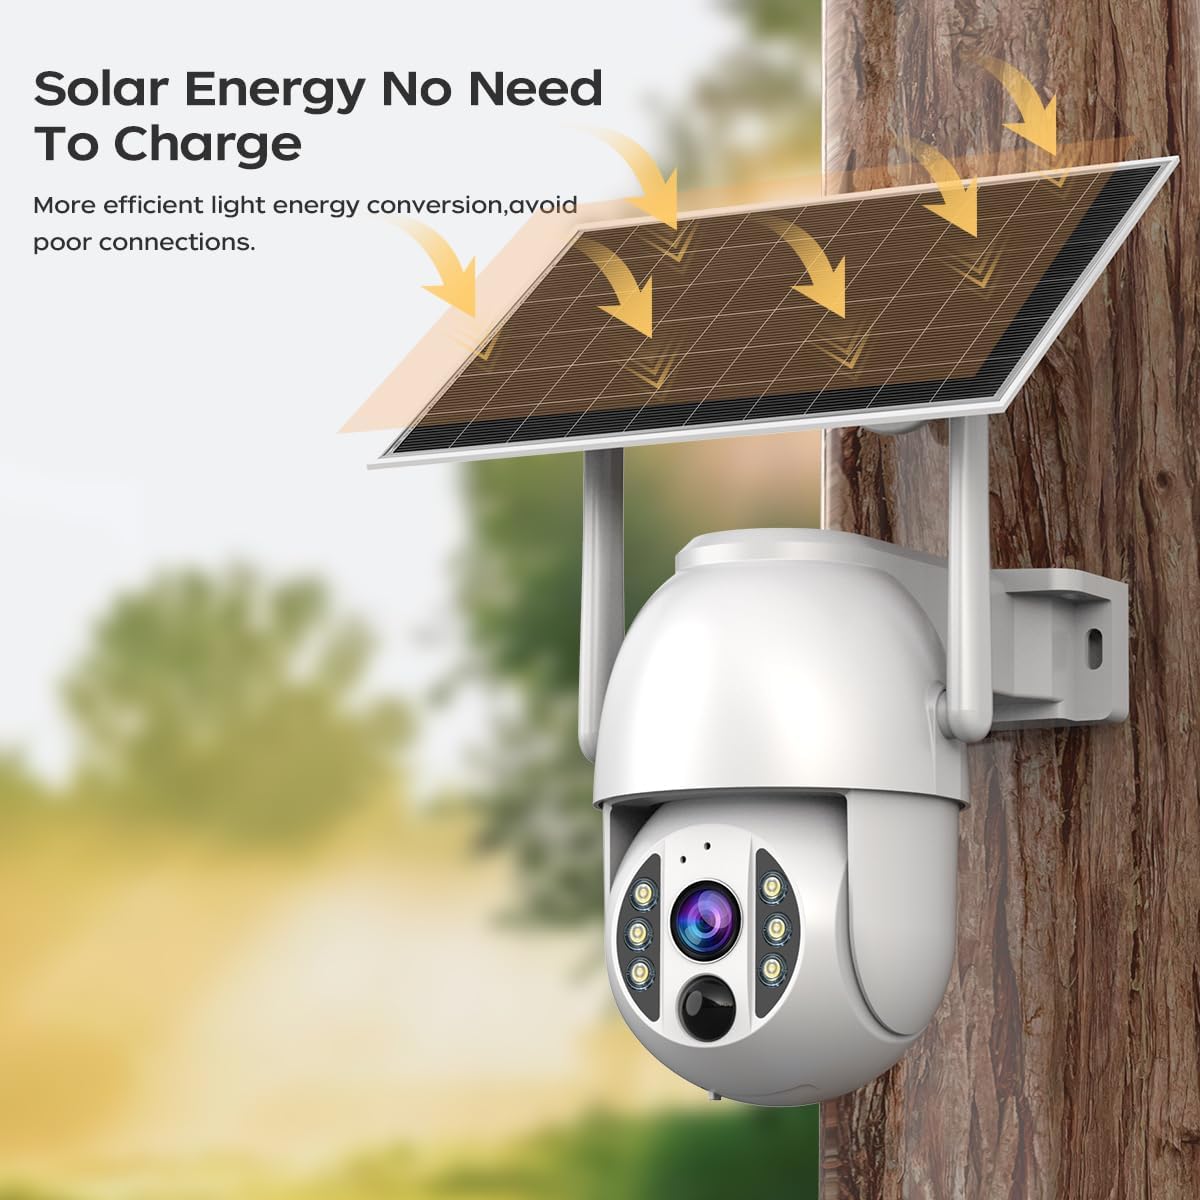
Image 2.1: The JOOAN 4G Solar Security Camera mounted with its solar panel, illustrating its solar energy capability for efficient light energy conversion and avoiding poor connections.
3. Kurulum ve Kurulum
3.1. SIM Kart ve SD Kart Takılması
Before mounting, install a 4G SIM card (not included) and an SD card (up to 256GB, not included) into the designated slots on the camera. Ensure the camera is powered off before inserting or removing cards.

Resim 3.1: Yakın çekim view of the JOOAN camera's SD card slot, indicating support for cloud storage and a maximum 256GB SD card.
3.2. Montaj Adımları
- Pozisyon Alma ve Yumruk Atma: Select a suitable location for the camera and solar panel. Mark the drilling points on the wall. Use a drill to create holes at the marked positions.
- Genleşme Vidalarını Takın: Gently tap the expansion screws into the drilled holes until they are flush with the surface.
- Kamerayı Monte Edin: Align the camera bracket with the expansion screws and secure it using the provided screws.
- Kurulumu Tamamla: Attach the solar panel to the camera bracket or mount it separately in a location with ample sunlight. Ensure all connections are secure.

Image 3.2: Visual guide showing the four installation steps: 1. Positioning and punching, 2. Inserting expansion screws, 3. Mounting the camera with screws, and 4. Completing the installation with the solar panel.
3.3. Uygulama Bağlantısı
Download the official JOOAN app from your smartphone's app store. Follow the in-app instructions to add your camera. There are typically two methods:
- Add APP Phone Code: Scan the QR code displayed on your mobile phone APP with the camera lens from a distance of 20-30cm to add the distribution network.
- Add Camera Body Code: Scan the QR code located on the camera body using the mobile phone APP to add the distribution network.

Image 3.3: Illustration of the two connection methods: scanning the APP phone code or scanning the camera body code to establish a network connection.
4. Operasyon
4.1. Açma/Kapama
The camera automatically powers on when sufficient solar power is available or when connected to a power source. To power off, disconnect the power source and allow the battery to deplete, or use the app if a power-off function is available.
4.2. Canlı View ve Kayıt
Once connected to the app, you can access the live video feed. The camera supports continuous recording to the SD card or cloud storage (subscription may be required). You can also manually record video or capture screenshots from the live view.
4.3. Hareket Algılama ve Uyarılar
Configure motion detection sensitivity and alert settings within the app. The camera will send notifications to your smartphone when motion is detected. Recorded events can be reviewed in the app's playback section.
4.4. Gece Görüş Modları
The camera offers three night vision modes, selectable via the app:
- Kızılötesi Gece Görüşü: Tamamen karanlıkta bile net siyah beyaz görüntüler sağlar.
- Tam Renkli Gece Görüşü: Düşük ışık koşullarında renkli görüntüler sağlamak için dahili spot ışıklarını kullanır.
- Akıllı Renkli Gece Görüşü: Automatically switches from infrared to full-color vision upon detection of motion or specific events.

Image 4.1: Comparison of the three night vision modes: Infrared night vision, Full color night vision, and Smart color night vision, demonstrating the camera's ability to pick out details in darkness up to 10 meters away.
5. Bakım
- Lensin Temizlenmesi: Net görüntü kalitesi sağlamak için kamera lensini düzenli olarak yumuşak, kuru bir bezle temizleyin. Aşındırıcı temizleyicilerden kaçının.
- Güneş Paneli Temizliği: Keep the solar panel free from dust, dirt, and debris to maximize charging efficiency. Clean with a damp ihtiyaç halinde bez.
- Donanım Yazılımı Güncellemeleri: Check the app periodically for available firmware updates to ensure optimal performance and security.
- Pil Sağlığı: Ensure the solar panel receives adequate sunlight to maintain battery charge. Prolonged periods without sunlight may require temporary charging via a USB power adapter (not included).
6. Sorun Giderme
6.1. Camera Not Connecting to 4G Network
- SIM kartın doğru şekilde takıldığından ve geçerli bir veri planıyla etkinleştirildiğinden emin olun.
- Check 4G signal strength at the camera's location.
- Restart the camera by briefly disconnecting and reconnecting its power.
6.2. No Video Feed or Poor Quality
- Verify the camera has sufficient power.
- Check the 4G signal strength.
- Kamera lensini temizleyin.
6.3. Güneş Paneli Şarj Olmuyor
- Güneş panelinin günde birkaç saat doğrudan güneş ışığı alacak şekilde konumlandırıldığından emin olun.
- Clean any dirt or obstructions from the solar panel surface.
- Güneş paneli ile kamera arasındaki bağlantı kablosunu kontrol edin.
6.4. SD Card Not Recording
- SD kartın doğru şekilde takıldığından ve uygulama içinde biçimlendirildiğinden emin olun.
- SD kartta yeterli boş alan olup olmadığını kontrol edin.
- Uygulamadaki kayıt ayarlarını doğrulayın.
7. Özellikler
| Özellik | Detay |
|---|---|
| Marka | JOOAN |
| Örnek | B0GCFGYCLX |
| Güç Kaynağı | Güneş Enerjili |
| Bağlantı Protokolü | 4G Cellular (SIM card required), Wi-Fi (for initial setup/local access if applicable) |
| Önerilen Kullanımlar | İç/Dış Mekan Gözetimi |
| Özel Özellik | Kurulumu Kolay |
| Depolamak | Supports up to 256GB SD card, Cloud Storage (subscription may apply) |
8. Garanti ve Destek
For warranty information and technical support, please refer to the JOOAN official webSite üzerinden satın alabilir veya doğrudan müşteri hizmetleriyle iletişime geçebilirsiniz. Satın alma belgenizi saklayın.
Daha fazla yardım için lütfen şu adresi ziyaret edin: JOOAN Mağazası Amazon'da