
1. Önemli Güvenlik Bilgileri
Please read all instructions carefully before operating the appliance. Retain this manual for future reference. Always follow basic safety precautions to reduce the risk of fire, electric shock, and injury.
- Cihazın düzgün topraklanmış bir elektrik prizine bağlı olduğundan emin olun.
- Güç kablosunu, fişini veya cihazı suya veya başka sıvılara batırmayın.
- Temizlemeden önce veya kullanılmadığı zaman cihazın fişini prizden çekin.
- Hasarlı bir kablo veya fiş ile cihazı çalıştırmayın.
- Cihazı ısı kaynaklarından ve doğrudan güneş ışığından uzak tutun.
- Bu cihaz yalnızca evlerde kullanıma yöneliktir.
2. Ürün Bittiview
The EUHOMY IM046-S is a countertop ice ball maker designed to produce crystal-clear, slow-melting 2-inch ice spheres. It features a self-cleaning function and offers both manual and automatic water refill options.

Resim 2.1: Ön view of the EUHOMY IM046-S Ice Ball Maker, showcasing its compact design and the ice spheres inside.
3. Kurulum
3.1 Paketin açılması
- Buz makinesini ambalajından dikkatlice çıkarın.
- Check that all included components are present: Ice Maker Machine, Inlet Pipe, Instruction Manual, Ice Clamp.
- Remove any protective film or tape from the appliance.
3.2 Yerleştirme
Place the ice maker on a stable, level surface away from direct sunlight and heat sources. Ensure there is adequate ventilation around the unit. The product dimensions are 17.6"D x 12.6"W x 17.9"H.

Image 3.1: Product dimensions (Length: 12.6 in, Width: 17.6 in, Height: 17.9 in) and key specifications.
3.3 Su Dolumu
The ice maker offers two methods for adding water:
- Manuel Doldurma: Open the water inlet cover and pour clean drinking water directly into the reservoir.
- Otomatik Doldurma: Connect the provided inlet pipe to a water line for continuous water supply.

Image 3.2: Illustration of the two water filling methods: manual pour and automatic water line connection.
3.4 İlk Temizlik
Before first use, perform a self-cleaning cycle. Refer to the 'Maintenance' section for detailed instructions on using the self-cleaning function.
4. Kullanım Talimatları
4.1 Kontrol Paneli
The ice maker features an intuitive touch control panel. Familiarize yourself with the buttons and indicators:
- Güç Düğmesi: Cihazı açar veya kapatır.
- Temizleme Düğmesi: Kendi kendini temizleme döngüsünü başlatır.
- su kıyısıtage Uyarı: Indicates when the water reservoir needs refilling.
- Door Alert: Indicates if the door is not properly closed.
- Ice Making Progress Bar: Mevcut s'yi görüntülertage of the ice production cycle.
- Nefes Alma Gösterge Işığı: Provides visual feedback on the machine's status.

Resim 4.1: Ayrıntılı view of the easy touch controls and indicators on the ice maker's display panel.
4.2 Buz Yapımı
- Su haznesinin dolu olduğundan emin olun.
- Basın Güç Düğmesi (right side) to turn on the machine.
- The ice maker will automatically begin the ice production cycle. Four 2-inch ice balls are typically ready in approximately 40 minutes.
- The machine will continue to produce ice until the ice storage capacity is reached or the water level is low.
Video 4.1: This video demonstrates the ice making process, showing the machine producing four ice balls in approximately 40 minutes.
4.3 Buz Depolama
The ice maker has a storage capacity of approximately 30-40 ice balls. The machine is designed to keep ice cold longer through adaptive cooling and high-density PU foam insulation, but it is not a freezer. For long-term storage, transfer ice balls to a freezer.

Image 4.2: The ice maker's large storage capacity, ideal for continuous ice supply.
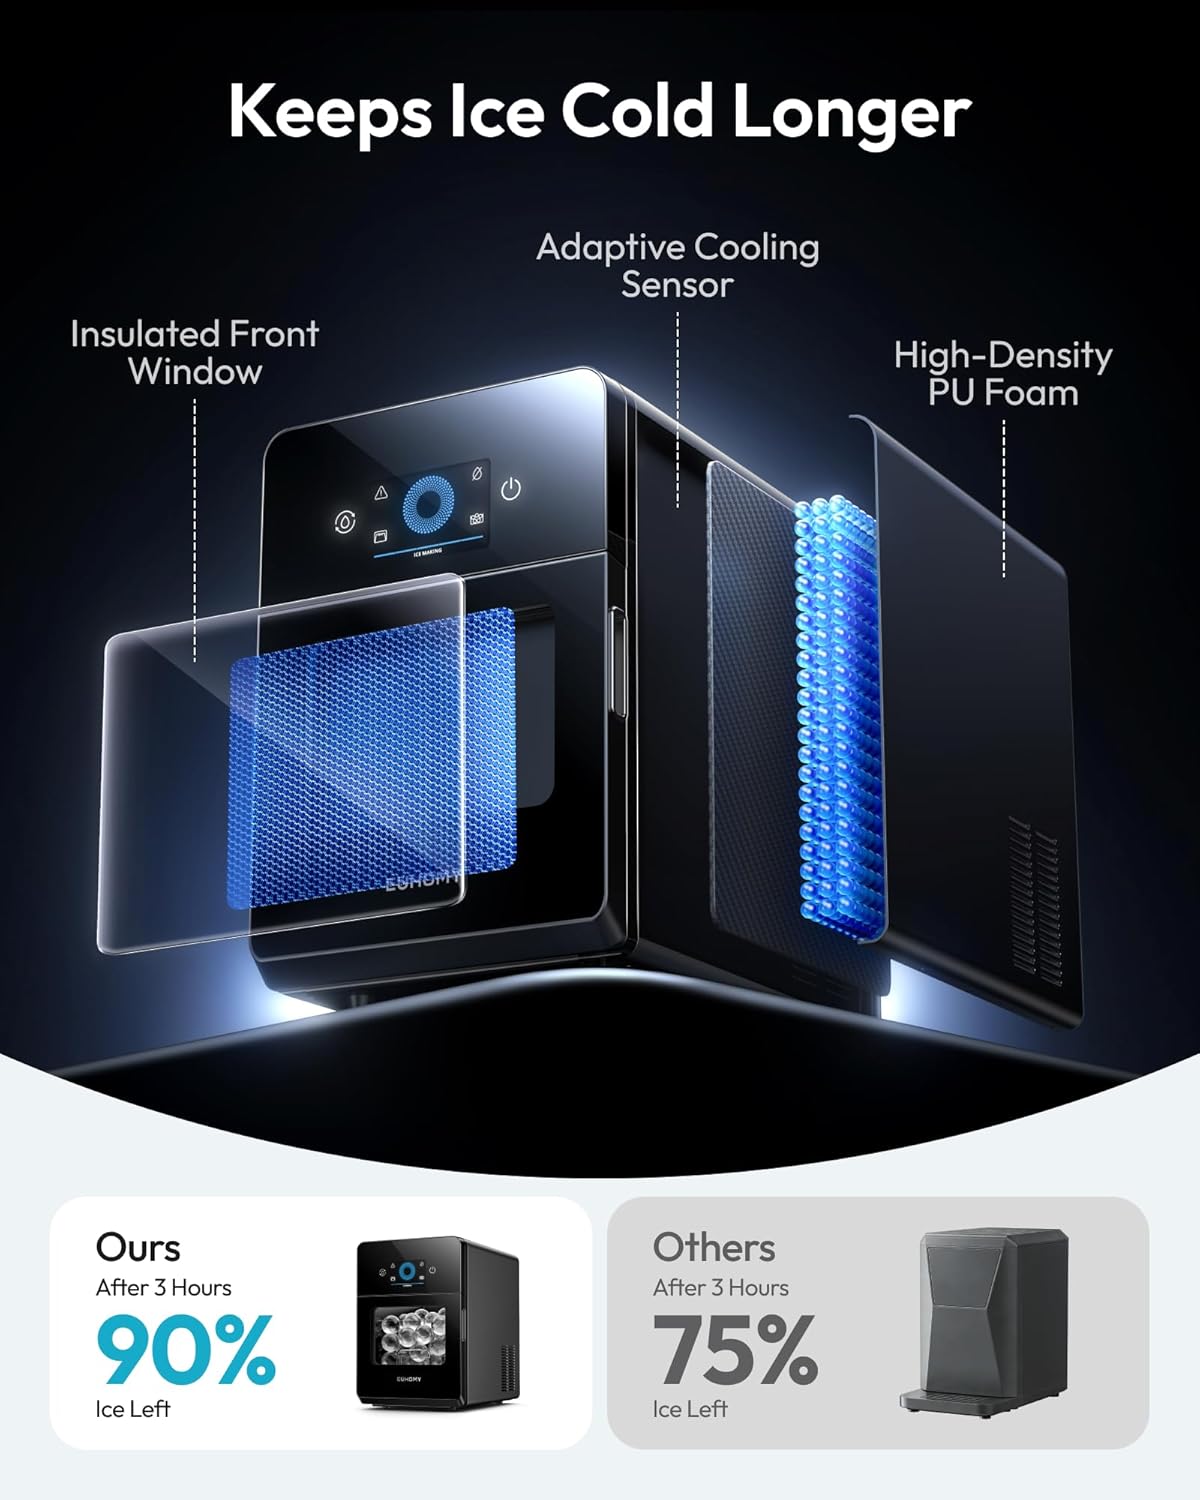
Image 4.3: Internal components demonstrating how the ice maker keeps ice cold longer, including insulation and cooling sensor.
4.4 Water Quality for Clear Ice
The clarity of the ice balls can be influenced by the quality of the water used. For best results and crystal-clear ice, distilled water is recommended. Filtered water also produces good results, while tap water may result in cloudier ice with more bubbles.

Image 4.4: Visual guide to ice clarity based on the Total Dissolved Solids (TDS) level in water, recommending distilled water for optimal results.

Image 4.5: Illustration demonstrating how the 2-inch clear ice spheres melt slower than standard ice cubes, preserving drink flavor.
5. Bakım
5.1 Kendi Kendini Temizleme Fonksiyonu
The ice maker is equipped with an automatic deep cleaning system:
- Su haznesinin temiz suyla doldurulduğundan emin olun.
- Basılı tutun Temizle Düğmesi (left side) for 5 seconds to initiate the thorough cleaning cycle.
- The machine will perform a cleaning process, circulating water to remove impurities.
- Once the cleaning cycle is complete, drain the water as described in section 5.2.

Image 5.1: The self-cleaning feature in action, ensuring hygienic ice production without manual scrubbing.
5.2 Suyun Boşaltılması
To drain water from the appliance:
- Locate the front-edge drain port at the bottom of the unit.
- Place a container under the drain port.
- Suyun dışarı akmasını sağlamak için tahliye tapasını çıkarın.
- Suyu boşalttıktan sonra tahliye tapasını güvenli bir şekilde yerine takın.

Image 5.2: The convenient front-edge drain port for easy water removal without lifting the machine.
5.3 Genel Temizlik
Regularly wipe the exterior of the appliance with a soft, damp cloth. For the interior, in addition to the self-cleaning function, periodically wipe down surfaces with a mild detergent solution and rinse thoroughly. Ensure the appliance is unplugged before any manual cleaning.
6. Sorun Giderme
If you encounter issues with your EUHOMY IM046-S ice ball maker, refer to the following common problems and solutions:
| Sorun | Olası Neden | Çözüm |
|---|---|---|
| Makine açılmıyor | Güç kaynağı yok | Güç kablosu bağlantısını ve duvar prizini kontrol edin. |
| Buz üretimi yok | Low water level; Door not closed; Ambient temperature too high | Refill water reservoir; Ensure door is securely closed; Operate in a cooler environment. |
| Ice balls are cloudy | Kötü su kalitesi | Use filtered or distilled water for clearer ice. |
| su kıyısıtage Alert is on | Su deposu boş | Refill the water reservoir manually or check auto-refill connection. |
| Door Alert is on | Kapı düzgün kapatılmamış | Close the door firmly until the alert disappears. |
Bu çözümleri denedikten sonra sorun devam ederse lütfen müşteri desteğiyle iletişime geçin.
7. Özellikler
| Özellik | Detay |
|---|---|
| Marka | EUHOMY |
| Model Adı | IM046-S |
| Ürün Boyutları | 17.6"D x 12.6"G x 17.9"Y |
| Kapasite | 22 Pounds (Ice Production per Day) |
| Netage | 150 watt |
| Cilttage | 120 Volt |
| Ice Ball Size | 2 inç (50 mm) |
| Ice Making Speed | 4 balls per 40 minutes |
| Günlük Buz Üretimi | Up to 144 balls per day |
| Buz Depolama Kapasitesi | 30-40 balls |
| Net ağırlığı | 40.23 Lbs / 18.25 Kg |
| Soğutucu | R290a |
| Dahil Bileşenler | Ice Maker Machine, Inlet Pipe, Instruction Manual, Ice Clamp |
8. Garanti ve Destek
This EUHOMY ice ball maker comes with a 1 Yıl Üretici Garantisi. For warranty claims, technical support, or any questions regarding the operation or maintenance of your appliance, please contact EUHOMY customer service. Refer to the contact information provided in the packaging or on the official EUHOMY webalan.