
giriiş
This manual provides detailed instructions for the GIGABYTE X870E AORUS ELITE X3D ICE AMD AM5 ATX Motherboard. It covers essential information for installation, operation, maintenance, and troubleshooting to ensure optimal performance and longevity of your system. The X870E AORUS ELITE X3D ICE supports AMD Ryzen 9000, 8000, and 7000 Series Processors, features DDR5 memory support, 16+2+2 power phase design, four M.2 slots, PCIe 5.0, WIFI7, and 5 GbE connectivity.
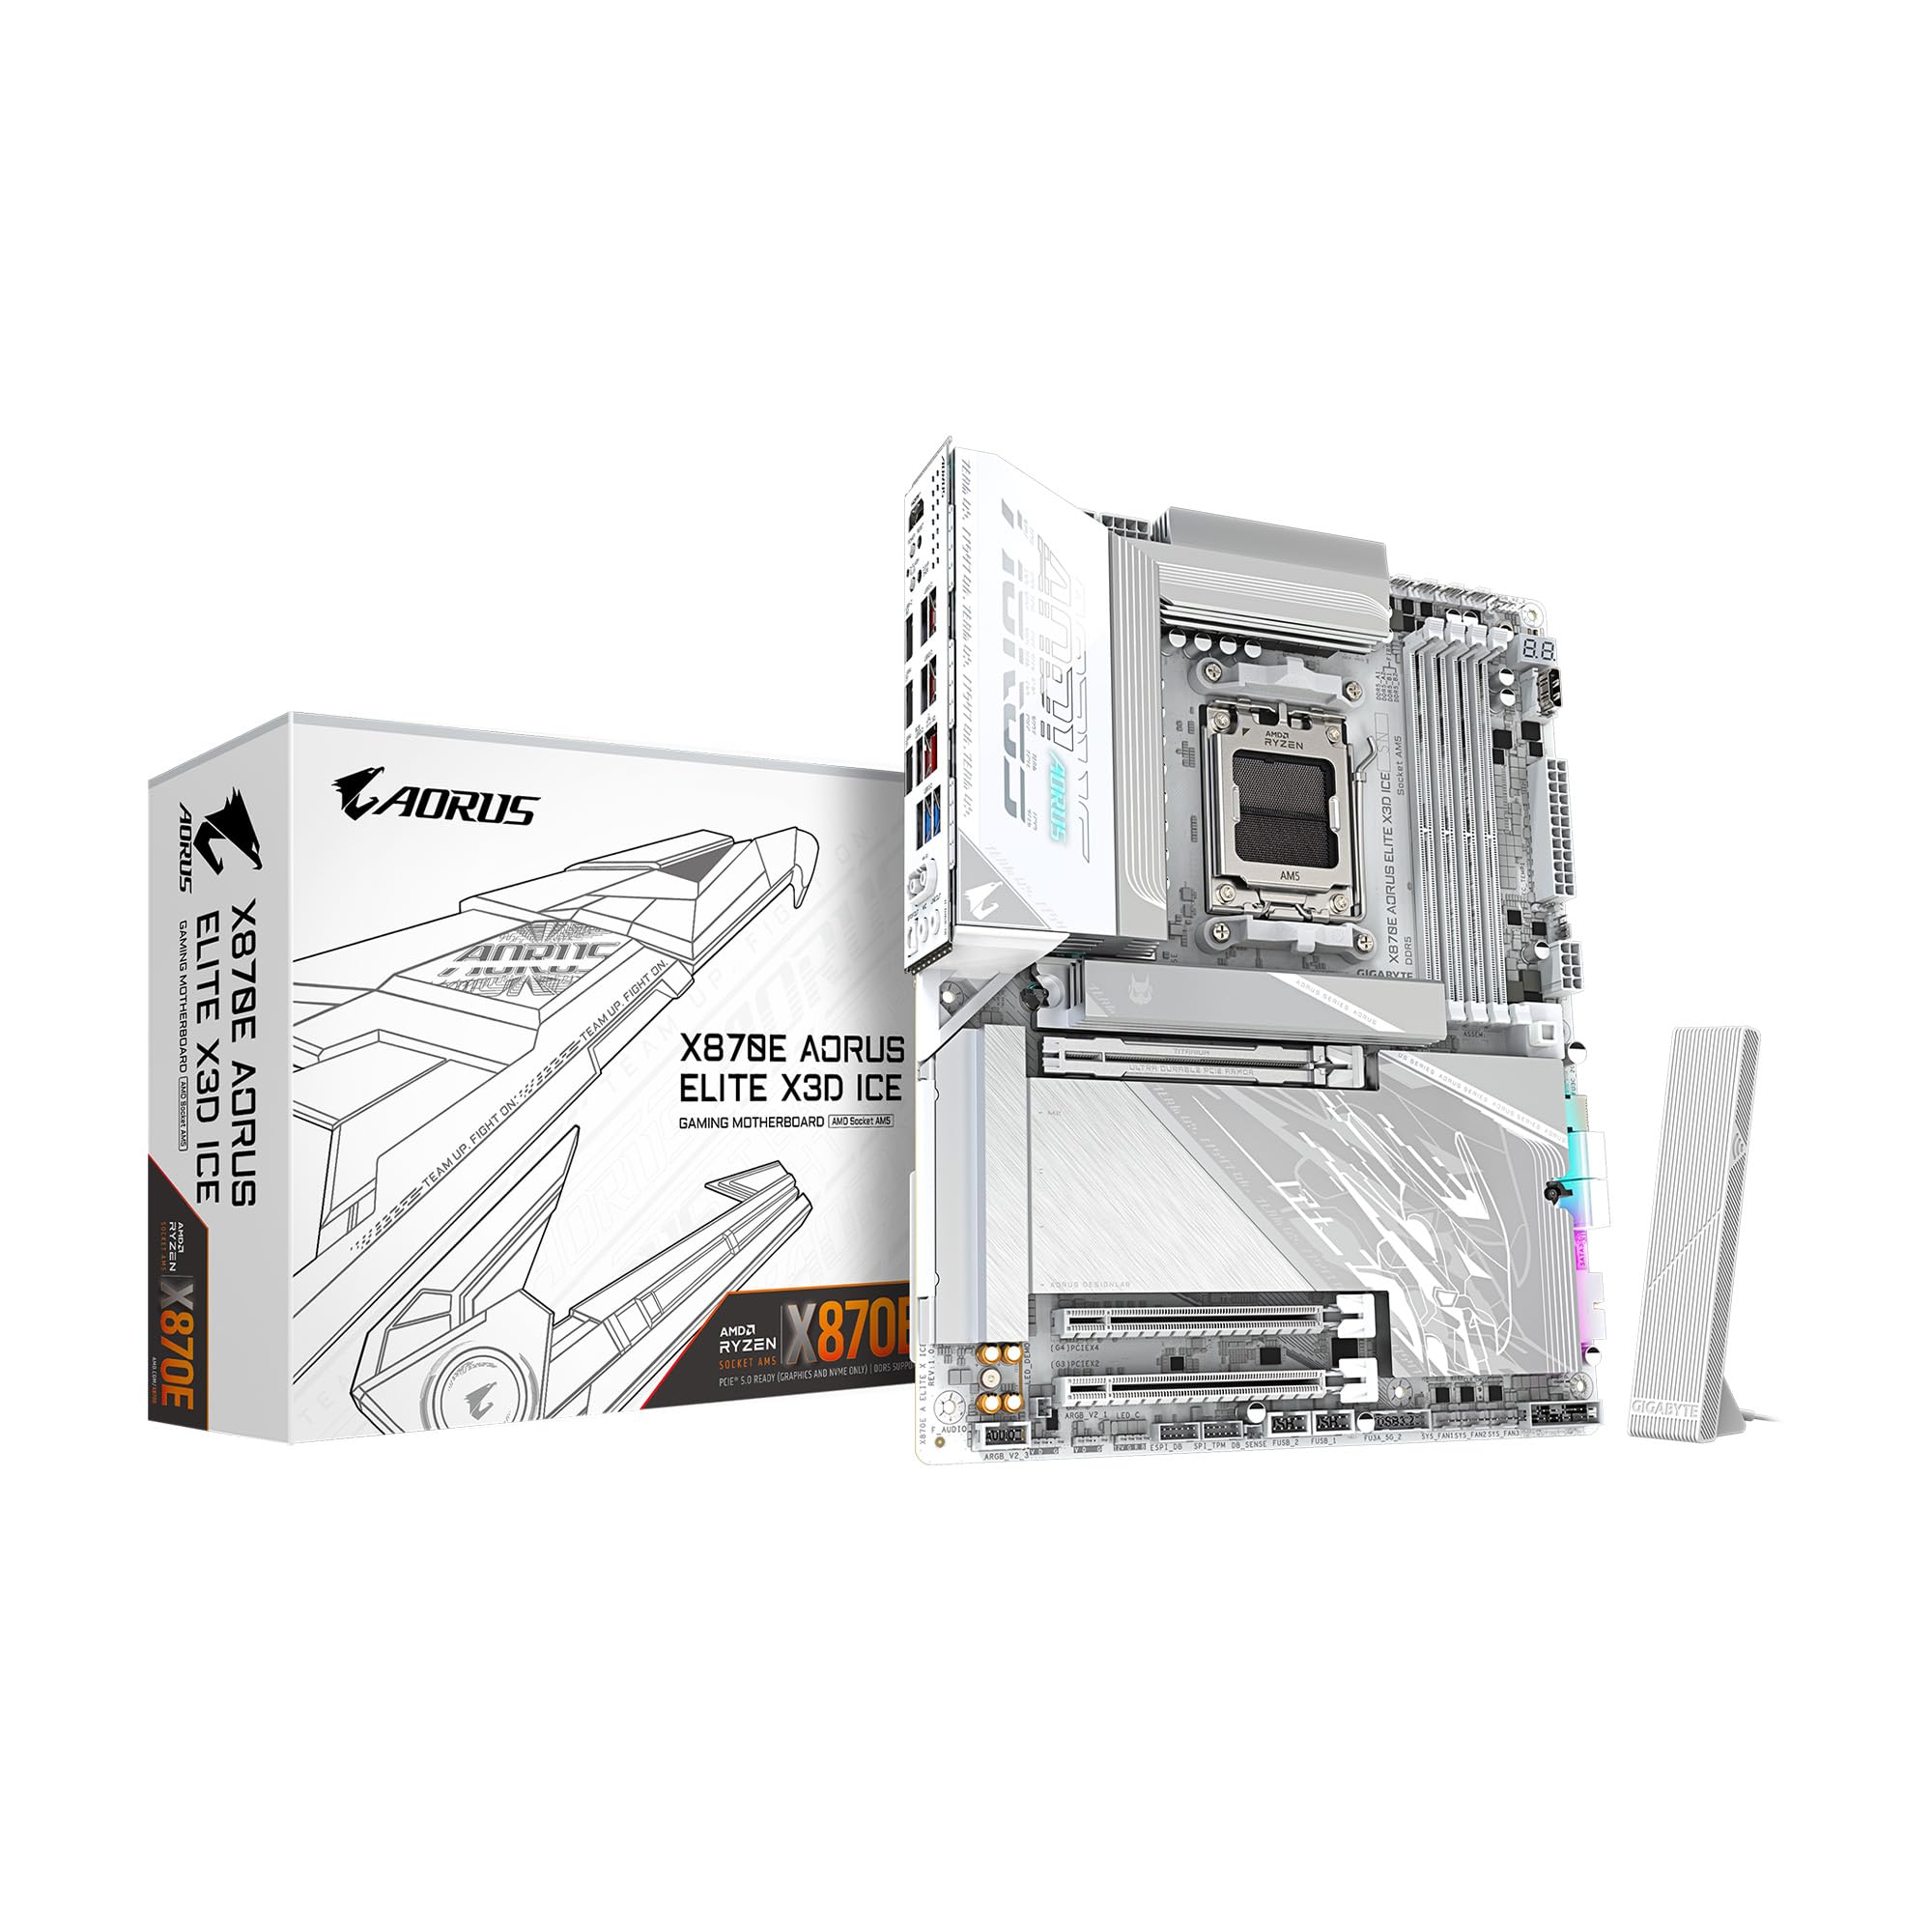
Figure 1: GIGABYTE X870E AORUS ELITE X3D ICE Motherboard, top-down view.
Kurulum ve Yükleme
Sisteminizin kararlılığı ve performansı için doğru kurulum çok önemlidir. Bu adımları dikkatlice izleyin.
1. Anakartın Hazırlanması
- Unpack the motherboard from its anti-static bag.
- Place the motherboard on a non-conductive surface, such as the anti-static bag itself or a cardboard box.
Video 1: Official unboxing of the X870E AORUS ELITE X3D ICE motherboard, showing the contents and initial handling.
2. CPU Kurulumu (AMD AM5 Soketi)
- Anakart üzerinde AM5 CPU soketini bulun.
- Open the CPU retention mechanism by pushing down and away from the socket.
- Carefully align the CPU with the socket, ensuring the golden triangle on the CPU matches the triangle on the socket. Do not force the CPU into place.
- CPU'yu güvence altına almak için tutma mekanizmasını kapatın.

Şekil 2: Yakın çekim view of the AMD AM5 CPU socket on the motherboard, ready for processor installation.
3. Bellek (RAM) Kurulumu
- DDR5 DIMM yuvalarının her iki ucundaki klipsleri açın.
- DDR5 bellek modülündeki çentiği DIMM yuvasındaki anahtarla hizalayın.
- Hafıza modülünü, klipsler yerine oturana kadar yuvaya sıkıca yerleştirin. Her iki klipsin de kapalı olduğundan emin olun.
- For dual-channel configuration, refer to the motherboard manual for specific slot pairing.

Şekil 3: View of the DDR5 memory slots on the motherboard, indicating where RAM modules are installed.
4. M.2 SSD Kurulumu
- Locate the M.2 slots on the motherboard. The X870E AORUS ELITE X3D ICE features two PCIe 5.0 M.2 slots and two PCIe 4.0 M.2 slots.
- Remove the M.2 heatsink and stand-off screw (if present).
- M.2 SSD'yi açılı bir şekilde yuvaya yerleştirin.
- Push down the M.2 SSD and secure it with the stand-off screw or the M.2 EZ-Latch mechanism.
- En iyi termal performans için M.2 soğutucusunu tekrar takın.

Figure 4: Illustration of M.2 SSD installation, highlighting the EZ-Latch mechanism for tool-less setup.
5. Grafik Kartı (GPU) Kurulumu
- Locate the PCIe Gen5 x16 slot.
- PCIe yuvasının ucundaki tutma klipsini açın.
- Ekran kartınızı yuvaya hizalayın ve yerine oturana kadar sıkıca bastırın.
- Ekran kartınızı vidalarla PC kasanıza sabitleyin.

Figure 5: Close-up of the PCIe EZ-Latch Plus, simplifying graphics card removal and installation.
6. Güç Bağlantıları
- Güç kaynağınızdan gelen 24-pin ATX ana güç konektörünü anakartınıza bağlayın.
- 8-pinli (veya 4+4 pinli) CPU güç konnektörünü anakarta bağlayın.
7. Ön Panel ve Çevre Birimi Bağlantıları
- Connect the front panel headers (power switch, reset switch, HDD LED, power LED) according to the motherboard manual.
- Ön paneldeki USB 2.0, USB 3.2 Gen 1 ve USB 3.2 Gen 2 Type-C bağlantı noktalarını bağlayın.
- Connect SATA drives to the available SATA 6Gb/s ports.
- Attach the WIFI antenna to the rear I/O panel for wireless connectivity.

Şekil 6: Ayrıntılı view of the rear I/O panel, showing USB ports, Ethernet, audio jacks, and Wi-Fi antenna connectors.
Kullanım Talimatları
1. İlk Önyükleme ve BIOS/UEFI Kurulumu
- Bilgisayarınızı monte ettikten sonra, monitörü, klavyeyi ve fareyi bağlayın.
- Sisteminizi açın. SİL BIOS/UEFI kurulumuna girmek için başlatma sırasında tuşa basın.
- Configure boot order, enable XMP/EXPO for memory, and set up any other necessary system parameters.
- Değişiklikleri kaydedin ve BIOS/UEFI'den çıkın.
2. Sürücü Kurulumu
- Install your operating system.
- After OS installation, install the latest drivers for your motherboard chipset, graphics card, audio, and network from the GIGABYTE website or the provided support DVD/USB.
3. GIGABYTE Software Utilities
GIGABYTE provides various software utilities to enhance your user experience:
- GIGABYTE Kontrol Merkezi (GCC): A unified software platform for managing system performance, RGB lighting, fan speeds, and more.
- BIOS Güncelleme Yardımcı Programı: Anakart BIOS'unu işletim sistemi içinden güncellemek için.
- App Center: Provides access to various GIGABYTE applications and utilities.
Bakım
Düzenli bakım anakartınızın uzun ömürlü ve istikrarlı çalışmasını sağlar.
1. Temizlik
- Anakart ve bileşenlerin üzerindeki tozu periyodik olarak basınçlı hava kullanarak temizleyin.
- Temizlemeden önce sistemin kapalı ve fişinin çekilmiş olduğundan emin olun.
- Sıvı temizleyicileri doğrudan bileşenler üzerinde kullanmaktan kaçının.
2. BIOS Güncellemeleri
- GIGABYTE'ı kontrol edin webEn yeni BIOS sürümleri için site.
- BIOS updates can improve compatibility, stability, and performance.
- Follow the instructions provided by GIGABYTE carefully when performing a BIOS update to avoid system damage.
3. Sürücü Güncellemeleri
- GIGABYTE'ı düzenli olarak kontrol edin website for updated drivers for your motherboard.
- Keeping drivers up-to-date can resolve issues and improve system performance.
Sorun giderme
Sorunlarla karşılaşırsanız aşağıdaki genel sorun giderme adımlarına bakın:
1. Güç Yok / Açılış Yok
- Tüm güç kablolarının (24-pin ATX, 8-pin CPU) güvenli bir şekilde bağlandığından emin olun.
- Güç kaynağının açık ve düzgün çalıştığından emin olun.
- Check front panel connections, especially the power switch.
- Sorunu tespit etmek için minimum bileşenlerle (işlemci, bir RAM çubuğu, entegre grafik kartı yoksa ekran kartı) önyükleme yapmayı deneyin.
2. POST Code Errors
- The motherboard may display a POST code on its debug LED. Refer to the GIGABYTE manual for the meaning of specific codes.
- Common codes relate to CPU, RAM, or GPU initialization failures.
3. Sistem Kararsızlığı / Çökmeler
- Tüm sürücülerin güncel olduğundan emin olun.
- Aşırı ısınmayı önlemek için CPU ve GPU sıcaklıklarını kontrol edin.
- Bellek tanılama araçlarını kullanarak RAM kararlılığını doğrulayın.
- Reset BIOS settings to default if overclocking or custom settings are causing issues.
Özellikler
| Özellik | Şartname |
|---|---|
| Marka | GIGABYTE |
| Model Adı | X870E AORUS ELITE X3D ICE |
| CPU Soketi | LGA 1718 (AMD AM5) |
| Uyumlu İşlemciler | AMD Ryzen 9000/8000/7000 Serisi |
| Yonga Seti Türü | AMD X870E |
| RAM Bellek Teknolojisi | DDR5 |
| Mevcut Bellek Yuvaları | 4 |
| RAM Bellek Maksimum Boyutu | 256 GB |
| PCIe Yuvaları | 1x PCIe Gen5 x16, 2x PCIe 5.0 M.2, 2x PCIe 4.0 M.2 |
| USB Bağlantı Noktaları | 2x USB4 Type-C with DP Alt, 1x USB 3.2 Gen 2 Type-C, 5x USB 3.2 Gen 2 Type-A, 3x USB 3.2 Gen 1 Type-A, 65W Front USB-C |
| Ethernet | 5 GbE LAN |
| Kablosuz Bağlantı | WİFİ7 |
| Güç Fazı | Digital Twin 16+2+2 |
| Form Faktörü | ATX |
| Boyutlar (U x G x Y) | 12.01"U x 9.61"G x 1.75"Y |
Garanti ve Destek
The GIGABYTE X870E AORUS ELITE X3D ICE Motherboard comes with a 5 Yıllık Üretici Garantisi. For technical support, driver downloads, BIOS updates, and further assistance, please visit the official GIGABYTE website. You can also refer to the multilingual installation guide included in the product packaging for additional details.
Video 2: 360 derece view of the X870E AORUS ELITE X3D ICE motherboard, showcasinTasarımı ve özellikleri.