1. Giriş
This manual provides comprehensive instructions for the installation, operation, and maintenance of your plplaaoo 3W Monocrystalline Solar Panel. Please read this manual thoroughly before using the product to ensure proper function and longevity. Keep this manual for future reference.
2. Ürün Bittiview
Temel Özellikler
- High Efficiency Monocrystalline Silicon: Ensures stable and uninterrupted power output, even in low light conditions.
- Çok Yönlü Şarj Bağlantı Noktaları: Equipped with Micro USB and Type-C ports for broad compatibility with security cameras and low-power devices.
- Integrated Protection Circuit: Offers protection against overcurrent, overcharging, overvoltage, kısa devreler ve aşırı ısınma.
- Rugged Weatherproof Construction: Yıl boyunca dış mekan kullanımına uygun olarak yağmur, kar ve aşırı sıcaklıklara dayanacak şekilde tasarlanmıştır.
- Geniş Uyumluluk: Suitable for surveillance cameras, bird feeders, garden lights, emergency lights, and traffic signals.
Paket İçeriği
- 1 x plplaaoo 3W Monocrystalline Solar Panel
- 1 x Ayarlanabilir Montaj Braketi
- 1 x Set of Mounting Screws and Wall Plugs
- 1 x Micro USB to Type-C Adapter
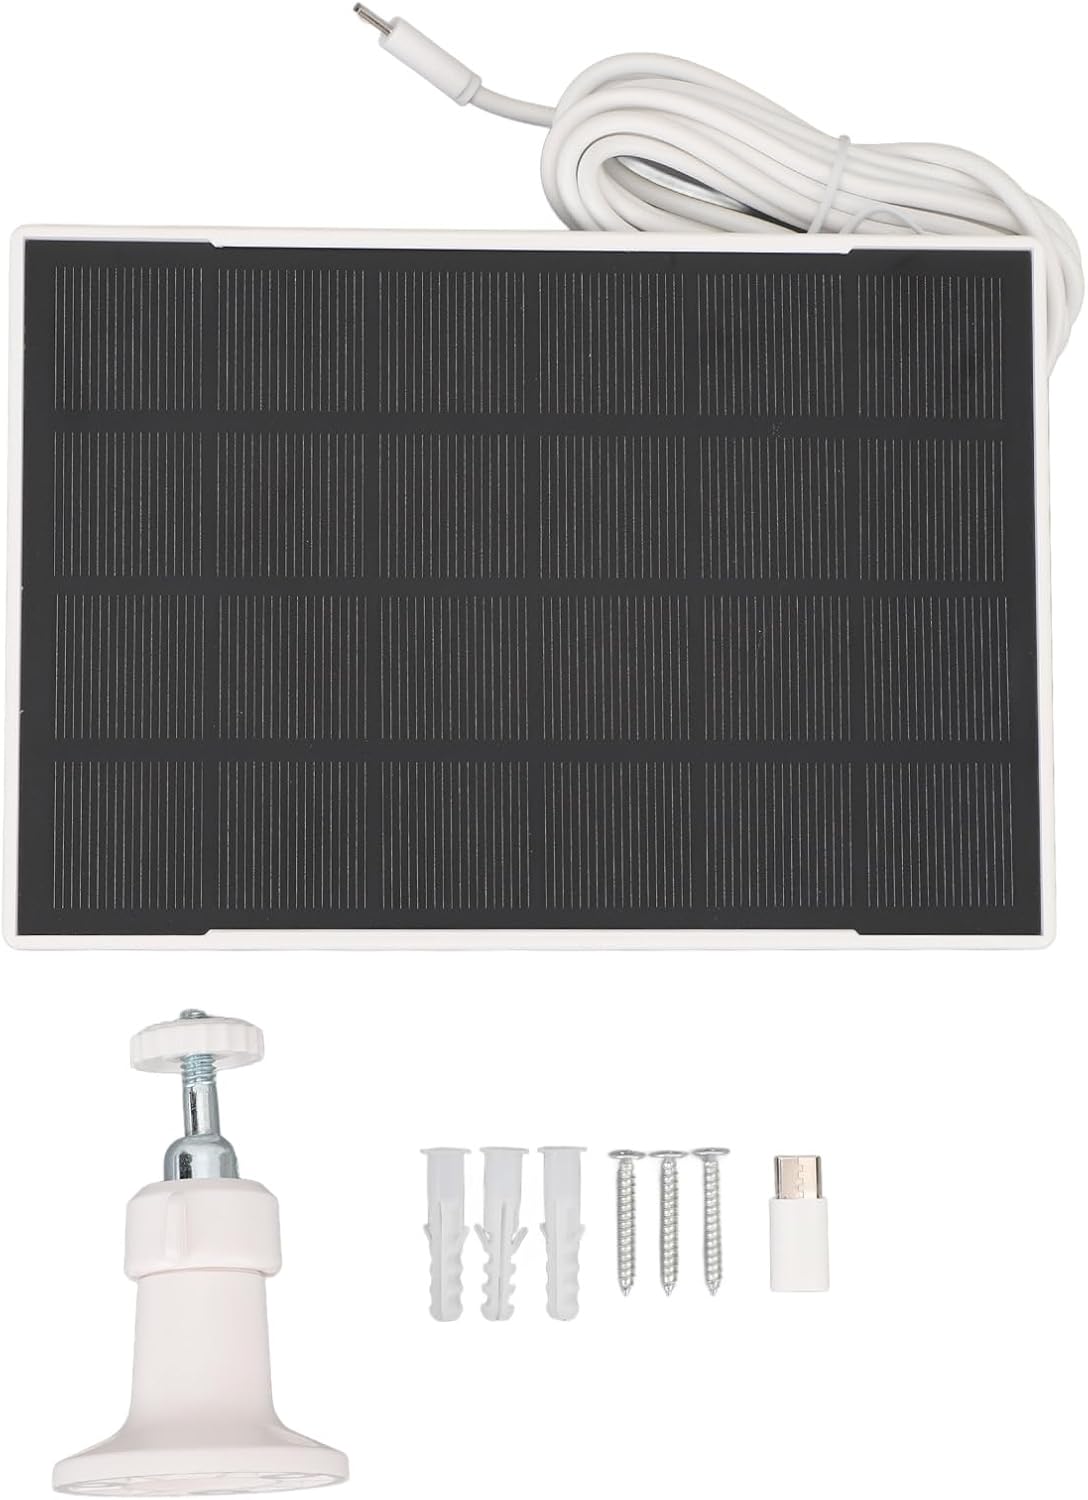
Figure 2.1: Contents of the plplaaoo Solar Panel package.
3. Kurulum Talimatları
3.1 Güneş Panelinin Montajı
- Bir Konum Seçin: Select an outdoor location that receives direct sunlight for the majority of the day. Avoid areas with significant shade from trees, buildings, or other obstructions.
- Montaj Braketini takın: Secure the adjustable mounting bracket to a stable surface (e.g., wall, fence post) using the provided screws and wall plugs. Ensure the bracket is firmly attached.
- Güneş Panelini Monte Edin: Attach the solar panel to the adjustable mounting bracket.
- Açı Ayarı: Orient the solar panel to face the sun directly. The adjustable bracket allows for multi-angle rotation to optimize light absorption. Adjust the panel's angle to maximize exposure to sunlight throughout the day.
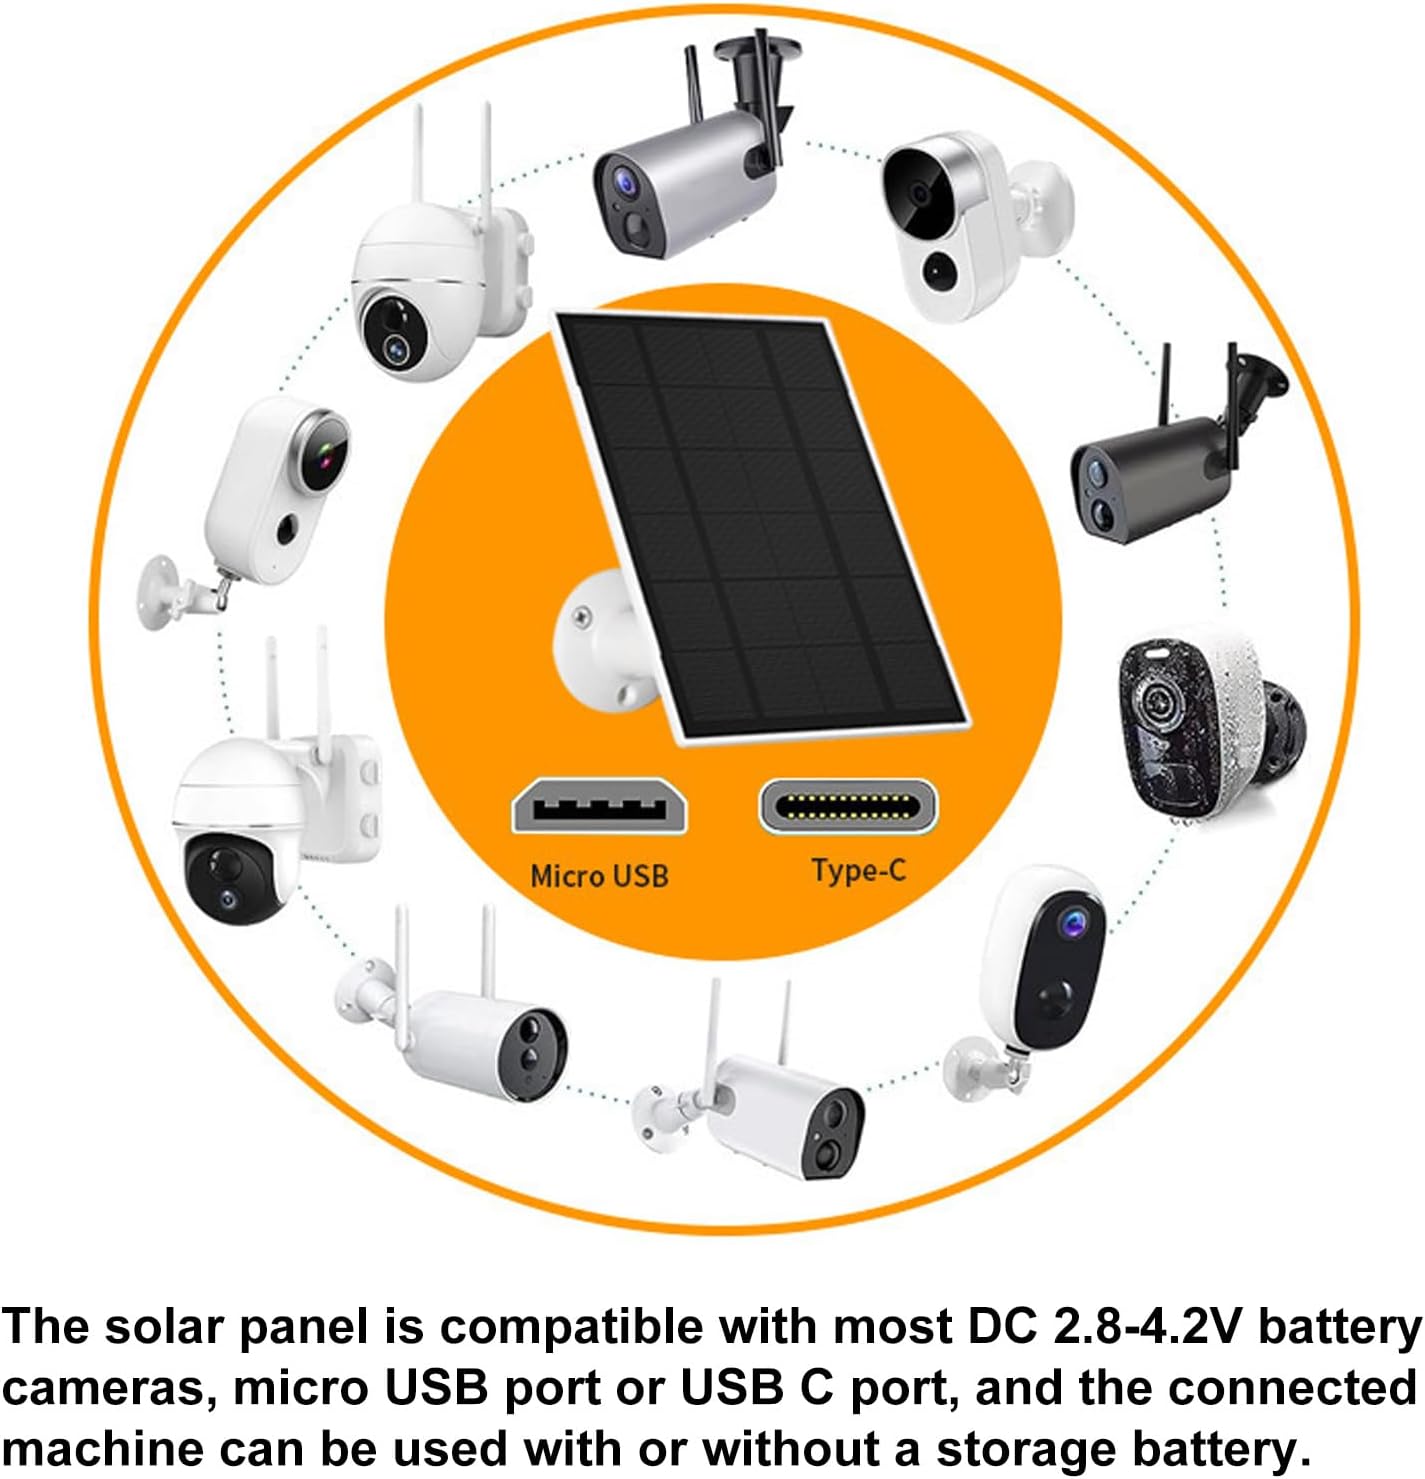
Figure 3.1: Adjustable mounting bracket for optimal sun exposure.

Şekil 3.2: Ör.ample of solar panel installation with an outdoor camera.
3.2 Cihazınıza Bağlanma
The solar panel is equipped with both Micro USB and Type-C output ports. Use the appropriate cable or the provided Micro USB to Type-C adapter to connect the solar panel to your compatible device (e.g., security camera, garden light). Ensure the connection is secure and weatherproof.

Figure 3.3: Universal compatibility with Micro USB and Type-C devices.
4. Operasyon
Once installed and connected, the plplaaoo solar panel will automatically begin converting sunlight into electrical energy to power and charge your connected device. The high-efficiency monocrystalline cells ensure consistent power delivery.
Optimum Performans İpuçları:
- Ensure the solar panel receives at least a few hours of direct sunlight daily.
- Keep the surface of the solar panel clean and free from dust, dirt, snow, or debris.
- Verify that all connections are secure and free from corrosion.

Figure 4.1: Solar panel actively charging a connected device.
5. Bakım
Düzenli bakım, güneş panelinizin ömrünü ve verimliliğini artırır.
- Temizlik: Güneş panelinin yüzeyini yumuşak bir bezle periyodik olarak silin.amp cloth to remove any accumulated dust, dirt, or debris. Avoid abrasive cleaners or harsh chemicals.
- Bağlantı Kontrolü: Annually inspect all cable connections for tightness and signs of wear or corrosion. Ensure the weatherproof seals are intact.
- Fiziksel Muayene: Check the panel and mounting bracket for any physical damage, cracks, or loose components, especially after severe weather conditions.
6. Sorun Giderme
Güneş panelinizle ilgili sorunlarla karşılaşırsanız, aşağıdaki yaygın sorunlar ve çözümlerine göz atın:
- Cihaz Şarj Olmuyor:
- Güneş panelinin doğrudan güneş ışığı aldığından emin olun.
- Tüm kablo bağlantılarının doğru şekilde takılıp takılmadığını ve sağlamlığını kontrol edin.
- Verify that the connected device is compatible with the solar panel's output voltag(2.8-4.2V).
- Clean the solar panel surface if it is dirty.
- Düşük Şarj Verimliliği:
- Adjust the panel's angle to optimize sun exposure.
- Ensure there are no obstructions (e.g., tree branches, eaves) casting shadows on the panel.
- Panel yüzeyinin temiz olduğundan emin olun.
- Fiziksel Hasar:
- If the panel or cable is physically damaged, discontinue use and contact customer support.
7. Özellikler
| Özellik | Şartname |
|---|---|
| Ürün Malzemesi | Monokristal Silisyum |
| Güç Çıkışı | 3W |
| Çıkış Hacmitage Aralık | 2.8-4.2V |
| Şarj Portları | Micro USB, Type-C |
| Ürün Ağırlığı | 13.8 ons (yaklaşık 391 gram) |
| Ürün Boyutları | 7.87 x 5.11 x 2.36 inç (20 x 13 x 6 cm) |
| Model Numarası | plplaaoofqxm1pbakw |
| ASIN | B0FPDV9B9P |
8. Garanti ve Destek
For warranty information or technical support, please refer to the product packaging or contact the manufacturer directly through their official website or the retailer where the product was purchased. Please have your model number (plplaaoofqxm1pbakw) and ASIN (B0FPDV9B9P) available when contacting support.