
1. Giriş
This manual provides comprehensive instructions for the installation, operation, and maintenance of your Brightever 7-Inch Motion Sensor LED Ceiling Light, Model XD180-04. This hardwired flush mount fixture features a motion sensor, selectable color temperatures, and adjustable timer settings, designed for various indoor applications.
2. Güvenlik Talimatları
- UYARI: Always turn off the power at the circuit breaker before beginning any electrical installation.
- Kurulum sürecinden emin değilseniz, kalifiye bir elektrikçiye danışın.
- Tüm elektrik bağlantılarının güvenli olduğundan ve yerel elektrik yönetmeliklerine uyduğundan emin olun.
- Üründe herhangi bir değişiklik yapmaya çalışmayın. Yapılacak her türlü değişiklik garantiyi geçersiz kılabilir ve güvenlik tehlikesi oluşturabilir.
- This fixture is designed for indoor use. While moisture resistant, avoid direct exposure to heavy water spray.
- Çocukları kurulum alanından uzak tutun.
3. Paket İçeriği
Kurulumdan önce tüm bileşenlerin mevcut olduğundan emin olun:
- Brightever 7-Inch Motion Sensor LED Ceiling Light (2 units for 2-pack)
- Montaj Donanımı (vidalar, kablo bağlantı somunları)
- Kullanım Kılavuzu (bu belge)
4. Ürün Özellikleri
- Entegre Hareket Sensörü: PIR sensor with 120° detection angle and 6.5-13 ft range.
- 3 Aydınlatma Modu:
- Her Zaman Açık: Light remains on (controlled by wall switch).
- Motion-Activated Always: Activates with motion regardless of ambient light.
- Dark-Activated: Activates with motion only in low light conditions.
- 3 Renk Sıcaklıkları: Selectable via DIP switch (2700K Warm White, 4000K Natural White, 6500K Cool White).
- 3 Zamanlayıcı Ayarları: Adjustable illumination duration after motion ceases (30s, 60s, 120s).
- Enerji Verimliliği: 15W LED, 1200 Lumens output, designed for long lifespan (30,000+ hours).
- Dayanıklı Yapı: Akrilonitril Bütadien Stiren (ABS) malzemesinden üretilmiştir.
- Göz Bakımı: Designed for flicker-free illumination with a high CRI (Color Rendering Index) of 90+.
- Koruma: Moisture resistant, dustproof, and mosquito proof design.
5. Kurulum ve Kurulum
Please follow these steps carefully. Ensure power is off at the circuit breaker before starting.
- Gücü Kapatın: Locate your circuit breaker and turn off the power to the area where you will install the light fixture. Verify power is off using a voltage test cihazı.
- Fix Mounting Bracket: The mounting bracket is located on the back of the light fixture. Remove it. Securely attach the mounting bracket to the ceiling junction box using the provided screws.
- Select Settings (Before Wiring): Before connecting wires, slide the DIP switches on the back of the light fixture to your desired color temperature (2700K, 4000K, or 6500K), lighting mode (Always On, Motion-Activated Always, or Dark-Activated), and illumination duration (30s, 60s, or 120s). These settings are difficult to change after installation.
- Kabloları Bağlayın: Connect the household electrical wires to the light fixture wires using the provided wire nuts. Typically, connect black to black (live), white to white (neutral), and green or bare copper to green (ground). Ensure connections are tight and secure.
- Install Light to Base: Align the light fixture with the mounting bracket and twist or push to secure it into place. Ensure it is firmly attached and flush with the ceiling.
- Gücü Geri Yükle: Turn the power back on at the circuit breaker. Test the light fixture to ensure proper operation based on your selected settings.

Figure 5.1: Attaching the mounting bracket to the ceiling.

Figure 5.2: Adjusting DIP switches for color temperature, lighting mode, and timer.

Figure 5.3: Securing the light fixture to the mounting bracket.

Figure 5.4: Completed installation of the ceiling light.
Kurulum Video Kılavuzu
Video 5.1: A step-by-step guide demonstrating the installation process for the 7-inch motion sensor ceiling light.
6. Kullanım Talimatları
The Brightever Motion Sensor LED Ceiling Light offers versatile operation through its adjustable settings.
6.1 Aydınlatma Modu
Select one of three lighting modes using the dedicated switch on the fixture (set during installation):
- Always On (ON): The light functions as a standard ceiling light, controlled by your wall switch. The motion sensor is bypassed.
- Motion-Activated Always (Sun Icon): The light will turn on when motion is detected, regardless of ambient light levels (day or night). It will turn off after the set duration if no further motion is detected.
- Dark-Activated (Moon Icon): The light will only turn on when motion is detected in low light conditions (e.g., at night or in a dark closet). It will turn off after the set duration if no further motion is detected.

Şekil 6.1: Üzeriview of the three selectable lighting modes.
6.2 Renk Sıcaklığı Seçimi
Choose your preferred light color from three options using the color temperature switch (set during installation):
- 2700K (Sıcak Beyaz): Provides a cozy and inviting ambiance.
- 4000K (Natural White): Offers a balanced and clear illumination, suitable for most tasks.
- 6500K (Soğuk Beyaz): Delivers bright, crisp daylight-like illumination for enhanced visibility.

Figure 6.2: Selecting the desired color temperature.
6.3 Zamanlayıcı Ayarı
Adjust how long the light remains on after motion is no longer detected using the timer switch (set during installation):
- 30 saniye: Light turns off 30 seconds after motion stops.
- 60 saniye: Light turns off 60 seconds after motion stops.
- 120 saniye: Light turns off 120 seconds after motion stops.

Figure 6.3: Adjustable timer settings for illumination duration.
6.4 Hareket Sensörünün Çalışması
The PIR motion sensor detects movement within a 120° angle and a range of 6.5 to 13 feet. For optimal performance, ensure the sensor is not obstructed. The light will activate when motion is detected and remain on for the selected duration, resetting the timer with continuous motion.
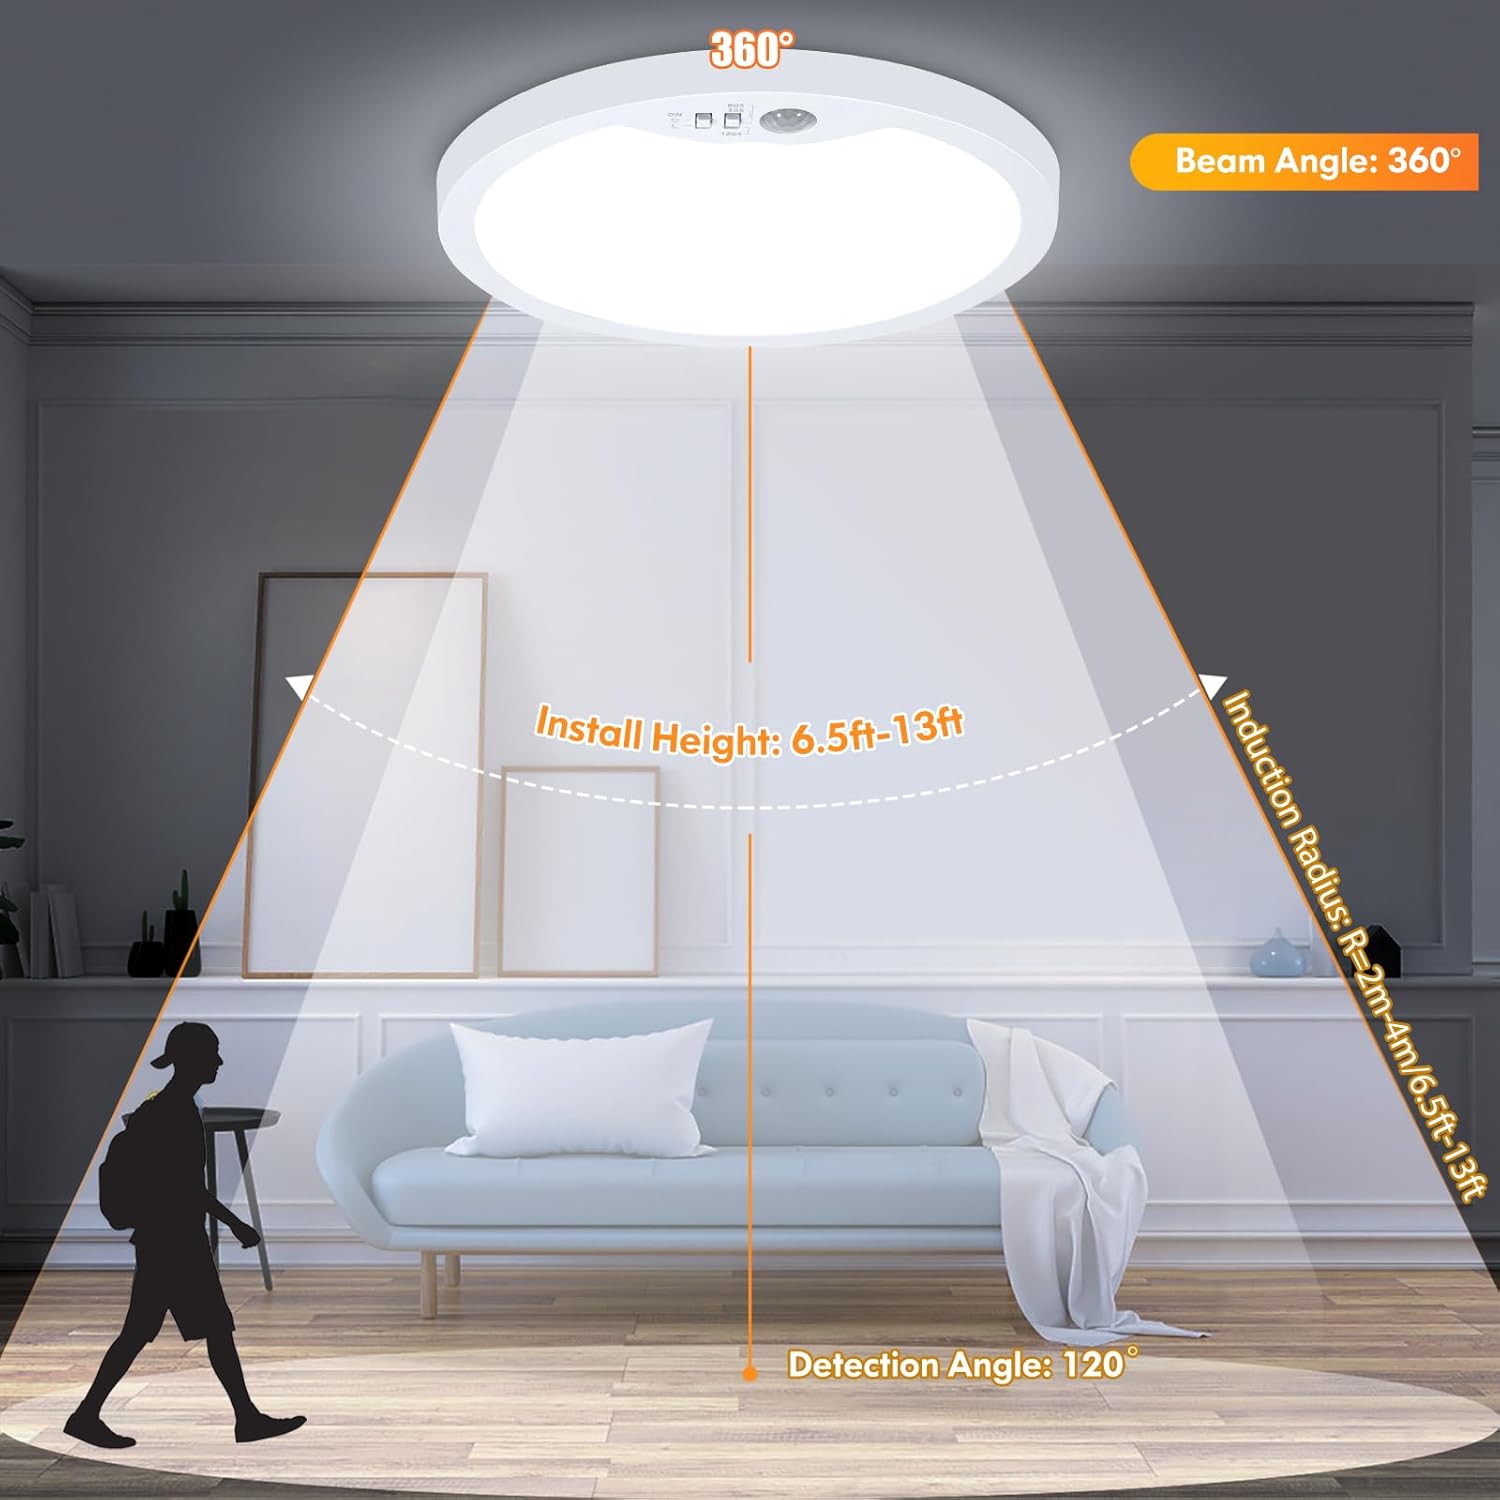
Figure 6.4: Motion sensor detection range and angle.
7. Bakım
To ensure the longevity and optimal performance of your Brightever LED Ceiling Light, follow these simple maintenance guidelines:
- Temizlik: Temizlemeden önce elektriği kesin. Yumuşak, kuru veya hafif nemli bir bez kullanın.amp cloth to wipe the surface of the fixture. Avoid abrasive cleaners, solvents, or harsh chemicals, as these can damage the finish or electrical components.
- Denetleme: Periodically check the fixture for any signs of damage, loose connections, or wear. If any issues are found, turn off power and consult a qualified electrician.
- Kullanıcı Tarafından Bakımı Yapılabilecek Parça Yok: The LED components are integrated and not user-replaceable. Do not attempt to open the fixture beyond what is required for installation.
8. Sorun Giderme
If you encounter issues with your Brightever LED Ceiling Light, refer to the following common problems and solutions:
| Sorun | Olası Neden | Çözüm |
|---|---|---|
| Işık açılmıyor. | No power; loose wiring; incorrect mode selection; faulty fixture. | Check circuit breaker. Verify wire connections. Ensure correct lighting mode is selected (e.g., not in Dark-Activated mode during daylight). If issues persist, contact support. |
| Motion sensor not working or light stays on/off. | Incorrect mode selection; sensor obstructed; constant motion; electrical surge damage. | Ensure the correct motion-activated mode (Sun or Moon icon) is selected. Clear any obstructions from the sensor. Ensure there is no continuous motion in the detection area. If the sensor was damaged by an electrical event, contact support. |
| Işık beklenmedik şekilde titriyor veya sönüyor. | Unstable power supply; loose wiring; internal component issue. | Check household wiring and power stability. Ensure all connections are secure. This fixture is non-dimmable; do not connect to a dimmer switch. If flickering continues, contact support. |
| Difficulty mounting flush to ceiling. | Interference with internal switches; uneven ceiling surface. | Ensure the DIP switches are fully recessed and do not interfere with the ceiling surface. If necessary, use small spacers or ensure the ceiling opening accommodates the switch mechanism. |
9. Özellikler
| Bağlanmak | Detay |
|---|---|
| Model Adı | XD180-04 |
| Marka | Daha parlak |
| Ürün Boyutları | 7"U x 7"G x 0.66"Y |
| Ürün Ağırlığı | 1.3 pound |
| Güç Kaynağı | Kablolu Elektrik |
| Cilttage | 120 Volt |
| Netage | 15 Watt |
| Parlaklık | 1200 Lümen |
| Işık Kaynağı Türü | NEDEN OLMUŞ |
| Renk Sıcaklıkları | 2700K, 4000K, 6500K Selectable |
| Anahtar Türü | Hareket Sensörü |
| Hareket Sensörü Algılama Açısı | 120° |
| Hareket Sensörü Algılama Aralığı | 6.5-13 feet |
| Ömür | 30,000+ saat |
| Malzeme | Akrilonitril Bütadien Stiren (ABS) |
| Kurulum Türü | Dağı Flush |
| İç/Dış Mekan Kullanımı | Kapalı |
| Su Direnç Seviyesi | Nem Dayanıklı |
10. Garanti ve Destek
The Brightever 7-Inch Motion Sensor LED Ceiling Light comes with a Limited Warranty. For specific warranty details, please refer to the documentation included with your purchase or contact Brightever customer support.
If you require further assistance, have questions, or need to report an issue, please contact Brightever customer service through the retailer where the product was purchased or visit the official Brightever webdestek iletişim bilgileri için site.