
1. Giriş
This manual provides detailed instructions for the installation, operation, and maintenance of your TESmart HDMI KVM Switch 8 Port 8K@60Hz. Please read this manual thoroughly before using the device to ensure proper functionality and to prevent damage.
2. Paket İçeriği
Aşağıda listelenen tüm ürünlerin paketinizde mevcut olduğundan emin olun. Eksik veya hasarlı bir ürün varsa, lütfen müşteri hizmetleriyle iletişime geçin.
- 1 x 8x1 HDMI KVM Anahtarı
- 8 x KVM Cables (HDMI + USB, 5ft each)
- 1 adet Kızılötesi Uzaktan Kumanda (AAA piller dahil değildir)
- 1 x IR Alıcı Kablosu
- 1 x DC 12V Güç Adaptörü
- 2 x Rack-ears
- 1 x Kullanım Kılavuzu
- 1 x 3-Pin Connector (for RS232)
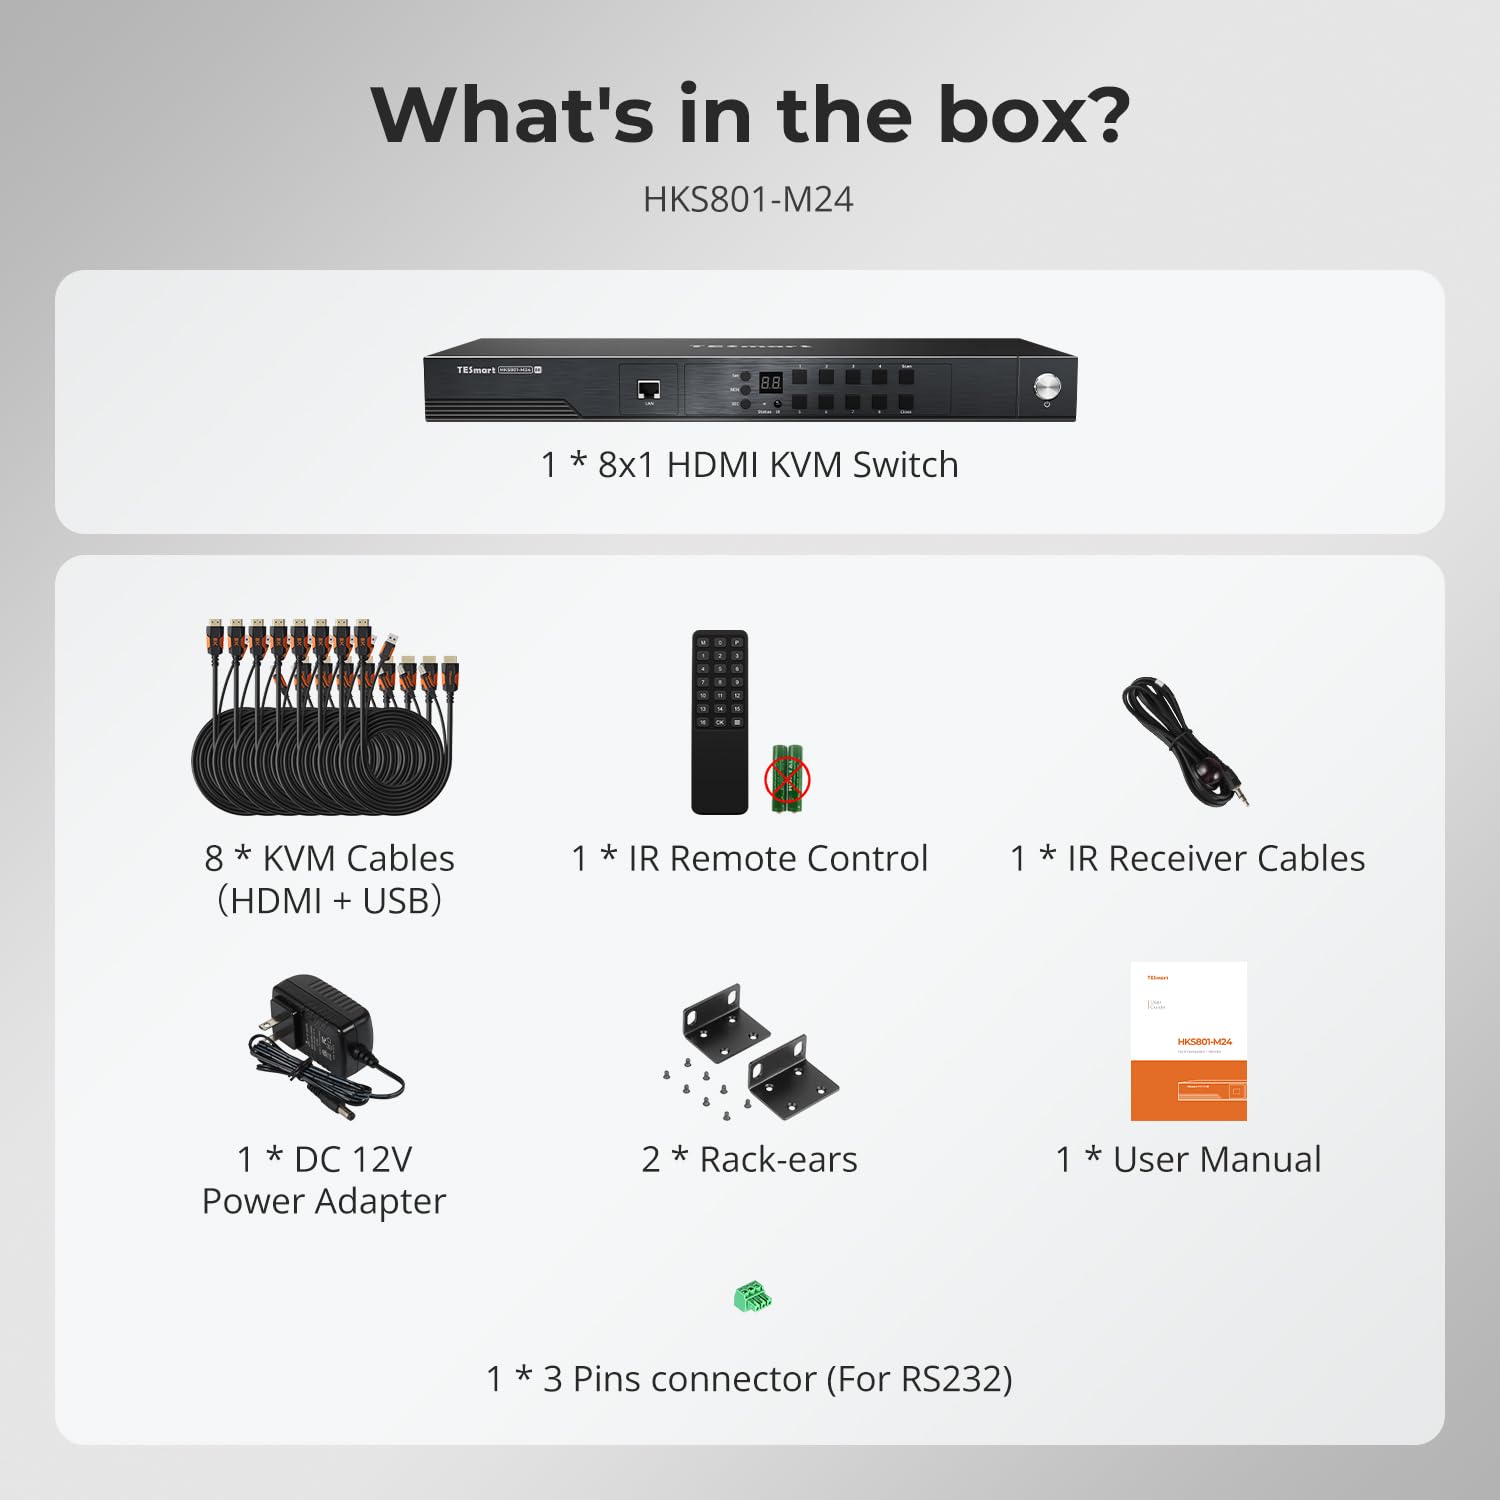
Image: All components included in the TESmart HDMI KVM Switch package.
3. Ürün Özellikleri
- 8-Port HDMI KVM Switch: Connects up to 8 HDMI-enabled computers to a single monitor, keyboard, and mouse console.
- 8K@60Hz Çözünürlük: Supports ultra-high-definition resolutions up to 7680x4320 at 60Hz.
- USB 3.0 Merkezi: Features two standard USB 3.0 ports for connecting additional peripherals like barcode scanners or USB hard drives.
- EDID Emulator: Integrated EDID emulators ensure correct display information is maintained across all input ports, preventing display setting changes during switching.
- Çoklu Anahtarlama Yöntemleri: Offers flexible control via IR remote, front panel buttons, keyboard hotkeys, mouse wheel, RS232 commands, and IP control.
- Auto Switching & Auto Detect Mode: Supports automatic switching between connected computers at specified intervals and automatically detects active devices.
- Tak ve Çalıştır: Requires no special software installation and supports hot-swapping of devices.
- Rafa Montaj Tasarımı: Includes rack-ears for easy installation into standard server racks.
4. Kurulum ve Kurulum
KVM anahtarınızı kurmak için şu adımları izleyin:
- Cihazları Kapatma: Ensure all computers and the monitor are powered off before beginning the installation.
- Monitörü Bağla: Connect your monitor to the HDMI OUTPUT port on the KVM switch using an HDMI cable.
- Klavye ve Fareyi Bağlayın: Connect your USB keyboard and mouse to the dedicated K/M USB ports on the KVM switch.
- Bilgisayarları Bağlayın: For each computer (up to 8), connect an HDMI cable from the computer's HDMI output to an HDMI INPUT port (PC 1-8) on the KVM switch. Simultaneously, connect a USB cable from the computer's USB port to the corresponding USB INPUT port (PC 1-8) on the KVM switch. Use the provided KVM cables for optimal performance.
- Gücü bağlayın: Plug the DC 12V power adapter into the KVM switch and then into a power outlet.
- Güç Açık: Power on the KVM switch, then power on your monitor, and finally power on your connected computers.

Image: Connection diagram for the TESmart 8-port KVM switch.

Image: Comprehensive connection overview including optional RS232, LAN, and USB device connections.
5. Kullanım Talimatları
TESmart KVM anahtarı, bağlı bilgisayarlar arasında geçiş yapmak için çeşitli yöntemler sunar:
5.1 Geçiş Yöntemleri
- Ön Panel Düğmeleri: Press the numbered buttons on the front panel to switch directly to the corresponding PC input.
- IR Uzaktan Kumanda: Use the included IR remote control to switch inputs. (Requires 2x AAA batteries, not included).
- Klavye Kısayol Tuşları: Specific key combinations allow for quick switching without moving your hand from the keyboard. Refer to the full user manual for specific hotkey commands.
- Mouse Wheel Switching: Scroll the mouse wheel to switch between inputs.
- RS232 Kontrolü: Connect via RS232 for serial command control.
- IP Kontrolü: Control the KVM switch over a network using IP commands.

Resim: Üzeriview of the six available switching methods.
5.2 Auto Detect Mode
The KVM switch can automatically detect when a connected PC becomes active and switch to its input. This eliminates the need for manual switching when a computer is powered on.

Image: Auto Detect Mode functionality.
5.3 Auto Scan Mode
In Auto Scan Mode, the KVM switch cycles through all connected active inputs at a user-defined interval (e.g., 5 seconds to 1 hour). This is useful for monitoring multiple systems.

Image: Auto Scan Mode for monitoring multiple devices.
5.4 EDID Emulation
The built-in EDID emulators ensure that your computers always receive correct display information, preventing issues like desktop icon rearrangement, screen flicker, or resolution changes when switching between inputs or when a computer is disconnected.

Image: EDID Emulation prevents display issues during switching.
5.5 Kilitleme Fonksiyonu
The KVM switch includes a lock function to prevent accidental input changes. Press the [0/Close] button on the front panel to turn off the HDMI display and disable hotkeys and remote control functions. Press it again to re-enable the display and controls.
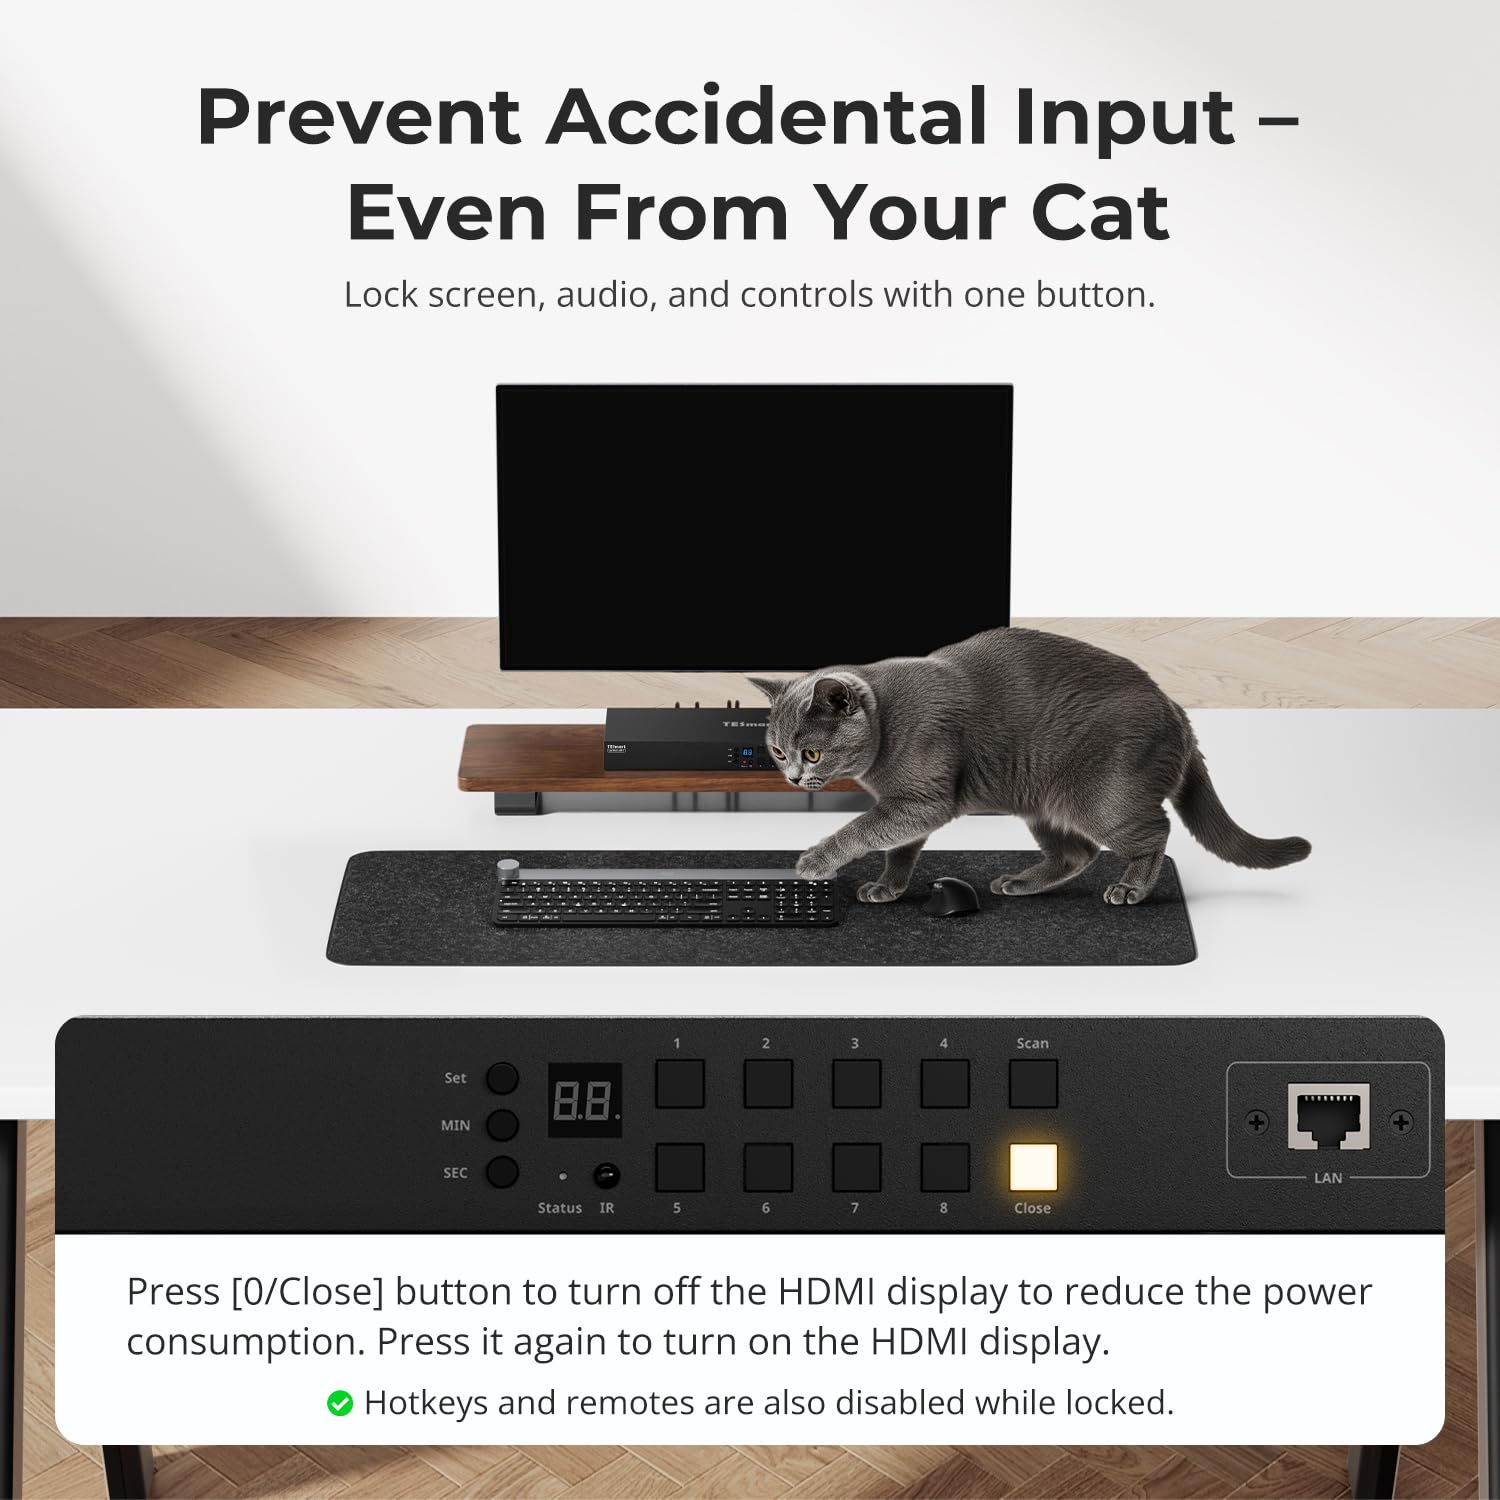
Image: Using the lock function to prevent unintended input.
6. Bakım
KVM anahtarınızın uzun ömürlü ve optimum performans göstermesini sağlamak için aşağıdaki bakım yönergelerini izleyin:
- Temizlik: Cihazın dış yüzeyini temizlemek için yumuşak, kuru bir bez kullanın. Sıvı temizleyiciler veya çözücüler kullanmaktan kaçının.
- Havalandırma: Ensure the KVM switch has adequate ventilation. Do not block any ventilation openings.
- Çevre: Operate the device within the specified temperature range (up to 40°C). Avoid extreme temperatures, humidity, and direct sunlight.
- Kablo yönetimi: Bağlantı noktalarına ve bağlantı noktalarına zarar gelmesini önlemek için kabloları düzenli tutun ve kıvrılmalarını veya aşırı gerilimlerini önleyin.
- Donanım Yazılımı Güncellemeleri: Üreticinin kontrol edin webPerformansı artırabilecek veya özellikler ekleyebilecek herhangi bir ürün yazılımı güncellemesi için siteyi düzenli olarak kontrol edin.
7. Sorun Giderme
KVM anahtarınızla ilgili sorunlarla karşılaşırsanız, aşağıdaki yaygın sorunlara ve çözümlere bakın:
- Ekran/Sinyal Yok:
- Ensure all HDMI and USB cables are securely connected to both the KVM switch and the computers/monitor.
- Verify the KVM switch is powered on and the correct input is selected.
- Try connecting the computer directly to the monitor to confirm the computer's video output is functional.
- Monitörün doğru giriş kaynağına ayarlanıp ayarlanmadığını kontrol edin.
- Klavye/Fare Yanıt Vermiyor:
- Ensure the keyboard and mouse are connected to the dedicated K/M USB ports on the KVM switch.
- Try connecting the keyboard and mouse directly to the computer to verify functionality.
- Some specialized gaming or multimedia keyboards/mice may require pass-through mode. Refer to the full manual for enabling this feature.
- Slow Switching Time:
- Switching times can vary depending on the connected devices and their display handshake processes. High-resolution or high-refresh-rate devices (e.g., PS5 at 4K 120Hz HDR) may experience longer switching delays (up to 5 minutes in some cases).
- For other devices, typical switching time is 5-10 seconds.
- Display Issues with High-Performance Devices (e.g., PS5):
- Devices requiring 4K 120Hz HDR VRR may be particularly sensitive to HDMI signal integrity.
- Ensure high-quality HDMI 2.1 certified cables are used.
- Consider simplifying the setup by connecting the KVM switch directly to the display, rather than through an A/V receiver, if experiencing signal drops or resolution degradation.
- If green lines or signal loss occur, try adjusting display settings on the source device to a lower resolution or refresh rate as a test.
- Audio Issues (e.g., Dolby Atmos):
- This KVM switch may not support certain advanced audio formats like Dolby Atmos. Verify audio compatibility with your specific setup.
- Control Software Issues:
- If experiencing difficulties with official control software for advanced settings (e.g., disabling the beep sound), check the TESmart website for updated software or drivers.
- Some users have reported success with third-party applications for controlling TESmart KVM switches; however, use such software at your own discretion.
8. Özellikler
| Özellik | Şartname |
|---|---|
| Model Numarası | HKS801-M24-USBK |
| Çalışma Modu | AÇIK KAPALI |
| Güncel Derecelendirme | 3 Amps |
| Çalışma Hacmitage | 12 Volt |
| Bağlayıcı Türü | HDMI, USB 3.0 |
| Ürün Boyutları (U x G x Y) | 17.32 x 5.9 x 1.8 inç |
| Ürün Ağırlığı | 4.22 pound |
| Malzeme | Metal |
| Renk | Siyah |
| Netage | 36 watt |
| Üst Sıcaklık Derecesi | 40 Derece Santigrat |
| Uluslararası Koruma Derecelendirmesi | IP30 |
| Uyumlu Cihazlar | Computers, servers, DVR/NVR, laptops, USB devices, HDMI 2.1 compatible devices |
9. Garanti ve Destek
TESmart products are designed for reliability and performance. For specific warranty information, please refer to the warranty card included with your product or visit the official TESmart website. For technical support, troubleshooting assistance, or to inquire about replacement parts, please contact TESmart customer service through their official channels.