
1. Giriş
This manual provides detailed instructions for the installation, operation, maintenance, and troubleshooting of your GIGABYTE B760 DS3H GEN5 Desktop Motherboard. This motherboard is designed to support Intel Core 14th, 13th, and 12th Generation Processors, offering advanced features for a robust computing experience.
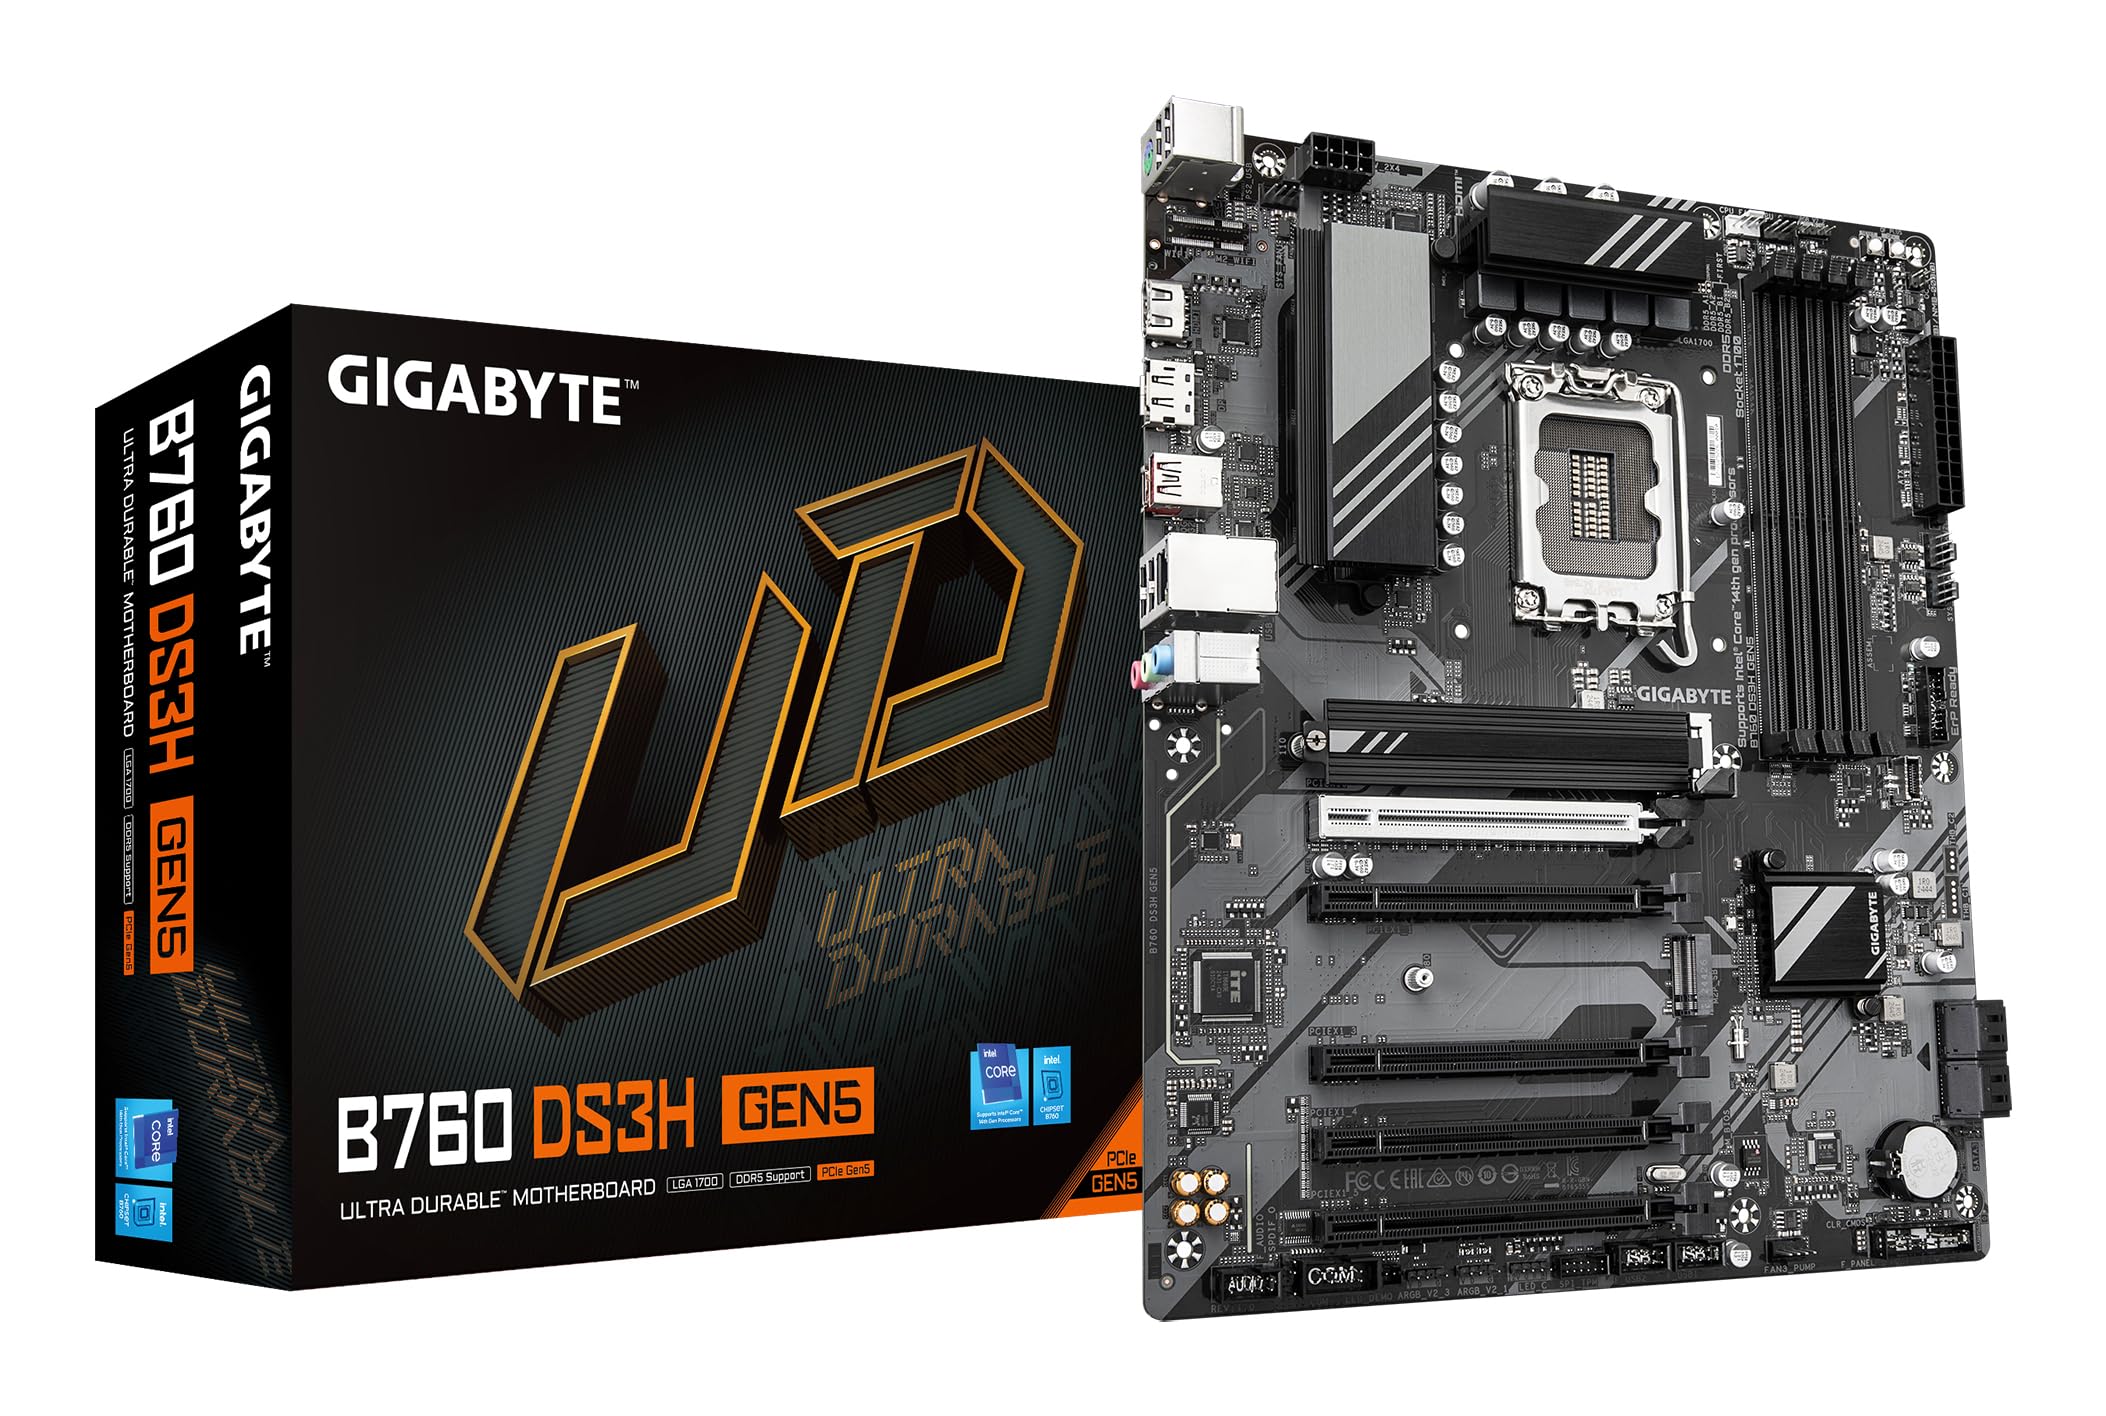
Figure 1.1: GIGABYTE B760 DS3H GEN5 Motherboard Layout. This image displays the overall layout of the motherboard, highlighting the LGA 1700 CPU socket, four DDR5 DIMM slots, and multiple PCIe expansion slots.
2. Temel Özellikler
- PCIe Gen5 Performance: Equipped with a PCIe 5.0 x16 slot for high-speed graphics card support.
- İşlemci Desteği: Compatible with 14th, 13th, and 12th Gen Intel Core Processors (LGA 1700 socket).
- EZ Mandalı: Features a quick-release design for the PCIe 5.0 x16 slot, simplifying component installation and removal.
- PCIe UD Slot: Enhanced PCIe 5.0 SMD Armor for improved graphics card stability and durability.
- Güç Teslimatı: Robust 8+2+1 Phase Hybrid VRM Solution for stable power to the CPU.
- Bellek Desteği: Dual Channel DDR5 with support for 4 DIMMs of XMP Memory Modules, up to 5600MHz.
- Ağ oluşturma: Integrated GbE LAN for reliable wired network connectivity.
- Depolamak: Two PCIe 4.0 x4 M.2 Connectors for high-speed NVMe SSDs.
- Bağlantı: Rear USB-C 20Gb/s, DisplayPort (DP), and HDMI for versatile peripheral and display connections.
- Soğutma: Smart Fan 6 with multiple temperature sensors and hybrid fan headers, including FAN STOP functionality for optimized cooling.

Figure 2.1: Motherboard Features Overview. This image provides an angled perspective, showcasing the VRM heatsinks, M.2 slots, and the PCIe 5.0 x16 slot with its reinforced design.
3. Kurulum ve Kurulum
3.1 Güvenlik Önlemleri
Always disconnect power from your system before installing or removing any components. Wear an anti-static wrist strap to prevent electrostatic discharge (ESD) damage to sensitive components.
3.2 Bileşen Kurulumu
- CPU Kurulumu: Carefully open the CPU socket lever. Align the triangular mark on the Intel processor with the mark on the LGA 1700 socket. Gently place the CPU into the socket without forcing it. Close the lever to secure the CPU.
- CPU Soğutucu Kurulumu: CPU soğutucunuzu üreticinin talimatlarına göre takın. Termal macunun doğru şekilde uygulandığından ve güvenli bir şekilde monte edildiğinden emin olun.
- RAM Kurulumu: Open the clips on the DDR5 DIMM slots. Align the notch on the memory module with the key in the slot. Press down firmly on both ends of the module until the clips snap into place. For dual-channel operation, refer to your motherboard manual for recommended slot pairing.
- M.2 SSD Kurulumu: Locate the M.2 connectors. Remove the M.2 screw/standoff. Insert the M.2 SSD into the slot at an angle, then gently push it down and secure it with the screw/standoff.
- Grafik Kartı Kurulumu: Open the EZ-Latch on the PCIe 5.0 x16 slot. Align your graphics card with the slot and press down firmly until it is fully seated and the latch clicks into place. Secure the card to your case with screws.
- Anakart Montajı: Install standoffs in your PC case according to the ATX form factor. Carefully place the motherboard onto the standoffs and secure it with screws.
- Güç Bağlantıları: Connect the 24-pin ATX main power connector and the 8-pin (or 4+4-pin) CPU power connector from your power supply to the motherboard. Connect SATA power cables to storage devices if applicable.
- Ön Panel Bağlantıları: Connect the front panel headers (power button, reset button, USB ports, audio jacks, LED indicators) to the corresponding pins on the motherboard. Refer to the motherboard's silkscreen labels for correct orientation.
3.3 Arka Giriş/Çıkış Paneli Bağlantıları
Connect your peripherals to the appropriate ports on the rear I/O panel.

Figure 3.1: Rear I/O Panel. This image illustrates the available ports on the rear of the motherboard, including USB 3.2 Gen 2x2 Type-C, USB Type-A, DisplayPort, HDMI, GbE LAN, and audio jacks.
- USB Bağlantı Noktaları: Connect keyboards, mice, and other USB devices. The USB-C port offers 20Gb/s data transfer.
- Görüntü Çıkışları: Use HDMI or DisplayPort for connecting to a monitor if using an integrated GPU.
- LAN Bağlantı Noktası: Ağ erişimi için bir Ethernet kablosu bağlayın.
- Ses Jakları: Connect speakers, headphones, or microphones.
4. Kullanım Talimatları
4.1 İlk Önyükleme ve BIOS/UEFI Kurulumu
After assembling your system, connect a monitor, keyboard, and mouse. Power on the system. During startup, repeatedly press the SİL BIOS/UEFI kurulum yardımcı programına girmek için tuşuna basın. Burada önyükleme sırasını, sistem saatini ve diğer gelişmiş ayarları yapılandırabilirsiniz.
4.2 Sürücü Kurulumu
After installing your operating system (Windows 10 or Windows 11 recommended), install the necessary drivers for the motherboard chipset, LAN, audio, and any other integrated components. These drivers are typically available on the GIGABYTE support webAnakart modelinize özel site.
4.3 Smart Fan 6
The Smart Fan 6 utility allows for precise control over your system's cooling. You can monitor temperatures, adjust fan curves, and utilize the FAN STOP feature to keep your system quiet during low loads. Access these settings through the BIOS/UEFI or a dedicated GIGABYTE software utility.
5. Bakım
5.1 Temizlik
Regularly clean your PC to prevent dust buildup, which can lead to overheating and reduced performance. Use compressed air to remove dust from fans, heatsinks, and other components. Ensure the system is powered off and unplugged before cleaning.
5.2 BIOS/UEFI Güncellemeleri
GIGABYTE'ı periyodik olarak kontrol edin website for BIOS/UEFI updates. Updates can provide improved compatibility, stability, and new features. Follow the instructions provided by GIGABYTE carefully when performing a BIOS update to avoid system damage.
5.3 Sürücü Güncellemeleri
Keep your motherboard drivers updated to ensure optimal performance and compatibility with new hardware and software. Download the latest drivers from the official GIGABYTE support page.
6. Sorun Giderme
If you encounter issues with your motherboard, refer to the following basic troubleshooting steps:
- Güç Yok: Ensure all power cables (24-pin ATX, 8-pin CPU) are securely connected. Check your power supply unit (PSU) and wall outlet.
- Görüntü yok: Verify that your monitor is connected to the graphics card (or motherboard if using integrated graphics) and is powered on. Reseat the graphics card and RAM modules.
- Sistem Kararsızlığı/Çökmeler: Check CPU and GPU temperatures. Ensure RAM modules are properly seated. Update drivers and BIOS/UEFI. Test components individually if possible.
- Bileşen Algılanamadı: Ensure the component (e.g., M.2 SSD, SATA drive, PCIe card) is correctly installed and powered. Check BIOS/UEFI settings to ensure it is enabled.
- Bip Kodları: If your system emits a series of beeps, consult the GIGABYTE website or the motherboard's full manual for a list of beep codes and their meanings, which can indicate specific hardware issues.
If troubleshooting steps do not resolve the issue, contact GIGABYTE technical support for further assistance.
7. Özellikler
| Özellik | Şartname |
|---|---|
| Marka | GIGABYTE |
| Model Adı | B760 DS3H GEN5 |
| CPU Soketi | LGA1700 |
| Uyumlu İşlemciler | Intel 14th/13th/12th Gen Core Processors |
| Yonga Seti Türü | Intel B760 Ekspres |
| RAM Bellek Teknolojisi | DDR5 |
| Bellek Saat Hızı | 5600 MHz'e kadar (XMP) |
| Mevcut Bellek Yuvaları | 4 |
| Ram Memory Maximum Size | 256 GB |
| Grafik Kartı Arayüzü | PCI Express (PCIe 5.0 x16) |
| Total PCIe Ports | 5 |
| Next Generation Storage | 2 x PCIe 4.0 x4 M.2 Konnektör |
| Toplam SATA Bağlantı Noktası Sayısı | 4 |
| Yerel Ağ | GbE LAN'ı |
| Toplam USB Bağlantı Noktaları | 6 (Rear I/O) + Internal Headers |
| Rear USB-C | 1 x USB 3.2 Gen 2x2 (20Gb/s) |
| Total Number of HDMI Ports | 1 |
| Ekran Bağlantı Noktası | Evet |
| Ana Güç Konektörü Türü | 24 Pinli ATX |
| Platform | , Windows 10 Windows 11 |
| Ürün Boyutları U x G x Y | 9.61"U x 12.01"G x 1.38"Y |
| Ürün Ağırlığı | 1000 Gram |
8. Garanti Bilgileri
GIGABYTE motherboards typically come with a limited manufacturer's warranty. The duration and terms of the warranty may vary by region and retailer. Please retain your proof of purchase for warranty claims. For detailed warranty information, visit the official GIGABYTE websiteyi ziyaret edin veya satın alma noktanızla iletişime geçin.
9. Destek
Teknik destek, sürücü indirme, BIOS güncellemeleri ve daha fazla ürün bilgisi için lütfen resmi GIGABYTE destek sitesini ziyaret edin. website. You can also find FAQs and community forums there to help with common issues.
GIGABYTE Resmi Webalan: https://www.gigabyte.com/