
Önemli Güvenlik Bilgileri
Please read all instructions carefully before using this monitor. Keep this manual for future reference.
- Yangın veya elektrik çarpması tehlikesini önlemek için monitörü yağmura veya neme maruz bırakmayın.
- Monitörü açmayınasing. İçerisinde kullanıcı tarafından bakımı yapılabilecek parça bulunmamaktadır. Tüm bakımlar için yetkili personele başvurun.
- Monitörün etrafında yeterli havalandırma olduğundan emin olun. Havalandırma açıklıklarını kapatmayın.
- Yalnızca üretici tarafından sağlanan güç adaptörünü ve kabloları kullanın.
- Monitör uzun süre kullanılmayacaksa elektrik fişini prizden çekin.
Paket İçeriği
Paketinizde tüm öğelerin mevcut olduğundan emin olun:
- GIGABYTE MO32U Monitor
- Güç kablosu
- HDMI 2.1 kablosu
- DP cable (DisplayPort cable)
- USB cable (USB Type-A to Type-B upstream cable)
- Hızlı Başlangıç Kılavuzu / Kullanıcı Kılavuzu (bu belge)
Kurmak
1. Stand Montajı
Carefully remove the monitor and stand components from the packaging. Attach the stand neck to the monitor panel, ensuring it clicks securely into place. Then, attach the base to the stand neck and tighten the screws if necessary. The stand allows for height adjustment (up to 130mm) and tilt (-5° to +21°).
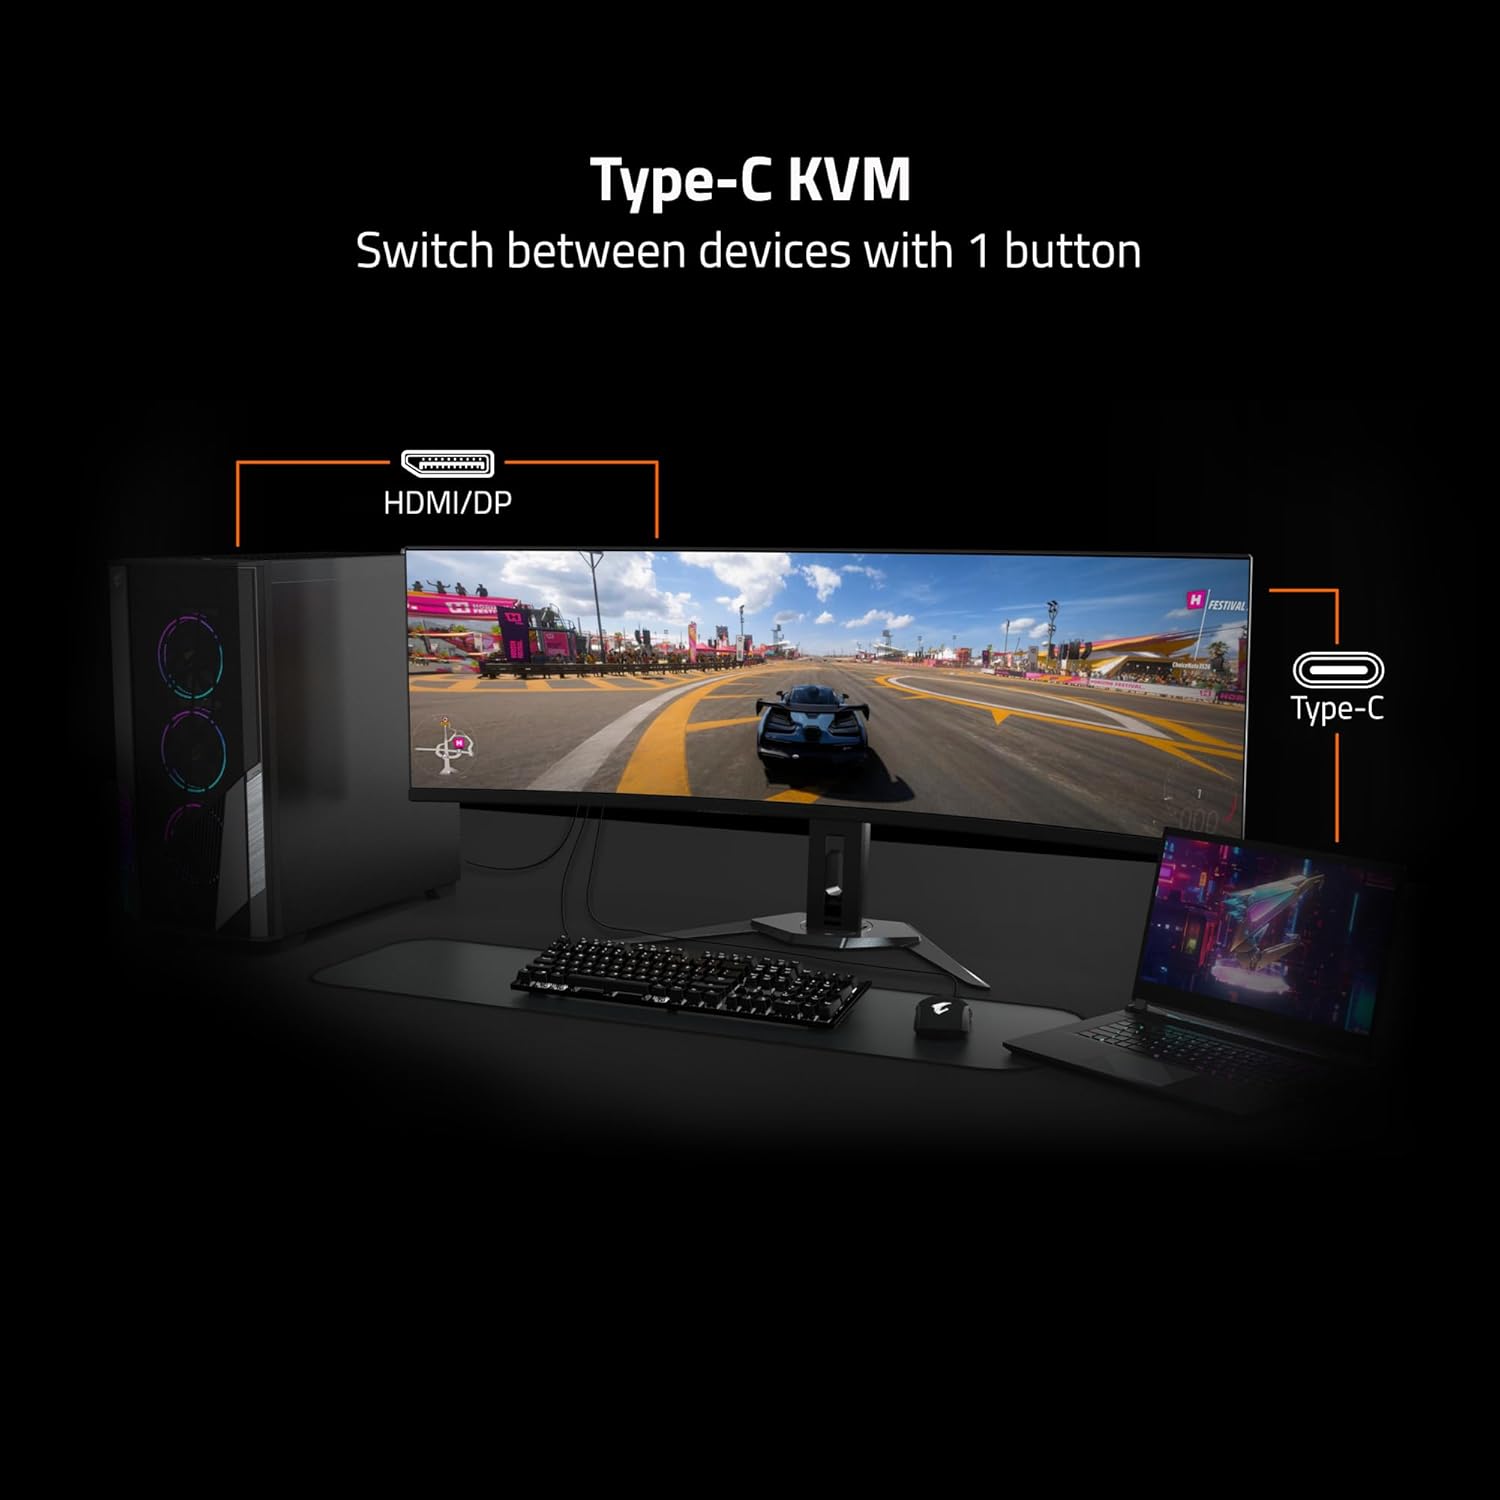
Image: Adjustable Stand and VESA Wall Mount points.
2. VESA Wall Mount Installation
The monitor supports VESA 100x100mm mounting. If using a VESA compatible wall mount or arm, remove the stand from the monitor. Secure the VESA mount to the monitor using appropriate screws (not included) according to the mount manufacturer's instructions. Refer to the image above for VESA mount point location.
3. Monitörünüzü Bağlama
Connect the necessary cables to the corresponding ports on the back of the monitor and to your computer or other devices. Ensure all connections are secure.
- Güç: Güç kablosunu monitöre ve bir elektrik prizine bağlayın.
- Video Girişi: Use the provided HDMI 2.1 or DisplayPort 1.4 cables to connect to your graphics card. The monitor also supports USB Type-C for video input.
- USB Yukarı Akışı: Connect the USB upstream cable (USB Type-A to Type-B) from your computer to the monitor's USB 3.0 Upstream port to enable the monitor's USB downstream ports and KVM functionality.
- USB Aşağı Akışı: Connect USB devices (keyboard, mouse, USB drives) to the USB 3.0 Downstream ports.
- Kulaklık girişi: Kulaklıkları veya harici hoparlörleri bağlayın.

Image: I/O Ports diagram on the back of the monitor.
Monitörünüzü Çalıştırma
1. Güç Açma/Kapatma
Press the power button, usually located on the back or bottom of the monitor, to turn the monitor on or off. The power indicator light will illuminate when the monitor is on.
3. KVM İşlevselliği
The GIGABYTE MO32U features a built-in KVM (Keyboard, Video, Mouse) switch, allowing you to control multiple devices (e.g., a desktop PC and a laptop) with a single set of keyboard and mouse connected to the monitor. To use KVM, ensure both devices are connected to the monitor via video inputs (HDMI/DP and Type-C) and the USB upstream cable is connected to the primary device. You can switch between devices using a dedicated KVM button or through the OSD menu.

Image: Type-C KVM setup for switching between devices.
4. Ekran Ayarları ve Özellikleri
The MO32U monitor offers advanced display features for an optimized viewDeneyim:
- Çözünürlük ve Yenileme Hızı: Enjoy a 4K UHD (3840x2160) resolution with a 165Hz refresh rate for smooth visuals.
- Yanıt Süresi: Experience ultra-fast 0.03ms GTG (Gray-to-Gray) response time, minimizing motion blur.
- AMD FreeSync Premium Pro: Ekran yırtılmasını ve takılmaları ortadan kaldırmak için monitörünüzün yenileme hızını GPU'nuzun kare hızıyla senkronize eder.
- QD-OLED Panel: Delivers vibrant colors, deep blacks, and high contrast (1.5M:1) with 99% DCI-P3 color gamut and 10-bit color depth.
- VESA DisplayHDR Gerçek Siyah 400: Provides enhanced contrast and color accuracy for HDR content.
- VESA ClearMR 9000: Ensures high motion clarity.
- Göz Bakımı Özellikleri: Includes Flicker-Free and Low Blue Light technologies, certified by Eyesafe, to reduce eye strain during prolonged use.

Image: Key display features and certifications.

Image: Visual comparison of 0.03ms/165Hz performance versus 5ms/60Hz.
5. GIGABYTE OLED Care
The monitor incorporates GIGABYTE OLED Care, an AI-based algorithm designed to minimize the risk of OLED burn-in issues. This suite of technologies operates in the background with minimal user interference. OLED Care includes various adjustable settings within the OSD menu to help protect the panel and extend its lifespan.
Bakım
Doğru bakım, monitörünüzün uzun ömürlü olmasını ve optimum performans göstermesini sağlar.
- Ekranın Temizlenmesi: Ekranı yumuşak, tiftiksiz bir bezle nazikçe silin. İnatçı lekeler için hafifçe silin.ampBezi su veya aşındırıcı olmayan bir ekran temizleyici ile silin. Sıvıyı doğrudan ekrana püskürtmeyin.
- C'yi Temizlemeasing: Monitörü silmek için yumuşak, kuru bir bez kullanın.asing. Güçlü deterjanlar veya aşındırıcı temizleyiciler kullanmaktan kaçının.
- OLED Bakımı: Allow the monitor to perform its automatic OLED Care functions. Avoid prolonged display of static images at high brightness settings.
Sorun giderme
Monitörünüzle ilgili sorunlarla karşılaşırsanız aşağıdaki yaygın çözümlere başvurun:
- Güç Yok: Güç kablosunun hem monitöre hem de çalışan bir elektrik prizine güvenli bir şekilde bağlı olduğundan emin olun. Güç gösterge ışığının yanıp yanmadığını kontrol edin.
- Sinyal yok: Verify that the video cables (HDMI, DisplayPort, USB-C) are correctly connected to both the monitor and your source device. Ensure the correct input source is selected in the monitor's OSD menu.
- Titreyen veya Bozuk Görüntü: Check cable connections. Ensure your graphics card drivers are up to date. Try adjusting the refresh rate in your operating system's display settings.
- Image Retention/Burn-in: While OLED Care minimizes this risk, prolonged static images can contribute. Utilize OLED Care features and avoid displaying static content for extended periods.
- KVM Geçiş Yapmıyor: Ensure the USB upstream cable is connected to the active source device and that the KVM function is properly configured in the OSD menu.
If the problem persists after trying these steps, contact GIGABYTE customer support.
Özellikler
| Özellik | Detay |
|---|---|
| Marka | GIGABYTE |
| Model Numarası | MO32U |
| Ekran Boyutu | 32 inç |
| Görüntü Türü | QD OLED |
| Çözünürlük | 4K UHD (3840x2160) |
| Yenileme Hızı | 165 Hz |
| Tepki Süresi | 0.03 Milliseconds GTG |
| En Boy Oranı | 16:9 |
| Kontrast Oranı | 1.5M:1 |
| Parlaklık | 1000 Candela per Square Meter (Peak) |
| Renk Gamı | %99 DCI-P3 |
| ViewAçı | 178 Derece |
| Bağlantı | 2x HDMI 2.1, 1x DisplayPort 1.4, 1x USB Type-C, 1x USB 3.0 Upstream, 3x USB 3.0 Downstream, 1x Earphone Jack |
| Uyarlanabilir Senkronizasyon | AMD FreeSync Premium Pro |
| HDR Desteği | VESA DisplayHDR Gerçek Siyah 400 |
| KVM | Yes, Type-C KVM |
| Montaj Tipi | VESA 100x100mm, Height Adjustable Stand |
| Güç Tüketimi | 54 Watt |
| Renk | Siyah |
Garanti Bilgileri
This GIGABYTE MO32U monitor comes with a 3 Yıl Üretici Garantisi. For detailed terms and conditions, please refer to the warranty card included in your product packaging or visit the official GIGABYTE webalan.
Destek
For technical assistance, troubleshooting beyond this manual, or warranty claims, please contact GIGABYTE customer support. You can find contact information and additional resources on the official GIGABYTE webalan.
Çevrimiçi Kaynaklar: Visit the GIGABYTE support page for drivers, FAQs, and further documentation.