
1. Giriş
This manual provides detailed instructions for the installation, operation, and maintenance of the Elitech Cold Storage Temperature Controller series. These controllers are designed for precise temperature management in various cold storage applications, ensuring optimal conditions for stored goods. Please read this manual thoroughly before installation and operation to ensure safe and efficient use.
2. Güvenlik Önlemleri
- Ensure all wiring is performed by a qualified electrician in accordance with local electrical codes.
- Herhangi bir kurulum, kablolama veya bakım işlemine başlamadan önce gücü kesin.
- Do not operate the controller in environments with excessive moisture, dust, or corrosive gases.
- Güç kaynağı hacmini doğrulayıntage, kontrol cihazının özelliklerine uygundur.
- Keep the device away from strong electromagnetic interference.
3. Ürün Bittiview
The Elitech temperature controller features a clear digital display, intuitive buttons for parameter setting, and robust construction for reliable performance in demanding environments. It typically includes inputs for temperature sensors and outputs for controlling refrigeration, defrost, and fan operations.
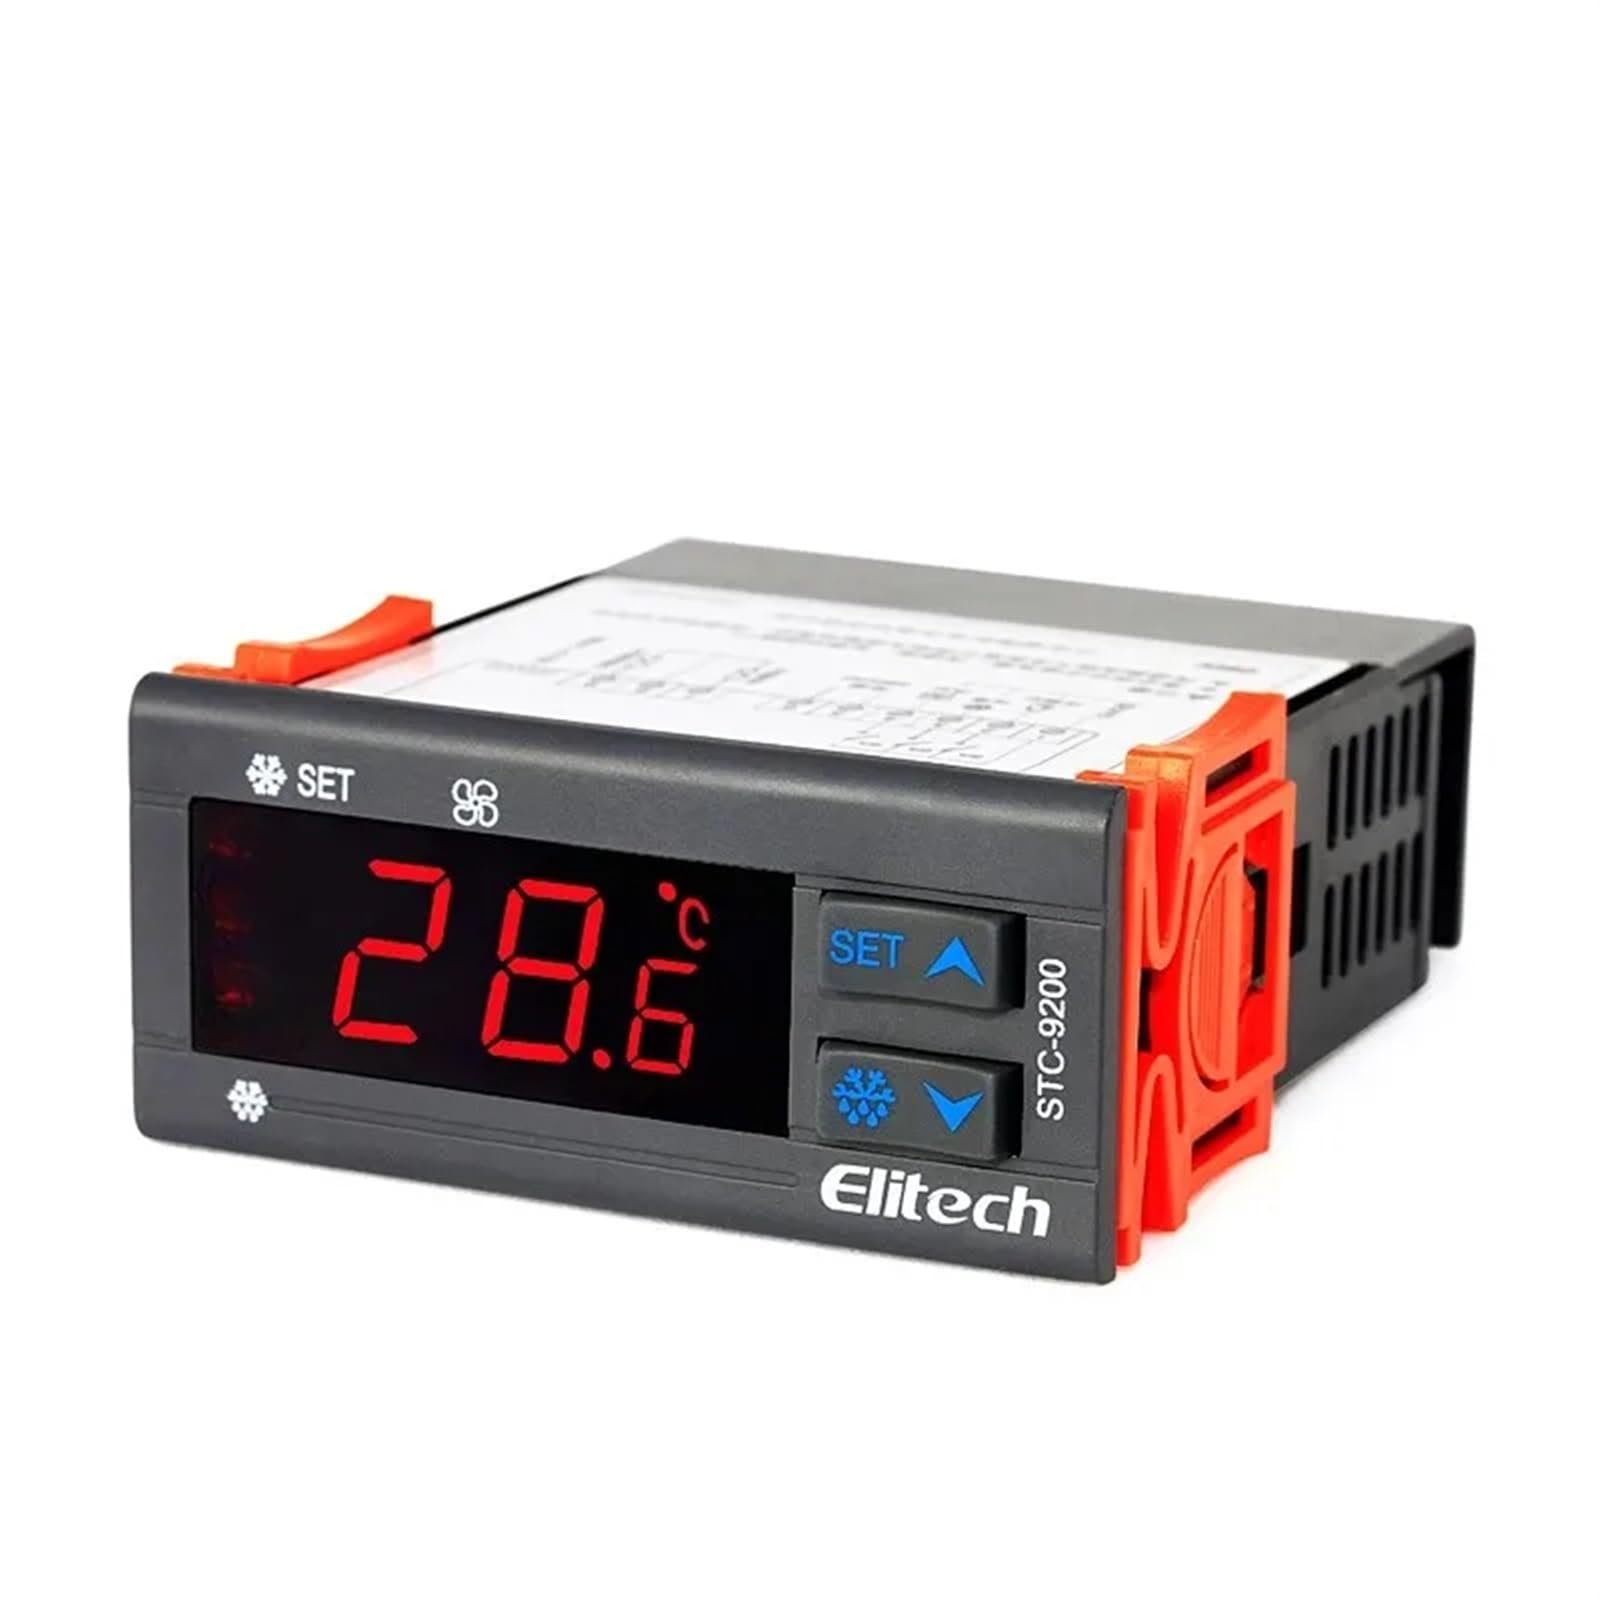
Şekil 1: Ön view of an Elitech temperature controller (model EK-3010 shown). This image displays the digital display, control buttons (Up, OK/Set, Down), and indicators for various functions like refrigeration, defrost, and fan operation. The display shows a temperature reading of -44.5.
4. Özellikler
| Özellik | Tanım |
|---|---|
| Güç Kaynağı | AC 220V ±10%, 50/60Hz (Typical, may vary by model) |
| Sıcaklık Ölçüm Aralığı | -50°C ila 99°C (-58°F ila 210°F) (Tipik) |
| Kontrol Aralığı | -40°C ila 70°C (-40°F ila 158°F) (Tipik) |
| Çözünürlük | 0.1°C / 1°F |
| Sensör Tipi | NTC sensor (Typical) |
| Röle Çıkış Kapasitesi | Compressor: 10A/250VAC; Defrost: 10A/250VAC; Fan: 10A/250VAC (Typical) |
| Çalışma Sıcaklığı | 0°C ila 60°C (32°F ila 140°F) |
| Depolama Sıcaklığı | -30°C ila 75°C (-22°F ila 167°F) |
| Bağıl nem | %20 ila %85 (yoğuşmasız) |
Note: Specifications may vary slightly between different models (STC-9200, STC-8080A, STC-200, STC-9100, STC-1000X, EK-3020). Refer to the specific model's packaging or label for precise details.
5. Kurulum ve Kurulum
5.1 Montaj
- Choose a suitable location for mounting the controller, away from direct heat sources, moisture, and vibrations.
- Ünitenin etrafında yeterli havalandırma olduğundan emin olun.
- Cut a rectangular opening in the panel according to the controller's dimensions (refer to the product diagram for exact measurements).
- Insert the controller into the opening and secure it using the provided mounting clips.
5.2 Kablolama
UYARI: Ensure power is disconnected before wiring.
- Güç Kaynağı: Connect the main power supply (L and N) to the designated terminals on the controller.
- Sıcaklık Sensörü: Connect the NTC temperature sensor to the sensor input terminals. Ensure correct polarity if applicable. The sensor should be placed in the area where temperature needs to be monitored and controlled.
- Compressor Output: Connect the compressor's power line to the compressor relay output terminals.
- Defrost Heater Output: Connect the defrost heater's power line to the defrost relay output terminals.
- Fan Output: Connect the evaporator fan's power line to the fan relay output terminals.
Refer to the wiring diagram printed on the side of the controller or in the specific model's manual for precise terminal connections.
6. Kullanım Talimatları
6.1 Güç Açma/Kapatma
- To power on, connect the main power supply. The display will show the current temperature.
- To power off, disconnect the main power supply.
6.2 ViewSıcaklık
The current measured temperature is continuously displayed on the front panel.
6.3 Parametrelerin Ayarlanması
The controller allows adjustment of various parameters such as setpoint temperature, differential, defrost cycle, and fan operation. The exact procedure may vary slightly by model, but generally follows these steps:
- Basılı tutun AYARLA/TAMAM button for 3-5 seconds to enter parameter setting mode.
- Kullanın UP Ve AŞAĞI buttons to navigate through the parameter codes (e.g., F1, F2, P1, P2).
- Basmak AYARLA/TAMAM ile view seçilen parametrenin değeri.
- Kullanın UP Ve AŞAĞI değeri ayarlamak için düğmeler.
- Basmak AYARLA/TAMAM again to confirm the new value and move to the next parameter, or press and hold AYARLA/TAMAM to save all changes and exit the setting mode.
Common parameters include:
- Set Point (SP): İstenilen sıcaklık.
- Differential (Hy): The temperature difference between the set point and the turn-on/off temperature.
- Defrost Cycle (Id): Interval between defrost cycles.
- Defrost Duration (Ed): Length of the defrost cycle.
- Fan Control (Fc): Settings for fan operation during refrigeration and defrost.
7. Bakım
7.1 Temizlik
- Ön paneli düzenli olarak yumuşak bir bezle temizleyin.amp bezle silin. Aşındırıcı temizleyiciler veya çözücüler kullanmayın.
- Ensure the ventilation openings are free from dust and debris to prevent overheating.
7.2 Sensor Check
- Periodically inspect the temperature sensor and its wiring for any damage or corrosion.
- Ensure the sensor is securely placed and making proper contact.
8. Sorun Giderme
| Sorun | Olası Neden | Çözüm |
|---|---|---|
| Display shows "EE" or "HH" | Sensor error or temperature out of range. | Check sensor connection and wiring. Replace sensor if damaged. Ensure temperature is within operating range. |
| Denetleyici açılmıyor | Güç kaynağı yok veya kablolama yanlış. | Verify power connection and voltage. Check wiring according to diagram. |
| kompresör çalışmıyor | Temperature not reaching set point, compressor delay, or wiring issue. | Check set point and differential. Wait for compressor delay. Verify compressor wiring. |
| Yanlış sıcaklık okuması | Sensor placement, sensor damage, or calibration needed. | Relocate sensor to a representative area. Check sensor for damage. Refer to manual for calibration procedure if available. |
9. Garanti ve Destek
Elitech products are typically covered by a limited warranty against defects in materials and workmanship. The warranty period and terms may vary by region and specific product model. Please retain your purchase receipt as proof of purchase.
For technical support, warranty claims, or service inquiries, please contact your authorized Elitech distributor or visit the official Elitech website for contact information. When contacting support, please have your product model number and purchase date available.