myGEKOgear D111
myGEKOgear Orbit D111 Dash Cam User Manual
Model: D111
1. Giriş
This manual provides detailed instructions for the installation, operation, and maintenance of your myGEKOgear Orbit D111 Full HD Dash Cam. Please read this manual thoroughly before using the device to ensure proper functionality and to maximize your user experience.
2. Kutuda Neler Var?
Paketin içinde tüm öğelerin mevcut olduğundan emin olun:
- Orbit D111 Dashcam
- Güç Kablosu (Araç Şarj Cihazı)
- Emme Kupası Dağı
- 32GB Mikro SD Kart
- Kullanım Kılavuzu (bu belge)
3. Ürün Bittiview
The myGEKOgear Orbit D111 is a compact dash camera designed to record your driving in Full HD 1080P resolution. It features a 3-inch display, a 140-degree wide-angle lens, G-Sensor for emergency recording, and supports loop recording.
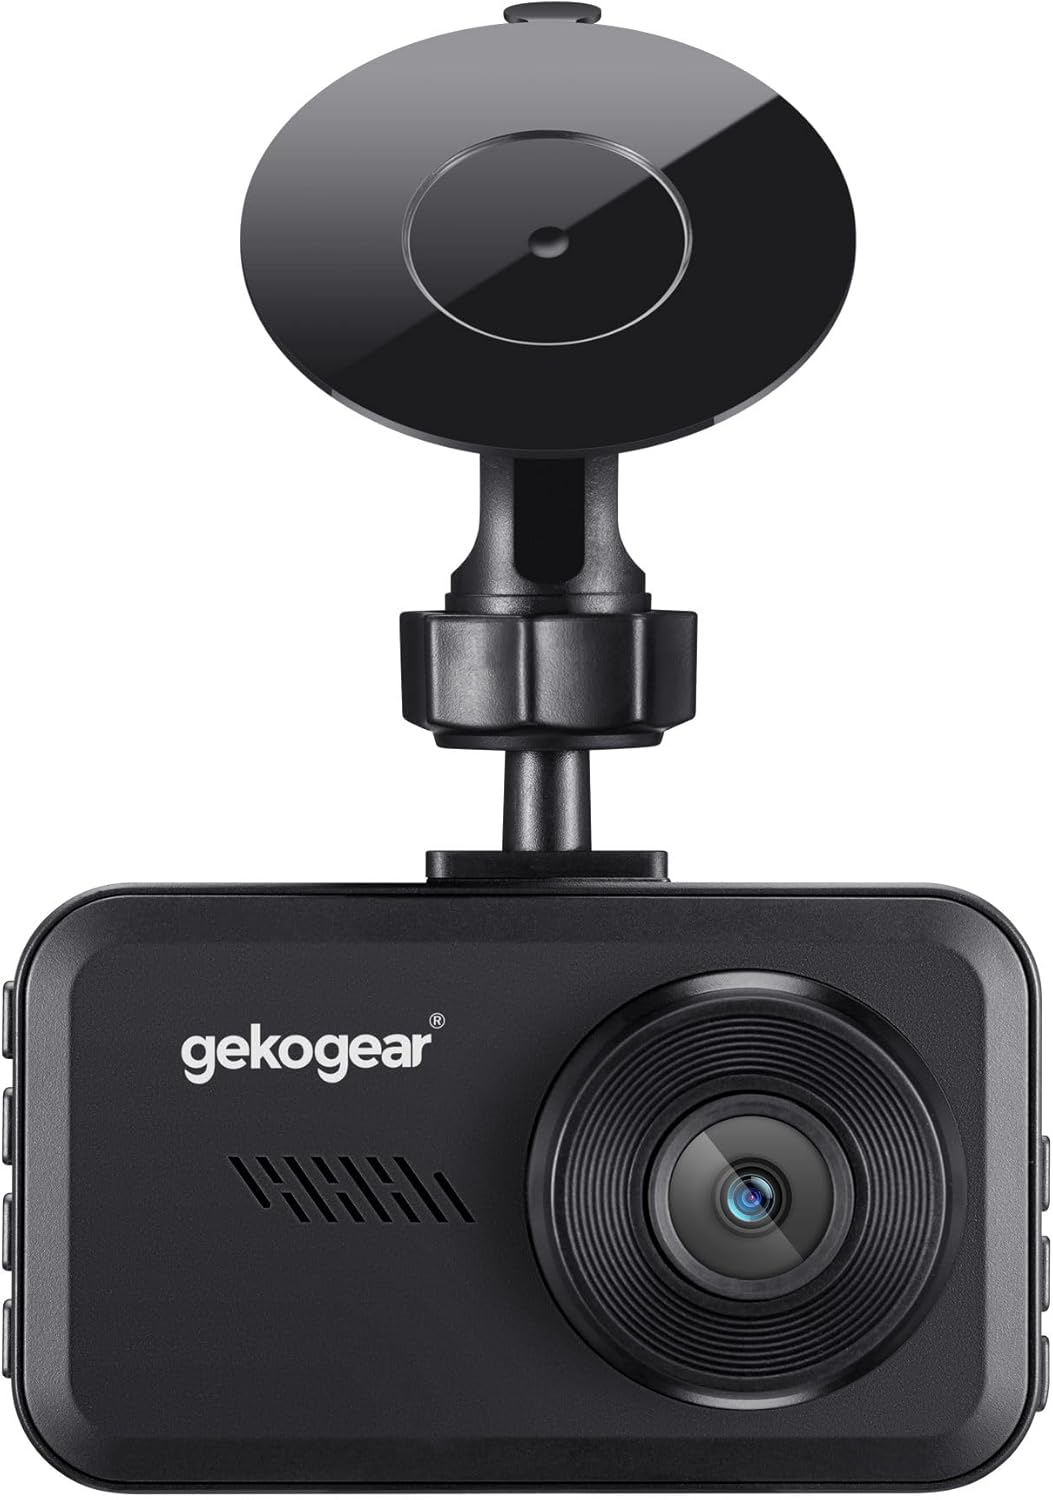
Şekil 3.1: Ön view of the Orbit D111 Dash Cam with its suction cup mount.
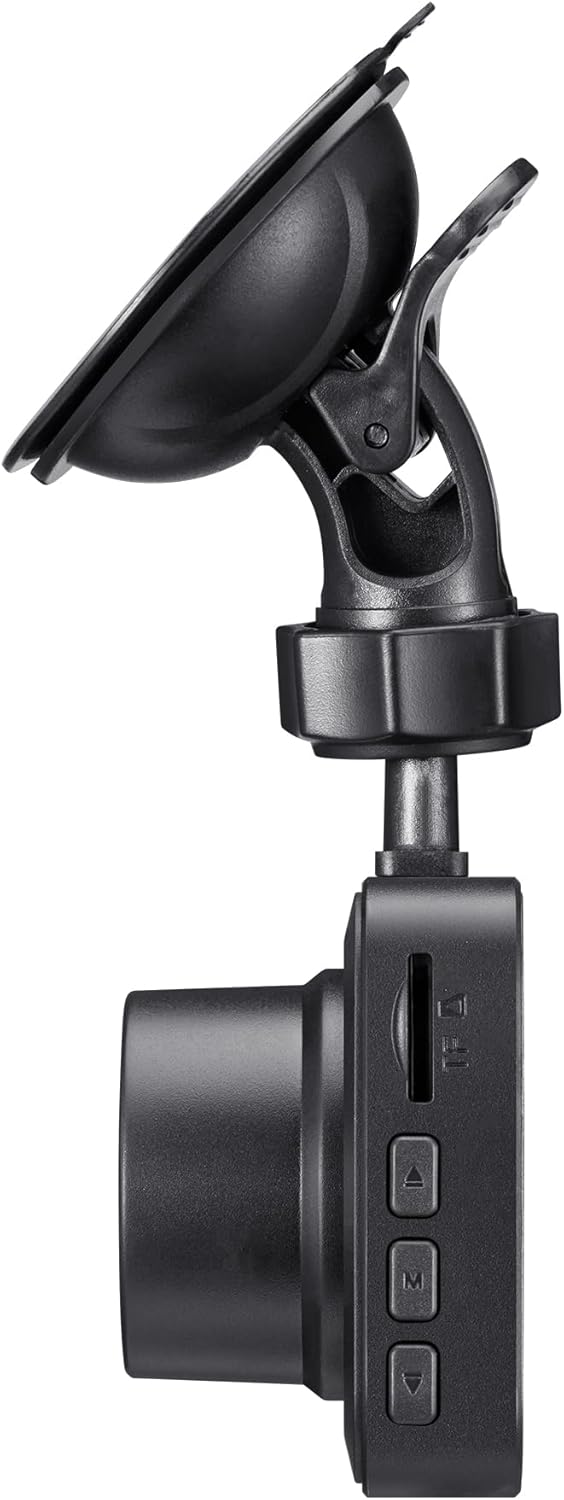
Şekil 3.2: Taraf view illustrating the control buttons and ports on the Orbit D111 Dash Cam.
4. Kurulum
4.1. MicroSD Kart Takılması
The Orbit D111 supports MicroSD cards up to 64GB. A 32GB MicroSD card is included. Ensure the card is inserted correctly before use.
- Araç içi kameranın yan tarafında bulunan MicroSD kart yuvasını bulun.
- Altın renkli kontaklar kameranın arkasına bakacak şekilde MicroSD kartı yerine oturana kadar takın.
- Çıkarmak için kartı yavaşça itin ve dışarı fırlamasını bekleyin.

Şekil 4.1: MicroSD card and adapter, illustrating the type of storage supported.
4.2. Dash Cam'in Montajı
Use the provided suction cup mount to secure the dash cam to your vehicle's windshield.
- Araç kamerasını takmayı düşündüğünüz ön camdaki bölgeyi temizleyin.
- Vantuzlu montaj aparatını araç kamerasına takın.
- Vantuzu ön cama sıkıca bastırın ve sabitlemek için kolu çevirin.
- Net bir görüntü elde etmek için kamera açısını ayarlayın. view Önümüzdeki yolun.

Şekil 4.2: The Orbit D111 Dash Cam securely mounted on a vehicle's windshield, displaying its live recording view.
4.3. Güç Bağlantısı
Connect the dash cam to your vehicle's power source using the included power cable.
- Güç kablosunun küçük ucunu araç kamerasının güç girişine takın.
- Plug the other end (car charger) into your vehicle's 12V power outlet (cigarette lighter socket).
- The dash cam will typically power on and begin recording automatically when the vehicle's ignition is turned on.
5. Kullanım Talimatları
5.1. Güç Açma/Kapatma
The dash cam is designed to power on and off automatically with your vehicle's ignition. You can also manually power it on or off by pressing and holding the power button.
5.2. Kayıt Modları
The Orbit D111 features continuous loop recording and emergency recording via its G-Sensor.
- Döngü Kaydı: The camera records video in segments (e.g., 1, 3, or 5 minutes). When the MicroSD card is full, the oldest unlocked files are overwritten to make space for new recordings.
- G-Sensörü (Acil Durum Kaydı): The built-in G-Sensor detects sudden impacts or rapid deceleration. When triggered, it automatically locks the current video segment, preventing it from being overwritten by loop recording.

Şekil 5.1: Visual representation of the G-Sensor feature, which automatically saves critical footagOlaylar sırasında.
5.3. Ekran ve Menü Gezinme
The 3-inch IPS display provides a live view of the recording and allows access to settings.

Şekil 5.2: Açık bir view of the 3-inch display, showing the live feed and recording indicators.
Use the physical buttons on the side of the dash cam to navigate through the menu options and adjust settings such as video resolution, loop recording duration, G-Sensor sensitivity, and date/time.
5.4. Wide-Angle Lens
The 140-degree wide-angle lens captures a broad view of the road, covering multiple lanes and reducing blind spots.

Şekil 5.3: Illustration of the 140-degree wide-angle lens coverage, showing an expansive view Yolun.
6. Bakım
- Temizlik: Use a soft, dry cloth to clean the camera lens and display. Avoid abrasive cleaners or solvents.
- MicroSD Kart: Periodically format the MicroSD card (at least once a month) within the camera's settings to ensure optimal performance and prevent data corruption. Back up any important filebiçimlendirmeden önce.
- Donanım Yazılımı Güncellemeleri: Check the myGEKOgear website for available firmware updates. Keeping your dash cam's firmware updated can improve performance and add new features.

Şekil 6.1: A laptop screen displaying a firmware update interface, indicating the availability of ongoing software support.
7. Sorun Giderme
- Kamera açılmıyor:
- Ensure the power cable is securely connected to both the dash cam and the vehicle's 12V outlet.
- Check if the vehicle's 12V outlet is functioning (e.g., by testing with another device).
- The dash cam may have a low battery; charge it for a few minutes. - Kayıt duruyor veya donuyor:
- The MicroSD card may be full. Format the card (after backing up important fileS).
- The MicroSD card may be faulty or too slow. Use a high-speed (Class 10 or U1/U3) MicroSD card.
- Ensure the card is properly inserted. - Kötü video kalitesi:
- Kamera lensini temizleyin.
- Lens üzerindeki koruyucu filmin çıkarıldığından emin olun.
- Kamera menüsünden video çözünürlüğü ayarlarını kontrol edin. - G-sensörü çok hassas/yeterince hassas değil:
- Adjust the G-Sensor sensitivity setting in the camera menu. - Tarih/Saat yanlış:
- Set the correct date and time in the camera's settings menu.
8. Özellikler
| Özellik | Şartname |
|---|---|
| Model Adı | D111 |
| Video Yakalama Çözünürlüğü | 1080p Full HD |
| Görüntülemek | 3 inç IPS Ekran |
| Alanı View | 140 Derece |
| Özel Özellikler | Built-In Display, Compact Design, G-Sensor, Loop Recording |
| Depolama Desteği | Up to 64GB MicroSD (32GB included) |
| Bağlantı Teknolojisi | USB |
| Montaj Tipi | Ön Cam Montajı (Vantuzlu) |
| Ürün Boyutları | 3.5 x 2 x 2 inç |
| Ürün Ağırlığı | 9.6 ons |
| Üretici | Adesso |
9. Garanti ve Destek
For warranty information and technical support, please refer to the official myGEKOgear webSite üzerinden satın alabilir veya doğrudan müşteri hizmetleriyle iletişime geçebilirsiniz. Satın alma belgenizi saklayın.
Ask a question about this manual
Ask about setup, troubleshooting, compatibility, parts, safety, or missing instructions. Manuals+ will review the question and use this page’s manual context to help answer it.