1. Giriş
Thank you for choosing the Auxbeam 6 Gang Auto-Dimmable RGB Switch Panel. This manual provides detailed instructions for the installation, operation, and maintenance of your new switch panel system. Please read this manual thoroughly before installation and operation to ensure proper function and safety.

Figure 1.1: Auxbeam 6 Gang RGB Switch Panel complete kit, showing the switch panel, control box, battery cables, and signal wire.
2. Ürün Özellikleri
- Otomatik Karartmalı RGB Arka Aydınlatma: Offers countless RGB backlight color options to match your vehicle's ambient lighting. The backlight automatically brightens in daylight and dims at night to prevent eye strain.
- 1 Touch Backlight OFF: Easily deactivate the backlight with a single click of the "MODE" button.
- 3 Aydınlatma Modu: Bağlı aksesuarların çok yönlü kontrolü için TOGGLE (cihaz sürekli açık), MOMENTARY (etkinleştirmek için basılı tutun) ve PULSED (flaş) modlarını destekler.
- Hafıza Fonksiyonu: Retains your last settings even after power cycling.
- Heavy-Duty Battery Cables: Includes a pair of 7AWG, 7ft long battery cables (red for positive, black for negative) with tinned-copper terminal lugs (0.23"/6mm and 0.31"/8mm).
- 20ft Signal Wire for Extension: A 20-feet 4-pin wiring harness extension with a Plug and Play design for effortless installation and extended reach to the controller box.
- Yükseltilmiş Kontrol Kutusu: Features a 1-sided outlet design, built-in solid-state relay, spare fuses, and clearly labeled outputs with malfunction indicator lights for flexible and secure installation.

Şekil 2.1: Temel avantajlartages of the Auxbeam RA60, highlighting RGB backlight, built-in solid-state relay, sturdy aluminum alloy material, and memory function.
3. Paket İçeriği
Lütfen aşağıda listelenen tüm öğelerin paketinizde mevcut olduğundan emin olun:
- Auxbeam 6 Gang RGB Switch Panel (RA60)
- Control Box with Built-in Solid State Relay
- 7 AWG 7FT Battery Cables (1x Red, 1x Black)
- 20FT Signal Wire 4-Pin Wiring Harness Extension
- Mounting Hardware (Screws, Brackets, etc. - specific items may vary)
- Kullanım Kılavuzu (bu belge)

Figure 3.1: Included 7 AWG 7FT Battery Cables, essential for power connection.
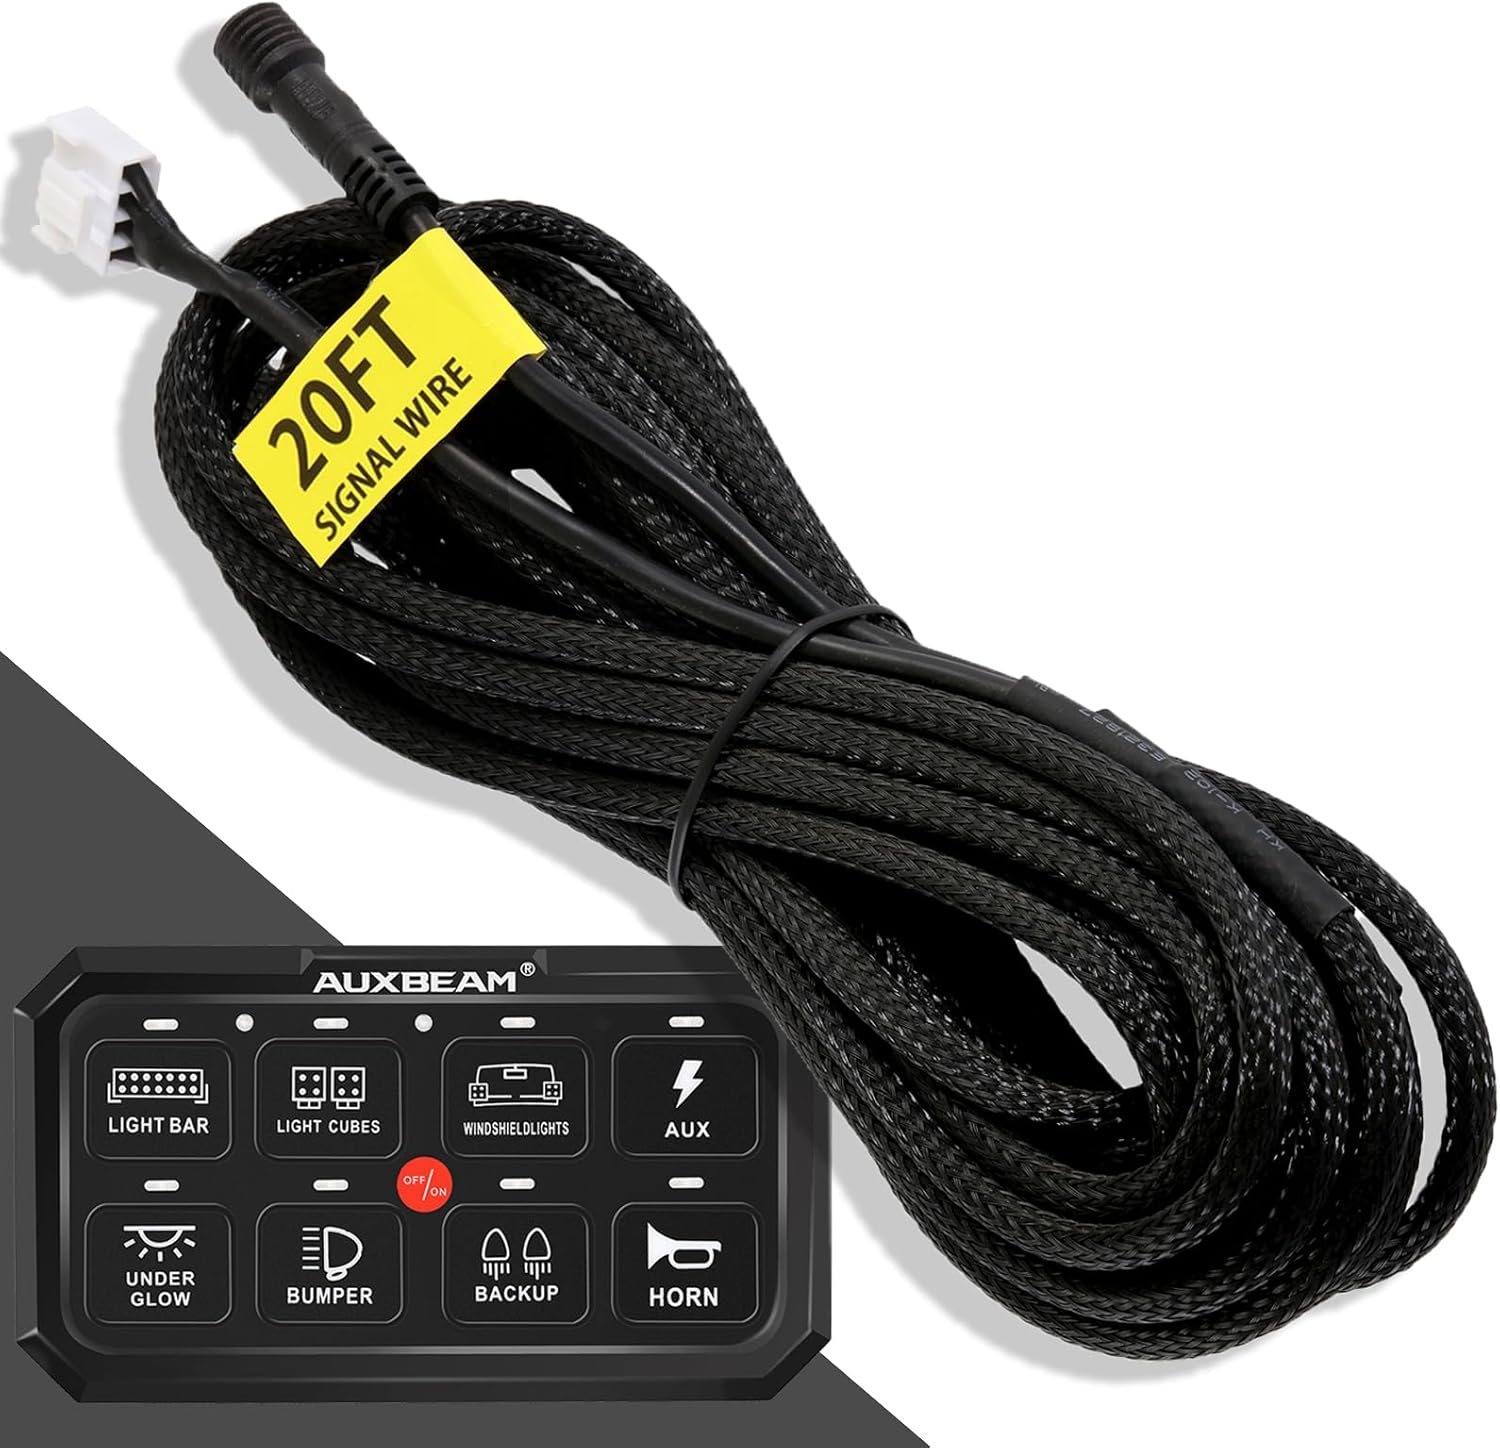
Figure 3.2: The 20FT Signal Wire, providing extended reach for installation.
4. Kurulum ve Kurulum
Proper installation is crucial for the safe and effective operation of your Auxbeam switch panel. It is recommended to have this installed by a professional if you are not familiar with automotive electrical systems.
4.1. Mounting the Control Box
Choose a secure, dry location for the control box, away from excessive heat or moisture. Ensure there is sufficient space for wiring connections and ventilation. Use the provided mounting hardware to secure the control box.

Şekil 4.1: Üzeriview of the Upgraded Control Box, highlighting its features and connection points.
4.2. Gücü Bağlama
- Connect the red 7AWG battery cable to the positive (+) terminal of your vehicle's battery.
- Connect the black 7AWG battery cable to the negative (-) terminal of your vehicle's battery or a suitable chassis ground point.
- Connect the other ends of the battery cables to the corresponding terminals on the control box. Ensure connections are tight and secure.
4.3. Connecting the Switch Panel to the Control Box
Use the provided 4-pin signal wire to connect the switch panel to the control box. The signal wire features a plug-and-play design for easy connection. If the standard length is insufficient, use the 20FT signal wire extension.

Figure 4.2: The 4-pin male and female connector, ensuring a secure and easy plug-and-play connection.

Figure 4.3: Illustration of how the 20FT Signal Wire can replace the original cable for extended reach without cutting or splicing.
4.4. Wiring Accessories
Connect your desired accessories (e.g., LED light bars, fog lights, auxiliary lights) to the corresponding output terminals on the control box. Each output is clearly labeled and protected by a fuse. Ensure the accessory's current draw does not exceed the fuse rating for that circuit.
5. Kullanım Talimatları
The Auxbeam 6 Gang RGB Switch Panel is designed for intuitive control of your vehicle's accessories.
5.1. Açma/Kapama
Press the main power button (usually indicated by a power symbol) on the switch panel to turn the unit on or off. Individual switches control their respective connected accessories.
5.2. RGB Backlight and Auto-Dimming
The switch panel features customizable RGB backlighting. The system automatically adjusts the backlight brightness based on ambient light conditions, brightening during the day and dimming at night for optimal visibility and comfort.
5.3. 1-Touch Backlight OFF
To quickly turn off the backlight of the entire panel, simply press the "MODE" button once. Press it again to restore the backlight.
5.4. Aydınlatma Modlarını Değiştirme
The Auxbeam switch panel offers three distinct lighting modes for each individual switch. To cycle through these modes for a specific switch, press and hold the corresponding switch button for a few seconds until the mode changes. The modes are:
- DEĞİŞTİR: The default mode. Press once to turn the accessory ON, press again to turn it OFF. The accessory remains on until manually switched off.
- ANLIK: The accessory is active only while the button is pressed and held. Releasing the button turns the accessory off. Ideal for horns or temporary functions.
- DARBELENDİRİLMİŞ (Flaş): The accessory will flash or strobe when activated. Press once to activate, press again to deactivate. Suitable for warning lights or special effects.

Figure 5.1: Visual representation of the three lighting modes (Toggle, Momentary, Pulsed) and the memory function.
5.5. Hafıza İşlevi
The switch panel is equipped with a memory function that remembers the last active state and lighting mode for each switch. When the panel is powered off and then on again, it will recall these settings.
6. Bakım
To ensure the longevity and optimal performance of your Auxbeam switch panel, follow these maintenance guidelines:
- Temizlik: Wipe the switch panel and control box with a soft, damp bez. Sert kimyasallar veya aşındırıcı temizleyiciler kullanmayın.
- Bağlantı Kontrolleri: Periodically inspect all wiring connections (battery cables, signal wire, accessory wires) to ensure they are secure and free from corrosion.
- Sigorta Denetimi: The control box contains spare fuses. If an accessory stops working, check the corresponding fuse in the control box and replace it if blown. Always replace with a fuse of the same rating.
- Çevre Koruma: While the control box is designed to be robust, avoid exposing it to extreme temperatures, direct water submersion, or excessive vibrations.
7. Sorun Giderme
If you encounter issues with your Auxbeam switch panel, refer to the following common troubleshooting steps:
| Sorun | Olası Neden | Çözüm |
|---|---|---|
| Panel açılmıyor. | No power from battery; Loose battery cable connections; Blown main fuse. | Pil hacmini kontrol edintage; Ensure battery cables are securely connected to battery and control box; Inspect and replace main fuse if necessary. |
| Individual accessory not working. | Blown accessory fuse; Loose accessory wiring; Faulty accessory. | Check the specific fuse for that output on the control box and replace if blown; Verify accessory wiring connections; Test the accessory directly if possible. |
| Arka ışık çalışmıyor veya titriyor. | Backlight turned off via "MODE" button; Loose signal wire connection; Internal fault. | Press the "MODE" button to toggle backlight; Re-seat the 4-pin signal wire connection; If problem persists, contact Auxbeam support. |
| Switch mode (Toggle/Momentary/Pulsed) not changing. | Button not held long enough; Internal software issue. | Ensure you are pressing and holding the individual switch button for several seconds until the mode changes; If issue persists, contact Auxbeam support. |
If these steps do not resolve your issue, please contact Auxbeam customer support for further assistance.
8. Özellikler
| Özellik | Detay |
|---|---|
| Marka | Yardımcı ışın |
| Örnek | RA60 |
| Çalışma Modu | Manuel |
| Bağlayıcı Türü | Wire Leads and Pin Headers |
| Terminal Tipi | Vida |
| Devre tipi | 6 yollu |
| Aktüatör Tipi | Basmalı Düğme |
| İletişim Malzemesi | Bakır |
| Pozisyon Sayısı | 6 |
| Kontrol Yöntemi | Dokunmak |
| Renk | Siyah |
| Akü Kablo Uzunluğu | 7 ft (7 AWG) |
| Signal Wire Length | 20 ft (4-pin) |
9. Garanti ve Destek
Auxbeam products are manufactured to high-quality standards and are backed by a 2 yıllık garanti satın alma tarihinden itibaren. Bu garanti, normal kullanımda malzeme ve işçilikteki kusurları kapsar.
For technical support, warranty claims, or any questions regarding your Auxbeam 6 Gang RGB Switch Panel, please visit the official Auxbeam website or contact their customer service department. Please have your product model (RA60) and purchase information ready when contacting support.
Auxbeam Official Webalan: www.auxbeam.com


