
1. Önemli Güvenlik Talimatları
Please read all instructions carefully before using the Teesa Steam Mop TSA5051. Keep this manual for future reference.
- Always ensure the appliance is unplugged before filling the water tank or performing maintenance.
- Do not leave the steam mop unattended while powered on.
- Çalışma sırasında çocukları ve evcil hayvanları cihazdan uzak tutun.
- Su deposunda mineral birikimini önlemek için yalnızca damıtılmış veya demineralize su kullanın.
- Buharı insanlara, hayvanlara veya elektrikli cihazlara doğrultmayın.
- Avoid using the steam mop on unsealed hardwood floors or surfaces that are sensitive to heat and moisture.
- Always attach a cleaning pad before operating the steam mop.
- Güç kablosu hasar görmüşse, tehlikeyi önlemek için üretici, servis acentesi veya benzer vasıflı kişiler tarafından değiştirilmelidir.
2. Ürün Bittiview ve Bileşenler
Familiarize yourself with the parts of your Teesa Steam Mop TSA5051 before assembly and operation.

Şekil 2.1: Fully assembled Teesa Steam Mop TSA5051, front view.

Şekil 2.2: Taraf view of the steam mop, showing the handle and power cord wrap.
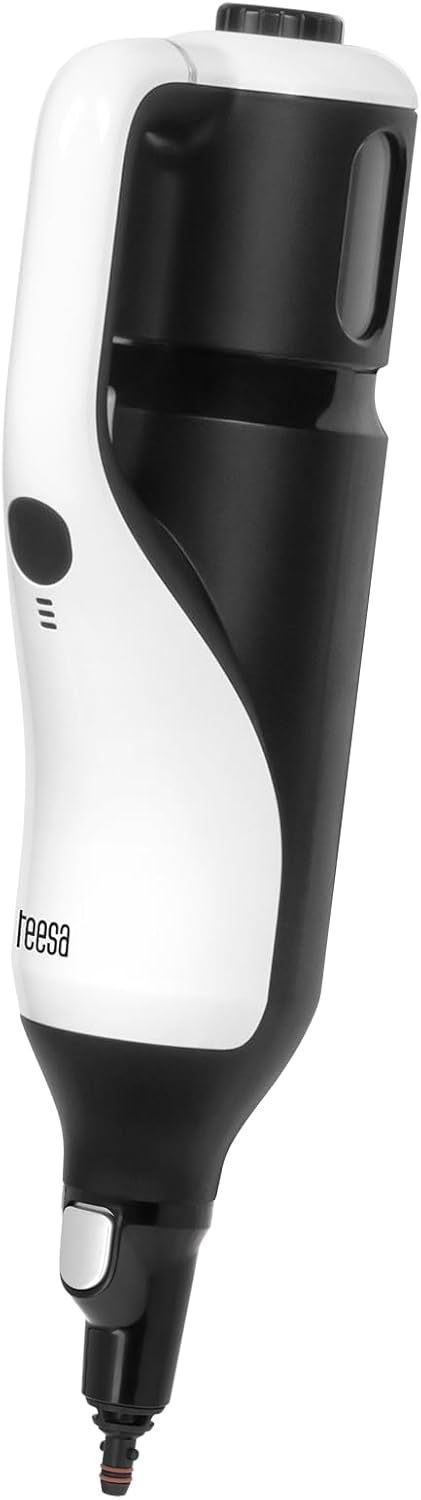
Şekil 2.3: The detachable handheld steam unit.

Şekil 2.4: Illustration of detaching the handheld unit from the main body.
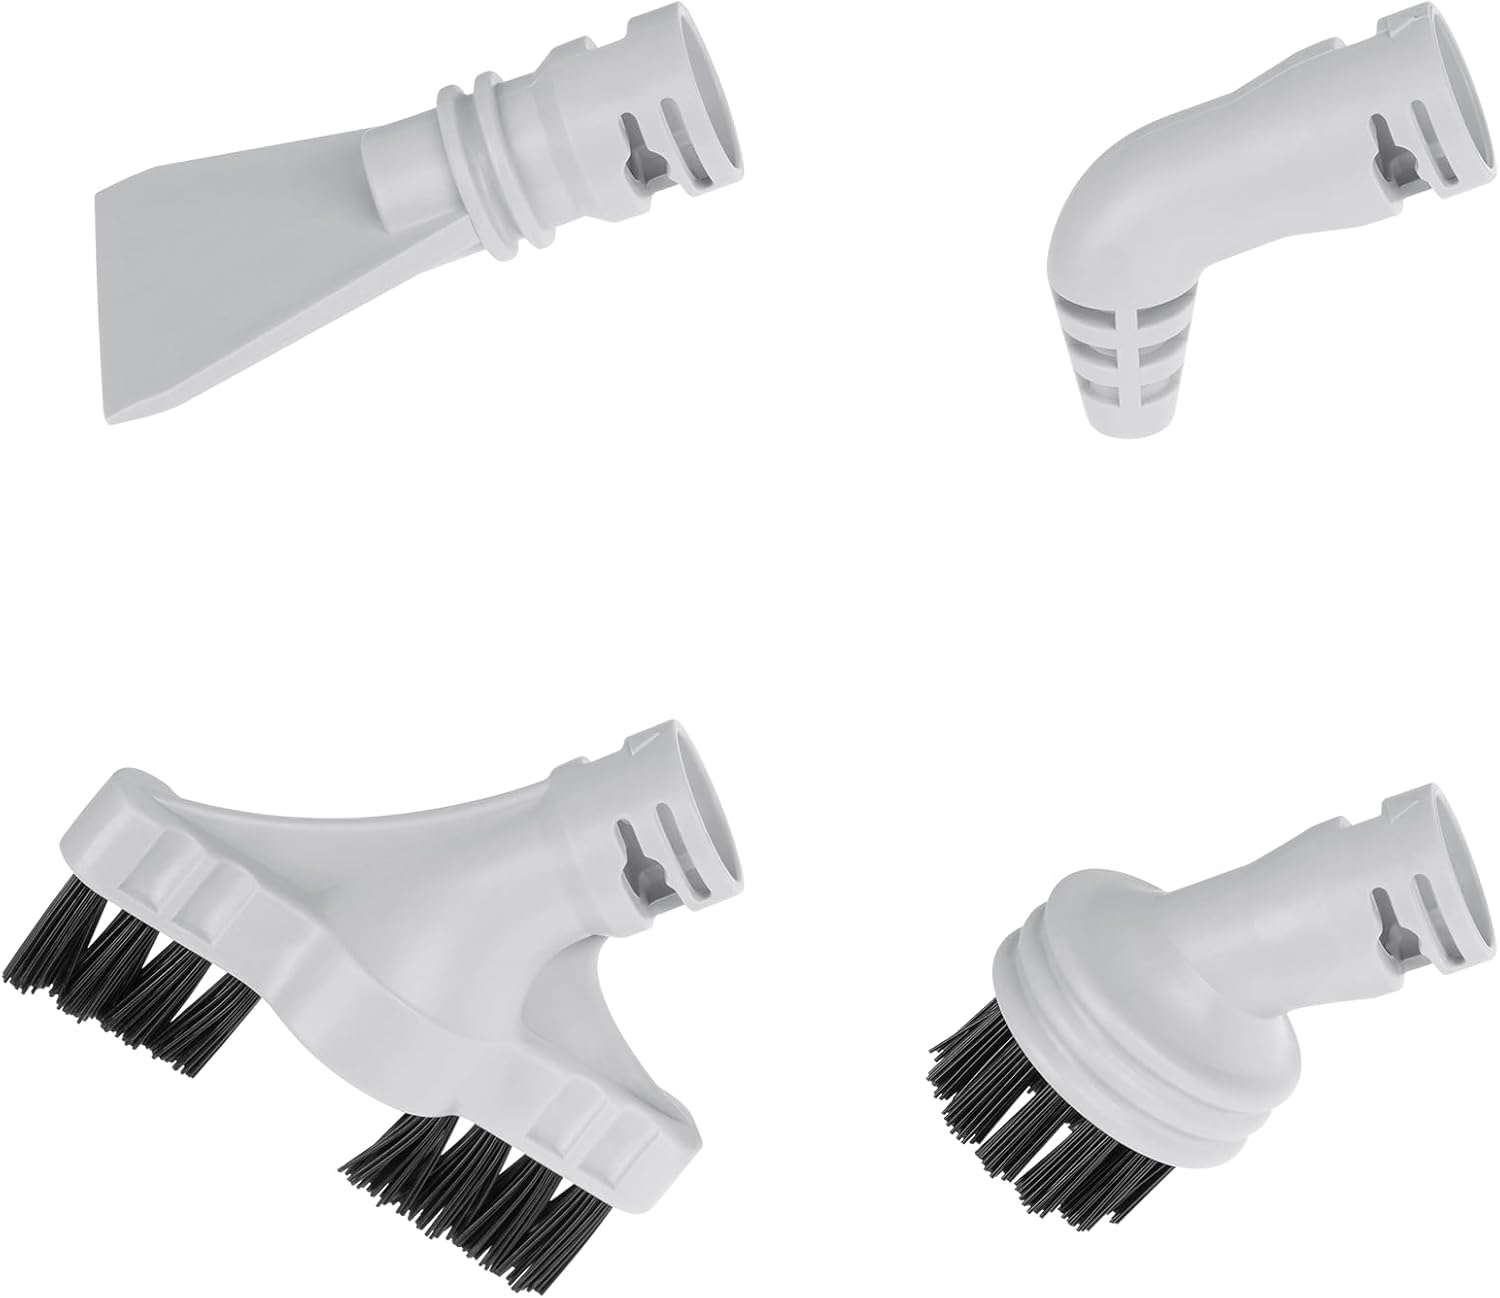
Şekil 2.5: Included accessories: round brush, joint accessory, slot nozzle, scraper.

Şekil 2.6: Measuring cup for water and adapter for accessories.
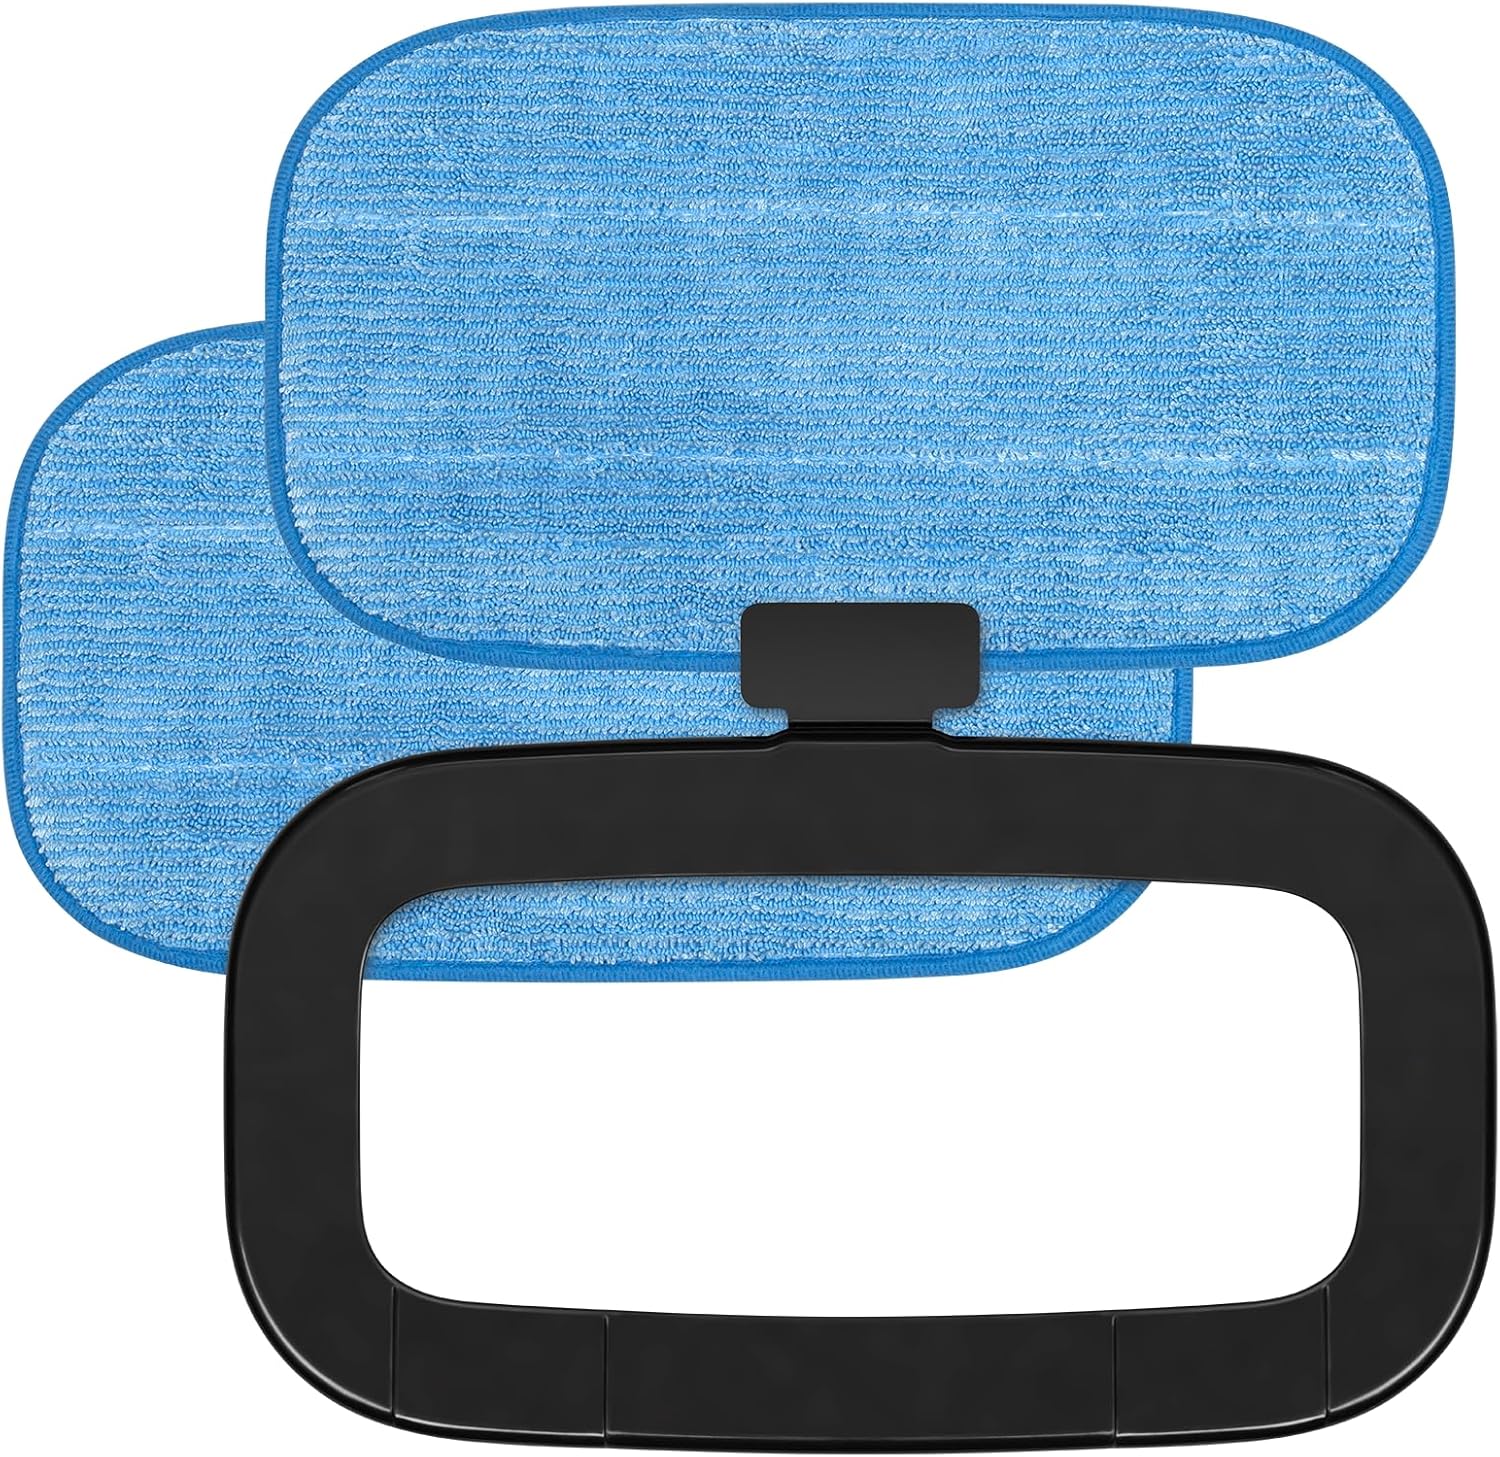
Şekil 2.7: Two sponge cloths (mop pads) and the carpet glider frame.
Dahil Bileşenler:
- Ana Buharlı Paspas Ünitesi (çıkarılabilir el tipi buhar başlığı ile birlikte)
- Kolu Meclisi
- 2 x Sponge Cloths (Mop Pads)
- Ölçü Kabı
- Aksesuar Adaptörü
- Yuvarlak fırça
- Joint Accessory
- Yuvalı Nozul
- Kazıyıcı
- Carpet Glider Frame
3. Kurulum ve Montaj
- Sapı Birleştirin: Insert the handle assembly into the main steam mop unit until it clicks securely into place.
- Temizleme pedini takın: Place one of the sponge cloths onto the bottom of the mop head, ensuring it is securely attached.
- Su deposunu doldur:
- Su deposu kapağını açın.
- Using the provided measuring cup, fill the water tank with up to 380 ml of distilled or demineralized water. Do not overfill.
- Su deposu kapağını güvenli bir şekilde kapatın.
- Optional: Attach Carpet Glider: For refreshing carpets, place the mop head with the attached cleaning pad into the carpet glider frame.
4. Kullanım Talimatları
4.1. Buharlı Paspas Olarak Kullanımı
- Su deposunun dolu olduğundan ve temizleme pedinin takılı olduğundan emin olun.
- Plug the power cord into a grounded electrical outlet (220-240 V AC, 50 Hz).
- The steam mop will begin heating. The indicator light will illuminate, signaling preparation. The device is ready in approximately 25 seconds.
- Select the desired steam level (3 levels available) using the control button.
- Begin cleaning by moving the mop head slowly and steadily over the floor surface. The swivel head allows for easy maneuverability.
- For carpet refreshing, ensure the carpet glider is attached and move the mop over the carpet.
- When finished, unplug the appliance and allow it to cool before emptying any remaining water and cleaning.
4.2. Using as a Handheld Steam Cleaner
- Unplug the steam mop and ensure it is cool.
- Press the release button to detach the handheld steam unit from the main body (refer to Figure 2.4).
- Attach the desired accessory (e.g., round brush, slot nozzle, joint accessory, scraper) to the handheld unit using the accessory adapter if needed.
- Fill the water tank if necessary (follow instructions in Section 3.3).
- Plug in the handheld unit. Wait for the indicator light to show it's ready (approx. 25 seconds).
- Buharı temizlenecek yüzeye doğru yönlendirin. Buhar sıcak olduğundan dikkatli olun.
- After use, unplug the unit and allow it to cool before detaching accessories and storing.
5. Bakım
Düzenli bakım, buharlı paspasınızın optimum performansını sağlar ve ömrünü uzatır.
- Temizleme Pedleri: The sponge cloths can be machine washed with mild detergent. Do not use bleach or fabric softeners. Air dry only. Replace pads when they become worn or lose their cleaning effectiveness.
- Su Tankının Boşaltılması: After each use, unplug the appliance and allow it to cool. Empty any remaining water from the tank.
- Dış Cephe Temizliği: Buharlı paspasın dış yüzeyini bir bezle silin.amp bez. Sert kimyasallar veya aşındırıcı temizleyiciler kullanmayın.
- Kireç çözme: If you notice a decrease in steam production or mineral residue, descaling may be necessary.
- Mix a solution of 1 part white vinegar to 2 parts water.
- Çözeltiyi su tankına dökün.
- Plug in the unit and allow it to heat up.
- Run the unit until half of the solution is used, then unplug and let it sit for 30 minutes.
- Plug it back in and run until the tank is empty.
- Rinse the tank thoroughly with fresh water and run two full tanks of fresh water through the unit to flush out any vinegar residue.
- Depolamak: Store the steam mop in a cool, dry place. Wrap the power cord around the designated cord wraps on the handle (refer to Figure 2.2).
6. Sorun Giderme
| Sorun | Olası Neden | Çözüm |
|---|---|---|
| No steam or low steam. |
|
|
| Water leaking from the mop head. |
|
|
| Paspas düzgün kaymıyor. |
|
|
7. Özellikler
| Model Numarası | TSA5051 |
| Güç | 1500 B |
| Su Tankı Kapasitesi | 380 ml |
| Steam Ejection Rate | 21 / 28 ml/min (3 levels) |
| Isınma Süresi | Yaklaşık. 25 saniye |
| Güç Kaynağı | 220-240VAC, 50Hz |
| Güç Kablosu Uzunluğu | 5 metre |
| Ağırlık | 3.0 kg (product), 4 kg (package) |
| Boyutlar (birleştirilmiş) | 30x25x110 cm |
8. Garanti ve Destek
For warranty information and customer support, please refer to the warranty card included with your product or visit the official Teesa webSite. Satın alma belgenizi herhangi bir garanti talebi için saklayın.
For further assistance, you may contact Teesa customer service through their official channels.