
giriiş
Thank you for choosing the Hisense APC09QC Portable Air Conditioner. This manual provides essential information for the safe and efficient operation of your new appliance. Please read these instructions thoroughly before use and retain them for future reference. This portable air conditioner is designed to provide cooling for indoor spaces, featuring a compact design and convenient mobility.
Güvenlik Bilgileri
Yangın, elektrik çarpması ve yaralanma riskini azaltmak için elektrikli aletleri kullanırken her zaman temel güvenlik önlemlerine uyun.
- Güç kaynağının ses seviyesiyle eşleştiğinden emin oluntagÜnitenin derecelendirme etiketinde belirtilmiştir.
- Üniteyi hasarlı bir kablo veya fişle çalıştırmayın.
- Hava giriş veya çıkışına parmaklarınızı veya herhangi bir nesneyi sokmayın.
- Üniteyi yanıcı maddelerden ve açık alevlerden uzak tutun.
- Temizlemeden veya bakımını yapmadan önce daima ünitenin fişini çekin.
- Üniteyi banyo veya çamaşır odası gibi ıslak ortamlarda kullanmayın.
- Bu cihaz, fiziksel, duyusal veya zihinsel yetenekleri kısıtlı olan veya deneyim ve bilgi eksikliği bulunan kişiler (çocuklar dahil) tarafından, güvenliklerinden sorumlu bir kişi tarafından cihazın kullanımıyla ilgili olarak gözetim veya talimat sağlanmadığı sürece kullanılmak üzere tasarlanmamıştır.
Paket İçeriği
Carefully unpack your portable air conditioner and check that all items are present.
- Hisense APC09QC Portable Air Conditioner Unit
- Hava Egzoz Hortumu
- Window Sealing Kit (components may vary, refer to specific kit instructions)
- Uzaktan Kumanda (varsa)
- Kullanım Kılavuzu (bu belge)
Ürün Bittiview
Familiarize yourself with the main components of your Hisense APC09QC Portable Air Conditioner.
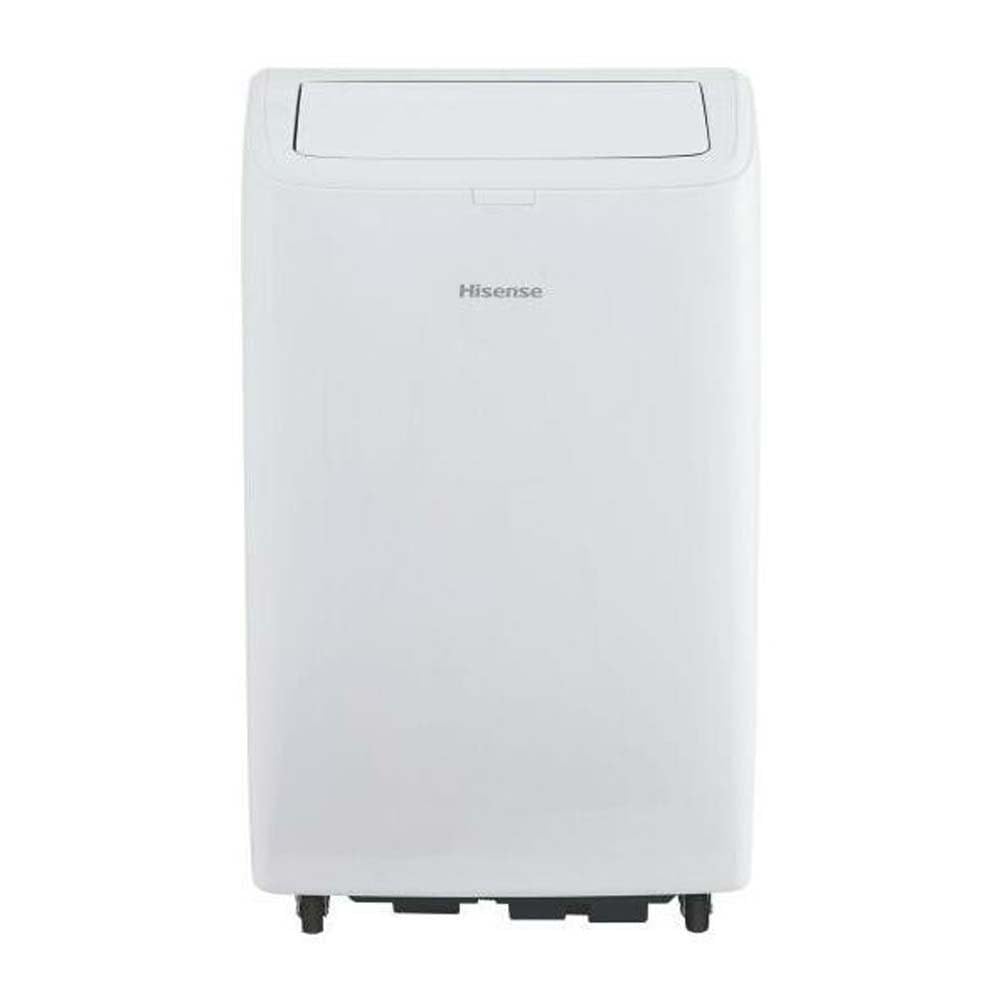
Şekil 1: Ön view of the Hisense APC09QC Portable Air Conditioner. The unit is white with the Hisense logo on the front. The top air outlet flap is open, showing the internal louvers.

Şekil 2: Taraf view of the Hisense APC09QC Portable Air Conditioner. This image highlights the integrated side handle for easy transport and the caster wheels at the base, facilitating movement.

Şekil 3: Tepe view of the Hisense APC09QC Portable Air Conditioner. The air outlet flap is closed, showing the sleek top panel where the control interface is typically located.
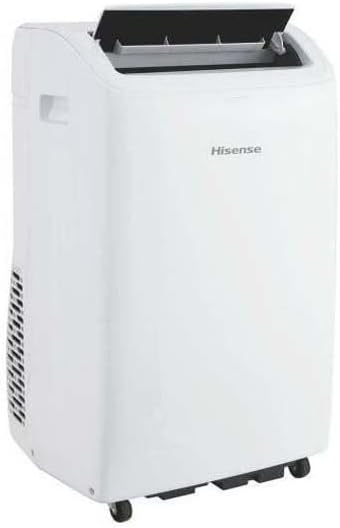
Şekil 4: Arka taraf view of the Hisense APC09QC Portable Air Conditioner. This angle shows the exhaust vent grille on the side, where the air exhaust hose connects.
Temel Özellikler:
- Kontrol Paneli: Located on the top of the unit for easy access to settings.
- Hava çıkışı: Adjustable louvers to direct airflow.
- Tekerlekler: For convenient movement between rooms.
- Yan Tutacaklar: For lifting and carrying the unit.
- Hava Filtresi: Removable for cleaning, located behind a grille (typically on the back or side).
- Egzoz Hava Çıkışı: Connection point for the exhaust hose to vent hot air outside.
- Drenaj limanı: Yoğuşmuş suyun elle boşaltılması için.
Kurmak
Doğru kurulum, en iyi performans ve güvenlik için çok önemlidir.
- Atama: Place the air conditioner on a flat, stable surface near a window. Ensure there is at least 20 cm (8 inches) of space around the unit for proper airflow. Do not block the air inlets or outlets.
- Egzoz Hortumu Kurulumu:
- Attach one end of the air exhaust hose to the exhaust air outlet on the back of the unit. Twist or click into place securely.
- Extend the other end of the hose to the window.
- Install the window sealing kit according to its specific instructions. This typically involves fitting the adjustable window slider kit into the window opening and sealing any gaps to prevent hot air from re-entering the room.
- Connect the exhaust hose adapter to the window kit, ensuring a tight seal to expel hot air outdoors.
- Güç Bağlantısı: Plug the power cord into a grounded electrical outlet. Ensure the outlet meets the electrical requirements of the unit (230 Volts).
- Initial Drainage Check: Before first use, ensure the drain plug is securely closed to prevent water leakage during operation.
Kullanım Talimatları
Your Hisense APC09QC offers various modes and settings for personalized comfort.
Kontrol Paneli ve Uzaktan Kumanda:
The unit can be operated via the control panel on top of the unit or the included remote control. The functions are generally identical.
- Güç Düğmesi: Üniteyi AÇIK veya KAPALI konuma getirir.
- Mod Düğmesi: Cycles through available operating modes: Cool, Fan, Dehumidify.
- Sıcaklık Arttırma/Azaltma Düğmeleri: İstenilen sıcaklık ayarını yapar.
- Fan Hızı Düğmesi: Fan hızını seçer (Düşük, Orta, Yüksek).
- Zamanlayıcı Düğmesi: Otomatik açma veya otomatik kapatma zamanlayıcısını ayarlar.
- Sleep/Silent Mode Button: Gece kullanımı için daha sessiz bir çalışma modunu etkinleştirir.
Çalışma Modları:
- Soğuk Mod: Provides cooling. Set your desired temperature using the Up/Down buttons. The unit will cool until the room reaches the set temperature.
- Fan Modu: Circulates air without cooling. You can adjust the fan speed.
- Nem Alma Modu: Havadaki nemi giderir. Bu modda fan hızı genellikle sabittir.
WiFi Connectivity and App Control:
The Hisense APC09QC is WiFi enabled and can be controlled via a smartphone application, such as ConnectLife. Refer to the app's instructions for pairing and remote operation. This allows for control through Google Assistant and Alexa.
- Download the ConnectLife app from your device's app store.
- Follow the in-app instructions to create an account and add your Hisense APC09QC unit.
- Once connected, you can control modes, temperature, fan speed, and set schedules remotely.
Bakım
Düzenli bakım, klimanızın verimli çalışmasını sağlar ve ömrünü uzatır.
- Hava Filtresinin Temizlenmesi:
- Hava filtresinin kullanıma ve hava kalitesine bağlı olarak iki haftada bir veya daha sık temizlenmesi gerekir.
- Cihazın fişini çekin.
- Remove the filter from its housing (refer to the unit's diagram for exact location).
- Filtreyi ılık, sabunlu suyla yıkayın. İyice durulayın ve tekrar takmadan önce tamamen kuruması için havada bekletin.
- Yoğuşmuş Suyun Tahliyesi:
- During cooling and dehumidifying, water condenses inside the unit. The unit has an internal reservoir.
- When the reservoir is full, the unit may stop operating and display an indicator.
- Unplug the unit. Place a shallow pan or tray under the drain port.
- Remove the drain plug to allow water to flow out. Re-insert the plug once drainage is complete.
- Dış Cephe Temizliği:
- Dış yüzeyini yumuşak bir bezle silin.amp bez. Sert kimyasallar veya aşındırıcı temizleyiciler kullanmayın.
- Kontrol paneline veya diğer elektrikli bileşenlere su girmemesine dikkat edin.
- Depolamak:
- Before long-term storage, drain all condensed water completely.
- Clean the air filter and ensure the unit is dry.
- Store the unit in an upright position in a cool, dry place, away from direct sunlight.
Sorun giderme
Müşteri hizmetleriyle iletişime geçmeden önce, aşağıdaki sık karşılaşılan sorunlar ve çözümlerine göz atın.
| Sorun | Olası Neden | Çözüm |
|---|---|---|
| Ünite açılmıyor. | Elektrik yok, güç kablosu fişten çekilmiş, devre kesici atmış, su deposu dolu. | Güç bağlantısını kontrol edin, devre kesiciyi sıfırlayın, su deposunu boşaltın. |
| Ünite etkili bir şekilde soğutmuyor. | Dirty air filter, blocked air intake/outlet, exhaust hose not properly installed/sealed, room too large, windows/doors open. | Clean air filter, ensure clear airflow, properly install and seal exhaust hose, close windows/doors. |
| Su sızıntısı. | Drain plug loose or open, unit not level, internal reservoir full. | Ensure drain plug is secure, place unit on a level surface, drain water tank. |
| Birim gürültülü. | Unit not on a level surface, fan obstruction, normal operating sounds. | Ensure unit is level, check for obstructions, some noise is normal during operation. |
| WiFi bağlantı sorunları. | Incorrect network password, unit too far from router, app issues. | Verify WiFi password, move unit closer to router, restart app/unit, consult app's troubleshooting guide. |
Özellikler
Technical details for the Hisense APC09QC Portable Air Conditioner.
| Model Numarası | APC09QC |
| Boyutlar (D x G x Y) | 49 cm x 31 cm x 88 cm (19.3 inç x 12.2 inç x 34.6 inç) |
| Ağırlık | 25.5 kg (56.2 lbs) |
| Soğutma Kapasitesi | 9000 BTU/h (2.6 kW / 2236 fg/h) |
| Enerji Verimliliği Sınıfı | A |
| Mevsimsel Enerji Verimliliği Oranı (SEER) | 37.4 |
| Gürültü Seviyesi | 63 Desibel |
| Soğutucu | R-290 |
| Cilttage | 230 Volt |
| Enerji Tüketimi (Soğutma) | 2.6 kW |
| Uygulanabilir Zemin Alanı | 60 metrekareye kadar |
| Özel Özellikler | Silent Mode, WiFi Enabled (App Control) |
| Kontrol Yöntemi | Control Panel, Remote Control, Application |
| Güç Seviyesi Sayısı | 3 (Fan Hızları) |
| Minimum Window Opening Height | 70.8 cm (27.9 inç) |
| Minimum Window Opening Width | 32 cm (12.6 inç) |
Garanti ve Destek
Your Hisense APC09QC Portable Air Conditioner comes with a manufacturer's warranty.
- Garanti Süresi: This product is covered by a two-year manufacturer's warranty from the date of purchase. This warranty covers defects in materials and workmanship under normal use.
- Garanti Talepleri: For warranty service, please retain your proof of purchase. Contact Hisense customer support or the retailer where the product was purchased. Do not attempt to repair the unit yourself, as this may void the warranty.
- Müşteri Desteği: For technical assistance, troubleshooting beyond this manual, or to inquire about parts and service, please visit the official Hisense webHisense'in web sitesini ziyaret edebilir veya müşteri hizmetleri departmanıyla iletişime geçebilirsiniz. İletişim bilgileri genellikle Hisense web sitesinde bulunabilir. websitenizde veya ürün kayıt belgelerinizde.