
1. Giriş
This manual provides essential information for the safe and efficient operation of your OMTech 60W CO2 Laser Engraver, Model SH-G570. Please read all instructions carefully before operating the machine. Proper understanding and adherence to these guidelines will ensure optimal performance and longevity of your laser engraver.
2. Güvenlik Yönergeleri
Operating a CO2 laser engraver involves potential hazards. Always prioritize safety to prevent injury or damage to the equipment. This device is a Laser Class 2 product with 0.827 mW output power.
- Göz Koruması: Always wear appropriate laser safety glasses when operating the machine. Never look directly into the laser beam.
- Havalandırma: Ensure adequate ventilation to remove fumes and smoke generated during engraving and cutting. Use the integrated air assist and an external exhaust system.
- Malzeme Uyumluluğu: Only engrave or cut materials approved for CO2 lasers. Avoid materials that produce toxic fumes or are highly flammable.
- Yangın Güvenliği: Yangın söndürücüyü yakınınızda bulundurun. Makineyi çalışma sırasında asla gözetimsiz bırakmayın.
- Elektriksel Güvenlik: Ensure the machine is properly grounded and connected to a suitable power supply. Avoid operating in wet conditions.
- Acil durdurma: Acil durdurma butonunun yerini ve çalışma şeklini öğrenin.
- Safe Observation: Utilize the flame-resistant viewing window to monitor the engraving process safely.
3. Kurulum
Follow these steps to set up your OMTech 60W CO2 Laser Engraver:
- Paketin açılması: Carefully remove the laser engraver and all accessories from its packaging. Inspect for any shipping damage.
- Atama: Makineyi sağlam, düz bir yüzeye ve iyi havalandırılan bir alana yerleştirin. Çalıştırma ve bakım için makinenin etrafında yeterli alan olduğundan emin olun.
- Water Chiller Connection: Connect the included water chiller (e.g., CW-5200) to the laser tube according to the chiller's instructions. Ensure the chiller is filled with distilled water and operating correctly to maintain optimal laser tube temperature.
- Egzoz Sistemi: Connect the exhaust fan and ducting to the machine and vent it outdoors or to a suitable filtration system.
- Hava Yardımı: Connect the air assist pump to the machine. This helps prevent flare-ups and keeps the lens clean during operation.
- Güç Bağlantısı: Connect the power cable to the machine and then to a grounded electrical outlet.
- Bilgisayar Bağlantısı: Connect the laser engraver to your computer using a USB cable or Ethernet cable.
- Yazılım Kurulumu: Install the LightBurn software on your computer. Follow the software's installation guide for proper setup and configuration.
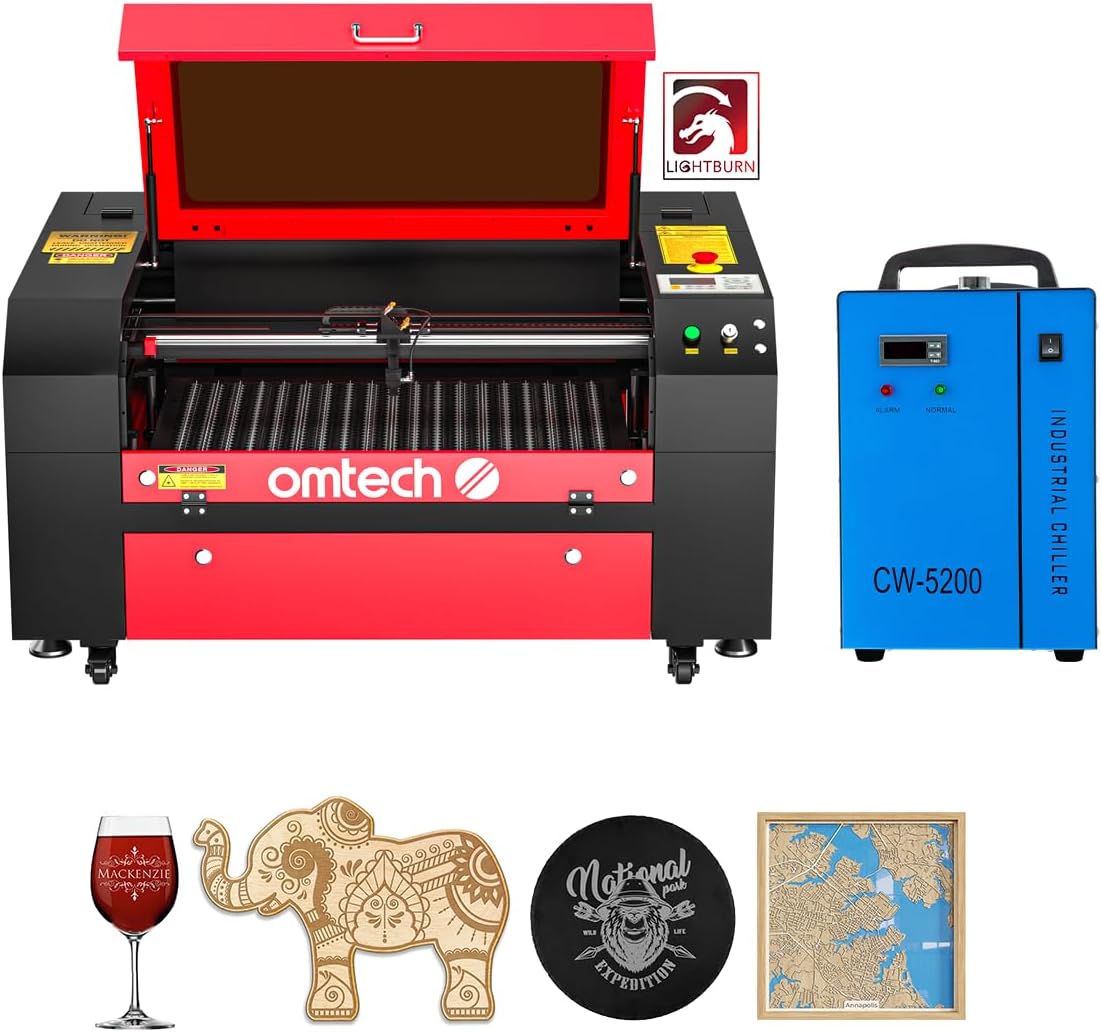
Figure 3.1: OMTech 60W CO2 Laser Engraver in a workshop setting, ready for operation. The machine is red and black, with a water chiller visible on the right.

Figure 3.2: The OMTech CW-5200 Water Chiller, an essential component for maintaining the laser tube's temperature during operation.
4. Kullanım Talimatları
Operating your laser engraver involves preparing your design, setting machine parameters, and monitoring the process.
- Malzeme Yükleme: Place your material onto the honeycomb or aluminum blade bed. Secure it to prevent movement during engraving. The 20"x28" (500x700 mm) work area accommodates most projects. Use the four-way pass-through doors for larger and longer items.
- Motorized Workbed Adjustment: Use the motorized workbed to adjust the height for proper focus. This ensures optimal engraving and cutting quality for various material thicknesses.
- Design Preparation (LightBurn):
- Import or create your design in LightBurn.
- Set the appropriate layer parameters (speed, power, DPI) based on your material and desired effect.
- Utilize LightBurn's features for image processing, such as dithering or halftone settings for photo engraving.
- Odak Ayarı: Perform a focus test to ensure the laser beam is precisely focused on the material surface.
- Oyma/Kesme İşlemine Başlayın: Initiate the job from LightBurn. Monitor the process through the flame-resistant viewpencere.

Figure 4.1: The motorized workbed allows for easy height adjustment to focus on materials of varying thicknesses.

Figure 4.2: The laser engraver features dual engraving beds (honeycomb and aluminum blade) with a 20"x28" work area. Four-way pass-through doors facilitate working with larger items.

Figure 4.3: The flame-resistant viewing window allows for safe observation of the engraving process.
Video 4.1: Tutorial on how to laser engrave a photo with a CO2 Laser Engraver. This video demonstrates the process of preparing an image and using the laser for photo-realistic engraving.
Video 4.2: Demonstration of laser engraving and cutting on acrylic mirror for a DIY project. This video showcases material-specific techniques and results.
5. Bakım
Düzenli bakım, lazer gravür cihazınızın uzun ömürlü olmasını ve istikrarlı performans göstermesini sağlar.
- Lens and Mirror Cleaning: Regularly clean the laser lens and mirrors with specialized lens cleaning solution and wipes to maintain beam quality.
- Çalışma Tezgahı Temizliği: Clean the honeycomb and aluminum blade beds frequently to remove debris and residue, which can affect engraving quality and fire safety.
- Water Chiller Maintenance: Check the water level and quality in the chiller regularly. Replace distilled water as needed to prevent algae growth and ensure efficient cooling.
- Hava Destek Sistemi: Inspect the air assist nozzle and tubing for blockages or damage.
- Egzoz Sistemi: Clean the exhaust fan and ducting to ensure efficient smoke and fume extraction.
- Laser Tube Lifespan: The high-performance DC tube delivers 60W of power for up to 1,000 hours of usage and doubles its lifespan when consistently used at lower settings. Monitor its performance and replace when necessary.

Figure 5.1: The high-performance DC laser tube, offering a high-efficiency laser beam with a lifespan of up to 2000 hours under optimal conditions.
6. Sorun Giderme
İşte bazı yaygın sorunlar ve olası çözümleri:
- Uneven Engraving/Cutting:
- Check material flatness on the workbed.
- Verify laser focus is correctly set for the material thickness.
- Ensure mirrors and lens are clean and properly aligned.
- Weak Laser Output:
- Confirm laser power settings in LightBurn are appropriate for the material.
- Check water chiller temperature; overheating can reduce laser power.
- Inspect the laser tube for any visible damage or signs of aging.
- Makine Yanıt Vermiyor:
- Verify all power connections and ensure the machine is turned on.
- Check USB/Ethernet cable connection to the computer.
- Restart LightBurn software and the laser engraver.
- Aşırı Duman/Gaz:
- Ensure the exhaust fan is operating at full capacity and ducts are clear.
- Verify air assist is active and properly directed at the engraving/cutting point.
7. Özellikler
| Özellik | Detay |
|---|---|
| Marka | OMTech |
| Model Numarası | SH-G570 |
| Lazer Gücü | 60W CO2 DC Tube |
| Çalışma Alanı | 20" x 28" (500 x 700 mm) |
| Maks. Alan sayısı Gravür Hızı | 600 mm/s (23.6 ips) |
| Maks. Gravür Derinliği | 0.4" (10 mm) on non-metallic materials |
| Çalışma yatağı | Motorized Autolift, Honeycomb & Aluminum Blade Beds |
| Geçiş | Four-way pass-through doors |
| Bağlantı | USB Cable, Ethernet Cable, USB Flash Drive, Offline |
| Yazılım Uyumluluğu | LightBurn (included), CorelDRAW, AutoCAD |
| Ürün Ağırlığı | 223 pound |
| Ürün Boyutları | 48.8 x 34.3 x 26.4 inç |
| Lazer Sınıfı | Class 2, 0.827 mW output power |

Figure 7.1: Key specifications of the OMTech 60W CO2 Laser Engraver.
8. Garanti
For detailed warranty information regarding your OMTech 60W CO2 Laser Engraver, please refer to the official OMTech webÜrününüzle birlikte verilen garanti belgesini veya siteyi ziyaret edin. Garanti şartları ve koşulları değişiklik gösterebilir.
9. Destek
Should you require technical assistance, have questions about operation, or need to order replacement parts, please contact OMTech customer support. You can find contact information and additional resources on the official OMTech webalan: OMTech Store.
Video 9.1: Bir overview of OMTech laser engravers, highlighting their suitability for various users and applications. This video provides general information about the brand's product range.