
Geek Smart L7
Geek Smart L7 Robot Vacuum and Mop User Manual
Model: L7
1. Giriş
Thank you for choosing the Geek Smart L7 Robot Vacuum and Mop. This device is designed to provide efficient and thorough cleaning for your home, combining powerful vacuuming with intelligent mopping capabilities. Featuring advanced LDS navigation, Wi-Fi connectivity, and smart app control, the L7 ensures a customized cleaning experience for various floor types, including carpets and hard floors.
This manual provides essential information for the safe operation, setup, maintenance, and troubleshooting of your robot vacuum. Please read it carefully before use and retain it for future reference.
2. Güvenlik Talimatları
Yaralanma veya hasar riskini azaltmak için, robot süpürgenizi kurarken, kullanırken ve bakımını yaparken tüm güvenlik önlemlerini okuyun ve uygulayın.
- Bu cihaz, güvenli bir şekilde cihazın kullanımı konusunda gözetim veya talimat verilmesi ve içerdiği tehlikelerin anlaşılması halinde 8 yaş ve üzeri çocuklar ve fiziksel, duyusal veya zihinsel yetenekleri azalmış veya deneyim ve bilgi eksikliği olan kişiler tarafından kullanılabilir.
- Çocukların cihazla oynamamalarını sağlamak için gözetim altında tutulmaları gerekir.
- Temizlik ve kullanıcı bakımı gözetimsiz olarak çocuklar tarafından yapılmamalıdır.
- Yalnızca üretici tarafından sağlanan orijinal güç adaptörünü kullanın.
- Robotu açık alev veya yanıcı maddelerin bulunduğu ortamlarda kullanmayın.
- Saçınızı, bol giysilerinizi, parmaklarınızı ve vücudunuzun tüm kısımlarını açıklıklardan ve hareketli parçalardan uzak tutun.
- Bebek veya çocuğun uyuduğu odalarda robotu çalıştırmayın.
- Robotu büyük parçaları, sıvıları veya yanan nesneleri toplamak için kullanmayın.
- Ensure the robot is placed on a stable surface and cannot fall from high places.
- Turn off the robot and unplug the charging dock before cleaning or maintenance.
3. Paket İçeriği
Paketi açtıktan sonra tüm parçaların eksiksiz ve iyi durumda olduğunu doğrulayın.
- Geek Smart L7 Robot Vacuum and Mop
- Şarj İstasyonu
- Güç Adaptörü
- Yan Fırçalar (2 çift)
- Ana Fırça
- Dust Bin (680ML)
- 2-in-1 Water Tank & Dust Bin (350ML water tank & 260ML dust bin)
- Paspas Bezleri (2)
- High-Efficiency Filter (pre-installed in dust bin)
- Temizleme Aracı
- Kullanıcı Kılavuzu
4. Ürün Bittiview
Robot Vakum Bileşenleri

Image: The Geek Smart L7 Robot Vacuum, showcasing its top view with control buttons, LDS sensor, and accompanying accessories like the charging dock and replacement filters.
- LDS Navigasyon Sensörü: En üstte yer alır, böylece hassas haritalama ve navigasyon sağlanır.
- Kontrol Düğmeleri: Power/Clean, Home/Recharge.
- Ön tampon: Engelleri algılar.
- Yan Fırçalar: Dökülen kalıntıları ana çalılık yoluna doğru süpürün.
- Ana Fırça: Kir ve döküntüleri toplar.
- Sürüş Tekerlekleri: Çeşitli yüzeyler üzerinde hareket etmeyi sağlar.
- Şarj Kişileri: Şarj istasyonuna bağlayın.
- Toz Haznesi / Su Tankı: Removable compartments for dust collection and water for mopping.
Şarj İstasyonu
The charging dock provides power to recharge the robot's battery. It should be placed in an open area with sufficient clearance.
5. Kurulum
5.1 Şarj İstasyonunun Yerleştirilmesi
- Şarj istasyonunu açık bir alanda duvara yaslayarak yerleştirin.
- Rıhtımın her iki yanında en az 0.5 metre (1.6 fit) ve önünde 1.5 metre (4.9 fit) boş alan olduğundan emin olun.
- Güç adaptörünü şarj yuvasına bağlayın ve duvardaki prize takın.
- Ensure the power indicator on the charging dock illuminates.
5.2 İlk Şarj
- Şarj temas noktalarının hizalandığından emin olarak robotu şarj yuvasına yerleştirin.
- The robot will automatically begin charging. Allow it to fully charge before its first use (approximately 4-5 hours).
5.3 Uygulama Bağlantısı ve Eşleme

Image: The Geek Smart L7 Robot Vacuum actively scanning its environment using LDS navigation to create a detailed map, with digital map representations floating above it.
- Download the Geek Smart app from your mobile device's app store (available for iOS and Android).
- Bir hesap kaydedin ve giriş yapın.
- Follow the in-app instructions to add your L7 robot vacuum. This typically involves connecting to the robot's Wi-Fi hotspot and then connecting the robot to your home Wi-Fi network.
- Once connected, initiate a full cleaning cycle. The robot will use its LDS navigation to create an accurate map of your home. This map will be saved in the app for future use, allowing for features like selective room cleaning and setting no-go zones. The robot can save up to 5 different maps.
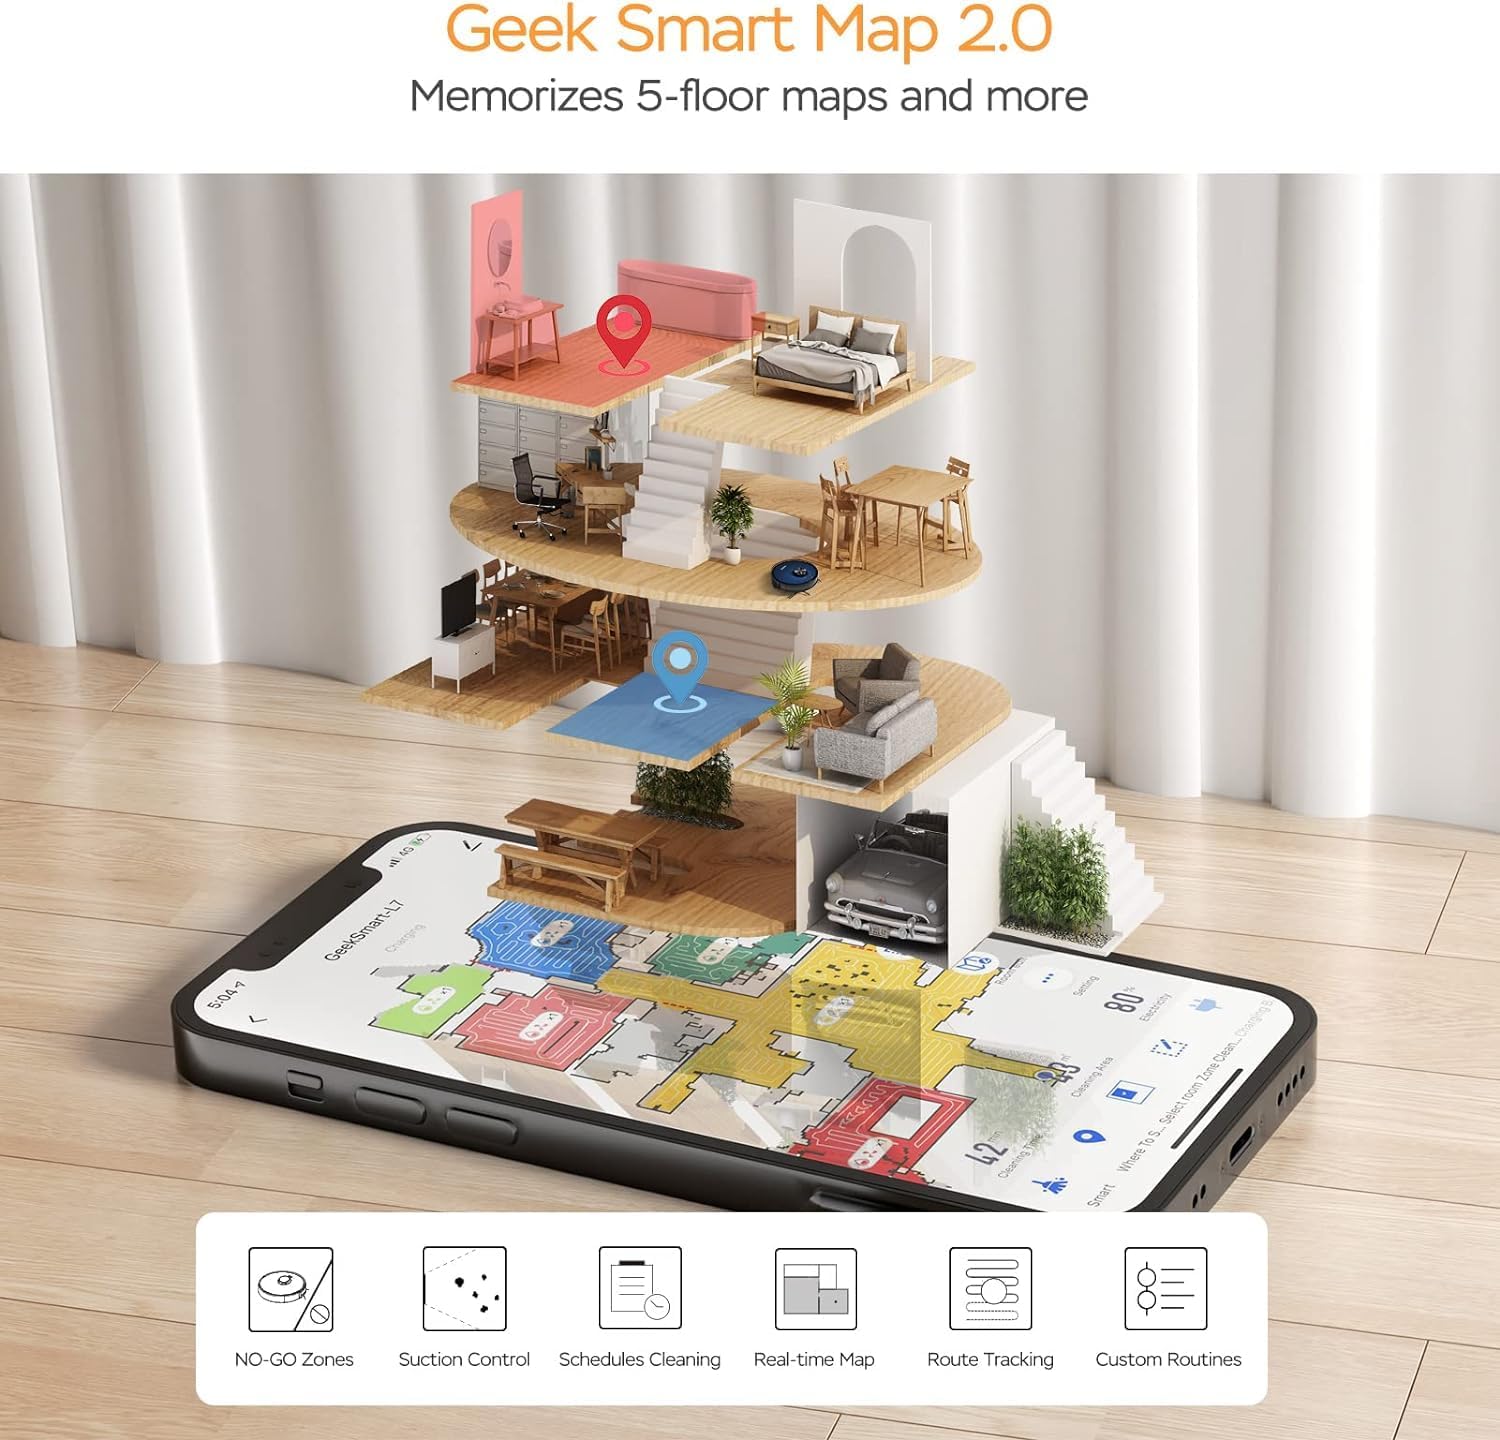
Image: A smartphone screen displaying the Geek Smart app interface, showing a color-coded floor plan map with various cleaning zones and controls.
6. Kullanım Talimatları
6.1 Temizliğin Başlatılması ve Durdurulması
- Temizlemeye başla: Press the Power/Clean button on the robot or tap "Start Cleaning" in the app. The robot will begin a full cleaning cycle.
- Temizliği Duraklat: Press the Power/Clean button during operation or tap "Pause" in the app.
- Özgeçmiş Temizliği: Press the Power/Clean button again or tap "Resume" in the app.
- İskeleye Dönüş: Press the Home/Recharge button on the robot or tap "Recharge" in the app. The robot will return to its charging dock.
6.2 Temizleme Modu
The L7 offers various cleaning modes to suit different needs.

Image: The Geek Smart L7 Robot Vacuum demonstrating its 2-in-1 sweeping and mopping capabilities on a hard floor, with debris being swept and a damp mop trail visible.
- Oto Temizleme: The robot intelligently plans its cleaning path using LDS navigation.
- Vakumlama: Utilizes up to 2700Pa suction power to clean dirt and debris from various surfaces.
- Paspaslama: Attach the mop cloth and fill the 2-in-1 water tank. The electronic water tank allows for adjustable water output.
- Elektrikli Süpürge ve Paspas (Eş Zamanlı): The robot can vacuum and mop simultaneously when the 2-in-1 tank is installed.
- Halı Hızlandırma Modu: The robot automatically increases suction power when it detects carpeted areas for deeper cleaning.

Image: The Geek Smart L7 Robot Vacuum actively cleaning a hard floor, with a visual representation of its powerful 2700Pa suction lifting debris.

Image: The Geek Smart L7 Robot Vacuum transitioning from a hard floor to a carpet, illustrating its Carpet Boost Mode with enhanced suction indicated by glowing lines.

Image: The Geek Smart L7 Robot Vacuum positioned on a floor split between marble and wood, illustrating its integrated mopping system and adjustable water output for different surfaces.
6.3 Uygulama Kontrol Özellikleri
The Geek Smart app unlocks advanced cleaning customization.
- Seçici Oda Temizliği: Choose specific rooms or areas on the map for cleaning.
- No-Go Zones / No-Mop Zones: Draw virtual boundaries on the map to prevent the robot from entering certain areas or mopping carpets.
- Invisible Walls: Create virtual walls to restrict the robot's movement.
- Planlama: Set cleaning schedules for automatic operation at desired times.
- Emiş Gücü Ayarı: Manually adjust the suction level.
- Water Output Adjustment: Control the water flow for mopping.

Image: The Geek Smart L7 Robot Vacuum operating quietly (65dB) in a living room, demonstrating its low noise level suitable for homes with sleeping individuals or pets.
7. Bakım
Regular maintenance ensures optimal performance and extends the lifespan of your robot vacuum. Always turn off the robot and unplug the charging dock before performing any maintenance.
7.1 Toz Kutusunun Boşaltılması
- Toz haznesi çıkarma düğmesine basın ve toz haznesini dışarı çekin.
- Open the dust bin cover and empty the contents into a trash can.
- Clean the filter and dust bin with the provided cleaning tool or a soft brush.
- Toz kutusunu yeniden takın.
7.2 Cleaning the 2-in-1 Water Tank & Dust Bin
- Robotun üzerindeki 2'si 1 arada tankı çıkarın.
- Empty any remaining water from the water tank compartment.
- Toz bölmesini boşaltın ve filtreyi temizleyin.
- Rinse the water tank compartment with clean water. Do not immerse the entire tank in water, especially the electronic components.
- Allow all parts to air dry completely before reassembling and reinstalling.
7.3 Ana Fırçanın Temizlenmesi
- Robotu ters çevirin ve ana fırça kapağını çıkarmak için serbest bırakma tırnaklarına basın.
- Ana fırçayı kaldırın.
- Use the cleaning tool to remove hair and debris tangled around the brush and its bearings.
- Ana fırçayı ve kapağı yeniden takın.
7.4 Yan Fırçaların Temizlenmesi
- Yan fırçaları yavaşça yukarı doğru çekerek çıkarın.
- Remove any hair or debris. If brushes are bent, soak them in warm water for a few minutes to reshape.
- Fırçaları yerine oturtup tık sesi duyana kadar bastırın.
7.5 Sensörlerin ve Şarj Kontaklarının Temizlenmesi
- Use a clean, dry cloth to wipe the cliff sensors (located on the bottom of the robot), wall sensors (on the side), and the charging contacts on both the robot and the charging dock.
- Ensure the LDS sensor on top is also clean and free of obstructions.
8. Sorun Giderme
If you encounter issues with your robot vacuum, refer to the following table for common problems and solutions.
| Sorun | Olası Neden | Çözüm |
|---|---|---|
| robot açılmıyor | Düşük pil; Güç düğmesi kapalı | Place robot on charging dock; Ensure power switch is on. |
| Robot şarj edilemiyor | Şarj kontakları kirli; Şarj yuvasına elektrik verilmiyor. | Robot ve şarj istasyonunun şarj temas noktalarını temizleyin; Şarj istasyonunun prize takılı olduğundan emin olun. |
| Robot sık sık takılıyor | Zeminde engeller var; Uçurum sensörleri kirli. | Clear cables and small objects; Clean cliff sensors. |
| Kötü temizleme performansı | Çöp kutusu dolu; Fırçalar birbirine dolanmış; Filtre tıkalı | Empty dust bin; Clean main and side brushes; Clean or replace filter. |
| Paspaslama işlevi çalışmıyor. | Water tank empty; Mop cloth dry; Water outlet clogged | Fill water tank; Moisten mop cloth; Clean water outlet. |
| Uygulama bağlantı sorunları | Yanlış Wi-Fi şifresi; Yönlendirici çok uzakta; Robot çevrimdışı | Verify Wi-Fi credentials; Move robot closer to router; Restart robot and router. |
9. Özellikler
| Özellik | Şartname |
|---|---|
| Marka | geek akıllı |
| Model Adı | L7 |
| Gezinme Türü | 360° LiDAR |
| Maksimum Emiş Gücü | 2700 Pa |
| Pil Kapasitesi | 2600 mAh |
| Maksimum Çalışma Zamanı | 130 dakikadır. |
| Toz Haznesi Kapasitesi | 680ML |
| Water Tank Capacity (2-in-1) | 350ML |
| Gürültü Seviyesi | Sub-65 dB |
| Ürün Boyutları | 12.59"U x 12.59"G x 3.74"Y |
| Ürün Ağırlığı | 13.39 pound |
| Uyumlu Cihazlar | Amazon Yankı |
| UPC | 764773837187 |
10. Garanti ve Destek
Geek Smart products are manufactured to the highest quality standards. For warranty information, technical support, or customer service inquiries, please refer to the contact information provided on the product packaging or visit the official Geek Smart webalan.
Garanti talepleri için lütfen satın alma belgenizi saklayın.
İlgili belgelerL7


Ask a question about this manual
Ask about setup, troubleshooting, compatibility, parts, safety, or missing instructions. Manuals+ will review the question and use this page’s manual context to help answer it.