
Sharp SPC5028AMZ
Sharp Digital Alarm Clock User Manual
Model: SPC5028AMZ
giriiş
Thank you for choosing the Sharp Digital Alarm Clock. This manual provides detailed instructions for setting up, operating, and maintaining your new alarm clock. Designed for clarity and convenience, this clock features an easy-to-read LCD display with an optional always-on backlight, dual alarm settings, and a USB charging port for your devices. Please read this manual thoroughly before use to ensure optimal performance and longevity of your product.

Ön view of the Sharp Digital Alarm Clock, displaying time, month, date, day, and temperature on its colorful LCD screen.
Güvenlik Bilgileri
Please observe the following safety precautions to prevent damage to the unit or personal injury:
- Üniteyi aşırı sıcaklıklara, doğrudan güneş ışığına veya yüksek neme maruz bırakmayın.
- Cihazı düşürmekten veya şiddetli darbelere maruz bırakmaktan kaçının.
- Eski ve yeni pilleri veya farklı pil türlerini karıştırmayın.
- Ünite uzun süre kullanılmayacaksa, sızıntıyı önlemek için pilleri çıkarın.
- Üniteyi su ve diğer sıvılardan uzak tutun.
- Üniteyi kendiniz sökmeye veya onarmaya çalışmayın. Tüm bakım işlemlerini yetkili personele yaptırın.
Paket İçeriği
Paketin içinde tüm öğelerin mevcut olduğundan emin olun:
- Sharp Digital Alarm Clock (Model SPC5028AMZ)
- Kullanım Kılavuzu (bu belge)
Note: 3 x AAA batteries are required and not included.
Ürün Bittiview
Ön Ekran

Diagram illustrating key features of the alarm clock, including atomic accuracy, 1.5-inch tall time display, on/off display nightlight, indoor temperature display, calendar display, bright color display, wall mountable or tabletop viewing, and battery operation (3x AAA batteries).
The front of the clock features a clear LCD display that shows the time, month, date, day of the week, and indoor temperature. The main time display is approximately 1.5 inches tall for easy readability.
Arka Panel ve Kontroller

Ayrıntılı view of the clock's rear panel, showing the location of the battery compartment, various control buttons (Calendar, Time, Alarm, 12/24, Up, °C/°F, Down, Wave), the ON/OFF switch for the nightlight, and the backstand for tabletop viewing. Dimensions (6.45"W x 5"H) are also indicated.
- CALENDAR Set Button: Used to set the date and year.
- TIME Set Button: Used to set the time manually.
- ALARM Set & ON/OFF Button: Alarm ayarlarını yapmak ve alarmları etkinleştirmek/devre dışı bırakmak için kullanılır.
- 12/24 Düğmesi: 12 saatlik ve 24 saatlik zaman formatları arasında geçiş yapar.
- YUKARI Düğmesi: Adjusts settings upwards.
- °C/°F Düğmesi: Sıcaklık gösterimini Celsius ve Fahrenheit arasında değiştirir.
- AŞAĞI Düğmesi: Adjusts settings downwards.
- WAVE (Atomic Search) Button: Initiates a manual search for the atomic time signal.
- ON/OFF Switch (Nightlight): Controls the always-on backlight feature.
- Pil Bölmesi: Holds 3 x AAA batteries.
- Backstand: For tabletop viewIng.
- Duvara Montaj Deliği: Saati duvara asmak için.
Kurmak
Pil Kurulumu
- Open the battery compartment cover on the rear of the clock.
- 3 adet yeni AAA pili, doğru kutuplara (+ ve -) dikkat ederek takın.
- Pil bölmesi kapağını sıkıca kapatın.
İlk Güç Açık
Upon battery installation, the clock will power on and attempt to synchronize with the atomic time signal.
Atomic Time Synchronization (WWVB)
The Sharp Digital Alarm Clock is designed to automatically synchronize with the WWVB atomic time signal broadcast from Fort Collins, Colorado, ensuring precise timekeeping.

Map of the United States showing the WWVB radio broadcast signal originating from Fort Collins, Colorado, which the atomic clock uses for synchronization.
- The clock will automatically attempt to receive the signal daily, typically overnight when electronic interference is minimal.
- For optimal reception, place the clock near a window and orient its front or rear panel towards Fort Collins, Colorado.
- A signal strength indicator (antenna icon) on the display will show the reception status.
- To manually initiate a signal search, press the DALGA arka paneldeki düğmeye basın.

Graphic depicting a full moon, with text 'LESS ELECTRONIC INTERFERENCE AT NIGHT SET BY MORNING', indicating optimal atomic clock synchronization occurs during nighttime hours.
Setting Time Zone
Even with atomic synchronization, you must manually select your local time zone for the correct hourly time display.
- Basılı tutun ZAMAN button until the time zone indicator flashes.
- Kullanın UP or AŞAĞI buttons to select your desired time zone (e.g., PST, MST, CST, EST).
- Basın ZAMAN onaylamak ve çıkmak için tekrar düğmesine basın.
Manuel Zaman ve Tarih Ayarı
If atomic synchronization is not desired or available, you can set the time and date manually.
- Zamanı ayarlamak için: Basılı tutun ZAMAN button until the hour flashes. Use UP/AŞAĞI Ayarlamak için. Basın ZAMAN to move to minutes, then adjust. Press ZAMAN tekrar kaydetmek için.
- Tarihi ayarlamak için: Basılı tutun TAKVİM button until the year flashes. Use UP/AŞAĞI Ayarlamak için. Basın TAKVİM to move to month, then day, adjusting each. Press TAKVİM tekrar kaydetmek için.
- 12/24 Saat Formatı: Basın 12/24 12 saatlik (AM/PM göstergeli) ve 24 saatlik formatlar arasında geçiş yapmak için kullanılan düğme.
Kullanım Talimatları
Adjusting Display Brightness and Backlight
The clock features an optional always-on backlight with adjustable brightness for optimal viewçeşitli aydınlatma koşullarında.
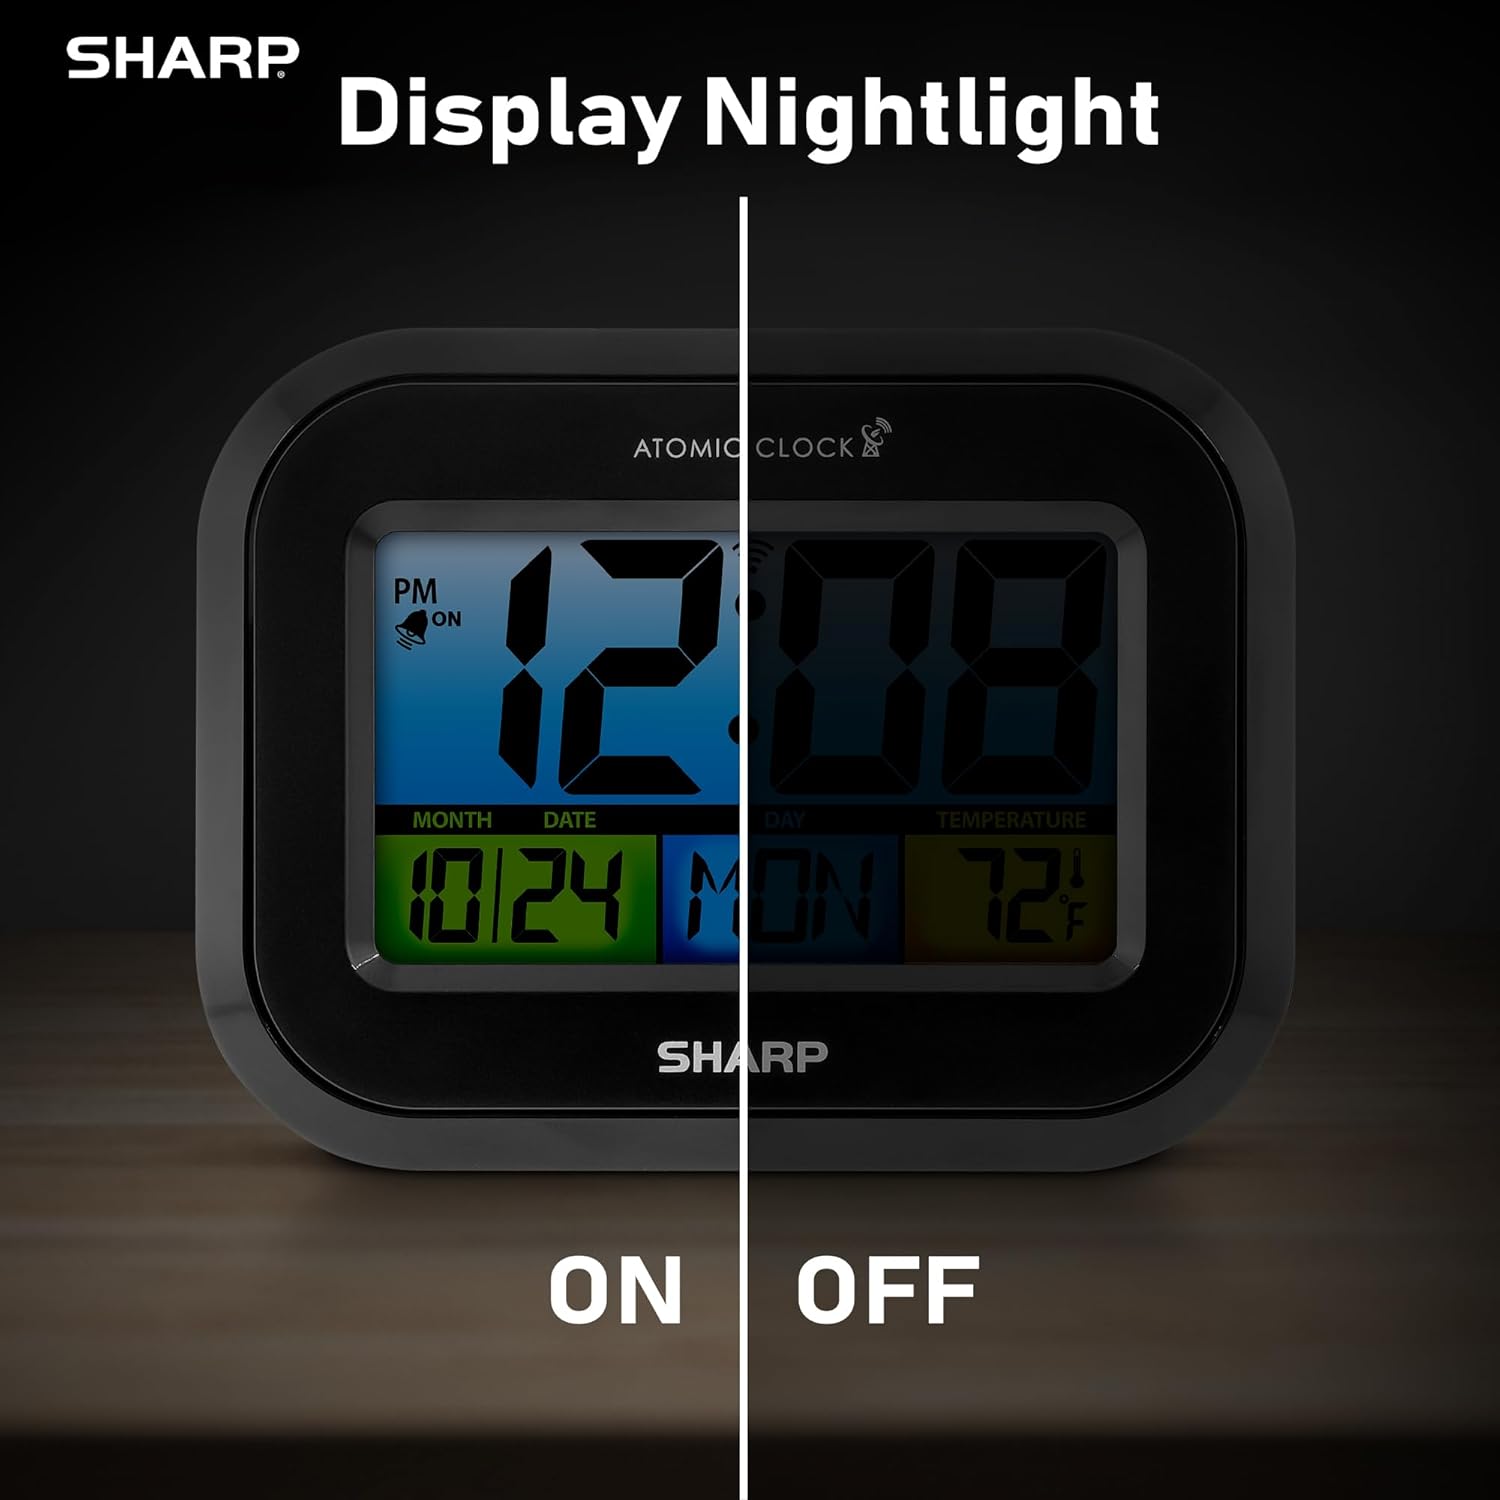
Comparison image showing the clock's display with the nightlight off (dim) and on (illuminated) in both day and night settings.
- Always-On Backlight: Kullanın AÇIK/KAPALI anahtarı on the rear panel to activate or deactivate the continuous backlight. When ON, the display will have a soft glow.
- İsteğe Bağlı Arka Aydınlatma: Even if the always-on backlight is OFF, you can momentarily illuminate the display by pressing the ARKA IŞIK button (usually located on the top edge, though not explicitly labeled in the provided image, it's a common feature). This provides a brighter illumination for a few seconds.

Image highlighting the physical ON/OFF switch on the rear of the clock for controlling the display nightlight, indicating its function for soft glowing backlight in the dark.
Çift Alarm Ayarı
The clock supports two independent alarm settings.
- Basın ALARM button once to select Alarm 1. Press again for Alarm 2.
- While the alarm time is displayed, press and hold the ALARM Saat yanıp sönene kadar düğmeye basın.
- Kullanın UP or AŞAĞI Saati ayarlamak için düğmelere basın. ALARM Dakikalara dönüştürün, ardından ayarlayın.
- Basmak ALARM again to save the alarm time.
- Alarmı etkinleştirmek/devre dışı bırakmak için tuşuna basın. ALARM button repeatedly until the alarm icon (bell) appears/disappears for the desired alarm.
USB Şarj Portunun Kullanımı
The clock includes a USB charging port for convenient charging of small electronic devices. Locate the USB port on the side or rear of the unit (specific location not detailed in provided images, but implied by feature bullets). Connect your device's USB cable to this port to begin charging.
Temperature Display (°C/°F)
The clock displays the indoor temperature. To switch between Celsius and Fahrenheit, press the °C/°F arka paneldeki düğmeye basın.
Viewing Angle Optimization
Like most LCD screens, this display is best viewed from the front or slightly above. Visibility may appear reduced at sharp side or low angles. For the best viewing experience, use the built-in kickstand to position the clock to face you.

Illustration demonstrating the optimal viewing angle for the LCD display, showing that the clock is best viewed from above or straight on, with a built-in kickstand to position it.
Wall Mounting and Tabletop Use
The clock is designed for versatile placement. Use the integrated backstand for tabletop viewing or the wall mount hole on the rear for hanging it on a wall.

The Sharp Digital Alarm Clock displayed in a home office setting, showing its versatility for both wall mounting and tabletop placement.
Bakım
Temizlik
Saati yumuşak, kuru bir bezle silin. Yüzeye zarar verebileceğinden aşındırıcı temizleyiciler veya çözücüler kullanmayın.
Pil Değişimi
When the display becomes dim or the clock stops functioning, it's time to replace the batteries. Follow the battery installation steps in the Setup section. It is recommended to replace all three AAA batteries at the same time with new ones.
Sorun giderme
| Sorun | Olası Çözüm |
|---|---|
| Ekran soluk veya boş. | Check battery polarity and ensure batteries are fresh. Replace all 3 AAA batteries. Ensure the backlight ON/OFF switch is in the 'ON' position if continuous illumination is desired. |
| Atomik zaman senkronize olmuyor. | Ensure the clock is placed near a window and oriented towards Fort Collins, Colorado. Avoid placing near electronic devices that may cause interference. Try initiating a manual search by pressing the WAVE button. Synchronization is often best overnight. |
| Time or date is incorrect after battery change. | Manually set the time zone. Allow time for atomic synchronization, or manually set the time and date using the TIME and CALENDAR buttons. |
| Display is hard to read from certain angles. | This is a characteristic of LCD technology. Adjust the clock's position using the kickstand to ensure it is viewed straight-on or from slightly above eye level. |
| Alarm çalmıyor. | Ensure the alarm is set and activated (bell icon visible). Check battery level. |
Özellikler
| Mülk | Değer |
|---|---|
| Marka | Keskin |
| Model Numarası | SPC5028AMZ |
| Görüntü Türü | LCD |
| Renk | Siyah |
| Ürün Boyutları | 6.45"G x 5"Y |
| Ürün Ağırlığı | 10.8 ons (0.31 Kilogram) |
| Güç Kaynağı | Pille Çalışır (3 x AAA, piller dahil değildir) |
| Çalışma Modu | Atomik |
| Özel Özellikler | Cordless, Dual Alarm, USB Charging Port, Indoor Temperature Display, Always-On Backlight |
| Montaj Tipi | Duvara Montaj, Masaüstü |
| Çerçeve Malzemesi | Plastik |
Garanti ve Destek
Sharp products are manufactured to the highest quality standards. For warranty information or technical support, please refer to the documentation included with your purchase or visit the official Sharp webSite. Satın alma fişinizi, garanti talepleriniz için satın alma belgeniz olarak saklayın.

Sharp Time Solutions
Ask a question about this manual
Ask about setup, troubleshooting, compatibility, parts, safety, or missing instructions. Manuals+ will review the question and use this page’s manual context to help answer it.