
HISTTON H6-i7-10810U
HISTTON H6 Fanless Industrial Mini PC User Manual
Model: H6-i7-10810U
1. Giriş
This manual provides essential information for the setup, operation, maintenance, and troubleshooting of your HISTTON H6 Fanless Industrial Mini PC. This compact and powerful system features an Intel Core i7-10810U processor, 16GB DDR4 RAM, and a 512GB M.2 SSD, running Windows 11 Pro. It is designed for various applications requiring stable performance and multiple connectivity options.

Image 1.1: The HISTTON H6 Fanless Industrial Mini PC.
2. Kutuda Neler Var?
Paketin içinde tüm öğelerin mevcut olduğundan emin olun:
- 1 x HISTTON H6 Mini PC
- 1 x Güç Adaptörü
- 1 x Kullanım Kılavuzu
- 1 x HDMI Kablosu
- 1 x VESA Montajı
- 8 x Screws for VESA Mount/Storage
- 2 x WiFi Anteni
- 2 x SATA Cables (for 2.5-inch drive installation)

Image 2.1: Package contents including the Mini PC, power adapter, cables, antennas, and VESA mount.
3. Ürün Bittiview
3.1 Temel Özellikler
- İşlemci: Intel Core i7-10810U (10th Gen, 6 Cores, 12 Threads, up to 4.90 GHz)
- Grafikler: Intel UHD Graphics for 10th Gen Processors, supporting 4K resolution.
- Hafıza: 16GB DDR4 RAM (expandable up to 64GB via 2 SO-DIMM slots)
- Depolamak: 512GB M.2 NVMe PCIe 3.0x4 / SATA 3 SSD, with an additional 2.5-inch SATA HDD/SSD slot.
- Görüntü Çıktısı: Dual HD (HDMI) and one DP (DisplayPort) for triple 4K display support.
- Ağ: Dual Gigabit Ethernet LAN (RJ-45), Dual-band 2.4G+5.0G WiFi (WIFI5), Bluetooth 4.2.
- Limanlar: 4x USB 3.0, 2x HD, 1x DP, 2x RS232/RS485 COM, 1x 14 Pin GPIO, 1x SPK (Audio Out), 1x MIC (Audio In).
- Soğutma: Fanless design for silent operation and excellent heat dissipation.
- İşletim Sistemi: Pre-installed Windows 11 Pro 64-bit (activated).
3.2 Dahili Bileşenler

Image 3.1: Internal layout highlighting the M.2 2280 slot, DDR4 RAM slots, and SATA 3.0 slot.
The internal design allows for easy upgrades of RAM and storage. The system supports up to 64GB DDR4 RAM and includes slots for both M.2 NVMe/SATA SSDs and 2.5-inch SATA HDDs/SSDs.
3.3 Bağlantı Noktası Yerleşimi

Resim 3.2: Ayrıntılı view of the front and rear ports, including USB, HD, DP, LAN, COM, and GPIO.
The Mini PC offers a comprehensive set of ports for various industrial and personal applications. The front panel includes the power button, USB 3.0 ports, and GPIO/COM ports. The rear panel features audio jacks, Gigabit LAN ports, HD (HDMI) ports, a DisplayPort, USB 2.0 ports, and the DC power input.
4. Kurulum Talimatları
4.1 İlk Bağlantı
- Antenleri Bağlayın: Screw the two WiFi antennas onto the corresponding connectors on the rear of the Mini PC.
- Ekranı Bağla: Connect your monitor(s) to the HD (HDMI) and/or DP (DisplayPort) outputs using the provided HDMI cable or a compatible DP cable. The device supports up to three displays simultaneously.
- Çevre Birimlerini Bağlayın: Plug in your USB keyboard and mouse into the available USB ports.
- Ağ Bağlantısı (İsteğe bağlı): For a wired connection, connect an Ethernet cable to one of the Gigabit LAN ports.
- Gücü bağlayın: Plug the power adapter into the DC IN port on the Mini PC, then connect the adapter to a power outlet.
4.2 Açma
Press the power button located on the front panel of the Mini PC. The system will boot up, and Windows 11 Pro will load automatically.
4.3 VESA Montajı (İsteğe bağlı)
The Mini PC can be mounted to the back of a VESA-compatible monitor or to a wall using the included VESA mount and screws. Attach the VESA bracket to the Mini PC, then secure the bracket to your desired mounting location.
5. Kullanım Talimatları
5.1 İşletim Sistemi
Your HISTTON H6 Mini PC comes with Windows 11 Pro pre-installed and activated. Follow the on-screen prompts for initial Windows setup, including user account creation and network configuration.

Image 5.1: The Mini PC running Windows 11 Pro.
5.2 Üçlü Ekran Kurulumu
The Mini PC supports connecting up to three independent displays simultaneously via its two HD (HDMI) ports and one DP (DisplayPort). To configure multiple displays:
- Connect all desired monitors to the available video output ports.
- Right-click on the desktop and select "Display settings."
- Windows should detect all connected displays. You can arrange them, change their resolution, and set their orientation.
- Choose between "Extend these displays" to have a larger desktop area or "Duplicate these displays" to mirror content.
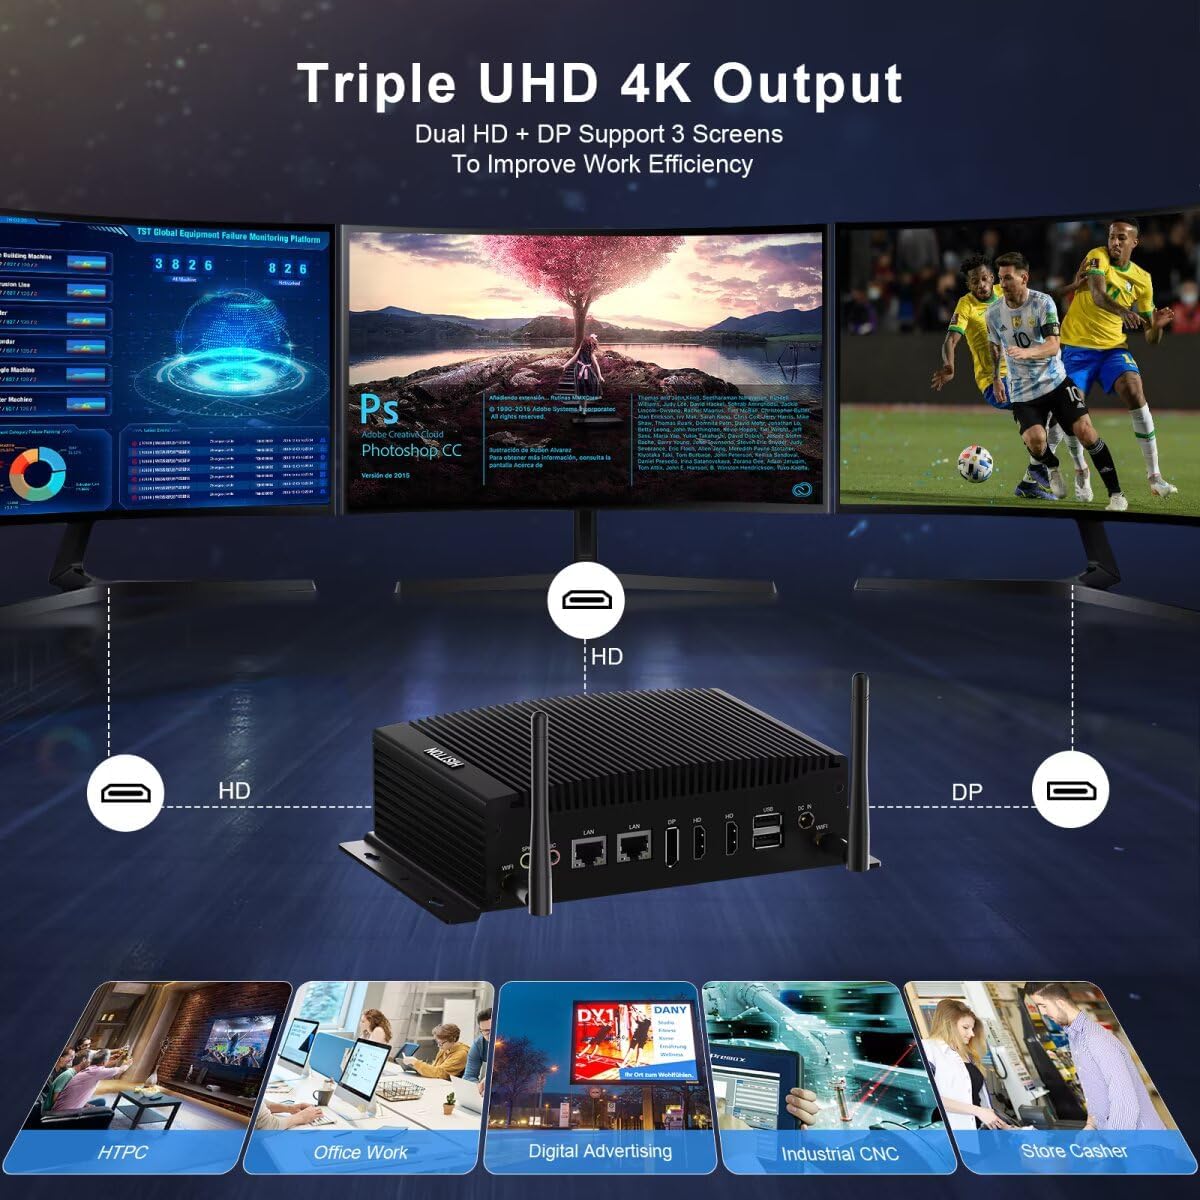
Image 5.2: Triple 4K display output configuration.
5.3 Ağ Bağlantısı
The Mini PC offers both wired and wireless networking options:
- Kablolu LAN: Connect an Ethernet cable to either of the two Gigabit LAN ports for a stable, high-speed internet connection.
- Wifi: The built-in Dual-band (2.4G+5.0G) Wi-Fi 5 module provides wireless internet access. To connect, click the Wi-Fi icon in the system tray, select your network, and enter the password.
- Bluetooth: Bluetooth 4.2 allows connection to compatible wireless peripherals such as keyboards, mice, and headphones. Access Bluetooth settings via the Windows Settings menu.

Image 5.3: High-speed network capabilities including Wi-Fi and Gigabit Ethernet.
5.4 GPIO and COM Ports
The 14-pin GPIO and 2x RS232/RS485 COM ports are designed for industrial applications and specialized peripheral connections. Refer to the specific documentation for your industrial equipment or custom applications for proper configuration and usage of these ports.
6. Bakım
6.1 Temizlik
- Temizlemeden önce cihazın kapalı ve fişinin çekilmiş olduğundan emin olun.
- Mini PC'nin dış yüzeyini silmek için yumuşak, kuru bir bez kullanın.
- Avoid using liquid cleaners or sprays directly on the device.
6.2 Yazılım Güncellemeleri
Regularly update your Windows operating system and drivers to ensure optimal performance and security. Access Windows Update through the Settings menu.
6.3 Depolama ve RAM Yükseltmeleri
The Mini PC supports upgrades for both RAM and storage. If you plan to upgrade, ensure the device is powered off and unplugged. Refer to the internal component diagram (Image 3.1) for slot locations. Use compatible DDR4 SO-DIMM modules and M.2 2280 NVMe/SATA SSDs or 2.5-inch SATA drives.
7. Sorun Giderme
- Güç Yok: Güç adaptörünün hem Mini PC'ye hem de çalışan bir elektrik prizine güvenli bir şekilde bağlı olduğundan emin olun. Prizin çalışıp çalışmadığını başka bir cihazla test edin.
- Görüntü yok: Verify that the monitor is powered on and correctly connected to the Mini PC. Try a different video cable or monitor if available. Ensure the correct input source is selected on your monitor.
- İnternet bağlantısı yok: For wired connections, check the Ethernet cable and router status. For Wi-Fi, ensure antennas are attached, Wi-Fi is enabled in Windows, and you are connected to the correct network with the right password.
- Sistem Yavaşlaması: Check Task Manager for high CPU or RAM usage by specific applications. Ensure sufficient free storage space. Consider performing a disk cleanup or system scan for malware.
- Çevresel Aygıt Algılanamadı: Çevre birimini farklı bir USB bağlantı noktasına bağlamayı deneyin. Gerekirse sürücülerin yüklü olduğundan emin olun.
8. Özellikler
| Özellik | Şartname |
|---|---|
| İşlemci | Intel Core i7-10810U (1.1 GHz base, up to 4.90 GHz) |
| Grafikler | 10. Nesil Intel İşlemciler için Intel UHD Grafikler |
| Veri deposu | 16 GB DDR4 (2x SO-DIMM slots, max 64GB) |
| Depolamak | 512 GB M.2 NVMe PCIe 3.0x4 / SATA 3 SSD, 1x 2.5-inch SATA HDD/SSD slot |
| İşletim Sistemi | Windows 11 Pro |
| Maksimum Ekran Çözünürlüğü | 3840 x 2160 piksel (4K) |
| Video Çıkışları | 2x HD (HDMI), 1x DP (DisplayPort) |
| USB Bağlantı Noktaları | 4x USB 3.0, 2x USB 2.0 |
| Ağ | 2x Gigabit Ethernet (RJ-45), Dual-band 2.4G+5.0G WiFi (WIFI5), Bluetooth 4.2 |
| Seri Portlar | 2x RS232/RS485 COM |
| GPIO | 1x 14 Pin GPIO |
| Ses | 1x SPK (Audio Out), 1x MIC (Audio In) |
| Güç Kaynağı | DC 12V 5A |
| Boyutlar (UxGxY) | 8.07 x 4.92 x 2.09 inç (20.5 x 12.5 x 5.3 cm) |
| Ağırlık | 2.64 pound (1.2 kg) |
9. Garanti ve Destek
HISTTON provides customer support for its products. For technical assistance, warranty claims, or general inquiries, please use the following contact methods:
- Amazon Desteği: For purchases made through Amazon, you can contact support by logging into your Amazon account, navigating to "Your Orders," and selecting "Ask Product Question" for your HISTTON Mini PC.
- Satış Sonrası Destek: You may also send an email directly to the HISTTON after-sales team for dedicated support.

Image 9.1: Support contact options for HISTTON products.
9.1 Resmi Ürün Videosu
Video 9.1: Bir overview of the HISTTON Mini PC, showcasing its features and potential applications with Windows 11 Pro and Linux/Ubuntu support.
Ask a question about this manual
Ask about setup, troubleshooting, compatibility, parts, safety, or missing instructions. Manuals+ will review the question and use this page’s manual context to help answer it.