
Model 2234
WorkPro Plus 14GPH Electric Paint Sprayer User Manual
Modeli: 2234
giriiş
The WorkPro Plus Electric Paint Sprayer, Model 2234, is designed for residential DIY painting projects, offering a flexible and efficient solution for applying various coatings. This manual provides comprehensive instructions for the safe and effective operation, maintenance, and troubleshooting of your paint sprayer.
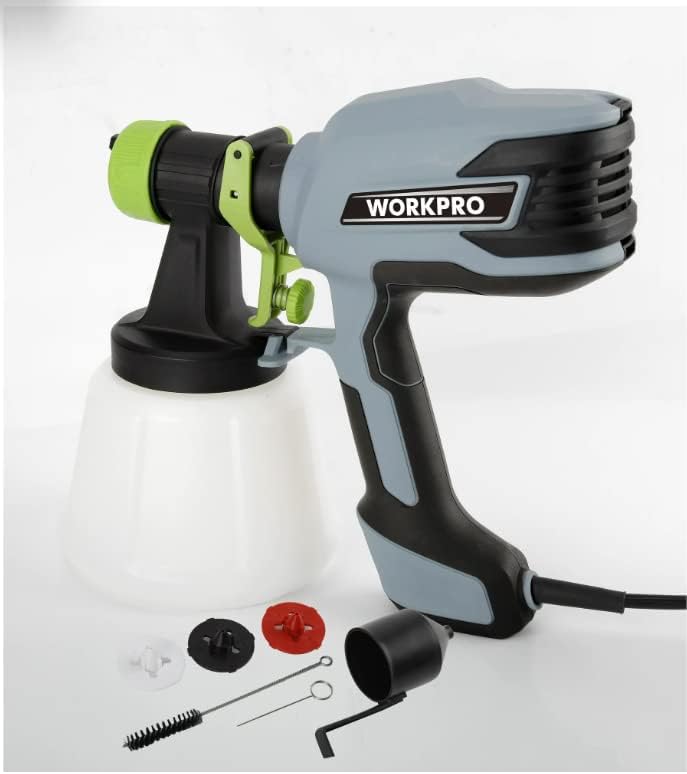
Image: The WorkPro Plus Electric Paint Sprayer, showing the main unit, paint container, and included accessories like nozzles, cleaning brush, and viscosity cup.
Güvenlik Bilgileri
Yaralanmaları veya ürüne zarar gelmesini önlemek için lütfen aşağıdaki güvenlik önlemlerine daima uyun.
- Püskürtme cihazını çalıştırmadan önce tüm talimatları okuyun.
- Wear appropriate personal protective equipment (PPE), including eye protection, gloves, and a respirator, especially when spraying paints or chemicals.
- Ensure the work area is well-ventilated to prevent the buildup of hazardous fumes.
- Çocukları ve evcil hayvanları çalışma alanından uzak tutun.
- Yanıcı sıvıları açık alevlerin, pilot lambalarının veya diğer tutuşturma kaynaklarının yakınına püskürtmeyin.
- Always disconnect the power cord before cleaning, performing maintenance, or when the sprayer is not in use.
- Motor ünitesini suya veya başka sıvılara batırmayın.
- Yalnızca üretici tarafından önerilen yedek parça ve aksesuarları kullanın.
Paket İçeriği
Paketin içinde tüm öğelerin mevcut olduğundan emin olun:
- WorkPro Plus Electric Paint Sprayer Unit
- 1200 ml Paint Reservoir
- 4 Nozzles (1.5 mm, 1.8 mm, 2.2 mm, 2.6 mm)
- Temizleme Fırçası
- Temizleme Pimi
- Viscosity Measuring Cup
- Kullanım Kılavuzu (bu belge)
Kurmak
- Çalışma Alanını Hazırlayın: Ensure the area is clean, well-ventilated, and free of obstructions. Cover surfaces not to be painted.
- Boyayı Hazırlayın:
- Boyayı iyice karıştırın.
- Use the included viscosity measuring cup to check the paint's thickness. Fill the cup with paint and time how long it takes for the paint to flow out. Refer to the paint manufacturer's recommendations for thinning.
- Thin the paint as necessary using the appropriate thinner (water for latex, mineral spirits for oil-based, etc.) until it reaches the desired viscosity for spraying.
- Strain the paint through a paint strainer or cheesecloth to remove any lumps or debris that could clog the nozzle.
- Rezervuarı doldurun: Unscrew the paint reservoir from the sprayer unit. Pour the prepared paint into the reservoir, ensuring not to overfill. Reattach the reservoir securely to the sprayer unit.
- Meme ucunu seçin ve takın: Choose the appropriate nozzle size (1.5 mm, 1.8 mm, 2.2 mm, or 2.6 mm) based on the paint type and desired spray pattern. Larger nozzles are generally for thicker paints. Securely attach the chosen nozzle to the sprayer.
- Gücü bağlayın: Plug the sprayer into a standard 120V - 60Hz electrical outlet.
Kullanım Talimatları
Sprey Kalıpları
The WorkPro Plus sprayer offers three adjustable spray patterns: Horizontal, Vertical, and Round. Adjust the air cap to change the pattern:
- Yatay: For spraying vertical surfaces (e.g., fences, walls).
- Dikey: For spraying horizontal surfaces (e.g., decks, ceilings).
- Yuvarlak: For small areas, corners, or detailed work.

Image: A hand holding the WorkPro Plus Electric Paint Sprayer, demonstrating its ergonomic design and showing the different nozzle sizes available.
Püskürtme Tekniği
- Test Spreyi: Before spraying your project, always test on a piece of scrap material to adjust the spray pattern and material flow.
- Hold Distance: Hold the sprayer approximately 6-12 inches (15-30 cm) from the surface, perpendicular to the surface.
- Hareket: Move the sprayer in smooth, even strokes, overlapping each pass by about 50%. Avoid tilting the sprayer, which can lead to uneven coverage.
- Tetik Kontrolü: Press the trigger fully to start spraying. Release the trigger at the end of each pass to avoid paint buildup.
- Malzeme Akış Kontrolü: Use the adjustable material flow control dial on the sprayer to increase or decrease the paint output, ensuring optimal coverage without runs or drips.
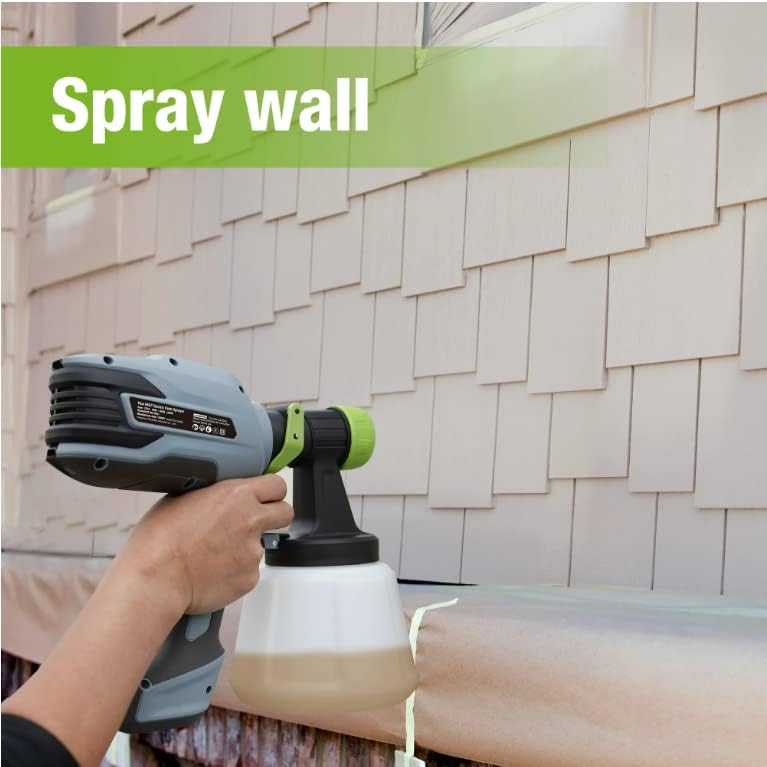

Images: The WorkPro Plus Electric Paint Sprayer in use, demonstrating its application on a wall and a fence, highlighting its versatility for various surfaces.
Bakım
Proper cleaning and maintenance are crucial for the longevity and performance of your paint sprayer. Clean the sprayer immediately after each use.
- Boşaltılmış Rezervuar: Disconnect the power. Empty any remaining paint from the reservoir back into its original container.
- İlk Durulama: Fill the reservoir with the appropriate cleaning solution (water for latex, mineral spirits for oil-based). Reattach the reservoir and spray the cleaning solution into a waste container until the liquid runs clear.
- Sökün ve Temizleyin:
- Unscrew the paint reservoir and clean it thoroughly with the cleaning solution and the cleaning brush.
- Remove the nozzle and air cap. Clean all parts with the cleaning solution and the cleaning brush. Use the cleaning pin to clear any blockages in the nozzle or air cap holes.
- Wipe down the exterior of the sprayer unit with a damp cloth. Do not immerse the motor unit.
- Kurutun ve Saklayın: Allow all parts to dry completely before reassembling. Store the sprayer in a clean, dry place, away from extreme temperatures.
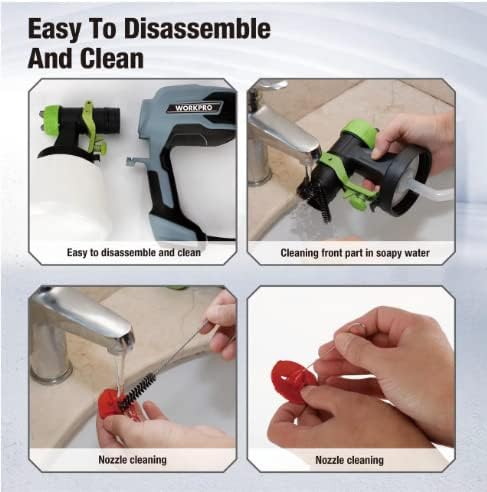
Image: A four-panel image illustrating the disassembly and cleaning process of the paint sprayer, including cleaning the front part in soapy water and using the cleaning pin for nozzles.
Sorun giderme
| Sorun | Olası Neden | Çözüm |
|---|---|---|
| Sprey yok veya zayıf sprey | Clogged nozzle; paint too thick; low paint level; air cap blocked. | Clean nozzle and air cap; thin paint; refill reservoir; clear air cap. |
| Düzensiz püskürtme deseni | Incorrect nozzle selection; improper thinning; air cap misalignment; inconsistent spraying distance. | Select correct nozzle; adjust paint viscosity; align air cap; maintain consistent distance. |
| Boya damlar veya akar | Paint too thin; spraying too close; too much material flow. | Thicken paint; increase spraying distance; reduce material flow. |
| Sprayer not turning on | Not plugged in; power outlet issue; internal fault. | Check power connection; test outlet; contact customer support if problem persists. |
Özellikler
| Özellik | Detay |
|---|---|
| Örnek | 2234 |
| Güç | 120V - 60Hz, 450W |
| Maksimum Akış Hızı | 950 ml/dk |
| Rezervuar Kapasitesi | 1200 ml |
| Nozul Boyutları | 1.5 mm, 1.8 mm, 2.2 mm, 2.6 mm |
| Sprey Kalıpları | Horizontal, Vertical, Round |
| Boyutlar | 6 x 7 x 2 inç |
| Ürün Ağırlığı | 4 pound |
| Malzeme | Plastik |
| Önerilen Kullanımlar | Exterior siding, decks, fences, garage doors, sheds, walls, ceilings; with paint, stain, primer, and sealer. |
Garanti ve Destek
Specific warranty information is not provided in this manual. For details regarding warranty coverage, technical support, or replacement parts, please contact the manufacturer or the retailer where the product was purchased. Keep your proof of purchase for warranty claims.
For further assistance, please refer to the contact information provided on the product packaging or the manufacturer's official webalan.
Ask a question about this manual
Ask about setup, troubleshooting, compatibility, parts, safety, or missing instructions. Manuals+ will review the question and use this page’s manual context to help answer it.