
1. Giriş
This manual provides essential information and instructions for the safe and efficient use of your Blackview BV7200 Rugged Smartphone. The BV7200 is designed for durability and performance in challenging environments, featuring advanced water and dust resistance, a powerful processor, and a high-capacity battery.
Temel özellikler şunlardır:
- IP68 & IP69K Certification: Advanced water and dust resistance for outdoor and demanding conditions.
- MediaTek Helio G85 İşlemci: Ensures smooth performance for gaming, multitasking, and general use.
- 50MP Dual Camera: Capture high-quality photos, even in low-light conditions.
- 5180mAh Pil: Long-lasting power with 18W fast charging support.
- 6.1-inch HD+ Display: Durable screen with Corning Gorilla Glass 3, optimized for comfortable viewIng.
- Eldiven Modu: Allows screen operation even when wearing gloves.

Resim: Üzeriview Siyahlarınview BV7200 Rugged Smartphone, highlighting its MediaTek Helio G85 processor, 50MP camera, IP68/IP69K ratings, 5180mAh battery, 6.1-inch display, and Glove Mode.
2. Kurulum
2.1. SIM Kart ve MicroSD Kart Kurulumu
To install your SIM card(s) and/or MicroSD card:
- Cihazın yan tarafındaki SIM tepsisini bulun.
- Tepsiyi açmak için verilen SIM çıkarma aracını kullanın.
- Carefully place your Nano-SIM card(s) and/or MicroSD card into the designated slots, ensuring correct orientation.
- Tepsiyi yerine oturana kadar yavaşça cihazın içine doğru itin.
2.2. İlk Şarj ve Güç Açma
İlk kullanımdan önce cihazınızı tam şarj etmeniz önerilir.
- Connect the USB Type-C cable to the charging port at the bottom of the phone. Ensure the port cap is securely opened before inserting the cable and closed after charging to maintain water resistance.
- Connect the other end of the cable to a compatible power adapter and plug it into a wall outlet.
- Once sufficiently charged, press and hold the Power button (usually on the right side) for a few seconds until the Blackview logosu belirir.
- Dil seçimi, Wi-Fi bağlantısı ve Google hesabı kurulumu dahil olmak üzere ilk kurulumu tamamlamak için ekrandaki talimatları izleyin.
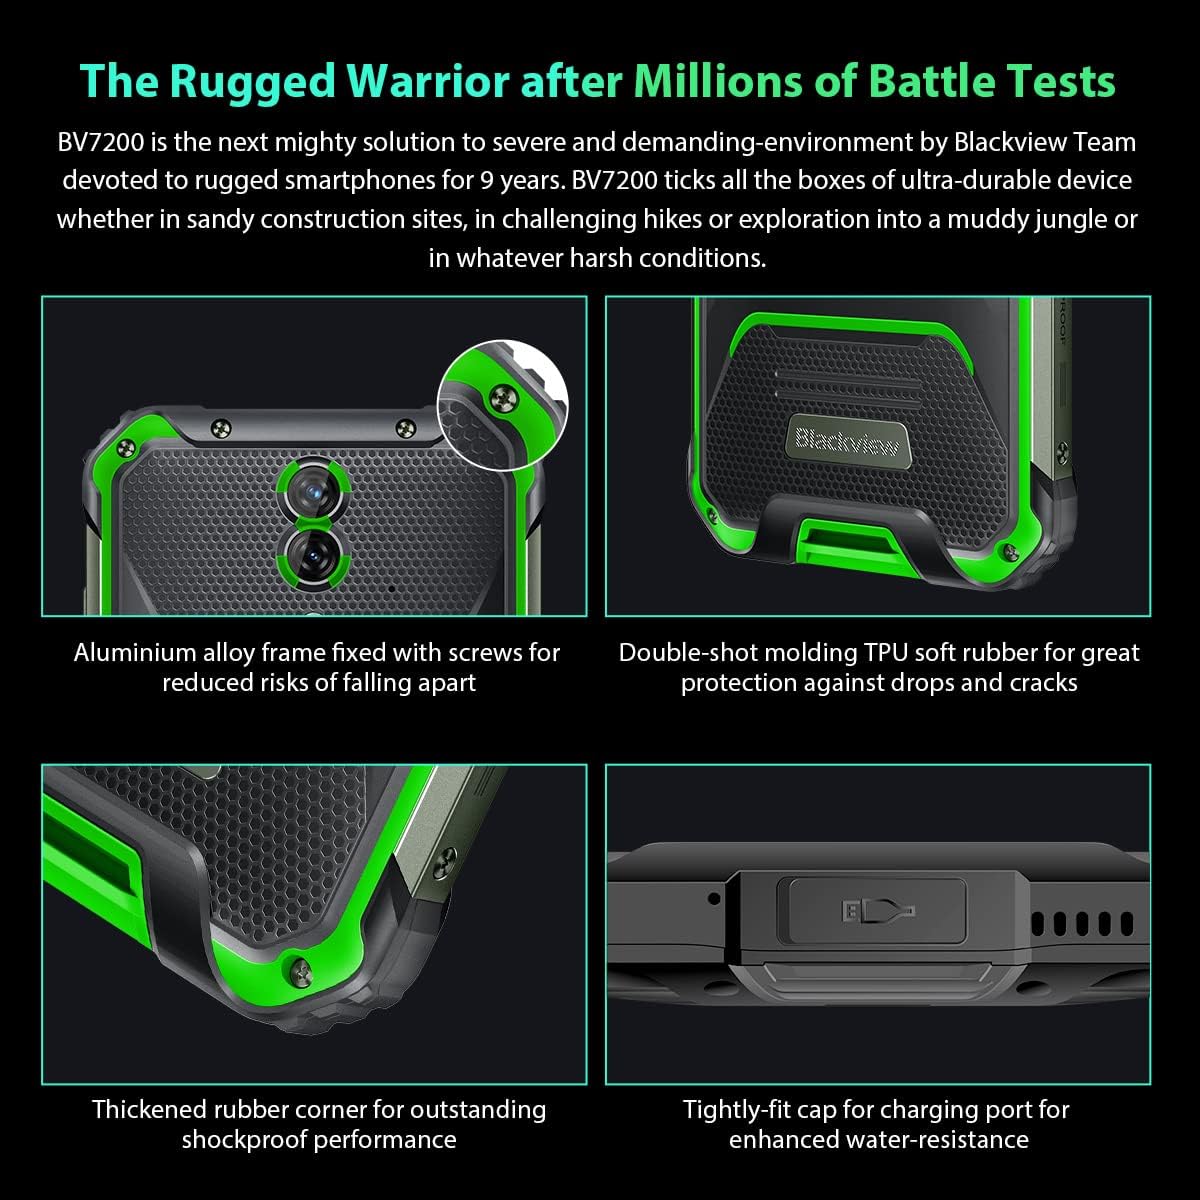
Resim: Yakın çekim views of the Blackview BV7200's rugged construction, including aluminum alloy frame, double-shot molding TPU rubber, thickened rubber corners, and the tightly-fit cap for the charging port, emphasizing its durability and water resistance.
3. Kullanım Talimatları
3.1. Temel Gezinme
Siyahview BV7200 operates on Doke OS 3.0, based on Android 12. Use touch gestures for navigation:
- Musluk: Bir öğe seçin veya bir uygulama açın.
- Tokatlamak: Ekranlar veya listeler arasında gezinin.
- Tutam: Görüntüleri yakınlaştırın veya uzaklaştırın ve web sayfalar.
- Uzun basma: Bağlamsal menülere erişin veya uygulama simgelerini taşıyın.
3.2. Kamera Kullanımı
The BV7200 features a 50MP main rear camera and an 8MP ultra-wide/macro rear camera.
- Ana ekranınızdan veya uygulama çekmecenizden Kamera uygulamasını açın.
- İstediğiniz modu seçin (Fotoğraf, Video, Portre, Profesyonel, vb.).
- Ekrana dokunarak belirli bir alana odaklanabilirsiniz.
- Press the Shutter button to capture a photo or start/stop video recording.

Image: Diagram illustrating the Blackview BV7200's 50MP Samsung ISOCELL JN1 main rear camera, 8MP ultra-wide and ultra-macro rear camera, and rear flash, highlighting its photographic capabilities.
3.3. Eldiven Modu
The BV7200 supports Glove Mode, allowing you to operate the touchscreen while wearing gloves.
- To activate/deactivate Glove Mode, navigate to Settings > Smart Assistant > Glove Mode.
- Ensure this mode is enabled when using gloves for optimal touch responsiveness.

Image: Collage demonstrating the Blackview BV7200's Glove Mode in various scenarios, showing users operating the phone while wearing different types of gloves, emphasizing its utility in cold or industrial environments.
3.4. Water and Dust Resistance (IP68 & IP69K)
The BV7200 is certified IP68 and IP69K, making it resistant to water immersion and high-pressure water jets. This allows for use in aquatic sports or dusty environments.
- Always ensure all port caps (charging port, SIM tray) are securely closed before exposing the device to water or dust.
- Rinse the phone with clean water after exposure to saltwater or chemicals.
- Do not charge the phone if the charging port is wet. Allow it to dry completely.
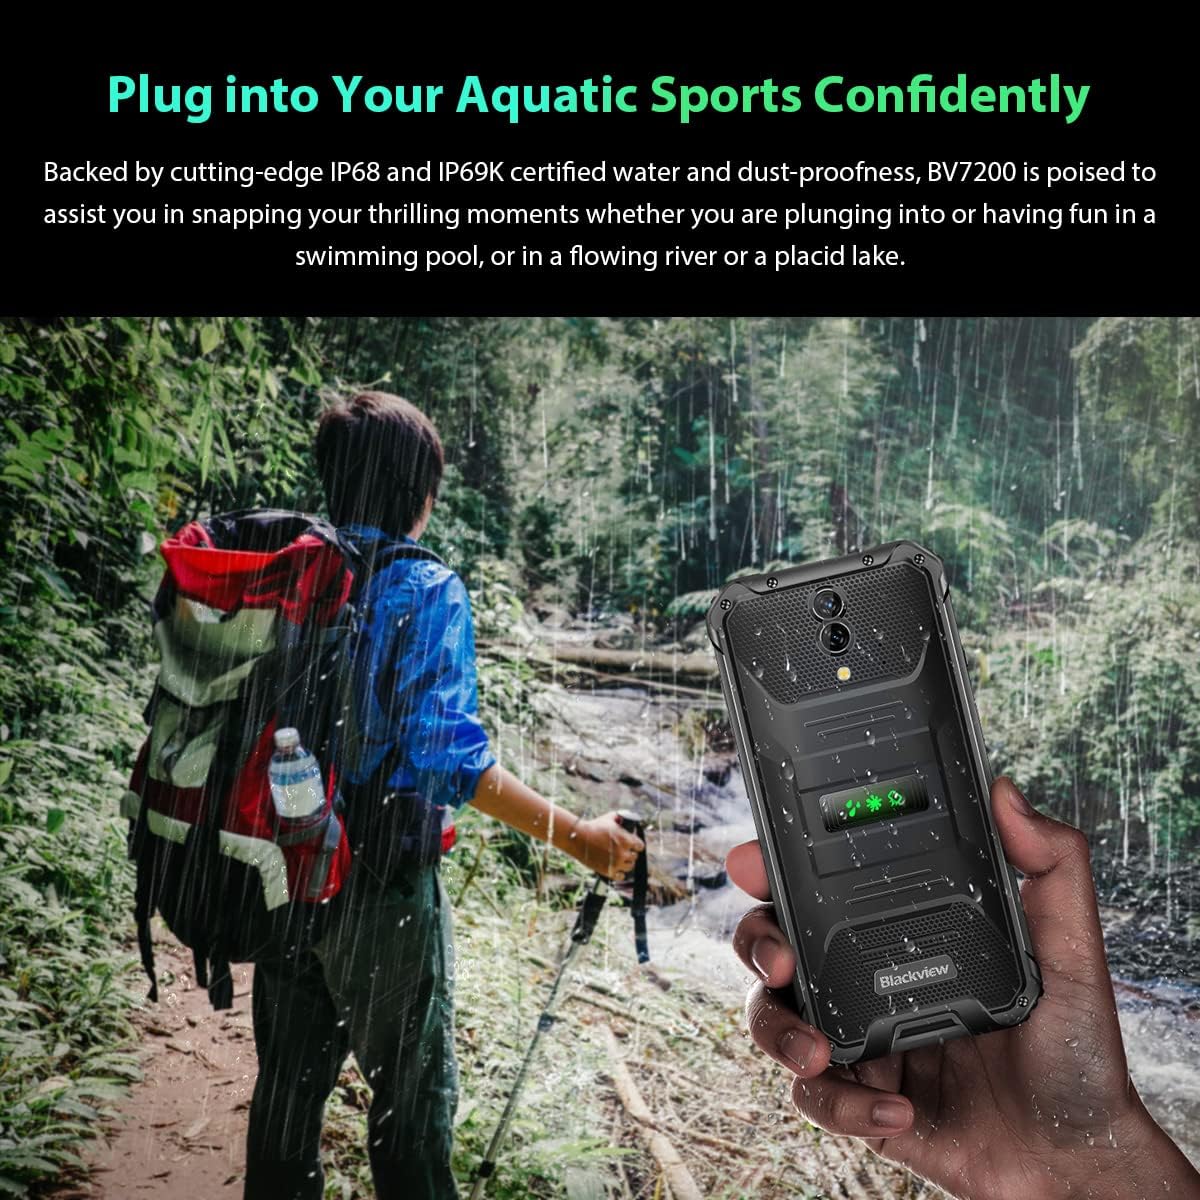
Image: A person holding the Blackview BV7200 near a stream or waterfall, illustrating its water resistance and suitability for outdoor and aquatic activities.
3.5. Pil Yönetimi
The 5180mAh battery provides extended usage. The device supports 18W fast charging.
- En iyi şarj hızı ve güvenliği için orijinal şarj cihazını ve kablosunu kullanın.
- The battery is designed to withstand temperatures down to -10°C.
- To prolong battery life, avoid extreme temperatures and fully discharging the battery regularly.
3.6. Bellek Genişletme
The BV7200 features 6GB of RAM with an additional 4GB virtual memory expansion, totaling 10GB, for enhanced multitasking and performance.

Image: Graphic illustrating the memory expansion feature of the Blackview BV7200, showing 6GB of physical RAM and an additional 4GB of virtual RAM, combining for a total of 10GB for improved performance.
4. Bakım
4.1. Cihazınızı Temizleme
Siyahınızı temizlemek içinview BV7200:
- Ekranı ve gövdeyi yumuşak, tiftiksiz bir bezle silin.
- İnatçı kirler için hafif bir d kullanın.amp Hafif sabunlu bir bezle silin, ardından kurulayın.
- Sert kimyasallar, çözücüler veya aşındırıcı temizleyiciler kullanmayın.
- Ensure all port caps are closed before cleaning with liquids.
4.2. Yazılım Güncellemeleri
En iyi performansı, güvenliği ve yeni özelliklere erişimi sağlamak için yazılım güncellemelerini düzenli olarak kontrol edin ve yükleyin.
- Git Ayarlar > Sistem > Sistem güncellemesi Mevcut güncellemeleri kontrol etmek için.
- Güncellemeye başlamadan önce cihazınızın yeterli pil seviyesine ve stabil bir Wi-Fi bağlantısına sahip olduğundan emin olun.
5. Sorun Giderme
5.1. Yaygın Sorunlar ve Çözümleri
- Cihaz açılmıyor: Pilin şarjlı olduğundan emin olun. En az 15 dakika şarj cihazına bağlayın, ardından tekrar açmayı deneyin.
- Ekran tepkisiz: Restart the device by holding the Power button for about 10-15 seconds. If the issue persists, try a factory reset (data will be lost).
- Bağlantı sorunları (Wi-Fi/Bluetooth/Mobil Veri):
- Wi-Fi/Bluetooth/Mobil Veri bağlantısını açıp kapatın.
- Cihazı yeniden başlatın.
- Check router/network settings.
- For mobile data, ensure SIM card is correctly inserted and activated.
- Uygulamalar çöküyor: Uygulamanın önbelleğini ve verilerini temizleyin (Ayarlar > Uygulamalar > [Uygulama Adı] > Depolama > Önbelleği Temizle/Verileri Temizle). If the problem continues, uninstall and reinstall the app.
5.2. Fabrika Ayarlarına Sıfırlama
Fabrika ayarlarına sıfırlama, telefonunuzdaki tüm verileri siler ve telefonu orijinal fabrika ayarlarına geri döndürür. İşleme başlamadan önce önemli verilerinizi yedekleyin.
- Git Ayarlar > Sistem > Sıfırlama seçenekleri > Tüm verileri sil (fabrika ayarlarına sıfırlama).
- Confirm your decision. The device will restart and perform the reset.
6. Özellikler
Below are the technical specifications for the Blackview BV7200:
| Özellik | Şartname |
|---|---|
| Marka | Siyahview |
| RAM Boyutu | 6 GB (expandable to 10GB with virtual RAM) |
| CPU Modeli | MediaTek Helio G85 |
| Depolama Kapasitesi | 128 GB (expandable up to 1TB with TF card) |
| Ekran Boyutu | 6.1 inç |
| Çözünürlük | 720 x 1560 HD+ |
| Hücresel Teknoloji | 4G |
| Kablosuz Ağ Teknolojisi | GSM, LTE, Wi-Fi |
| Pil Kapasitesi | 5180 mAh |
| İşletim Sistemi | Android 12 (Doke OS 3.0) |
| Suya/Toza Dayanıklılık | IP68, IP69K |

Resim: Ayrıntılı view of the MediaTek Helio G85 processor, highlighting its specifications including RAM, ROM, GPU, and expandable storage, emphasizing its strong performance capabilities.

Image: Graphic detailing the Blackview BV7200's 6.1-inch HD+ display specifications, including resolution (720x1560), screen-to-body ratio (83%), brightness (380cd/cm2), and PPI (283), emphasizing its visual quality and durability with Corning Gorilla Glass 3.
7. Garanti ve Destek
For warranty information and technical support, please refer to the warranty card included with your product or visit the official Blackview webSite. Satın alma belgenizi garanti talepleriniz için saklayın.
For further assistance, you may contact Blackview resmi kanalları aracılığıyla müşteri hizmetleri.