
1. Giriş
Thank you for choosing the PRIXTON Cinema Mini Projector. This compact and versatile projector is designed to provide an immersive viewing experience for movies, games, and presentations. Its multiple connectivity options and portable design make it ideal for various environments. Please read this manual carefully before using the projector to ensure proper operation and to maximize its lifespan.
2. Güvenlik Bilgileri
- Güç Kaynağı: Yalnızca belirtilen güç adaptörünü kullanın. Voltajın düşük olduğundan emin olun.tage bölgenizle uyumludur.
- Havalandırma: Havalandırma açıklıklarını kapatmayın. Aşırı ısınmayı önlemek için projektörün etrafında yeterli hava akışı sağlayacak boşluk bırakın.
- Göz Güvenliği: Projektör lensine doğrudan bakmayın.amp Açıktır. Parlak ışık göz hasarına neden olabilir.
- Su ve Nem: Projeksiyon cihazını sudan, yağmurdan ve aşırı nemden uzak tutun. Islak ellerle çalıştırmayın.
- Temizlik: Disconnect the power before cleaning. Use a soft, dry cloth. Avoid liquid cleaners.
- Atama: Projeksiyon cihazını sabit, düz bir yüzeye yerleştirin. Doğrudan güneş ışığına veya ısı kaynaklarının yakınına koymaktan kaçının.
- Çocuklar: Keep the projector and its accessories out of reach of children.
3. Paket İçeriği
Lütfen paketinizde tüm öğelerin mevcut olduğundan emin olun:
- PRIXTON Sinema Mini Projektörü
- Uzaktan kumanda
- Güç Adaptörü
- Kullanıcı Kılavuzu
4. Ürün Bittiview
Familiarize yourself with the various parts of your PRIXTON Cinema Mini Projector.
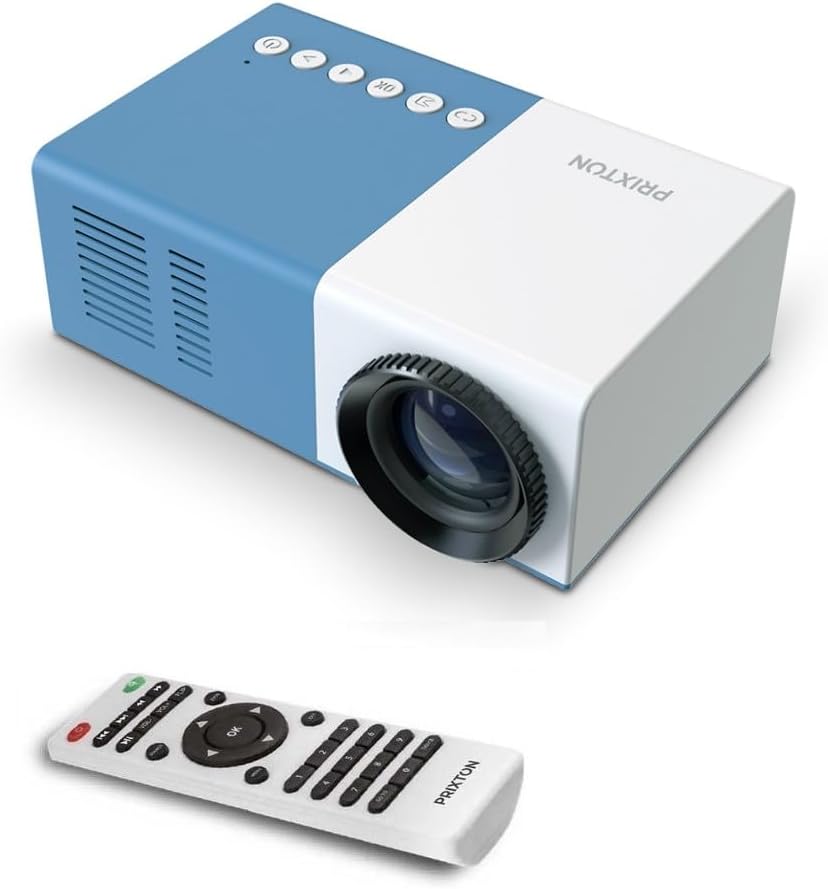
Şekil 4.1: Ön ve Üst View of the PRIXTON Cinema Mini Projector with its remote control. The projector is blue and white, showing the lens, control buttons, and the included remote.
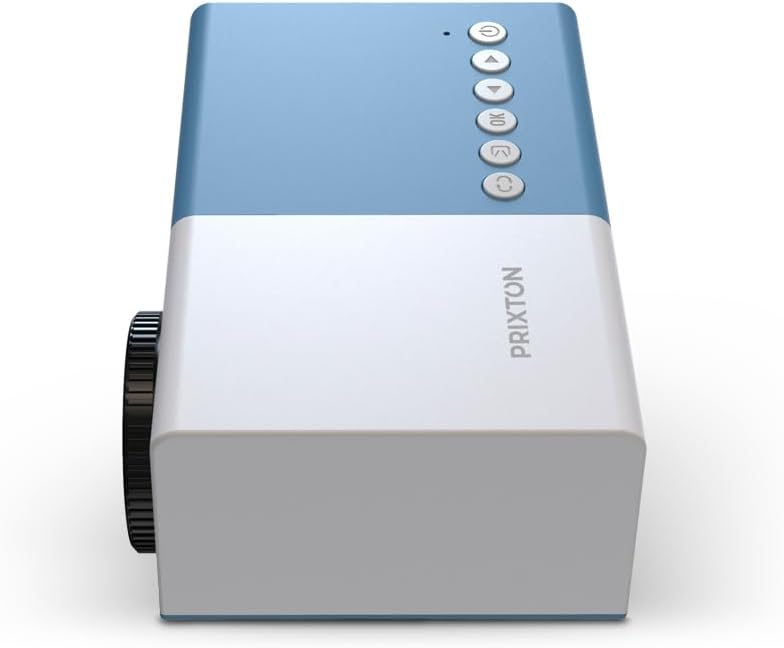
Şekil 4.2: Tepe view of the projector, highlighting the control buttons (Power, Menu, OK, Navigation) and the focus wheel on the side.
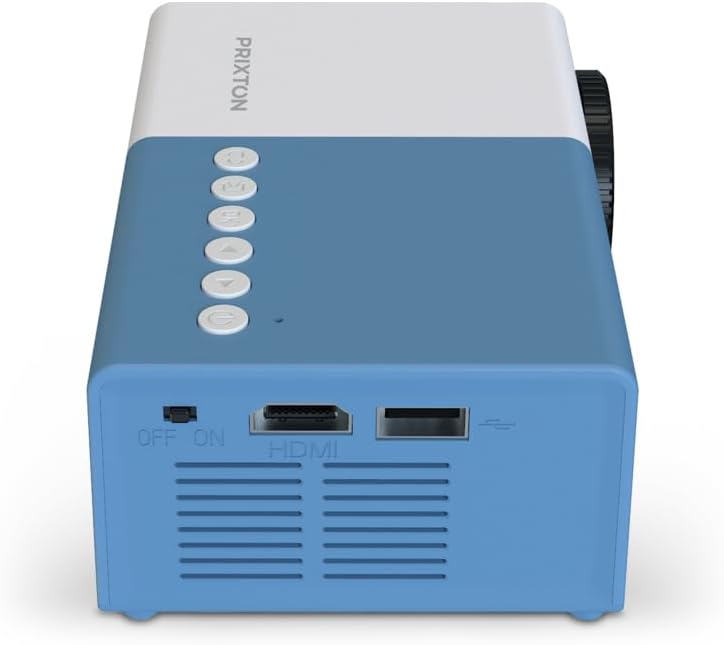
Şekil 4.3: Arka view of the projector, showing the power switch, HDMI port, USB port, and ventilation grilles.

Şekil 4.4: Taraf view of the projector, displaying the MicroSD card slot, AV In port, and additional ventilation.
Bileşenler:
- Mercek: Görüntüyü ekrana yansıtır.
- Odak Tekerleği: Görüntü netliğini ayarlar.
- Kontrol Düğmeleri: Power, Menu, OK, and navigation buttons for on-device control.
- Güç düğmesi: Projektörü açar veya kapatır.
- HDMI Bağlantı Noktası: Connects to devices like laptops, streaming sticks, and game consoles.
- USB Bağlantı Noktası: USB sürücülerden medya oynatmak için.
- MicroSD Yuvası: For media playback from MicroSD cards.
- AV Girişi: AV kablosu kullanarak eski cihazlara bağlanır.
- Entegre Hoparlör: Ses çıkışı sağlar.
5. Kurulum
5.1 Güç Bağlantısı
- Güç adaptörünü projektörün güç giriş portuna bağlayın.
- Güç adaptörünü duvar prizine takın.
- Flip the power switch on the projector to the 'ON' position. The power indicator light should illuminate.
5.2 Yerleştirme ve Projeksiyon
Place the projector on a stable surface, ensuring the lens is facing the projection surface (wall or screen).

Şekil 5.1: Illustration of projection distance and screen size. The projector can project images between 24 and 60 inches, with a maximum distance of 2 meters from the surface.
- For optimal image quality, ensure the room is dark.
- The projector can display images from 24 inches to 60 inches.
- The optimal projection distance is up to 2 meters (approximately 6.5 feet). Adjust the distance to achieve your desired screen size.
6. Çalıştırma
6.1 Güç Açma/Kapatma
- Açmak İçin: After connecting power, press the Power button on the projector or the remote control.
- Kapatmak İçin: Güç düğmesine tekrar basın. İstenirse kapatmayı onaylayın.
6.2 Odak Ayarı
After powering on, the image may appear blurry. Use the focus wheel located on the side of the projector to sharpen the image until it is clear.
6.3 Kaynak Seçimi
To select an input source (HDMI, USB, MicroSD, AV):
- Press the 'Source' or 'Input' button on the remote control or the projector.
- Use the navigation buttons to highlight your desired input source.
- Seçiminizi onaylamak için 'Tamam' düğmesine basın.
7. Bağlantı
The PRIXTON Cinema Mini Projector offers multiple ways to connect your devices.
7.1 HDMI Bağlantısı
Connect devices such as laptops, streaming sticks (e.g., Chromecast, Fire TV Stick), game consoles, or Blu-ray players using an HDMI cable.
- Connect one end of the HDMI cable to your device and the other end to the HDMI port on the projector.
- Select 'HDMI' as the input source (refer to Section 6.3).
7.2 USB ve MicroSD Oynatma
The projector supports direct media playback from USB drives and MicroSD cards.
- Insert your USB drive into the USB port or your MicroSD card into the MicroSD slot.
- Select 'USB' or 'MicroSD' as the input source.
- Gezinme files using the remote control and select the media you wish to play.
7.3 AV In Connection
For older devices that use composite video and stereo audio (RCA), connect them via the AV In port.
- Connect the AV cable from your device to the AV In port on the projector.
- Select 'AV' as the input source.
8. Ses Çıkışı
The projector features an integrated stereo speaker, providing audio for your content. Volume can be adjusted using the remote control.

Şekil 8.1: The PRIXTON Cinema Mini Projector in use, projecting content in a living room environment, demonstrating its portability and ease of setup for home entertainment.
9. Bakım
9.1 Lensin Temizlenmesi
Optik lensler için özel olarak tasarlanmış, yumuşak ve tüy bırakmayan bir bez kullanın. Aşındırıcı temizleyiciler veya aşırı güç kullanmayın, çünkü bu lensi çizebilir.
9.2 Projektör Gövdesinin Temizlenmesi
Wipe the exterior of the projector with a soft, dry cloth. Avoid using chemical cleaners that may damage the finish.
9.3 Havalandırma
Regularly check that the ventilation grilles are free from dust and debris to ensure proper heat dissipation and prevent overheating.
9.4 Depolama
When not in use, store the projector in a cool, dry place, away from direct sunlight and extreme temperatures. If possible, use the original packaging or a protective case.
10. Sorun Giderme
Projeksiyon cihazınızla ilgili sorunlarla karşılaşırsanız, aşağıdaki yaygın sorunlar ve çözümlere göz atın.
| Sorun | Olası Neden | Çözüm |
|---|---|---|
| Ekranda görüntü yok | No power; Incorrect input source; Cable not connected. | Check power connection and switch; Select correct input source; Ensure HDMI/AV/USB cable is securely connected. |
| Görüntü bulanık | Odak ayarı yapılmamış; Projektör çok yakın/uzak. | Odak tekerleğini ayarlayın; Projeksiyon mesafesini ayarlayın. |
| Ses yok | Volume too low; Muted; Source device audio issue. | Increase volume; Unmute projector; Check audio settings on source device. |
| Uzaktan kumanda çalışmıyor | Batteries low/dead; Obstruction; Remote not aimed at sensor. | Replace batteries; Remove obstructions; Aim remote directly at the projector's IR sensor. |
| Projektör aşırı ısınıyor ve kapanıyor | Havalandırmanın engellenmesi; Uzun süreli kullanım. | Havalandırma deliklerinin açık olduğundan emin olun; Projektörün soğumasını bekleyin; İyi havalandırılmış bir alanda çalıştırın. |
11. Özellikler
Technical specifications for the PRIXTON Cinema Mini Projector.
| Özellik | Şartname |
|---|---|
| Marka | Prixton |
| Model Numarası | Cinema Mini |
| Renk | Mavi |
| Projeksiyon Teknolojisi | NEDEN OLMUŞ |
| Yerel Çözünürlük | QVGA 320 x 240 |
| Desteklenen Çözünürlük | Up to Full HD (1920 x 1080) |
| Parlaklık | 900 Lümen (15 ANSI Lümen) |
| Projeksiyon Boyutu | 24" - 60" |
| Projeksiyon Mesafesi | 2 metreye kadar |
| Bağlantı | HDMI, USB, MicroSD, AV In |
| Ses Çıkışı | Entegre Stereo Hoparlör |
| Özel Özellikler | Hafif, Taşınabilir |
| Dahil Bileşenler | Uzaktan kumanda |
12. Garanti ve Destek
For warranty information, please refer to the documentation provided at the time of purchase or contact your retailer. Information regarding spare parts availability and software updates is not available in this manual. For further assistance or technical support, please visit the official PRIXTON websitesine gidin veya müşteri hizmetleriyle iletişime geçin.