1. Giriş
Welcome to the HyperX Armada 25 Gaming Monitor user manual. This document provides essential information for setting up, operating, maintaining, and troubleshooting your new monitor. The HyperX Armada 25 is designed for competitive gaming, featuring a 24.5-inch Full HD (1920x1080) IPS panel, a 240Hz refresh rate, and a 1ms response time, ensuring smooth and responsive visuals. It also includes NVIDIA G-SYNC compatibility to eliminate screen tearing and minimize input latency. A desk mount is included for convenient setup and to maximize desk space.
Temel Özellikler:
- Hepsi Bir Arada Paket: Includes an ergonomic arm and desk mount for easy setup and space-saving.
- Yüksek Yenileme Hızı ve Tepki Süresi: 240Hz refresh rate and 1ms response time for ultra-smooth gaming.
- Vibrant IPS Panel: 24.5-inch Full HD (1920x1080) IPS panel delivers stunning visuals with accurate colors and wide viewaçıları.
- NVIDIA G-SYNC Compatible: Eliminates screen tearing and reduces stuttering for a fluid gaming experience.

Resmi Ürün Videosu:
2. Kurulum
This section guides you through the initial setup of your HyperX Armada 25 Gaming Monitor, including assembly and connection to your computer.
2.1. Assembling the Desk Mount
The HyperX Armada 25 comes with an integrated ergonomic desk mount. Follow the instructions provided in the separate quick start guide for detailed assembly steps. The monitor head easily snaps into the arm, allowing for quick and secure installation.

2.2. Monitörün Bağlanması
Connect the monitor to your computer using the appropriate cables. The HyperX Armada 25 supports both HDMI and DisplayPort connections.
- HDMI veya DisplayPort kablosunun bir ucunu bilgisayarınızın ekran kartındaki ilgili bağlantı noktasına bağlayın.
- Connect the other end of the cable to an available HDMI 2.0 or DisplayPort 1.4 port on the back of your monitor.
- Güç kablosunu monitöre ve ardından bir elektrik prizine bağlayın.
- Açmak için monitördeki güç düğmesine basın.

3. Monitörü Çalıştırma
This section covers basic operation and navigation of the monitor's On-Screen Display (OSD) menu.
3.1. Ekran Üstü Görüntüleme (OSD) Navigasyonu
The OSD menu is controlled using a joystick located on the back of the monitor. This joystick allows you to power on/off the monitor and navigate through various settings.
- Kumanda koluna basın: To open the OSD menu or confirm a selection.
- Kumanda kolunu yukarı/aşağı/sola/sağa hareket ettirin: To navigate through menu options and adjust settings.
- Hold the joystick: To power off the monitor.

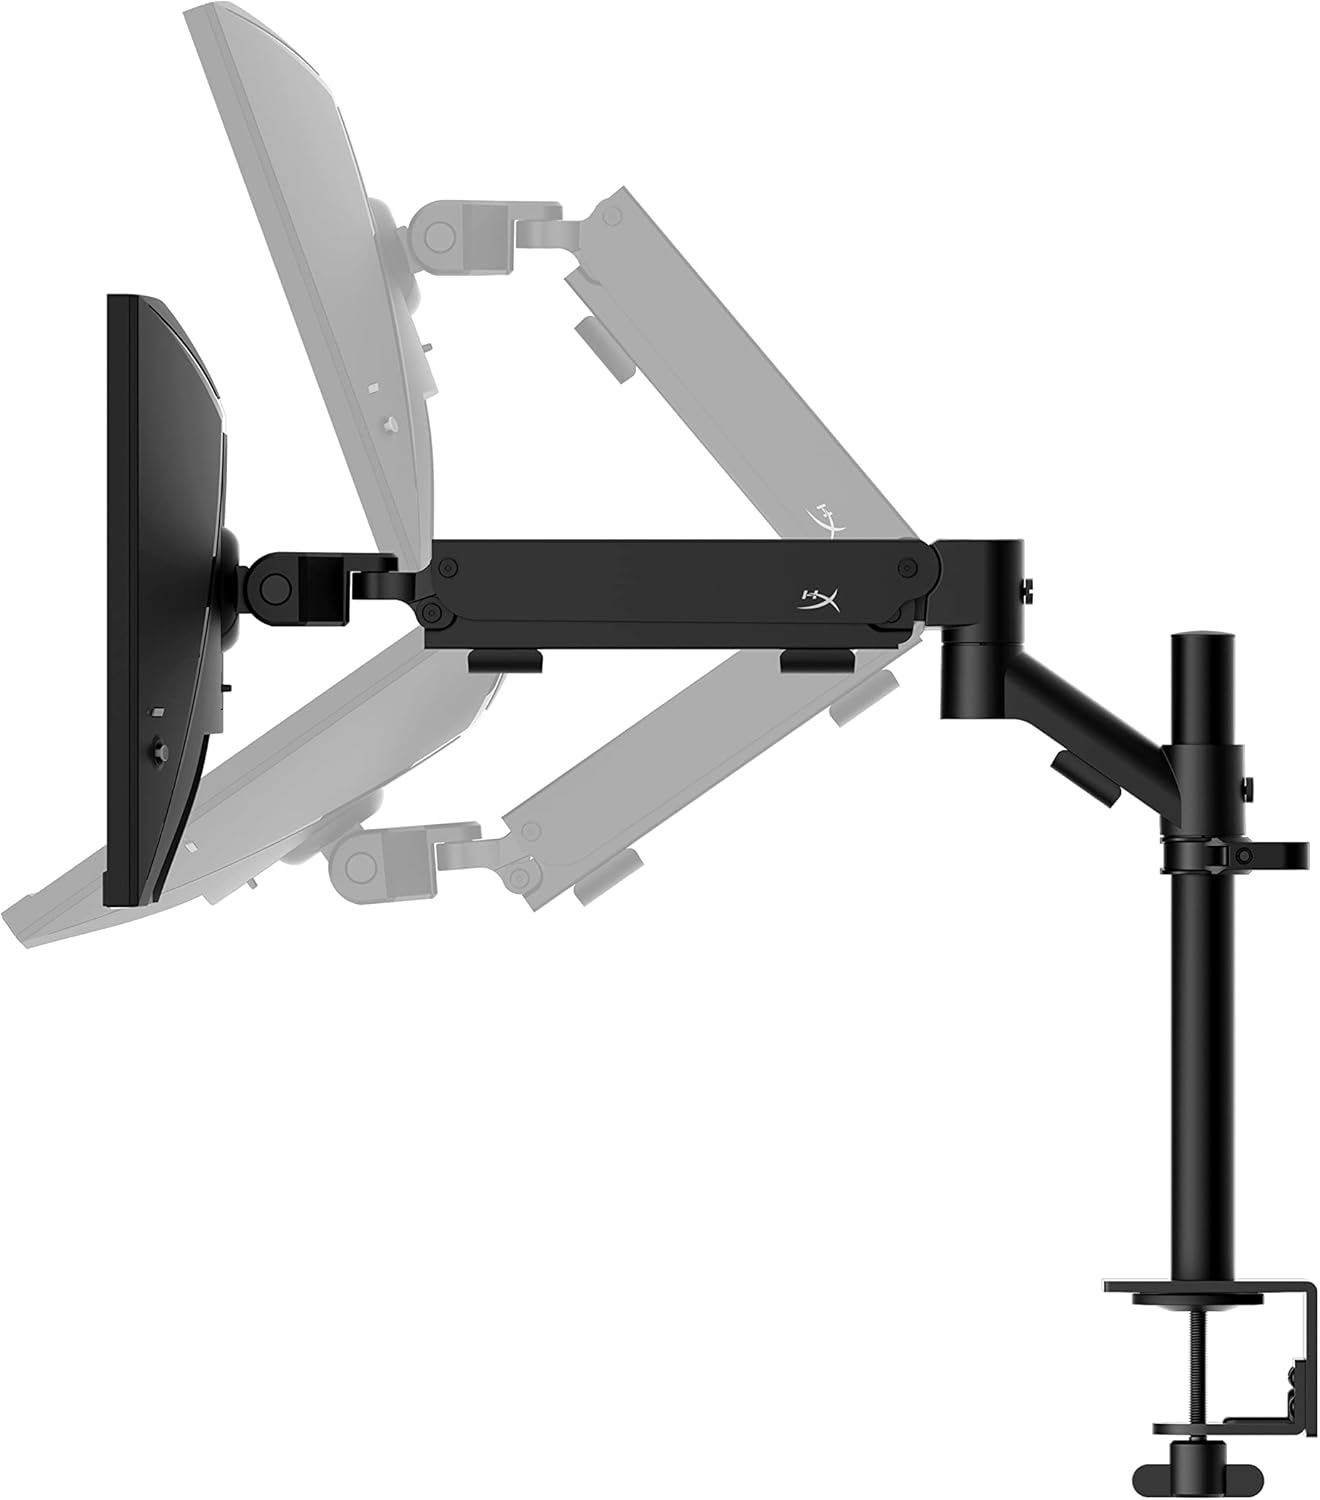
3.2. Monitör Konumunun Ayarlanması
The ergonomic desk mount allows for flexible positioning of your monitor. You can adjust the height, tilt, swivel, and pivot to find your optimal viewaçı.

4. Bakım
Proper maintenance ensures the longevity and optimal performance of your HyperX Armada 25 Gaming Monitor.
- Ekranın Temizlenmesi: Hafifçe yumuşak, tüy bırakmayan bir bez kullanın.ampened with water or a specialized screen cleaner. Avoid using harsh chemicals, abrasive materials, or direct spraying onto the screen.
- C'yi Temizlemeasing: Monitörü silinasinYumuşak ve kuru bir bezle silin.
- Havalandırma: Aşırı ısınmayı önlemek için monitörün havalandırma deliklerinin kapatılmadığından emin olun.
- Kullanılmadığında Gücü Kapatma: Enerji tasarrufu sağlamak ve ömrünü uzatmak için uzun süre kullanmayacağınız zaman monitörü kapatın.
5. Sorun Giderme
Monitörünüzle ilgili sorunlarla karşılaşırsanız, aşağıdaki yaygın sorun giderme adımlarına bakın.
- Güç Yok:
- Güç kablosunun hem monitöre hem de elektrik prizine güvenli bir şekilde bağlı olup olmadığını kontrol edin.
- Elektrik prizinin düzgün çalıştığından emin olun.
- Monitördeki güç düğmesine basın.
- Sinyal yok:
- Verify that the HDMI or DisplayPort cable is securely connected to both the monitor and your computer.
- Bilgisayarınızın açık olduğundan ve uyku modunda olmadığından emin olun.
- OSD menüsünü kullanarak doğru giriş kaynağını seçin.
- Flickering Screen or Image Issues:
- Check the display cable for damage or loose connections.
- Ekran kartı sürücülerinizin güncel olduğundan emin olun.
- Bilgisayarınızın ekran ayarlarından yenileme hızını ayarlayın.
- If G-SYNC is enabled, try disabling it temporarily to see if the issue persists.
- Buttons Not Responding (OSD Joystick):
- Monitörün açık olduğundan emin olun.
- Try restarting the monitor by unplugging and replugging the power cable.
- Clean around the joystick to ensure no debris is obstructing its movement.
6. Özellikler
Detailed technical specifications for the HyperX Armada 25 Gaming Monitor.
| Özellik | Detay |
|---|---|
| Ürün Boyutları | 21.94 x 25.79 x 31.12 inç; 16.98 Pound |
| Ürün Model Numarası | HyperX Armada 25 |
| İlk Mevcut Tarih | 24 Ağustos 2022 |
| Üretici | HP A.Ş. |
| ASIN | B0B2C1G356 |
| Ekran Boyutu | 24.5 inçlik Diyagonal |
| Çözünürlük | FHD (1920x1080) |
| Yenileme Hızı | 240Hz |
| Panel Tipi | IPS Panel |
| Tepki Süresi | 1ms |
| Senkronizasyon Teknolojisi | NVIDIA® G-SYNC® Uyumlu |
| Included Mount | Desk Mount Included |
| Bağlantı | HDMI and Display Port |
7. Garanti ve Destek
For warranty information, technical support, or to access additional resources, please visit the official HyperX websitesine gidin veya müşteri hizmetleriyle iletişime geçin.
- Official HyperX Webalan: www.hyperx.com
- Ürün Destek Sayfası: Refer to the support section on the HyperX webBelirli modeliniz için site.