
giriiş
Thank you for choosing the OUKANING 20-Inch Enclosed Low Profile Ceiling Fan with Light. This manual provides essential information for the safe installation, operation, and maintenance of your new ceiling fan. Please read these instructions thoroughly before installation and retain them for future reference.
Önemli Güvenlik Talimatları
- Tüm talimatları okuyunuz: Kurulum işlemine başlamadan önce tüm talimatları ve güvenlik bilgilerini okuyun.
- Elektriksel Güvenlik: All electrical connections must be performed by a qualified electrician or a person with electrical experience. Ensure the power is disconnected at the circuit breaker before installation or maintenance.
- Montaj: The mounting structure must be capable of supporting the weight of the fan (approximately 10-15 lbs). Ensure the fan is securely mounted to a ceiling joist or a suitable support structure.
- Kablolama: Follow all local electrical codes and ordinances. Ensure proper grounding.
- Bıçak Boşluğu: Ensure there is adequate clearance between the fan blades and any obstacles. This fan features enclosed blades for enhanced safety.
- Temizlik: Vantilatörü temizlemeden önce daima elektriği kesin. Yumuşak bir bez kullanın.amp temizlik bezi.
- Non-Reversible Fan: Note that this fan model is not reversible.
Paket İçeriği
Kuruluma başlamadan önce tüm bileşenlerin mevcut ve hasarsız olduğundan emin olun.
- Ceiling Fan Unit (x1)
- Uzaktan Kumanda (x1)
- Screws Set (x1)
- Kullanım Kılavuzu (x1)

Image: Contents of the OUKANING ceiling fan package, showing the remote control, mounting screws, and the instruction manual.
Özellikler
| Armatür Yüksekliği | 8.2 inç |
| Fikstür Genişliği | 20 inç |
| Ürün Boyutları (D x G x Y) | 20"D x 20"G x 8.2"Y |
| Ampul Tipi | Entegre LED |
| Renk Sıcaklığı | 3000K (Sıcak), 4500K (Nötr), 6000K (Beyaz) |
| Netage | 36-48W (Light), 48W (Fan) |
| Number of Fan Blades | 5 (Invisible/Enclosed) |
| Cilttage | AC110-120V |
| Kontrol Yöntemi | Uzaktan kumanda |
| Fan Hızları | 3 (Düşük, Orta, Yüksek) |
| Zamanlayıcı Fonksiyonu | 1 saat / 2 saat / 4 saat |
| Malzeme | Acrylic, Metal, Woodiness Case |
| Montaj Tipi | Dağı Flush |
| İç/Dış Mekan Kullanımı | Sadece İç Mekan |

Image: Detailed dimensions of the ceiling fan, indicating a 20-inch width and 8.2-inch height.

Image: Key components of the fan labeled, such as the metal mounting, wood-look casing, acrylic light cover, and the internal wind director.
Kurulum Talimatları
This ceiling fan is designed for surface (flush) mounting. Professional installation is recommended. Ensure power is OFF at the circuit breaker before starting.
Gerekli Araçlar (Dahil Değildir):
- Yıldız tornavida
- Tel striptizci
- Elektrik bandı
- Merdiven
- Cilttage test cihazı
Kurulum Adımları:
- Gücü Kapatın: Locate the circuit breaker for the room where you are installing the fan and turn off the power. Verify power is off using a voltage test cihazı.
- Montaj Yerini Hazırlayın: Ensure the ceiling junction box is securely mounted and capable of supporting the fan's weight. If replacing an existing fixture, carefully remove it.
- Montaj Braketini Takın: Secure the provided mounting bracket to the ceiling junction box using the screws provided. Ensure it is firmly attached.
- Kablo Bağlantıları:
- Connect the fan's live wire (usually black) to the house's live wire.
- Connect the fan's neutral wire (usually white) to the house's neutral wire.
- Connect the fan's ground wire (usually green or bare copper) to the house's ground wire.
- Tüm bağlantıları kablo somunları ve elektrik bandıyla sabitleyin.
- Fanı Monte Edin: Carefully lift the fan unit and align it with the mounting bracket. Secure the fan to the bracket using the provided screws.
- Son Kontrol: Ensure all connections are secure and the fan is firmly mounted.
- Gücü Geri Yükle: Sigortadan elektriği tekrar açın.
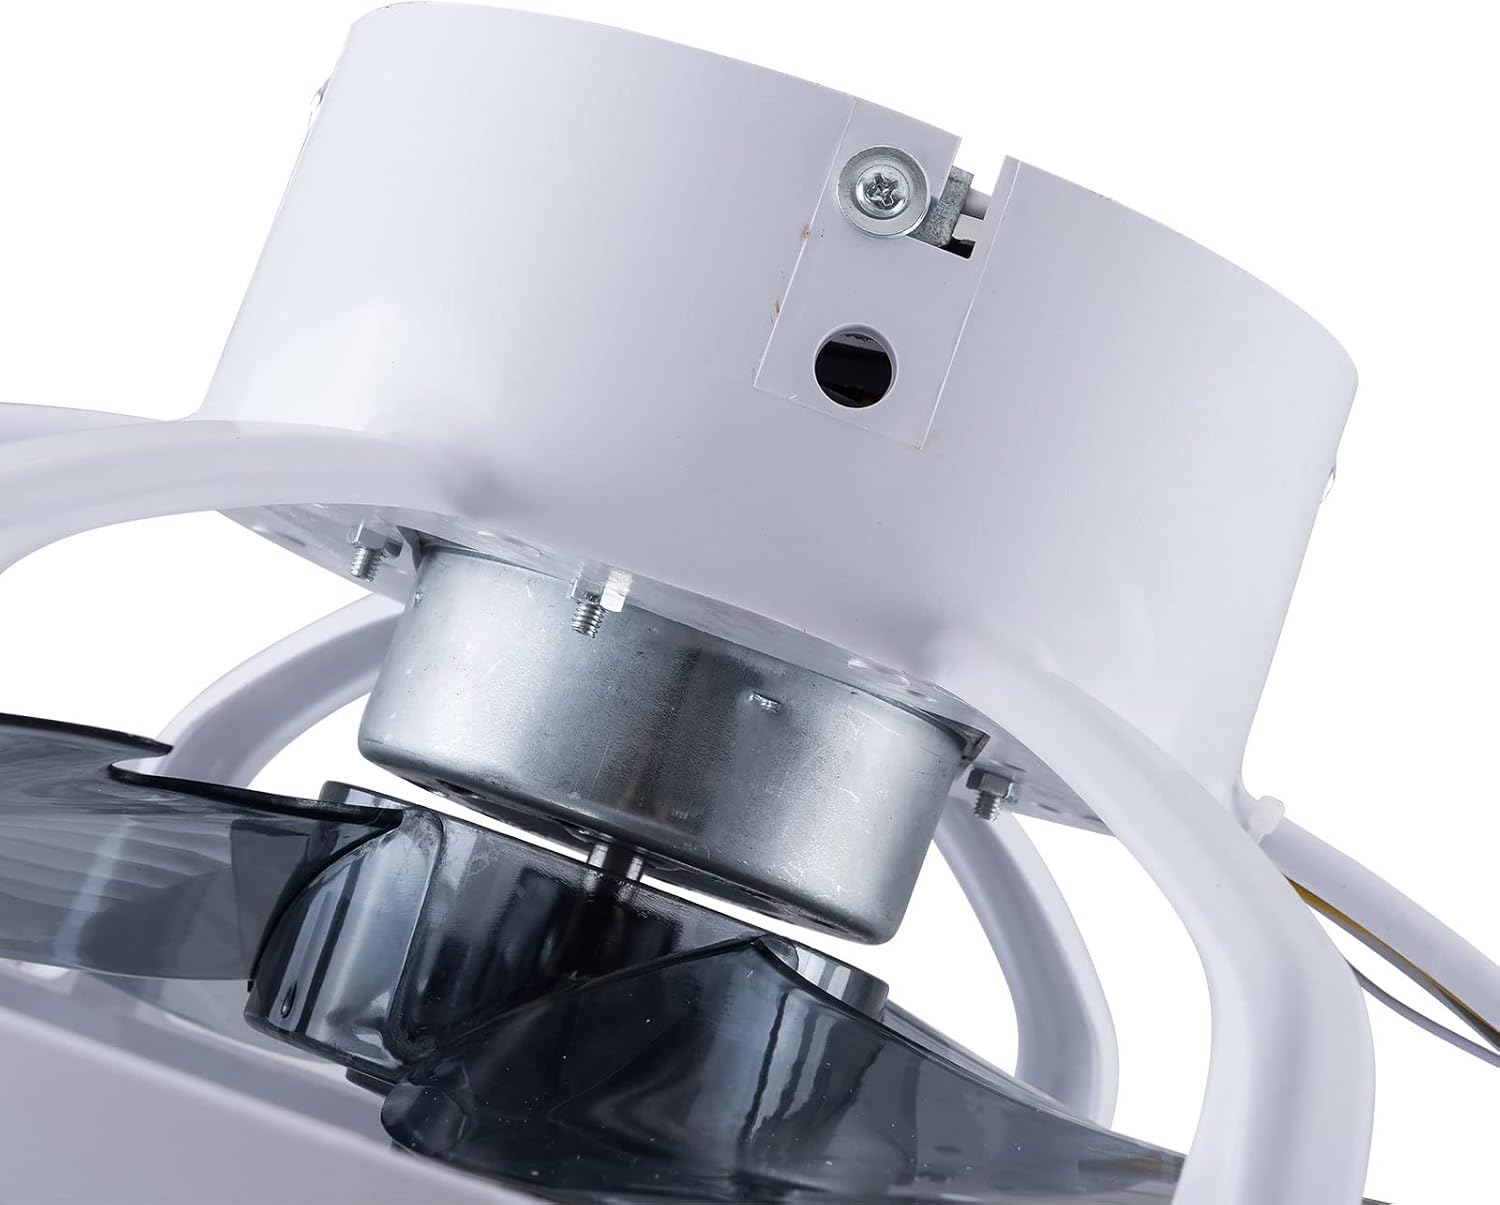
Resim: Dahili view showing the motor and wiring area, crucial for understanding electrical connections during installation.

Resim: View of the fan's underside, illustrating the mounting bracket and internal components for flush installation.
Kullanım Talimatları
Your OUKANING ceiling fan is operated using the included remote control.
Uzaktan Kumanda Fonksiyonları:
- Güç AÇIK/KAPALI: Press to turn the fan and light on or off.
- Fan Hız Kontrolü: Cycle through 3 fan speeds: Low, Medium, High.
- Açık Renk Sıcaklığı: Switch between three light color temperatures:
- Sıcak Işık (3000K)
- Nötr Işık (4500K)
- Beyaz Işık (6000K)
- Zamanlayıcı Fonksiyonu: Set the fan to automatically turn off after 1 hour, 2 hours, or 4 hours.


Resim: Eskiamples of the three available light color temperatures: Warm Light, Neutral Light, and White Light, demonstrating the fan's lighting versatility.
Bakım
Düzenli bakım, tavan vantilatörünüzün uzun ömürlü olmasını ve en iyi performansı göstermesini sağlar.
- Temizlik:
- Temizliğe başlamadan önce mutlaka elektrik şalterinden elektriği kesin.
- Yumuşak bir d kullanınamp cloth to wipe down the fan housing and light cover.
- Aşındırıcı temizleyiciler veya çözücüler kullanmayın, çünkü bunlar yüzeye zarar verebilir.
- The fan is designed for easy removal for thorough cleaning if necessary.
- Bağlantı elemanlarını sıkın: Periodically check all screws and fasteners on the fan and mounting bracket to ensure they are secure.
- Yağlama Gerektirmez: Motor sürekli olarak yağlanmıştır ve ek yağlama gerektirmez.
Sorun giderme
Tavan vantilatörünüzle ilgili sorunlar yaşıyorsanız, aşağıdaki yaygın sorunlara ve çözümlere bakın:
| Sorun | Olası Neden | Çözüm |
|---|---|---|
| Fan başlamıyor | Vantilatöre elektrik gelmiyor; Kablo bağlantıları gevşek; Uzaktan kumanda pili zayıf. | Check circuit breaker; Verify all wire connections are secure (power off first); Replace remote control battery. |
| Işık çalışmıyor | Lambaya elektrik gelmiyor; Kablo bağlantıları gevşek; LED sürücüsünde sorun var. | Check circuit breaker; Verify wire connections; Contact customer support if LED driver is suspected. |
| Uzaktan kumanda çalışmıyor | Battery low or dead; Remote not paired (if applicable); Obstruction between remote and receiver. | Replace battery; Ensure clear line of sight; Refer to remote pairing instructions (if provided separately). |
| Fan alışılmadık bir ses çıkarıyor | Loose mounting screws; Internal component issue. | Ensure all mounting screws are tight; If noise persists, contact customer support. |
Müşteri Desteği
For any questions, technical assistance, or if you encounter issues not covered in this manual, please contact our customer service team. Refer to your purchase documentation or the OUKANING webBelirli iletişim bilgileri için siteyi ziyaret edin.
Destek ekibiyle iletişime geçerken lütfen ürün model numaranızı ve sorunun ayrıntılı bir açıklamasını belirtin.