
1. Giriş
This manual provides essential information for the safe and efficient operation, maintenance, and troubleshooting of your Profile GE Automatic Espresso Machine + Milk Frother. Please read these instructions thoroughly before first use and retain for future reference.

Image 1.1: The Profile GE Automatic Espresso Machine with a prepared espresso and a latte.
2. Güvenlik Bilgileri
Yangın, elektrik çarpması ve kişilerin yaralanma riskini azaltmak için elektrikli aletleri kullanırken her zaman temel güvenlik önlemlerine uyun.
- Ensure the appliance is connected to a grounded outlet.
- Makineyi, kablosunu veya fişini suya veya başka sıvılara daldırmayın.
- Kullanmadığınız zamanlarda ve temizlemeden önce fişini prizden çekin.
- Hasarlı kablosu veya fişi olan hiçbir cihazı çalıştırmayın.
- Ellerinizi ve kabloları sıcak yüzeylerden uzak tutun.
- Sadece üreticinin önerdiği aparatları kullanın.
3. Ürün Bittiview
Profesyonelfile GE Automatic Espresso Machine is designed for convenience and quality, featuring an integrated grinder, milk frother, and smart connectivity.
3.1 Bileşenler
- Kontrol Paneli: Touch-sensitive buttons for various drink selections and functions.
- Fasulye Haznesi: Stores whole coffee beans for grinding.
- Su deposu: Çıkarılabilir su deposu.
- Kahve Musluğu: Demlenmiş kahve verir.
- Buhar Değneği: Sütü köpürtmek için.
- Damlama tepsisi: Collects excess liquids.
- Zemin Konteyneri: Kullanılmış kahve telvelerini toplar.

Image 3.1: The top control panel with buttons for Espresso, Americano, My Brew, Steam, and Hot Water.

Image 3.2: The integrated bean hopper with whole coffee beans and grind size adjustment knob.

Image 3.3: The removable water reservoir being lifted from the machine.
4. Kurulum
4.1 Paketin Açılması ve İlk Yerleştirme
- Tüm ambalaj malzemelerini dikkatlice çıkarın.
- Place the machine on a stable, level surface away from heat sources and direct sunlight.
- Makinenin etrafında havalandırma ve bileşenlere erişim için yeterli alan olduğundan emin olun.
4.2 İlk Temizlik
Before first use, clean all removable parts with warm water and mild detergent. Rinse thoroughly and dry. Wipe the exterior of the machine with a damp Kumaş.
4.3 Su Deposunun Doldurulması
- Remove the water reservoir from the machine (refer to Image 3.3).
- Fill with fresh, cold drinking water up to the MAX line.
- Replace the reservoir securely into the machine.
4.4 Kahve Çekirdeklerinin Eklenmesi
- Open the lid of the bean hopper (refer to Image 3.2).
- Pour whole coffee beans into the hopper. Do not overfill.
- Kapağı sıkıca kapatın.
4.5 Çalıştırma ve İlk Durulama
- Güç kablosunu topraklı bir elektrik prizine takın.
- Press the power button on the control panel. The machine will perform an initial rinse cycle.
- Place a container under the coffee spout to collect the rinse water.
4.6 SmartHQ App Connection
For enhanced customization and software updates, connect your espresso machine to the SmartHQ app.
- Download the SmartHQ app from your device's app store.
- Follow the in-app instructions to pair your espresso machine.
- Customize drink preferences, volume, and strength through the app.

Image 4.1: Using the SmartHQ app to control and customize the espresso machine.
5. Kullanım Talimatları
5.1 Kahve Demleme
The machine offers Espresso, Americano, Lungo, and Hot Water options. The 'My Cup' setting is pre-set to Ristretto and can be adjusted via the SmartHQ app.
- Ensure the water reservoir is filled and the bean hopper contains coffee beans.
- Kahve musluğunun altına bir fincan yerleştirin.
- Select your desired drink (Espresso, Americano, Lungo, My Cup) from the control panel.
- Bu makine kahve çekirdeklerini otomatik olarak öğütecek, demleyecek ve kahvenizi servis edecektir.

Image 5.1: The espresso machine dispensing a fresh shot of espresso.
5.2 Öğütme Boyutunun Ayarlanması
The integrated conical burr grinder allows for 5 levels of grind size adjustment, from coarsest to finest, to optimize flavor extraction.
- Locate the grind size adjustment knob inside the bean hopper (refer to Image 3.2).
- Turn the knob to select your desired grind setting. Finer grinds are suitable for espresso, while coarser grinds are better for longer coffee types.
5.3 Using the Steam Frother
The steam frother creates various milk textures for cappuccinos, lattes, and more.
- Fill the included stainless steel frothing pitcher with cold milk.
- Buhar çubuğunu sütün içine yerleştirin.
- Press the 'Steam' button on the control panel.
- Move the pitcher to achieve desired foam texture.
- Once finished, press the 'Steam' button again to stop.
- Immediately clean the steam wand after each use to prevent milk residue buildup.
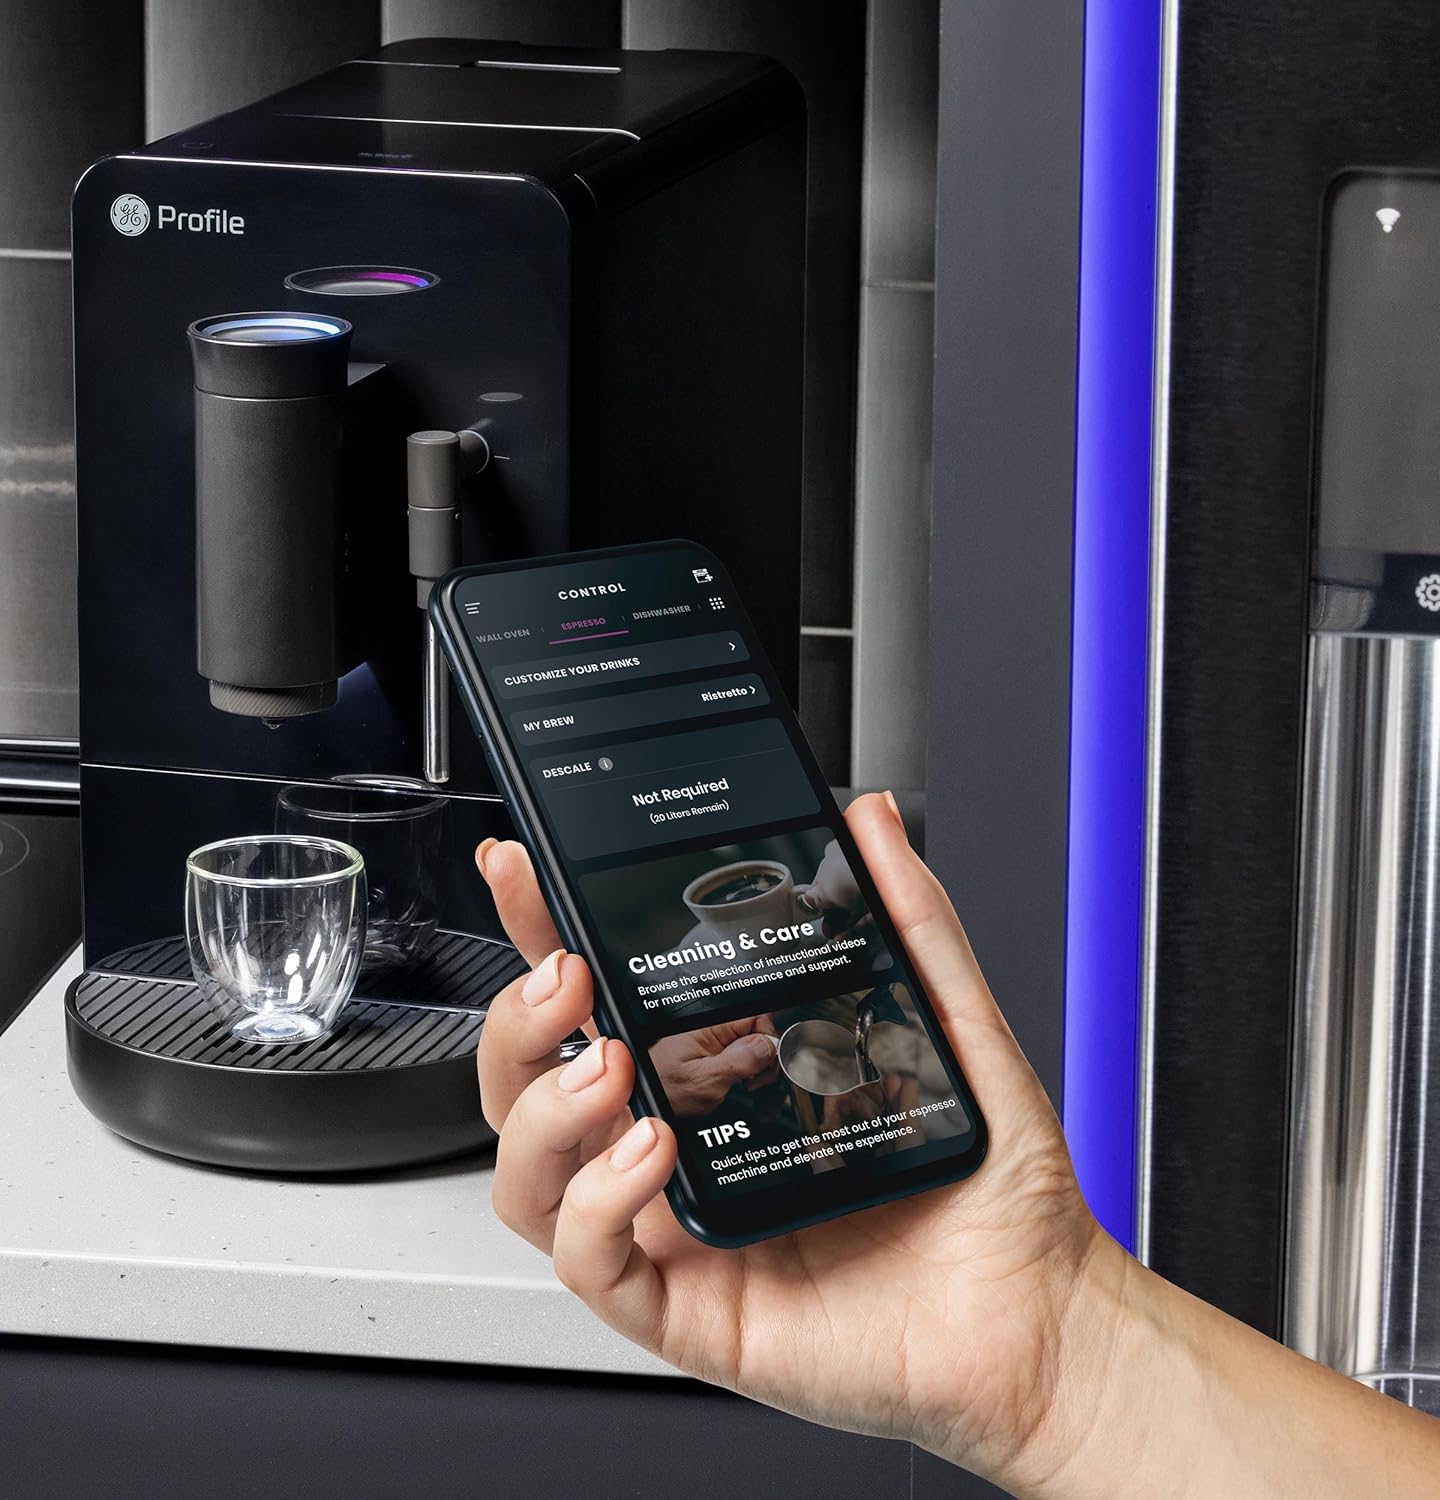
Image 5.2: A hand using the steam wand to froth milk in a stainless steel pitcher.
6. Bakım
Düzenli temizlik ve bakım, espresso makinenizin optimum performans göstermesini ve uzun ömürlü olmasını sağlar.
6.1 Günlük Temizlik
- Buhar Değneği: Her kullanımdan sonra buhar çubuğunu bir bezle silin.amp cloth. Purge steam briefly to clear any milk residue from the nozzle.
- Damlama Tepsisi ve Telve Kabı: Her gün boşaltın ve durulayın. Makine, telve kabının boşaltılması gerektiğinde uyarı verecektir.
- Su deposu: Her gün durulayın ve taze suyla doldurun.
6.2 Haftalık Temizlik
- Demleme Ünitesi: The brew unit is typically removable for rinsing under running water. Refer to the included cleaning kit instructions for detailed steps.
- Fasulye Haznesi: Periodically clean out any oil residue or old beans.
6.3 Kireç çözme
The machine will prompt you when descaling is required. Use a descaling solution specifically designed for espresso machines and follow the instructions provided with the descaling agent or in the SmartHQ app.
7. Sorun Giderme
Bu bölümde, espresso makinenizle karşılaşabileceğiniz yaygın sorunlar ele alınmaktadır.
| Sorun | Olası Neden | Çözüm |
|---|---|---|
| No coffee dispensed / "Add Beans" message | Bean hopper empty or beans not feeding correctly. | Refill bean hopper. Gently stir beans to ensure they feed into the grinder. |
| Kahve çok zayıf veya sulu | Grind size too coarse, insufficient coffee dose, or descaling needed. | Adjust grind size to a finer setting. Check SmartHQ app for strength settings. Perform descaling if prompted. |
| Süt düzgün şekilde köpürmüyor | Steam wand clogged, milk type unsuitable, or insufficient steam pressure. | Clean steam wand thoroughly. Use fresh, cold milk. Ensure machine is heated to steam temperature. |
| Makine açılmıyor | Fişe takılı değil, güç çıkışıtage, or circuit breaker tripped. | Check power connection. Verify power outlet functionality. Reset circuit breaker if necessary. |
| SmartHQ app connectivity issues | Incorrect Wi-Fi password, network interference, or app bug. | Verify Wi-Fi credentials. Ensure machine is within Wi-Fi range. Restart app and machine. Check for app updates. |
8. Özellikler
- Marka: Profesyonelfile
- Model Adı: GE Profesyonelifile Automatic Espresso Machine + Frother
- Ürün Model Numarası: P7CEBBS6RBB
- Renk: Siyah
- Ürün Ölçüleri: 7"D x 16"G x 12.5"Y
- Ürün Ağırlığı: 16 pound
- Cilttage: 120V
- Çalışma Modu: Tam Otomatik
- Özel Özellikler: Built-In Bean Hopper, Built-In Conical Burr Grinder & Adjustable Grind Size, Programmable My Brew Setting, Steam Frother & Frothing Pitcher, WiFi Connected
- Dahil Bileşenler: Cleaning Kit, Coffee Bean Container, Espresso Machine, Steam Wand, Milk Pitcher, Water Tank
- Kahve Giriş Türü: Bütün Fasulye
- İnsan Arayüzü Girişi: Dokunmatik ekran

Resim 8.1: Espresso makinesinin ürün boyutları.
9. Garanti ve Destek
This product is covered by a manufacturer's warranty. For specific warranty details, registration, or technical support, please refer to the warranty card included with your product or visit the official GE Profile website. You may also contact customer service through the SmartHQ app for assistance.