
1. Önemli Güvenlik Talimatları
Please read these instructions carefully before using the appliance to prevent damage, fire, or injury. Keep this manual for future reference.
- Cihazın her zaman sabit ve ısıya dayanıklı bir yüzeye yerleştirildiğinden emin olun.
- Cihazı, kablosunu veya fişini suya veya başka sıvılara batırmayın.
- Kullanılmadığı zaman, parçalarını monte etmeden veya sökmeden önce ve temizlemeden önce cihazın fişini prizden çekin.
- Kablo veya fişi hasarlı olan veya cihaz arızalandıktan veya herhangi bir şekilde hasar gördükten sonra hiçbir cihazı çalıştırmayın.
- Cihaz çalışırken çocukları ondan uzak tutun. Yüzeyi ısınabilir.
- Üretici tarafından tavsiye edilmeyen aksesuarları kullanmayın.
- Bu cihaz yalnızca evlerde kullanıma yöneliktir.
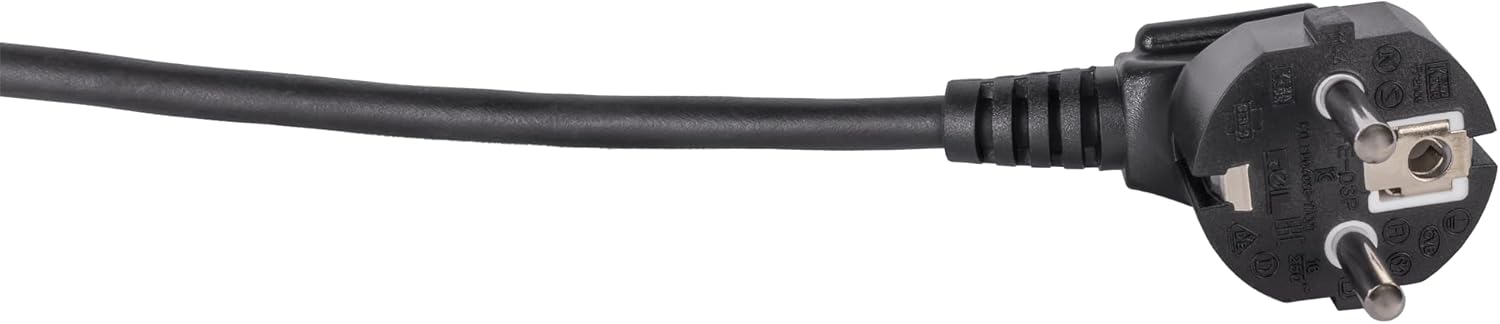
Image: Standard European power plug. Ensure the plug is fully inserted into a grounded outlet.
2. Ürün Bittiview
2.1 Bileşenler
The Steba BM 3 Bread Maker includes the following main components:
- Main Unit with Control Panel and Display
- Removable Baking Pan with Non-stick Coating
- Yoğurma Küreği
- Ölçü Kabı
- Ölçü Kaşığı
- Hamur yoğurma aparatını çıkarmak için kanca
- ile kapak ViewPencere

Resim: Ön view of the Steba BM 3 Bread Maker, showing its compact design.
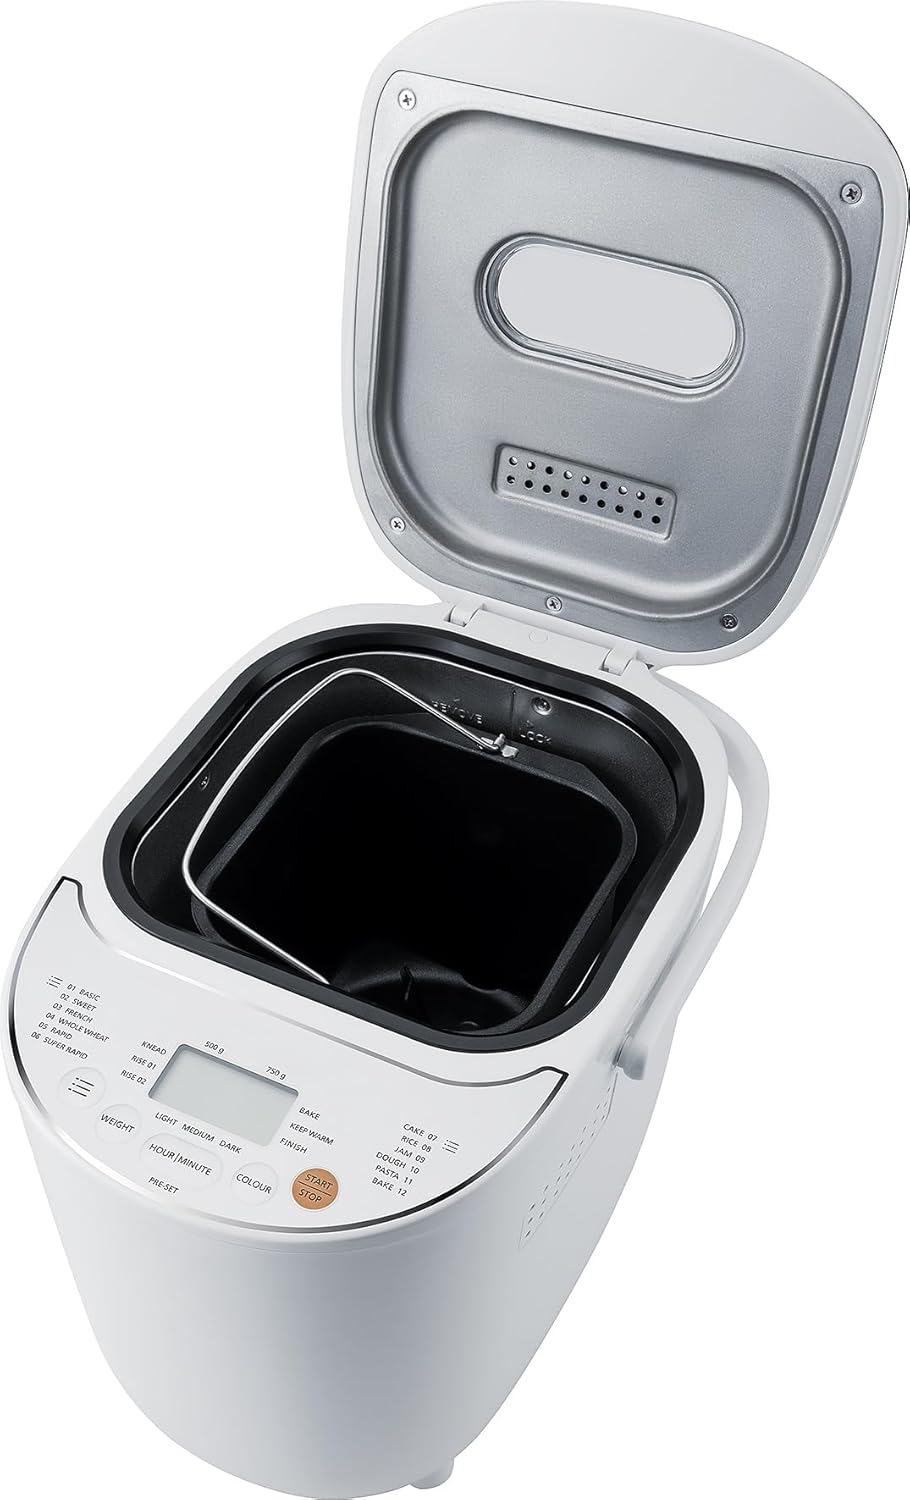
Image: The bread maker with its lid open, revealing the removable baking pan inside.
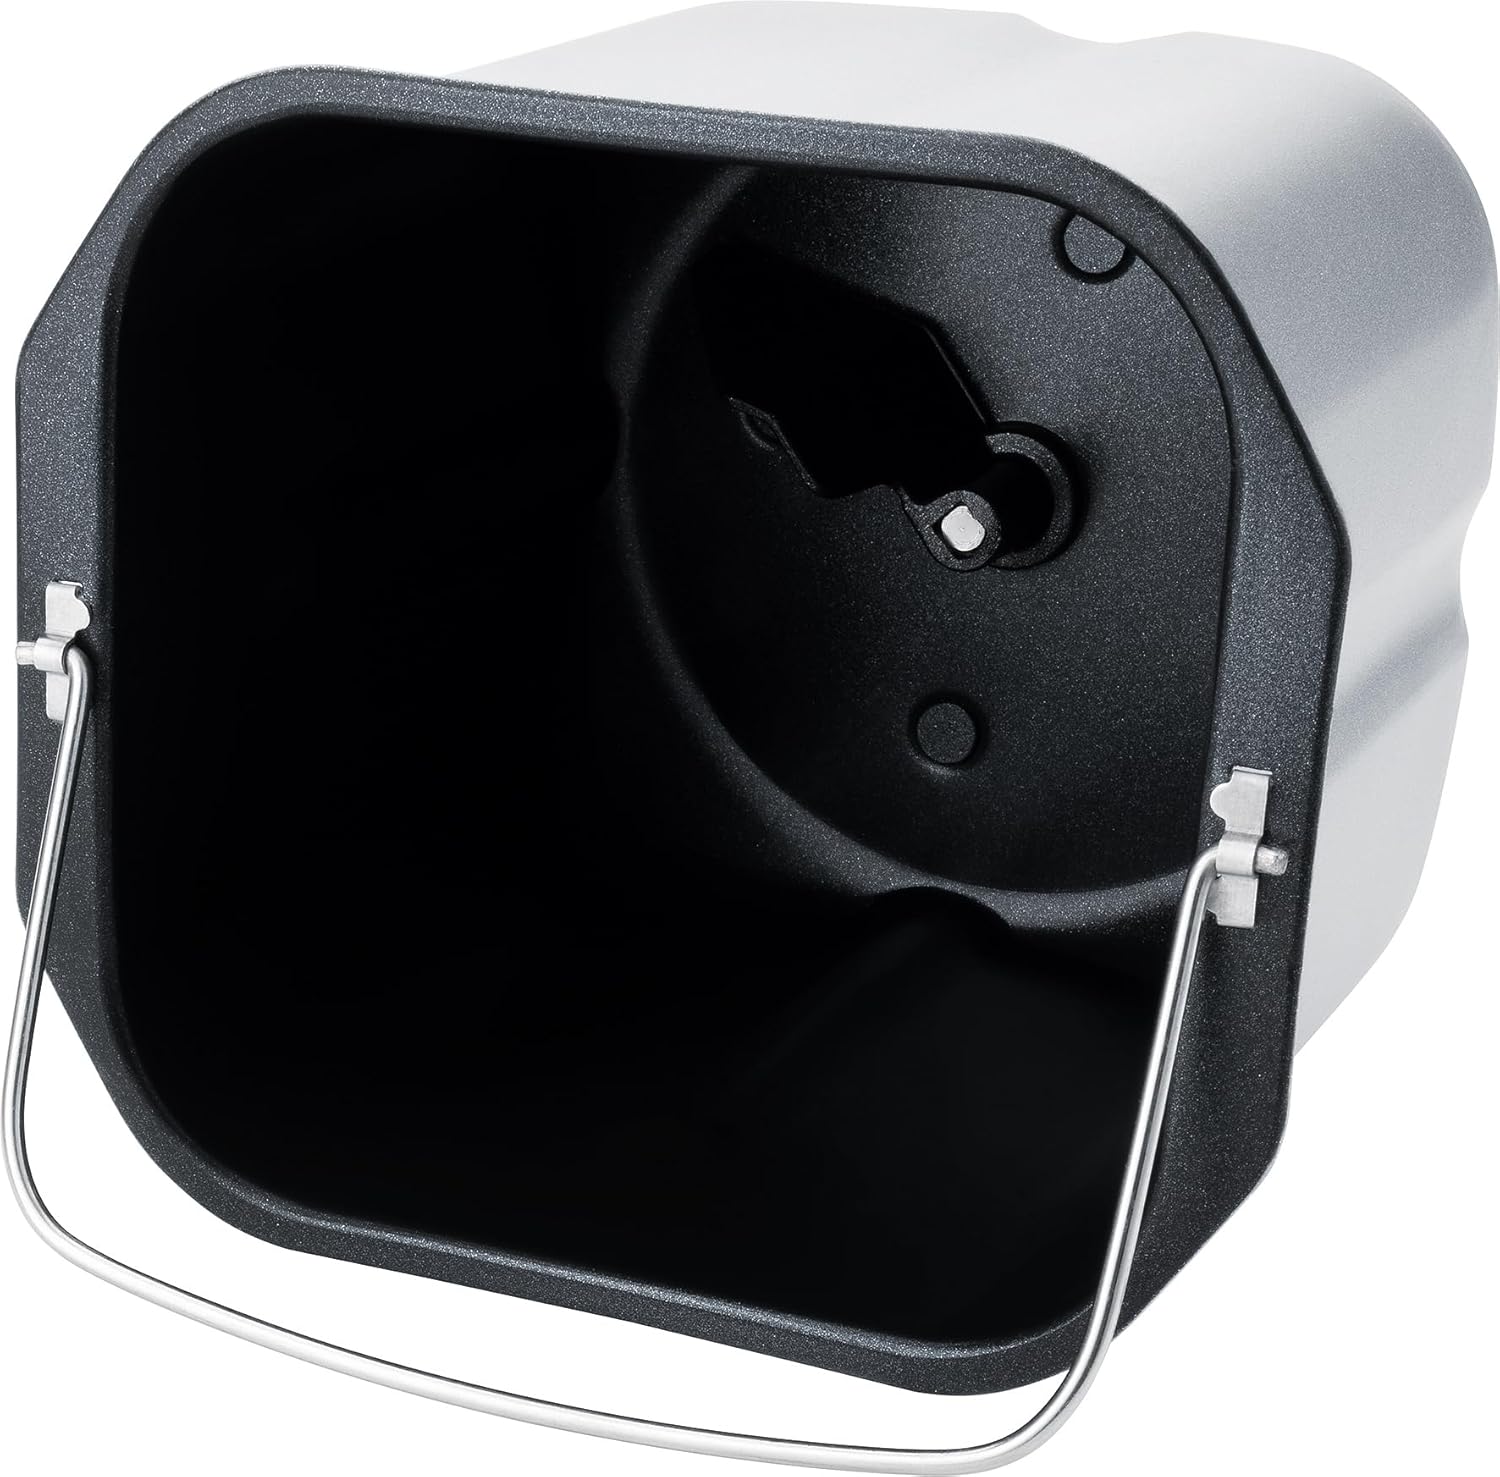
Resim: Ayrıntılı view of the non-stick baking pan with the kneading paddle shaft.

Image: Included accessories: a measuring cup, a double-sided measuring spoon, and a hook for removing the kneading paddle.
2.2 Kontrol Paneli ve Ekran
The intuitive Touch-Control panel allows for easy program selection and setting adjustments.

Image: Close-up of the control panel, showing the digital display, program list, and control buttons for weight, time, color, and start/stop.
Tuş Kontrolleri:
- Görüntülemek: Shows selected program, time, and settings.
- Program Seçimi: Choose from 12 automatic programs (Basic, Sweet, French, Whole Wheat, Rapid, Super Rapid, Cake, Rice, Jam, Dough, Pasta, Bake).
- Ağırlık Düğmesi: Adjust bread weight (500g or 750g).
- Colour Button: Select crust browning level (Light, Medium, Dark).
- Hour/Minute (Pre-set) Buttons: Set delay timer for up to 13 hours.
- Başlat/Durdur Düğmesi: Initiate or cancel a program.
3. Kurulum ve İlk Kullanım
3.1 Paketin açılması
- Ekmek yapma makinesini ve tüm aksesuarlarını ambalajından dikkatlice çıkarın.
- Cihazın üzerindeki koruyucu filmleri veya etiketleri çıkarın.
- Wash the baking pan, kneading paddle, measuring cup, and spoon in warm, soapy water. Rinse thoroughly and dry completely. The main unit should only be wiped with a damp Kumaş.
3.2 İlk Kullanım
- Place the bread maker on a clean, dry, and stable surface.
- Insert the baking pan into the main unit and twist it clockwise until it locks into place.
- Attach the kneading paddle onto the shaft inside the baking pan.
- For the first use, it is recommended to run a short 'Bake' cycle (Program 12) without ingredients for about 10 minutes to burn off any manufacturing residues. Ensure good ventilation during this process.
- Allow the appliance to cool down completely before cleaning and proceeding with actual baking.
4. Operasyon
4.1 Basic Bread Making Steps
- Malzemeler ekleyin: Follow a recipe and add liquid ingredients first, then dry ingredients, and finally yeast. Ensure yeast does not come into direct contact with liquids or salt.
- Programı Seçin: Plug in the bread maker. The default program (usually 'Basic') will appear on the display. Press the 'Program' button repeatedly to cycle through the 12 available programs until your desired program is selected.
- Ayarlanan Ağırlık: Press the 'Weight' button to choose between 500g or 750g loaf size, if applicable for the selected program.
- Set Crust Colour: Press the 'Colour' button to select Light, Medium, or Dark crust.
- Pişirmeye Başlayın: Press the 'Start/Stop' button. The bread maker will begin the selected program.
- Tamamlama: Once the program finishes, the bread maker will beep and automatically switch to a 1-hour 'Keep Warm' function.
- Ekmeği çıkarın: Unplug the appliance. Using oven mitts, carefully remove the baking pan by twisting it counter-clockwise and lifting it out. Invert the pan to release the bread onto a wire rack to cool. If the kneading paddle remains in the bread, use the provided hook to remove it.
4.2 Gecikme Zamanlayıcı Fonksiyonu
The delay timer allows you to set the bread maker to finish baking at a later time, up to 13 hours. This is ideal for fresh bread in the morning.
- Add all ingredients to the baking pan.
- Select your desired program, weight, and crust colour.
- Press the 'Hour' and 'Minute' buttons to set the desired delay time. The displayed time includes the baking cycle duration.
- Press 'Start/Stop'. The timer will count down, and the bread maker will start automatically when the delay time expires.
Not: Do not use the delay timer with recipes containing highly perishable ingredients like milk, eggs, or fresh fruit, as they may spoil.

Image: An assortment of various types of freshly baked bread, illustrating the potential output of the bread maker.
5. Bakım ve Temizlik
Proper cleaning and maintenance ensure the longevity and optimal performance of your bread maker.
5.1 Temizlik
- Temizlemeden önce daima cihazın fişini çekin ve tamamen soğumasını bekleyin.
- Fırın tepsisi ve hamur yoğurma aparatı: These parts are non-stick and should be washed by hand with warm, soapy water. Avoid abrasive cleaners or scouring pads that could damage the non-stick coating. Rinse thoroughly and dry completely.
- Ana Ünite: Ekmek makinesinin dışını yumuşak bir bezle silin.amp Bez kullanın. Sert kimyasallar kullanmayın veya cihazı suya batırmayın.
- Kapak: Kapak, bir bezle silinerek temizlenebilir.amp bez. viewing window can be cleaned with a mild glass cleaner if necessary.
5.2 Depolama
Store the bread maker in a dry, clean place, away from direct sunlight and out of reach of children.
6. Sorun Giderme
Ekmek makinenizde sorun yaşıyorsanız, aşağıdaki yaygın sorunlara ve çözümlere bakın:
| Sorun | Olası Neden | Çözüm |
|---|---|---|
| Ekmek kabarmıyor | Son kullanma tarihi geçmiş maya, yanlış su sıcaklığı, çok fazla tuz/şeker, yanlış program. | Check yeast expiry, use lukewarm water, ensure correct ingredient ratios, select appropriate program. |
| Ekmek çok yoğun | Çok fazla un, yeterli sıvı yok, maya sorunu. | Measure ingredients precisely, ensure proper liquid-to-flour ratio, check yeast activity. |
| Ekmeğin içine sıkışmış yoğurma küreği | Normal bir durum. | Use the provided hook to carefully remove the paddle after the bread has cooled slightly. |
| Cihaz çalışmıyor | Not plugged in, program not selected, 'Start/Stop' not pressed. | Ensure power connection, select a program, press 'Start/Stop'. |
7. Özellikler
Technical details for the Steba BM 3 Bread Maker:
- Model Numarası: 188300
- Marka: Steba
- Cilttage: 230 Volt
- Netage: 540 Vat
- Kapasite: Up to 750 Grams
- Ürün Boyutları (D x G x Y): 34D x 27.5G x 24Y cm
- Ürün Ağırlığı: 4 Kilogram
- Malzeme: Plastik
- Program Sayısı: 12
- Bakım Talimatları: (Çıkarılabilir parçalar için) Sadece elde yıkayın.
- AB Yedek Parça Temin Edilebilirliği: 2 Yıl

Image: Diagram showing the dimensions of the Steba BM 3 Bread Maker: 34 cm depth, 27.5 cm width, and 24 cm height.
8. Garanti ve Destek
For warranty claims, technical support, or service inquiries, please contact your retailer or the manufacturer directly. Keep your proof of purchase for warranty validation.


