
1. Giriş
This manual provides detailed instructions for the installation, operation, and maintenance of the VIVOTEK ND9323P H.265 8-Channel Embedded PoE Network Video Recorder (NVR). Please read this manual thoroughly before using the product to ensure proper and safe operation. Keep this manual for future reference.
2. Güvenlik Bilgileri
Observe the following safety precautions to prevent damage to the NVR and to ensure user safety:
- Güç Kaynağı: Use only the power adapter supplied with the NVR. Ensure the power source matches the NVR's voltage gereksinimleri.
- Havalandırma: Havalandırma açıklıklarını kesinlikle kapatmayın. Aşırı ısınmayı önlemek için NVR cihazını iyi havalandırılan bir alana kurun.
- Çevre: Avoid exposing the NVR to water, moisture, extreme temperatures, or direct sunlight. Do not place heavy objects on the NVR.
- Servis: Bu ürüne kendiniz servis vermeye çalışmayın. Tüm servis işlemleri için kalifiye servis personeline başvurun.
- İşleme: NVR cihazını dikkatli kullanın. Düşürmekten veya şiddetli darbelere maruz bırakmaktan kaçının.
3. Paket İçeriği
Carefully unpack the box and ensure all items are present and in good condition. If any items are missing or damaged, contact your vendor immediately.
- VIVOTEK ND9323P NVR Unit
- Güç Adaptörü
- USB Mouse
- Hızlı Kurulum Kılavuzu
- Accessory Pack (Screws for HDD installation, Ethernet cable)
- Case (referring to the NVR enclosure itself)
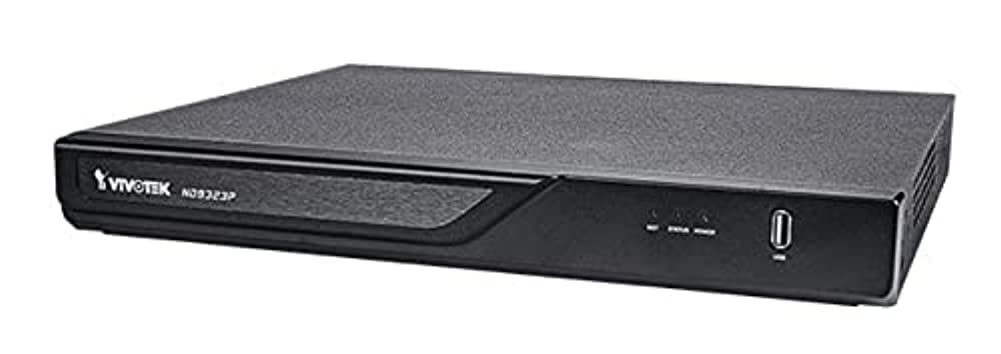
Figure 3.1: VIVOTEK ND9323P NVR unit. This image shows the front panel of the NVR, typically featuring status indicators and USB ports.
4. Ürün Bittiview
The VIVOTEK ND9323P is an 8-channel embedded Network Video Recorder designed for IP surveillance systems. It supports H.265 video compression for efficient storage and bandwidth usage. With its integrated Power over Ethernet (PoE) ports, it simplifies camera installation by providing both power and data connectivity through a single Ethernet cable.
4.1 Temel Özellikler
- 8-Channel Video Input
- H.265/H.264 Video Compression
- 8 x 802.3at/af PoE Ports
- Local Display Output (HDMI/VGA)
- Remote Access via VIVOTEK VIVOCloud App or VMS
- Supports up to 16TB HDD storage (HDD not included)
4.2 Ön ve Arka Paneller
Refer to the Quick Installation Guide for detailed diagrams of the front and rear panels, indicating ports and indicators.
- Ön Panel: Power LED, HDD LED, Network LED, USB ports.
- Arka panel: Power input, LAN port, PoE ports (1-8), HDMI output, VGA output, Audio I/O, USB ports.
5. Kurulum
5.1 Sabit Disk Kurulumu (İsteğe Bağlı)
The NVR does not typically include a pre-installed hard drive. Follow these steps to install a 3.5-inch SATA hard drive:
- NVR'nin üst kapağını sökün ve çıkarın.
- NVR'dan sabit diske SATA veri ve güç kablolarını bağlayın.
- Verilen vidaları kullanarak sabit sürücüyü NVR kasasına sabitleyin.
- Üst kapağı yerine takın ve vidalarla sabitleyin.
Not: Ensure the NVR is powered off and unplugged before installing or removing a hard drive.
5.2 Fiziksel Bağlantılar
- Kameraları Bağlayın: Connect your IP cameras to the NVR's PoE ports (1-8) using Ethernet cables. The NVR will provide power and network connectivity to the cameras.
- Ağa bağlan: Connect the NVR's LAN port to your local network router or switch using an Ethernet cable.
- Ekranı Bağla: Monitörü NVR'ın HDMI veya VGA çıkış portuna bağlayın.
- Fareyi Bağla: USB fareyi NVR'ın USB bağlantı noktalarından birine takın.
- Güç Açık: Güç adaptörünü NVR'nin güç girişine bağlayın ve ardından bir elektrik prizine takın. NVR otomatik olarak açılacaktır.
5.3 İlk Yapılandırma
Upon first boot, the NVR will guide you through a setup wizard on the connected monitor:
- Dil Seçimi: Tercih ettiğiniz dili seçin.
- Şifre Kurulumu: Yönetici hesabı için güçlü bir parola oluşturun. Bu, güvenlik açısından çok önemlidir.
- Ağ Ayarları: Configure network settings (DHCP or Static IP). DHCP is recommended for most home users.
- Saat ve Tarih: Doğru saat dilimini, tarihi ve saati ayarlayın.
- Sabit Sürücü Başlatma: If you installed a new hard drive, the NVR will prompt you to format it. Confirm to proceed. Uyarı: Formatting will erase all data on the drive.
- Kamera Arama ve Ekleme: The NVR will automatically search for connected VIVOTEK cameras. Select and add them to the NVR.
- Sona ermek: Complete the wizard to access the NVR's live view.
6. NVR'yi Çalıştırma
6.1 NVR'ye Erişim
You can access and manage the NVR through various methods:
- Yerel Ekran: Directly via the connected monitor and USB mouse.
- Web Tarayıcı: NVR'nin IP adresini girin. web Aynı ağa bağlı bir bilgisayardaki tarayıcı.
- VIVOTEK VIVOCloud App: Download the mobile app for remote viewing ve yönetim.
- VIVOTEK VAST 2 VMS: For advanced management and multi-NVR systems.
6.2 Canlı View
Canlı view displays real-time video feeds from all connected cameras. You can switch between single-camera viewçoklu kamera ızgarası viewve ekran düzenini özelleştirin.
6.3 Kayıt Ayarları
Her kamera için kayıt programlarını ve modlarını yapılandırın:
- Sürekli Kayıt: 7/24 kayıt.
- Hareket Algılama Kaydı: Sadece hareket algılandığında kayıt yapar.
- Planlanmış Kayıt: Records during specific time periods.
- Etkinlik Kaydı: Records based on external triggers or alarms.
Access these settings through the NVR's main menu: Configuration > Recording > Schedule.
6.4 Oynatma
Yırttıview kaydedilmiş footage:
- Ana menüden şunu seçin: Playback.
- Yeniden düzenlemek istediğiniz kamera(lar)ı ve tarih/saat aralığını seçin.view.
- Zaman çizelgesini ve oynatma kontrollerini (oynat, duraklat, ileri sar, geri sar) kullanarak yiyecekler arasında gezinin.tage.
6.5 Event Management and Notifications
Configure the NVR to respond to events such as motion detection, camera tampering, or network disconnection. The NVR can send email notifications, trigger alarms, or start recording.
Access these settings via: Yapılandırma > Etkinlik.
7. Bakım
7.1 Firmware Güncellemesi
Regularly check for and install firmware updates to ensure optimal performance, security, and access to new features. Firmware can be updated via the NVR's web interface or local display menu: Configuration > System > Firmware Upgrade.
Dikkat: Do not power off the NVR during a firmware upgrade. This can cause permanent damage.
7.2 Sabit Sürücü Yönetimi
Monitor the health of your hard drive(s) and ensure sufficient storage space. The NVR will automatically overwrite the oldest recordings when the disk is full, based on your settings.
Access HDD status and settings via: Configuration > Storage > HDD Management.
7.3 Temizlik
Keep the NVR unit clean and free from dust. Use a soft, dry cloth for cleaning. Do not use liquid cleaners or aerosols.
8. Sorun Giderme
This section addresses common issues you might encounter with your VIVOTEK ND9323P NVR.
8.1 Monitörde Görüntü Yok
- Kabloları Kontrol Edin: HDMI/VGA kablosunun hem NVR'ye hem de monitöre güvenli bir şekilde bağlı olduğundan emin olun.
- Monitör Girişi: Monitörün doğru giriş kaynağına (HDMI/VGA) ayarlandığından emin olun.
- NVR Gücü: Confirm the NVR is powered on and its power LED is illuminated.
8.2 Cameras Not Showing Up / No Image
- PoE Bağlantısı: Ensure cameras are properly connected to the NVR's PoE ports. Check if the PoE port LEDs on the NVR are active.
- Kamera Gücü: If not using PoE, ensure cameras are receiving power from their own power adapters.
- Ağ Bağlantısı: Verify the NVR and cameras are on the same network segment if not directly connected via PoE.
- Kamera Durumu: Check the camera's own status indicators.
- NVR Camera Management: Git Configuration > Camera > Camera Management to ensure cameras are added and enabled. Try rescanning for cameras.
8.3 Cannot Access NVR via Web Tarayıcı
- IP Adresi: Confirm the NVR's IP address is correct and that your computer is on the same network.
- Ağ kablosu: Ensure the NVR's LAN port is connected to your network.
- Güvenlik Duvarı: Temporarily disable your computer's firewall to check if it's blocking access.
- Tarayıcı Uyumluluğu: Use a recommended web tarayıcı (örneğin, Chrome, Firefox).
8.4 Unutulan Şifre
If you forget the administrator password, you may need to perform a factory reset. Refer to the VIVOTEK support website or contact technical support for the specific procedure for your model, as this often involves a physical reset button or a specific utility.
9. Özellikler
The following table lists the key specifications for the VIVOTEK ND9323P NVR:
| Özellik | Şartname |
|---|---|
| Model Numarası | ND9323P |
| Marka | VİVOTEK |
| Kanal Sayısı | 8 |
| Bağlantı Teknolojisi | Ethernet |
| Uyumlu Cihazlar | Camera, Mobile Device |
| Video Sıkıştırma | H.265, H.264 |
| PoE Bağlantı Noktaları | 8 x 802.3at/af |
| Ürün Boyutları | 19.69 x 19.69 x 11.02 inç |
| Ürün Ağırlığı | 0.01 ons |
| Üretici | Vivotek |
10. Garanti ve Destek
VIVOTEK ürünleri sınırlı garanti kapsamındadır. Ayrıntılı garanti şartları ve koşulları için lütfen ürününüzle birlikte verilen garanti kartına bakın veya resmi VIVOTEK web sitesini ziyaret edin. webalan.
For technical support, product registration, or to download the latest firmware and software, please visit the VIVOTEK support portal:
VIVOTEK Official Support Webalan
When contacting support, please have your NVR's model number (ND9323P) and serial number ready.